Table of Contents
Advertisement
Quick Links
Advertisement
Table of Contents

Subscribe to Our Youtube Channel
Related Manuals for Lionel FastTrack Graduated/Elevated Trestles


Summary of Contents for Lionel FastTrack Graduated/Elevated Trestles
- Page 1 71-2037-250 10/11 Lionel Graduated/Elevated Trestles Owner’s Manual...
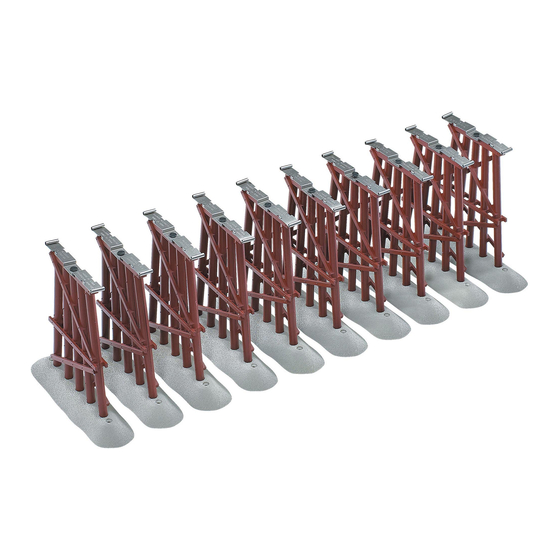
- Page 2 Elevated Trestle Inventory • 10 piers • 10 bases • 10 brackets • 10 pins • 10 spacers The following Lionel marks are used throughout this catalog and are protected under law. All rights reserved. ® ™ ™ ® ®...
- Page 3 Assembling the trestle Follow these steps to assemble the trestle. 1. As illustrated in Figure 1, press the piers into the bases. If you are assembling the Graduated Trestle, be sure that the numbers on the Note! underside of the base match the numbers on the piers. Pier Base Figure 1.
- Page 4 2. Assemble the brackets and the spacers, inserting a pin through the hole in each component. Refer to Figure 2. Bracket Spacer Spacer Figure 2. Bracket and spacer assembly...
- Page 5 3. As illustrated in Figure 3, insert the pins into the holes in the piers. Spacer Bracket Pier Base Figure 3. Track installation...
- Page 6 4. Snap the brackets onto the FasTrack roadbed. Refer to Figure 4. Underside of roadbed Bracket Pier Figure 4. Pier installation...
- Page 7 5. You may choose to secure the base to your layout by driving screws (not included) into the holes in the bases. Refer to Figure 5 for the completed trestle. Figure 5. Completed trestle...
-
Page 8: Product Description
(or copy) from an Authorized Lionel Retailer*, will at the discretion of Lionel LLC, be repaired or replaced, without charge for parts or labor. In the event the defective product cannot be repaired, and a suitable replacement is not available, Lionel will offer to replace the product with a comparable model (determined by Lionel LLC), if available.
Need help?
Do you have a question about the FastTrack Graduated/Elevated Trestles and is the answer not in the manual?
Questions and answers