Table of Contents
Advertisement
Quick Links
Advertisement
Chapters
Table of Contents

Related Manuals for Gigabyte GX2


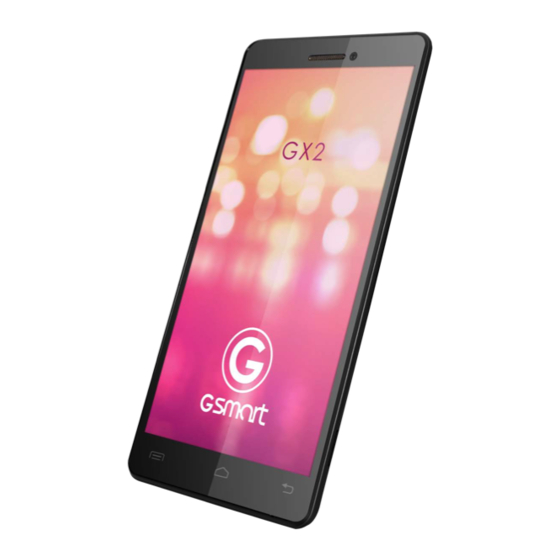
Summary of Contents for Gigabyte GX2
-
Page 2: Copyright
GIGA-BYTE COMMUNICATIONS INC. Reproduction, transfer, distribution, or storage of part or all of the contents in this document in any form without the prior written permission of GIGA-BYTE COMMUNICATIONS INC. is prohibited. GIGA-BYTE COMMUNICATIONS INC. GX2 |1... -
Page 3: General Information
EN50332-1 and/or EN 50332-2 standards. Permanent hearing loss may occur if earphones or headphones are used at high volume for prolonged periods of time. Prevention of Hearing Loss Warning statement requirement under EN 60950-1:A12. GX2 |2... - Page 4 For DTS patents, see http://patents.dts.com. Manufactured under license from DTS Licensing Limited. DTS, the Symbol, & DTS and the Symbol together are registered trademarks, and DTS Studio Sound is a trademark of DTS, Inc. © DTS, Inc. All Rights Reserved. GX2 |3...
-
Page 5: Table Of Contents
2.3 Multimedia Message 3. Wi-Fi & Bluetooth 3.1 Wi-Fi 3.2 Bluetooth 4. Multimedia Applications 4.1 Camera 4.2 Music 5. Pre-Installed Programs Introduction 6. Managing Your Phone 6.1 Protecting Your Phone 6.2 Backup or Reset Your Phone 7. Specifications GX2 |4... -
Page 6: Getting Started
The SIM card contains your phone number, memory storage, and details of network service. To remove the back cover 1. Please turn over your phone with the back cover facing up. 2. Please move your fingertip into the slot. 3. Pull the back cover with your fingertip and remove it. GX2 |5... - Page 7 You may need a microSD card to store photos, music, videos and other data. To install the memory card (1) Insert the memory card with the gold contact facing down. (2) Push the memory card until it clicks into slot. GX2 |6...
-
Page 8: Charging The Battery
(3) For phone’s safety, please only use the original charger that comes with your device. Any possible damage caused by using non-original charger or any other equipment will not be under GIGABYTE Communication Inc.’s responsibility. NOTE: *To ensure safety, do not remove the battery from the phone while the AC adapter is connected or while it is being charged. -
Page 9: Turning The Phone On Or Off
(3) Choose where you want to synchronize the new contact with Google account, Phone, SIM1 or SIM2. (4) A new contact screen appears. (5) Tap each field to fill out the contact information. (6) Tap ”DONE” to save it. NOTE: The SIM card contact can’t add picture to contact information. GX2 |8... -
Page 10: The Home Screen
Self-defined Home Screen: You can add the shortcuts and widgets. Icons Functions Tap to turn on/off network. Tap to turn on/off DTS studio sound Tethering or hotspot active Enable/disable Wi-Fi. Enable/disable Bluetooth. Enable/disable GPS. Enable/disable Data Synchronization. Tap to adjust the brightness. GX2 |9... - Page 11 Both USB tethering and Portable Wi-Fi hotspot are activated. GPS is on. Bluetooth is on. The device is connected to PC via the USB cable. New text message. New e-mail. New Gmail. Notification Alarm. Event notification. USB debugging is connected. GX2 |10...
-
Page 12: Phone Functions & Messages
. It’s the end icon to end a call. To Start a Three-way call (1) When you are already having a call conversation, tap to enter another phone number(If SIM2 inserted). (2) Tap to set up the conference call. GX2 |11... -
Page 13: Creating And Sending A Text Message
Function Tap to close input keyboard. Tap to active Capital letter mode. Tap to delete words. Switch different language inputs and methods. Tap to activate the symbols and numerical keyboard. Tap to move to the next text zone. GX2 |12... -
Page 14: Multimedia Message
The message converts to a MMS message automatically. (5) Enter your message with the on-screen keyboard in “Type message” filed. (6) Tap to send your message. GX2 |13... -
Page 15: Wi-Fi & Bluetooth
(2) Tap “SEARCH FOR DEVICES” to search for a new device. (3) Detected Bluetooth devices are displayed on the screen. Tap one device to connect. (4) Start to pair, enter the password, and then tap “OK” to finish pairing. GX2 |14... - Page 16 4.2 Music You have to copy your audio files to the storage card before playing music, because the music player only plays audio files saved in the storage card of your phone. Tap Applications tab > Music. GX2 |15...
- Page 17 The area of audio information Slide to go forward or backward To play the song To pause the song Previous song Next song Tap to go to playlists To start or close shuffle function To repeat the current song/ all songs GX2 |16...
- Page 18 Listening to your music Play Play Music Google News Center. collection anywhere. Newsstand To find applications Set up a reminder Reminder which you can Play Store timer list on your Timer download and install on phone. your phone. GX2 |17...
- Page 19 TouchPal To set up your update update information. Touchpal Keyboard. Quickly to search your It is online video Voice phone, the web, and streaming service that YouTube Search nearby locations by to view, search, and speaking. upload videos. GX2 |18...
- Page 20 (1) Tap Applications tab > > Backup & reset. (2) Tap Factory data reset > Reset phone > Erase everything to reset the phone. NOTE: Before resetting your device, please remember to back up all your data and information. GX2 |19...
- Page 21 1. Specifications are subject to change without the prior notice. They may vary in some regions also. 2. Mobile data interruption, unexpected error in CPU and high power consumption could be caused by in-app AD in Android phone. We suggest you try to remove GX2 |20...
- Page 22 AD which had been installed in your device for preventing any abnormal situation happens and saving more power as well. If this document is modified, please download the latest version on GSmart official website. www.gigabytecm.com GX2 |21...
- Page 23 Android 4.4 Introduction Android 4.4 | 0...
- Page 24 Table of Contents Chapter 1 Phone Functions & Input 1.1 Phone Calls 1.2 Video Calls 1.3 Using On-Screen Keyboard Chapter 2 Email & Messages 2.1 Creating and sending a text message 2.2 E-mail Accounts Chapter 3 Using the Internet 3.1 Connecting to the Internet 3.2 Bluetooth modes Chapter 4 Multimedia Applications 4.1 Viewing Photos and Videos...
-
Page 25: Chapter 1 Phone Functions & Input
1. Phone Functions & Input Phone Functions Tap Application Drawer > APPS tab > Phone. 1.1 Voice Calls To make a call from the Phone screen 1. Go to the Phone screen. 2. Use the keypad to input phone number. 3. - Page 26 To put a call on hold If you are having a call conversation, you can tap to put the call on hold. To switch between calls If you are having a call conversation, and there is another incoming call, slide to to put the first call on hold and answer the second call.
-
Page 27: Video Calls
1.2 Video Calls To make a video call from Phone screen 1. Go to the Phone screen. 2. Use the keypad to input phone number. 3. Then tap > Video Call to make the video call. To make a video call from People 1. -
Page 28: Using On-Screen Keyboard
1.3 Using On-Screen Keyboard On-screen keyboard appears in portrait mode when an application requires text input, such as messaging and writing e-mails. The keyboard input method is activated by the default settings. Using on-screen keyboard Use the keys on the on-screen keyboard. ... -
Page 29: Chapter 2 Email & Messages
2. Email & Messages 2.1 Creating and sending a message Create and send messages 1. Text messages could be included text and emotional icons. 2. Multimedia messages/ MMS contain letters, an image, an audio, or a video file. 3. Support to send voice messages and attach files with ringtone and audio. NOTE: 1. - Page 30 3. Type your message and tap to send your message. To forward a text message 1. Tap Application Drawer > APPS tab > 2. Tap a message to view the whole thread. 3. Tap and hold a message to show Message option list. 4.
- Page 31 Android 4.4 | 8...
-
Page 32: Email Accounts
2.2 Email Accounts All your received email messages are delivered to your phone. Set up an Internet Email account 1. Tap Application Drawer > APPS tab > 2. Enter your e-mail address and Password. Tap “Next”. 3. Select the e-mail account of types. 4. - Page 33 want to attach. To reply or forward an Email 1. Open an e-mail. 2. Refer the following instructions: Reply: Tap to reply the email. Reply all: Tap > to reply all recipients and sender. Forward: Tap > to forward the e-mail to other people. 3.
-
Page 34: Wi-Fi
3. Using the Internet 3.1 Connecting to the Internet Your phone connects to the Internet via: Wi-Fi GPRS/ EDGE/ 3G/ 3.5G/ HSPA+ NOTE: If you connect to the Internet, you may be charged. If you want to stop the connection, you need to tap Application Drawer >... - Page 35 4. Tap ”Add VPN network” to edit VPN network. 5. After filling in all necessary information, tap “Save” to finish the settings. To start a data connection If you set up multiple data connections, select the connection you want to use. 1.
-
Page 36: Bluetooth
3.2 Bluetooth modes Bluetooth on your phone operates in three different modes: On: Bluetooth is turned on. Your phone detects other Bluetooth devices, but your phone is not visible to others. Discoverable: Bluetooth is turned on, but your phone is not visible to other Bluetooth devices. -
Page 37: Multimedia Applications
4. Multimedia Applications 4.1 Viewing Photos and Videos To view photos in the album 1. Tap Application Drawer > APPS tab > 2. Tap one of picture folders to view the images in thumbnails. 3. Tap an image to view. 4. -
Page 38: Music
4.2 Music To play music 1. Tap Application Drawer > APPS tab > 2. Tap Songs, and all songs on the phone will be displayed. 3. Tap to select a song, and then it will play automatically. Icon Function Album art picture or animation The area of audio information Slide to go forward or backward To play the song... - Page 39 Tap “Library” to see all playlists. To edit music You could set up effects, tap Menu > Sound effects. 1. Drag or tap Equalizer to turn it on. 2. Tap arrow to show different effect list 3. Tap to select an effect you want. Items will be adjusted automatically. 4.
-
Page 40: Chapter 5 Programs
5. Programs 5.1 Browser Open the Browser to view web pages. 1. Tap Application Drawer > APPS tab > 2. An address bar appears at the upper side of screen, and you can type the URL there. 3. You can open several web pages at the same time. ... -
Page 41: Calendar
5.3 Calendar 1. Calendar helps you schedule and sound alarms for appointments, meetings, and events. 2. Tap Application Drawer > APPS tab > 3. If you do not log in your Google Account, tap Menu > Settings > ADD ACCOUNT to create an account, or tap “Existing”... -
Page 42: Gmail
5.5 Gmail Gmail is Google's web-based email service. Gmail can be configured when you set up your phone for the first time. Depending on your settings of the synchronization, Gmail on your phone may be synchronized with your Gmail account on the web automatically. 1. -
Page 43: Maps
5.6 Maps Google's mapping service help you search for the places you want. To open Maps 1. Tap Application Drawer > APPS tab > Icons Function Display your current location Select different layers, such as Traffic, Satellite, Transit Lines, etc. Type in a keyword and search for a place you want Input the start point and end point to get the direction Find places, such as restaurants, cafes, bars, attractions, etc. -
Page 44: Youtube
5.9 YouTube YouTube is an online video streaming service that allows you to view, search, and upload videos. To Play YouTube 1. Tap Application Drawer > APPS tab > 2. Videos are grouped into categories. Tap a category to watch the available videos. 3. -
Page 45: Fm Radio
5.13 FM Radio Tap Application Drawer > APPS tab > Please plug in your earphone before listening. Icons Function Open the channel list Close FM Radio More functions Add to favorites Previous radio frequency/ Next radio frequency Previous channel/ Next channel 5.14 Google+ You can check your friends’... -
Page 46: Connecting Your Phone To A Computer
5.15 Connecting your phone to a computer Tap and drag down Status Bar and tap “Connected as USB Storage” on your device. Please choose one of modes to connect with your computer 5.16 Screenshots Please press the and hold “Volume Down Key” and “Power Key” at the same time to capture any screen from the device. -
Page 47: Managing Your Phone
6. Managing Your Phone 6.1 Managing Basic Settings Date and Time You can set up the date and the time on your phone. To set up the date and time 1. Tap Application Drawer > APPS tab > > Date & time. 2. - Page 48 2. Check “Auto-rotate screen” to adjust the screen automatically. To display the screen never sleep while charging 1. Tap Application Drawer > APPS tab > > About phone. 2. Tap five times on “Build number”. 3. “Develop options” will be show up. 4.
-
Page 49: Managing Your Sim Cards
6.2 Managing your SIM cards Setting SIM card’ background color You can change the SIM1 and SIM2 background colors. It helps you identify SIM1 and SIM2 quickly. 1. Tap Application Drawer > APPS tab > > SIM management. 2. Tap a SIM card from “SIM INFORMATION” list. 3. -
Page 50: Protecting Your Phone
6.4 Protecting Your Phone You can protect your phone from unauthorized users by requiring the PIN or entering a password. Enable the PIN of the SIM card When the PIN is enabled, you are required to enter the PIN before making a call. 1. -
Page 51: Resetting Your Phone
6.5 Resetting Your Phone With Clean Boot, you can reset your phone to its factory defaults. When you reset your phone, the data stored in your phone may be erased. 1. Tap Application Drawer > APPS tab > > Backup & reset. 2.
Need help?
Do you have a question about the GX2 and is the answer not in the manual?
Questions and answers