Table of Contents
Advertisement
Quick Links
Download this manual
See also:
Quick Manual
Advertisement
Table of Contents

Subscribe to Our Youtube Channel
Related Manuals for Gigabyte GSmart G1305


Summary of Contents for Gigabyte GSmart G1305
- Page 2 Copyright All mobile products by GIGA-BYTE COMMUNICATIONS INC. mentioned in this document, including the device, accessories, software, text, music, and pictures, are owned by, or authorized by original manufacturers to GIGA-BYTE COMMUNICATIONS INC. Reproduction, transfer, distribution, or storage of part or all of the contents in this document in any form without the prior written permission of GIGA-BYTE COMMUNICATIONS INC.
-
Page 3: Safety Information
Safety Information This section contains important information on safe and efficient operation. Please read this information before using the device. • Use only the batteries and power adapter provided by the manufacturer. Use of unauthorized accessories may void your warranty. •... - Page 4 an aircraft. Copyright © 2009. All Rights Reserved. Android is a trademark of Google Inc. Use of this trademark is subject to Google Permissions. Bluetooth and the Bluetooth logo are trademarks owned by Bluetooth SIG, Inc. Java, JME and all other Java-based marks are trademarks or registered trademarks of Sun Microsystems, Inc.
- Page 5 WEEE Notice The WEEE logo on the product or on its box indicates that this product must not be disposed of or dumped with your other household waste. You are liable to dispose of all your electronic or electrical waste equipment by relocating over to the specified collection point for recycling of such hazardous waste.
-
Page 6: General Information
General Information This section contains important information on safe and efficient operation. Please read this information before using the device. Ignorance of the following notices may lead to violations of the law. • Before using the device, please make sure you have fully charged the battery. •... -
Page 7: Table Of Contents
Table of Contents Copyright ..............................0-1 Safety Information ............................0-2 General Information ............................ 0-5 Chapter 1 Getting Started ........................1-1 1.1 Your Phone ............................1-1 1.2 Installing or uninstalling the SIM Card, Battery, and Memory Card ............1-3 1.3 Charging the Battery ..........................1-5 1.4 Using Headset ............................ - Page 8 6.5 Facebook .............................. 6-6 6.6 File Browser ............................6-6 6.7 Gallery ..............................6-6 6.8 Gmail ..............................6-6 6.9 Maps ..............................6-6 6.10 Google Talk ............................6-7 6.11 Market ..............................6-7 6.12 Note pad ............................. 6-8 6.13 RoadSync ............................6-8 6.14 RoadSync Calendar ........................... 6-10 6.15 RoadSync Mail ...........................
-
Page 9: Chapter 1 Getting Started
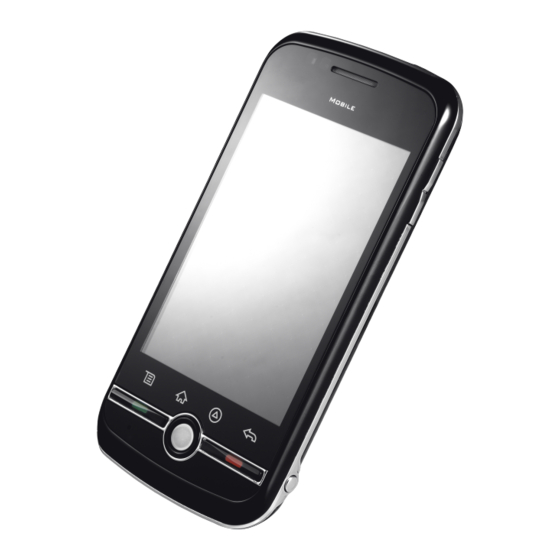
1. Getting Started 1.1 Your Phone press to temporarily turn the screen on or off. This section introduces you to the hardware of the The source of music and device. Earpiece voice. Touch screen Display screen. • Go back to Home Screen. Home •... -
Page 10: G1305│
Items Functions • Connect USB cable to PC as a modem / USB mass storage. Micro USB port Items Functions • Connect USB cable The camera on the and the AC adapter to back of the device charge the battery. 5 Megapixels supports 5-mega-pixel It is for hanging cell... -
Page 11: Installing Or Uninstalling The Sim Card, Battery, And Memory Card
1.2 Installing or uninstalling the 3. Stay your palm close to the back cover. SIM Card, Battery, and Memory Card To remove the back cover 1. Please turn over your phone with the back cover facing up. 4. Then pull the back cover with your middle fingertip to remove it. - Page 12 To remove the battery Use your fingertip to lift the battery, and then, To remove the SIM card remove it. 1. Remove battery. 2. Use your finger to slide the SIM card from the card slot. Battery Your phone comes with a rechargeable Li-Ion battery.
-
Page 13: Charging The Battery
• To ensure safety, do not remove the battery Memory card from the phone while the AC adapter is You will need a microSD® card to store photos, connected or while it is being charged. music, videos, and other data. To install the memory card 1. -
Page 14: Initial Settings
off. 2. Slide the volume bar to adjust the volume. Do 3. Select OK to confirm. either of the following: NOTE: If your phone is locked, please tap a. Drag the slider towards the left to decrease the Menu to un-luck it. Then you can turn off your volume, or drag the slider towards to the right to phone. - Page 15 Searching for Contacts On Contacts tab, do any of the following to easily search for contacts: • Tap Menu > Search. • Type the first few letters of the contact to search. The list is filtered as you type. • Tap an alphabetical index to view contacts that start with the letter.
-
Page 16: The Home Screen
contact. 1. When you tap the Clock Icon, you can change 3. The contact submenu appears, and then, tap the type of the clock. Add to favorites. 2. Select a clock you want from the bar at the 4. When you tap the contact, you will find a golden bottom of the screen, and then, tap the star appears next to the contact name. - Page 17 Event Home Screen: Check calendar, and Self-defined Home Screen: There are two arrange events and activities. screens. You can add the shortcuts and widgets. Music Home Screen: Play music and audio files. Quick Home Screen: Adjust Wi-Fi, Bluetooth, GPS, Data synchronization, and Brightness. G1305│...
- Page 18 Photo Home Screen: Viewing photos. You can slide the home screen from the left side to the right side or from the right side to the left side to switch it. The three icons located at the bottom of every home screen have different functions.
- Page 19 No network signal. Task notification Maximum signal Missed call strength. Fewer notification bars indicate lower signal strength. Shortcut Icons GPRS network is Tap shortcut icons to activate the related in use. Phone functions. Tap and hold a shortcut icon to move it. HSDPA network is Network in use.
- Page 20 3. When you tap Photo Widget, you can watch the slide show on Home Screen. 4. When you tap Weather Information, you can read the information on Home Screen. Tap the widget to adjust the settings. You can select the country/area, and then, select the city.
-
Page 21: Chapter 2 Phone Functions & Input
2. Phone Functions & Input To open Phone screen, do any of the following: 2. Tap the desired contact. • Tap Application Drawer > Dialer. 3. Tap Call mobile, Call work, or Call home. Or, • On any application screen, press Talk Key. press Talk Key to dial the default number directly. -
Page 22: Using On-Screen Keyboard
To switch between calls If you are having a call conversation, and there is another incoming call, tapping “Hold current call & answer“ to put the first call on hold. Tap Menu > Swap calls to switch between calls. To set up conference calls 1. - Page 23 Basic settings • Word prediction: Enable word prediction function. • Key press sound: Phone sounds when user presses any key on the on-screen keyboard. • Key press vibration: Phone vibrates when user presses any key on the on-screen keyboard. • Layout in portrait mode. •...
-
Page 24: Chapter 3 Email & Messaging
3. Email & Messaging Use Messaging to access text and MMS messages. Use Email to send and receive e-mail To request message delivery notification messages via your internet e-mail accounts. 1. In Messaging, tap Menu > Settings to access SMS and MMS settings. 3.1 Creating and sending a text 2. -
Page 25: Multimedia Message
To delete a message within a thread then, enter your message with the on-screen 1. Tap Application Drawer > Messaging. keyboard. 2. Tap the contact who send message to you. 8. Tap Send to send your message. 3. Tap and hold the message you want to delete. 4. -
Page 26: E-Mail Accounts
2. Tap New Message. and then, tap Done. 3. Tap Menu > Attach > Record audio. NOTE: The Account display name is the name shown on the Email screen. 4. Tap to record an audio file. To open Email 5. Tap to stop recording. - Page 27 2. Tap a name to open contact. To move between messaging accounts 3. Tap Email home. Tap Email in the submenu. If you are viewing the messaging list screen of 4. Enter the Subject and compose your e-mail. one account and you want to view the list of 5.
-
Page 28: Chapter 4 Using The Internet
4. Using the Internet 4.1 Connecting to the Internet Your phone connects to the Internet via: Wi-Fi GPRS / EDGE / 3G / 3.5G If you want to connect to the Internet automatically, you can tap Application Drawer > Settings > Wireless controls >... - Page 29 To add Wi-Fi network 1. Tap Application Drawer > Settings to access Wireless controls. 2. Tap Wi-Fi settings. 3. In Wi-Fi networks, tap Add Wi-Fi network. A new window is displayed. 4. Follow the on-screen instructions and enter necessary information, and then, tap Save to store settings.
- Page 30 To configure Wi-Fi settings To set up wireless data connection 1. Tap Application Drawer > Settings to access 1. Tap Application Drawer > Settings > Wireless Wireless controls. controls. 2. Tap Wi-Fi Settings. 2. Tap Mobile networks > Access Point Names. 3.
-
Page 31: Bluetooth Modes
Access Point Names. 3. Tap to check Bluetooth and activate. 3. A list of connections will be displayed. Tap the 4. To make your phone visible to others, check radio button to select the connection you want Discoverable to make this phone visible to to use. - Page 32 the other Bluetooth device. 6. After the Bluetooth device is connected to your phone, you can use the Bluetooth device. NOTE: Tap and hold the selected device to enter device options menu. NOTE: Once a partnership has been created, connecting to that device again will no longer require entering the password.
-
Page 33: Chapter 5 Multimedia Applications
5. Multimedia Applications 5.1 Photos and Videos Tap “+” or “-” to zoom the image in or out. Your phone is equipped with a 5.0 megapixels camera to take photos and videos. 1. Tap Application Drawer > Camera. The screen switches to landscape view automatically. - Page 34 Displays the last video. Icon Function Tap to go to Review Tap DELETE to delete the Screen. You need to picture. insert your SD card first. Tap SHARE to share the picture via Email or Indicates capture mode. Messaging. Swipe to switch between Tap SET AS to set the image video and camera mode.
- Page 35 settings. seconds, 5 seconds, and 10 Configuring camera settings seconds On the camera screen, tap Menu > Settings. Show/Hide Grid grid when preview Turn the Shutter sound shutter sound on/off Off, 50 Hz, Anti Banding 60 Hz, and Auto 5M (2560 x 1920), 3M (2048 x 1536), 2M...
-
Page 36: Viewing Photos And Videos
No limit, No preview Prompt after (default), 3 capture seconds, 5 seconds, and 10 seconds (640*480), Video Quality (352*288), and QCIF (176*144) 1 minute (for sharing), 10 minutes, 30 Video duration minutes, 60 minutes, and 120 minutes. To play slideshow 5.2 Viewing Photos and Videos 1. -
Page 37: Using Music Player
5.3 Using Music Player You must copy your audio files to the storage card before you play music, because the music player only plays audio files saved in the storage card of your phone. Tap Application Drawer > Music. Music Screen Playback screen: Displays the playback area with the playback controls. - Page 38 Tap to go to the previous song. Tap to play or pause the song. Tap to go to the next song. Slide to go forward or backward. Tap to go to Playlist. Tap to go to Now playing list. Tap to shuffle. Library Screen Tap to enable or disable Now Playing screen: Displays the list of...
- Page 39 Now Playing Screen Creating a Playlist Add songs to a specific playlist or create a playlist. To play music 1. Tap Application Drawer > Music. 1. Tap Application Drawer > Music. 2. The Library screen is displayed. 2. The Library screen is displayed. 3.
-
Page 40: Chapter 6 Programs
6. Programs Your phone comes with the following pre-installed Go Viewer, and PDF programs. To Go Lite. Sends and receives Icons Programs Description Email e-mail messages. Browses the web and Browser download files from Logs in and uses the Internet. Facebook Facebook Performs basic... -
Page 41: Browser
install on your phone. that allows you to view, search, and Sends and receives upload videos. all types of Messaging messages, such as text message and 6.1 Browser MMS. Open the Browser to view web pages. Plays and manages 1. Tap Application Drawer > Browser Music the music and audio 2. - Page 42 Managing a Web Page sets text encoding. While viewing a web page, tap Menu to change Block pop-up view settings or apply other functions. windows: blocks pop-up windows The following table lists the Menu options. when browsing a Depending on the function, some options may be web page.
-
Page 43: Calculator
To schedule an event Remember form data: 1. Tap Application Drawer > Calendar. remembers the data 2. Tap Menu > New event. typed in forms for later 3. Enter event details. use. 4. Select the dates for From and To field. Clear form data: clears NOTE: For an all-day event, check All day. - Page 44 through other pages. 4. To close the file, tap Return. 4. To close the file, tap Return. NOTE: To create a new presentation or edit an NOTE: To create a new document or edit an existing presentation, purchase the full version existing document, purchase the full version of of Documents To Go.
-
Page 45: Facebook
videos. 4. The images or videos will be displayed in thumbnails. 6.5 Facebook Facebook application lets you connect to facebook with a single tap. You can log in to your facebook account and get connected with your friends anytime. Tap Application Drawer > Facebook. 6.8 Gmail Gmail is Google's web-based email service. -
Page 46: Google Talk
To open Map 6.10 Google Talk 1. Tap Application Drawer > Maps. Google Talk is Google's instant messaging 2. Do any of the following: program. To search for a place of interest: Tap Menu > Search, and then, type in a keyword to begin To sign in to Google Talk search. -
Page 47: Note Pad
available games. You can also tap Downloads to view the programs you have previously 6.13 RoadSync downloaded. RoadSync provides secure, wireless, and direct push synchronization of corporate e-mail, calendar, contacts, and attachments. Set up RoadSync for the first time 1. Tap Application Drawer > RoadSync Calendar or RoadSync Mail. - Page 48 Preferences screen is displayed automatically. Use the Preferences screen to customize synchronization settings. Server Settings Tap to edit server settings such as User name, Password, Server address, Domain, and enable or disable SSL. Data Sync Settings Tap to choose the data to synchronize. Tap to select the check boxes of the following: E-mail: To sync Inbox messages and attachments.
-
Page 49: Roadsync Calendar
incomplete message upon opening it. Signature: To customize and add your signature to e-mails you send. My e-mail address: To enter the e-mail address to exclude when sending or replying e-mails to all. Status bar: Select this check box to display notification on the status bar when a new e-mail arrives. -
Page 50: Rss Reader
To open RoadSync Mail 6.17 Voice Note 1. Tap Application Drawer > RoadSync Mail. 2. Do any of the following: To Record Voice Note To view a message, tap the message. 1. Tap Application Drawer > Voice Note. To create a new message, tap Menu > New 2. -
Page 51: Gps Tracker
allows you to view, search, and upload videos. To start using Youtube 1. Tap Application Drawer > Youtube. 2. Videos are grouped into categories, such as Most viewed, Most discussed, Most recent, and Top rated. Tap a category to watch the available videos. - Page 52 Save GPS File 1. Tap Application Drawer > GPS Tracker. Managing Tracking Data 2. Tap Menu > Save to. You can save the Tracking data for your personal 3. Enter default path to save the file in your SD record. card.
-
Page 53: Chapter 7 Managing Your Phone
7. Managing Your Phone 7.1 Phone Settings Sound & display Application Description Tap Application Drawer > Settings to view and adjust Turn silent mode the settings of your phone. The Settings menu is on/off. All sounds categorized into: Wireless controls, Call settings, Silent mode except media &... - Page 54 Adjust the delay Tap to set the unlock Set unlock pattern Screen Timeout before the screen pattern. turns off automatically. Lock SIM card and Set up SIM card lock Enable/disable LED change SIM card pin. Notification LED effect for call/message Show passwords as Visible passwords notification.
-
Page 55: Managing Basic Settings
card. Choose what to Searchable items search on the phone. To show available Available space space of internal Clear shortcuts to Clear search phone storage. recently chosen shortcuts search results. Delete all data on the phone and restore to Factory data reset Speech synthesis factory default Application... - Page 56 or am/pm field, and use the up and down arrows 4. Tap Ringtone to set up the preferred ringtone to increase or decrease the value. when your alarm sounds. 5. Tap Set to apply the values. 5. Tap Vibrate to enable/disable vibration when the alarm sounds.
- Page 57 Using Stop watch Using countdown timer 1. Tap Application Drawer > Clock. 1. Tap Application Drawer > Clock. 2. Tap to go to Stop watch tab. 2. Tap to go to countdown timer tab. Tap Start to start and time elapsed will appear on Press Set to set the countdown time.
- Page 58 3. Check the box to switch the screen orientation automatically when rotating the phone. Display Settings To turn off backlight when the phone is idle 1. Tap Application Drawer > Settings > Sound & display. Ring Settings 2. In the Display settings, tap Screen Timeout. You can assign a ring tone and a ring tone type for 3.
-
Page 59: Protecting Your Phone
3. Select the Ring tone from the lists. four dots. 4. Tap OK when finished. 4. The phone records the pattern. Tap Continue. When prompted, draw the unlock pattern again, 7.3 Protecting Your Phone and then, tap Confirm. Note: To change your unlock pattern, tap You can protect your phone from unauthorized users Application Drawer >... - Page 60 individual usage.) Up to 6.5 hours (It may vary depending Talk time on the availability of local networks and individual usage.) Radio Band & Standard 850 / 900 / 1800 /1900 GSM/GPRS/EDGE WCDMA 900 / 1900 / 2100 MHz Connectivity GPS / AGPS Wi-Fi IEEE 802.11 b/g...
Need help?
Do you have a question about the GSmart G1305 and is the answer not in the manual?
Questions and answers