Table of Contents
Advertisement
Quick Links
Download this manual
See also:
Quick Manual
Advertisement
Table of Contents

Related Manuals for Gigabyte GSmart G1310


Summary of Contents for Gigabyte GSmart G1310
- Page 1 G1310...
- Page 2 Copyright All mobile products by GIGA-BYTE COMMUNICATIONS INC. mentioned in this document, including the device, accessories, software, text, music, and pictures, are owned by, or authorized by original manufacturers to GIGA-BYTE COMMUNICATIONS INC. Reproduction, transfer, distribution, or storage of part or all of the contents in this document in any form without the prior written permission of GIGA-BYTE COMMUNICATIONS INC.
-
Page 3: Safety Information
Safety Information This section contains important information on safe and efficient operation. Please read this information before using the device. • Use only the batteries and power adapter provided by the manufacturer. Use of unauthorized accessories may void your warranty. •... - Page 4 navigation system. As a safety measurement, it is against the law in most countries to use the phone on board an aircraft. Copyright © 2010. All Rights Reserved. Android is a trademark of Google Inc. Use of this trademark is subject to Google Permissions. Bluetooth and the Bluetooth logo are trademarks owned by Bluetooth SIG, Inc.
- Page 5 conserve natural resources. Moreover, proper recycling of the electronic and electrical waste equipment will ensure safety of human health and environment. For more information about electronic and electrical waste equipment disposal, recovery, and collection points, please contact your local city center, household waste disposal service, shop from where you purchased the equipment, or manufacturer of the equipment.
-
Page 6: General Information
General Information This section contains important information on safe and efficient operation. Please read this information before using the device. Ignorance of the following notices may lead to violations of the law. • Before using the device, please make sure you have fully charged the battery. •... -
Page 7: Table Of Contents
Table of Contents Copyright ..............................0-1 Safety Information ............................0-2 General Information ............................ 0-5 Chapter 1 Getting Started ........................1-1 1.1 Your Phone ............................1-1 1.2 Installing or uninstalling the SIM Card, Battery and Memory Card ............1-3 1.3 Charging the Battery ..........................1-6 1.4 Turning the Phone On or Off ........................ - Page 8 6.3 Calendar ............................... 6-4 6.4 Gmail……………………………………………………………………………………………………………..6-5 6.5 Maps ..............................6-5 6.6 Latitude ..............................6-6 6.7 Places ..............................6-6 6.8 Navigation ............................6-6 6.9 Google Search ............................ 6-6 6.10 Voice Search ............................6-7 6.11 Talk ..............................6-7 6.12 YouTube ............................. 6-7 6.13 Market ..............................
-
Page 9: G1310│
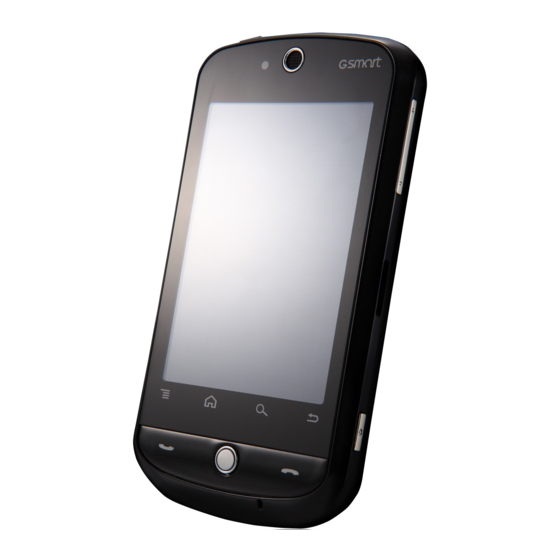
1. Getting Start 1.1 Your Smartphone • Press and hold for several seconds to turn the phone This section introduces you to the hardware of the on or off. device. Power • To set your phone to sleep mode, press the power button briefly. - Page 10 button briefly. Press again to turn on the display. Recent Press to bring up recent Applications activities. Sound Receiver. For hanging cell phone Strap hole strap. • Connect USB cable to PC as a modem / USB mass storage. 17 Micro USB port •...
-
Page 11: Installing Or Uninstalling The Sim Card, Battery And Memory Card
1.2 Installing or uninstalling the SIM Card, Battery and Memory Card To remove the back cover 1. Please turn over your phone with the back cover facing up. 2. Please move your fingertip into the slot located Items Functions at the top of the back cover. The source of music and Speaker voice. - Page 12 3. Place your palm close to the back cover. Then pull the back cover with your fingertip to remove To remove the SIM card 1. Remove battery. 2. Use your finger to slide the SIM card from the SIM card card slot.
- Page 13 To replace the back cover 1. Please insert the hook of the bottom of the back cover into the slot of the phone. To remove the battery Use your fingertip to lift the battery, and then, remove it. 2. With your right and left thumbs, press the middle of the back cover.
-
Page 14: Charging The Battery
3. Then, press the top of the back cover until it clicks into place. To remove the memory card 1. For safe removal, tap Application Drawer > Settings > SD card & phone storage > Unmount SD card. 2. Push the memory card down to eject it from the slot. -
Page 15: Turning The Phone On Or Off
1.4 Turning the Phone On or Off After installing the SIM card and charging the battery, you are now ready to turn on your phone. 1.6 Notification LED To turn on your phone Press and hold the power button until the phone Types Descriptions vibrates. -
Page 16: Initial Settings
emergency call, or tap “Change language” to Types Descriptions change the default language. • When you receive an 3. Tap “Skip” to skip the learning step, or tap incoming call, press the “Begin” to learn how to use your phone. button to answer the call. -
Page 17: Contacts
mode. NOTE: When the phone is set to the silent mode, all sounds are turned off except media and alarm. 1.10 Contacts “Contacts” is your phonebook that lets you store names, phone numbers, e-mail addresses and other information. Contacts are stored in the phone memory. -
Page 18: The Home Screen
• If you want to categorize the contacts, tap Menu Favorite Contacts > Display options to set up the category. You can add the most frequently called contacts to the favorite contact list which helps you to Manage Accounts access the contacts quickly and easily. 1. - Page 19 You can slide the home screen from the left side Settings Home Screen: Shortcuts for settings. to the right side or from the right side to the left side to switch it. The icons located at the bottom of the home page have different functions: Icons Descriptions Tap to launch Application Drawer...
- Page 20 Multimedia Home Screen: Multimedia settings. How to Navigate Tap: You can tap the icon on the screen to activate the application. Press and Hold: Press and hold the icon on the home screen to make it movable. Press and hold an icon in Application Drawer to add it to the home screen you want.
- Page 21 No network signal / Notification Alarm. No SIM card inserted. Event notification. Maximum signal Missed call. strength. Fewer bars indicate lower USB debugging is Network signal strength. connected. Airplane mode. PC Sync mode. Call is in progress. General notification. Your call is on hold.
- Page 22 Using Widgets Folders You may add and customize the Widgets on You can also add / delete folders to your Home Home Screen as you like. screen. You have to make sure there still has enough space for adding folders. To add widgets 1.
-
Page 23: Chapter 2 Phone Functions & Input
2. Phone Functions & Input To open Phone screen, do any of the following: 4. Tap to dial. You can select SIM1 or Tap Application Drawer > Phone. SIM2 (If SIM2 inserted). On any application screen, press Talk Key. Answering a call 2.1 Voice Calls When you receive an incoming call:... -
Page 24: Using On-Screen Keyboard
Menu > Merge calls to set up the conference 2. Select the input method you want. calls. 3. If you are having a call conversation, and there Basic settings is another incoming call, you can tap Menu > Tap Application Drawer > Settings > Language & Merge calls to set up the conference calls also. - Page 25 insert highlighted word automatically. Tap to activate the settings of Guobi input method. User dictionary Tap to move to the next text zone. Tap Menu > Add to add the self-defined words in the user dictionary. When you compose, you can Using Android keyboard use them.
-
Page 26: Chapter 3 Email & Messaging
3. Email & Messaging Use Messaging to access text and MMS select SIM1 or SIM2 (If SIM2 inserted). messages. Use Email to send and receive e-mail messages via your Internet e-mail accounts. NOTE: If you exit Messaging before sending, unsent message will be saved as a draft 3.1 Creating and sending a text automatically. -
Page 27: Multimedia Message
To delete a message within a thread 6. To insert a picture, video, audio etc., tap Menu 1. Tap Application Drawer > Messaging. > Attach. 2. Tap a contact who sending messages to you. 7. To insert text, tap “Type to compose”, then, 3. -
Page 28: E-Mail Accounts
To open Email 2. Tap New Message. Tap Application Drawer > Email to view your 3. Tap Menu > Attach > Record audio. e-mails. 4. Tap to record an audio file. To select an account 5. Tap to stop recording. 1. - Page 29 4. Enter the Subject and compose your e-mail. To move between messaging accounts 5. Tap Send to send your e-mail. If you are viewing the messaging list screen of one account and you want to view the list of Adding attachments to an e-mail message another account, tap Menu >...
-
Page 30: Chapter 4 Using The Internet
4. Using the Internet 4.1 Connecting to the Internet Your phone connects to the Internet via: Wi-Fi GPRS / EDGE / 3G / 3.5G NOTE: If connect to the Internet, you may be charged. If you want to stop the connection, you need to tap Application Drawer >... - Page 31 VPN settings Set up & manage Virtual Private Networks (VPNs.) 1. Tap Application Drawer > Settings > Wireless & networks. 2. Tap VPN settings > Add VPN to add VPNs. Manual settings for Cellular Data Network Check the availability of these connections with your network service provider and obtain the following information: ...
-
Page 32: Bluetooth Modes
4.2 Bluetooth modes NOTE: Tap and hold the selected device to launch device options menu. Bluetooth on your phone operates in three different modes: NOTE: Once a partnership has been created, On: Bluetooth is turned on. Your phone connecting to that device again will no longer detects other Bluetooth devices, but your require inputting the password. -
Page 33: Chapter 5 Multimedia Applications
5. Multimedia Application 5.1 Photos and Videos Tap to set flash mode. Your phone is equipped with a 5.0 megapixels camera to take photos and videos. Tap to zoom in or out. Taking a photo 1. Tap Application Drawer > Camera. The screen switches to landscape view automatically. - Page 34 Indicates capture mode. Swipe to switch between video and camera mode. Press to record video. Configuring Camcorder settings. Tap to set white balance. Tap to set flash mode. Tap to set video quality. Icon Function Tap Set as to set the picture as the 1.
- Page 35 50 Hz, 60 Hz, and Anti Banding Auto Level 0, Level 1, Saturation Level 2, Level 3, Level 4, Level 5 Level 0, Level 1, Contrast Level 2, Level 3, Level 4, Level 5 Level 0, Level 1, Sharpness Level 2, Level 3, Level 4, Level 5 Icon Function...
-
Page 36: Viewing Photos And Videos
To edit an image Daylight, and While viewing the image, to edit an image: Cloudy To rotate image, tap Menu > Rotate > Rotate Flash mode On and Off Left or Rotate Right. High(30m), To crop, tap Menu > Crop. Low(30m), Video 1. - Page 37 Tap to enable or disable the repeat function. Library screen: Display folder categories make searching for media files quickly and easily. Icon Function Album art picture or animation The display area of audio information. Now playing screen: Tap to go to Now Tap to go to the previous playing...
- Page 38 submenu. 3. Select the playlist you want. Or, tap New to create a new playlist. Input a name for the created playlist, and then, tap Save. The song will be added to the new playlist automatically. To remove a music file from the playlist 1.
-
Page 39: Chapter 6 Programs
6. Programs Pre-installed programs You can share your Icons Programs Description location with your Latitude friends and view your Allow you to use the friends' locations on phone more easily, the map. Best we recommend and Choice provide you the best Find applications and software and fun games which you... -
Page 40: Browser
Google’s mapping settings of your service help you phone. Maps search for the places Sound Record a voice note. you want. Recorder Camcorder Records videos. Videos Play videos. Search for Voice Camera Captures still images. information by your Search voice. Clock Sets up alarm clock. - Page 41 To set the Home page Tap to select text on the web Select text 1. While viewing a web page, tap Menu > More > page. Settings > Set home page. Tap to view web page Page info 2. Enter the URL of the page that you want to set information.
-
Page 42: Calculator
Open new windows security. behind the current one. Set home page: Enters Advance settings the URL and sets as your Set search engine: Select home page. a search engine. Invert color: Display Website settings: pages in inverted color. Advanced settings for individual websites. -
Page 43: Gmail
6.4 Gmail Gmail is Google's web-based email service. Gmail can be configured when you set up your phone at the first time. Depending on your settings of the synchronization, Gmail on your phone may be synchronized with your Gmail account on the web automatically. -
Page 44: Latitude
Mode. Starred Places: Tap Menu > Starred Places. 6.7 Places Help you find the places quickly. Use Google maps to search places that you want Join Latitude: Tap Menu > Join Latitude to to find near your current location and the details share my location with my friends and Google. -
Page 45: Voice Search
Search. Settings. To view terms and privacy: Tap Menu > Add the searchable items in your device Settings > Terms & Privacy. 1. Tap Application Drawer > Google Search. To Sign out: Tap Menu > Sign out. 2. Tap Menu > Search settings > Searchable items. -
Page 46: Weather
the list of available applications, and tap Games 6. More information: Tap Menu > More. It includes to view the list of available games. You can also Update Frequency, Update Notification, Demo, tap My apps to view what you have and About. -
Page 47: People
6.17 Best Choice 6.16 People For easy to use, we recommend you the best This application could perfectly integrate your software and functionality. With this function, you friends’ social networking services. can find the web links to the services you need 1. -
Page 48: Sound Recorder
radio frequency. 6.20 File Manager File manager helps you manage the files in your 6. Tap to play the radio, or tap to stop phone and in your SD card. the radio. 1. Tap Application Drawer > File Manager. 2. Tap the folder list, and then, tap the folder you want to browse. -
Page 49: Usb Manager
albums. 2. PC Sync: Tap PC Sync on your phone, your Videos: Allows you to add and to play videos. device will connect and access Android Manager. Music: Allows you to add, to delete, to edit and to Android Manager on your PC will synchronize play music. -
Page 50: Chapter 7 Managing Your Phone
7. Managing Your Phone 7.1 Phone Settings Call settings You can select SIM1 or SIM2 (If SIM2 inserted.) Tap Application Drawer > Settings to view and adjust Application Description the settings of your phone. Fixed Dialing Manage the fixed Numbers dialing numbers. - Page 51 Location & security calls. Application Description Set up your default Notification ringtone ringtone of Check to connect to notifications. wireless networks. Use wireless Turn on for some Enable/disable sounds networks location-based Audible touch tones when using the dial services(LBS). pad. Use GPS Check to enable GPS Enable/disable sounds...
- Page 52 Applications Connect to PC Application Description Application Description Allow/disallow the You can select Data installation of USB Manager Storage, PC Sync, Unknown sources non-market Default Action Data card, Charge applications. Settings Only, and Keep asking me every time. Manage and remove Manage applications the installed applications.
-
Page 53: Managing Basic Settings
To set up the date and time settings voice recognition. 1. Tap Application Drawer > Settings > Date & time. Text-to-speech Text-to-speech 2. If you check Automatic, the system will get the settings settings. information of the current date and time automatically. -
Page 54: Protecting Your Phone
green. To display the screen when your device is charging 1. Tap Application Drawer > Settings > Applications > Development. 2. Check Stay awake to display the screen when your device is charging. To change the ringtone of an incoming call 1. -
Page 55: Resetting Your Phone
3. Tap Change SIM/RUIM PIN. Type the old PIN. data stored in your phone may be erased. Then tap OK. 1. Tap Application Drawer > Settings > Privacy. 4. Type the new PIN. Then tap OK. 2. Tap Factory data reset > Reset phone > Erase 5. - Page 56 850 / 900 / 1800 /1900 GSM/GPRS/EDGE WCDMA 900 / 2100 MHz Connectivity Wi-Fi IEEE 802.11 b/g Bluetooth Bluetooth 2.1 + EDR Micro USB 2.0 Audio Jack 3.5 mm stereo audio jack Digital Camera 5.0 Megapixel Color Digital Camera Camera with AF and Video Recording External Memory MicroSD supports up to...
Need help?
Do you have a question about the GSmart G1310 and is the answer not in the manual?
Questions and answers