Table of Contents
Advertisement
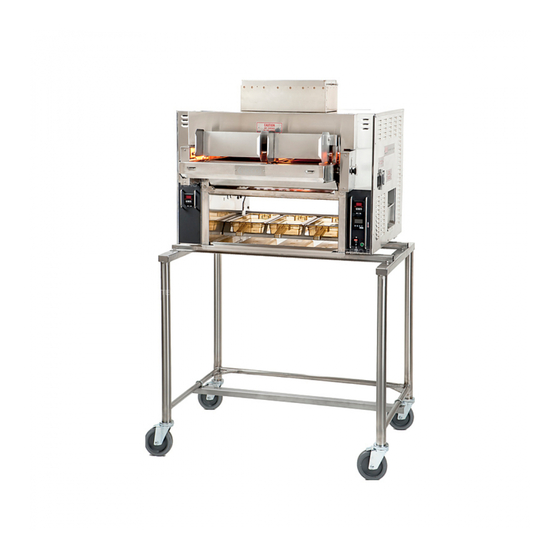
BroilVection
BroilVection
Model JF93 Gas
Owner's Manual
A P P R OVA L S :
F O R Y O U R S A F E T Y :
Do not store or use gasoline or other flammable vapors or liquids in the vicinity of this or any other
appliance.
W A R N I N G :
Improper installation, adjustment, alteration, maintenance can cause property damage, injury, or death.
Read the installation, operating and maintenance instructions thoroughly before installing or servicing
this equipment.
Broiler area must be kept free of combustible materials, and the flow of combustion and ventilation air
must not be obstructed. Operating personnel must not perform any maintenance or repair
functions. Contact your Nieco Authorized Dealer.
IMPORTANT: RETAIN THIS MANUAL IN A SAFE PLACE FOR FUTURE REFERENCE
™
™
Advertisement
Table of Contents

Subscribe to Our Youtube Channel
Related Manuals for Nieco JF93G Gas BroilVection


Summary of Contents for Nieco JF93G Gas BroilVection
- Page 1 Broiler area must be kept free of combustible materials, and the flow of combustion and ventilation air must not be obstructed. Operating personnel must not perform any maintenance or repair functions. Contact your Nieco Authorized Dealer. IMPORTANT: RETAIN THIS MANUAL IN A SAFE PLACE FOR FUTURE REFERENCE...
- Page 2 This page intentionaly left blank.
-
Page 3: Table Of Contents
I. specifications ..........43 Nieco Corporation - Model JF93G... -
Page 4: General Information
This manual provides the safety, installation and operating procedures for the Nieco Automatic Broiler Model JF93. We recommend that all information contained in this manual be read prior to installing and operating the broiler. -
Page 5: Service/Technical Assistance
Authorized Nieco Distributors and Service Agencies will void the warranty and may significantly alter the performance of your broiler. The use of non-Nieco parts is capable of affecting these criteria, and may affect broiler performance, parts longevity and food safety. Your local Authorized Nieco Distributor and Service Agent has been factory trained and has a complete supply of parts for your Nieco Automatic Broiler. - Page 6 Distributor for adjustment or repair. • Use only genuine Nieco replacement parts for your broiler. Failure to do so will void the warranty and may significantly alter the performance of your broiler. The use of non-Nieco parts is capable of affecting these criteria, and may affect broiler performance, parts longevity and food safety.
-
Page 7: Machine Installation
12” (305 mm) 0” (0 mm) 0” (0 mm) Sides of broiler 12” (305 mm) 0” (0 mm) 0” (0 mm) Front of broiler 12” (305 mm) 0” (0 mm) 24” (610 mm) (Feed end) Nieco Corporation - Model JF93G... -
Page 8: Gas Connection
For easy movement of the appliance, the connector should be installed with a "lazy" loop for minimum tension. note: Gas appliances should be disconnected prior to maximum movement. (Minimal movement is possible to connect hose.) Nieco Corporation - Model JF93G... -
Page 9: Restraining Device
Disconnect power before servicing. b.10 Pre-operation Check Be sure that all parts are installed in the proper location: Ventilation is turned on Broiler is plugged in Gas line is connected Nieco Corporation - Model JF93G... -
Page 10: Operation
4. Ignition failure light. This light will flash if the broiler burners fail to ignite. Cycle the on/off switch to reset. Check the troubleshooting guide if the broiler fails to light. Nieco Corporation - Model JF93G... - Page 11 3. ADJUSTMENT BUTTONS - Use to adjust product cook times, element settings and product names. 4. SELECTION INDICATOR LIGHT - Lights up to show which button is selected. Multi-speed control P/N 15161-B Nieco Corporation - Model JF93G...
-
Page 12: Step-By-Step Lighting Procedure
If this still doesn’t light the broiler, see the MANUAL IGNITION instructions. 1. Turn the MaIn PoWeR sWITCH on. 2. Allow broiler to heat for 45 minutes before cooking. Nieco Corporation - Model JF93G... -
Page 13: Shutdown Procedure
Your Nieco Automatic Broiler is designed to automatically stop gas flow to the broiler in the event of power failure, gas pressure loss or any other related incident. No attempt to operate this appliance should be made in the event of a power failure. -
Page 14: Control Operation
Leave the broiler at 1000º F for one hour. DO NOT COOK DURING THIS HOUR. After the hour is up, use the arrows to put the set point to 20º UNDER the actual temperature. The bottom number is the set temperature and the top number is the actual temperature. Nieco Corporation - Model JF93G... - Page 15 (10 character limit). Press and hold the PRODUCT SELECTION BUTTON for 5 seconds to save the changes and return to normal operation. Nieco Corporation - Model JF93G...
- Page 16 W a s h , r i n s e , a n d s a n i t i z e i n t h e 3 -compartment s i n k . Nieco Corporation - Model JF93G...
-
Page 17: Assembly/Disassembly And Cleaning
Meat Guides Clean: Every 4 hours Feed End Tools Scrub Pad 3-Compartment Sink Instructions 1. Lift the meat guides up and off the feeder. 2. Wash, rinse, and sanitize in the 3-compartment sink. Nieco Corporation - Model JF93G... - Page 18 3. Wash, rinse, and sanitize in the 3-compartment sink. DO NOT lift the feeder base by the feeder bar or the chains. This will damage the feeder base. REASSEMBLY: Pull the release pin and place feeder base in position. Nieco Corporation - Model JF93G...
- Page 19 Feeder Housing Clean: Daily Feed End Tools Scrub Pad 3-Compartment Sink Instructions 1. Lift and remove. 2. Wash, rinse, and sanitize in the 3-compartment sink. REASSEMBLY: Hang feeder housing on brackets. Nieco Corporation - Model JF93G...
- Page 20 Heat Resistant Gloves Degreaser 3-Compartment Sink Instructions 1. Slide warming pan shield out. 2. Take to sink area and spray with degreaser. 3. Wash with a scrub pad, rinse, and sanitize in the 3-compartment sink. Nieco Corporation - Model JF93G...
- Page 21 Scrub Pad Heat Resistant Gloves Degreaser 3-Compartment Sink Instructions 1. Slide crumb tray out. 2. Take to sink area and spray with degreaser. 3. Wash with a scrub pad, rinse, and sanitize in the 3-compartment sink. Nieco Corporation - Model JF93G...
- Page 22 Discharge End Tools Scrub Pad Heat Resistant Gloves Degreaser 3-Compartment Sink Instructions 1. Lift up and off. 2. Take to sink area and spray with degreaser. 3. Wash, rinse, and sanitize in the 3-compartment sink. Nieco Corporation - Model JF93G...
- Page 23 Make sure stripper blade is cool before putting in water or it may warp. 2. Take to sink area and spray with degreaser. 3. Wash with a scrub pad, rinse, and sanitize in the 3-compartment sink. REASSEMBLY: Hang stripper blade on brackets. Nieco Corporation - Model JF93G...
- Page 24 2. Take to sink area and spray with degreaser. 3. Wash with a scrub pad, rinse, and sanitize in the 3-compartment sink. REASSEMBLY: Be sure grease trough is pushed all the way into the broiler. Nieco Corporation - Model JF93G...
- Page 25 2. SOAK IN WARM WATER FOR 1 HOUR. RINSE WITH WATER ONLY. NEVER USE ANY CHEMICALS ON THE CATALYST. 3. Lay flat to drain water and let air dry overnight. CAUTION: Extremely Hot 4. Make sure Incendalyst™ is dry before putting back on broiler. Nieco Corporation - Model JF93G...
- Page 26 EXTREMELY HOT! Be careful not to burn yourself. 1. Lift upper heat shield up and off. 2. Take to sink area and spray with degreaser. 3. Wash with a scrub pad, rinse, and sanitize in CAUTION: Extremely Hot the 3-compartment sink. Nieco Corporation - Model JF93G...
- Page 27 2. Remove the ceramic boot from the back of the flame sensor. 3. Loosen the wing nut holding the flame sensor in place. 4. Remove the flame sensor and clean the metal tip with a DRY, clean scrub pad. Nieco Corporation - Model JF93G...
- Page 28 Be sure that both air box assemblies are installed and sit flush on their brackets. Main Burner Orifices Clean: Monthly Side Tools Small Orifice Brush Instructions 1. Use a small brush to clean the main burner orifices Nieco Corporation - Model JF93G...
- Page 29 1. Remove the Rear Heat Shield, Return Slide and Stripper Blade. 2. Loosen 7/16” adjusting bolts. 3. Use a large screwdriver to pry down on the crossbar to remove excess slack from belt. 4. Tighten 7/16” adjusting bolts. Nieco Corporation - Model JF93G...
- Page 30 Check cookout temperature (undercooking). CooKInG PRobleMs Burgers under or over cooked. Adjust conveyor belt speed. Clean burners and orifices. Excessive flaming in broiler. Clean the catalyst if equipped. Check the hood for proper operation. Check product for overcooking. Nieco Corporation - Model JF93G...
-
Page 31: Troubleshooting Guide
PaRTs loCaTIon DRaWInGs Discharge end View Nieco Corporation - Model JF93G... -
Page 32: Parts Location Drawings
PaRTs loCaTIon DRaWInGs feed end View Nieco Corporation - Model JF93G... - Page 33 PaRTs loCaTIon DRaWInGs feeder assembly Nieco Corporation - Model JF93G...
- Page 34 PaRTs loCaTIon DRaWInGs Clutch assembly Nieco Corporation - Model JF93G...
- Page 35 G. PaRTs RePlaCeMenT lIsT nIeCo ReCoMMenDeD PaRTs & aCCessoRIes - MoDel Jf93 - 03/2012 PaRT # DesCRIPTIon Gas bURneR & aIR sYsTeM 24338 AIR BOX W/ BURNER (REAR) 24209 AIR BOX (FRONT) 22993 UPPER HEAT REFLECTOR 20705 LOWER BUNRER, DOUBLR FULL...
-
Page 36: Parts Replacement List
FRAME SUPPORT - HOLDING PAN - 2 LANE 21230 GREASE DRIP TRAY - BOTTOM 22632 HOOD / CHIMNEY 22634 WARMER PAN SHIELD feeDeR 22156 FEEDER COVER 21998 ENCLOSURE 22129 DRIVE UNIT PUSH BAR - LH Nieco Corporation - Model JF93G... - Page 37 G. PaRTs RePlaCeMenT lIsT 22134 DRIVE UNIT PUSH BAR - RH 20099 FEEDER BAR - 14” 22132 FEEDER BAR - 8” 11381 FEEDER CHAIN 11478 FLANGE BUSHING - PUSHBAR FEEDER 22296 TENSIONER BRACKET - PUSHBAR FEEDER LH 22297 TENSIONER BRACKET - PUSHBAR FEEDER RH 22950 PATTY DIVIDER NON-ADJUSTABLE - 14”...
- Page 38 H. WIRInG DIaGRaMs 115V Wiring H i gh Pr essur e B l ow er M ot or R ever se Sw i t ch P/ N 18447 P/ N 13579 Nieco Corporation - Model JF93G...
-
Page 39: Wiring Diagrams
H. WIRInG DIaGRaMs 115V Wiring H i gh Pr essur e B l ow er P/ N 18447 Nieco Corporation - Model JF93G... - Page 40 H. WIRInG DIaGRaMs 230V Wiring H i gh Pr essur e B l ow er M ot or R ever se Sw i t ch P/ N 18447 P/ N 13579 Nieco Corporation - Model JF93G...
- Page 41 H. WIRInG DIaGRaMs 230V Wiring H i gh Pr essur e B l ow er P/ N 18447 Nieco Corporation - Model JF93G...
- Page 42 Nieco Corporation - Model JF93G...
-
Page 43: Specifications
CaUTIon Do not operate the broiler at gas pressures other than those stated here. Doing so will affect the opera- tion of your broiler. Nieco Corporation - Model JF93G... - Page 44 Added cleaning inner shield, updated calibration 4-21-2014 Updated, photos, instructions, specs. nieco Corporation 7950 Cameron Drive Windsor, CA 95492 (707) 284-7100 Office • (707) 284-7430 Fax www.nieco.com • e-mail: service@nieco.com Printed in the USA © 2012 Nieco Corporation All Rights Reserved P/N 99002...
Need help?
Do you have a question about the JF93G Gas BroilVection and is the answer not in the manual?
Questions and answers