
Related Manuals for wiwa OPTIMA 2100


Summary of Contents for wiwa OPTIMA 2100
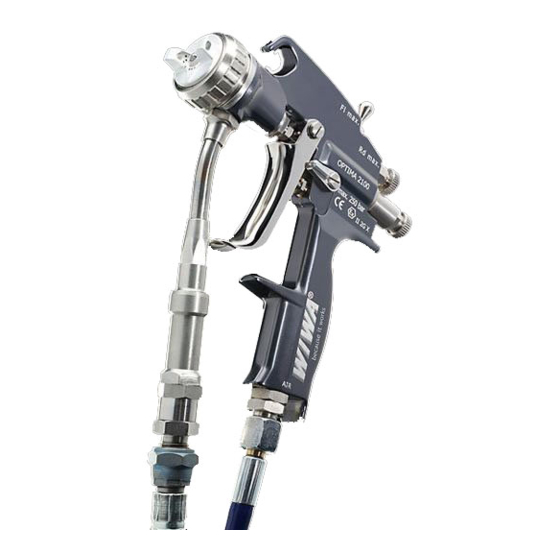
- Page 1 Operation manual Air Combi SPrAY GUN Translation of the original operation manual SPAC_Optima2100_1302_en • 0550012 • jw...
-
Page 3: Table Of Contents
Inhaltsverzeichnis Preface .....................5 Safety ....................6 First read, then start ................6 Description of symbols ..............7 Dangers caused by rebuilds and changes ........8 Dangers caused by attachments and spare parts ......9 Dangers caused by emissions ............9 Safety instructions................10 Operating staff ................12 Safety measures at installation site ..........13 Safety equipment ................13 Description of equipment .............14 Intended use ...................14... - Page 4 Copyright © 2008 WIWA Copyright ownership for this operation manual remains with WIWA WILHELM WAGNER GmbH & Co. KG Gewerbestraße 1-3 • 35633 Lahnau Phone: +49 (0)6441 609-0 • Fax: +49 (0)6441 609-50 This operation manual is solely intended for personnel involved in preparation, operation and servicing.
-
Page 5: Preface
No method of operation should be exercised which impairs the safety of the operating personnel or product. We wish you much success and excellent working results when using your spray gun. WIWA Wilhelm Wagner GmbH & Co. KG Translation of the original operation manual SPAC_Optima2100_1302_en • 0550012 • jw... -
Page 6: Safety
Safety Safety This spray gun was designed and built in accordance with all safety aspects. It corresponds with the present standards of technical regulations and current rules for accident prevention. It left the factory in perfect condition, insuring a high level of safety. However, the following dangers exist if operated incorrectly or used inappro- priately: to life and limb of operator or third... -
Page 7: Description Of Symbols
Safety operation, it is absolutely required to: Shut down the spraying equipment in accordance with the instructions in ➤ ➤ the user's handbook. Release the pressure found in the spray gun and hose. ➤ ➤ Secure the spray gun. ➤ ➤... -
Page 8: Dangers Caused By Rebuilds And Changes
Safety Take care to ground the spray gun through contact with the contai- ner in order to prevent a major static discharge. DANGER OF EXPLOSION marks a situation, where there is danger of explosion. Observation of this information is absolutely essential. USE BREATHING PROTECTION For health reasons, it is very important to pay attention to this warn- ing. -
Page 9: Dangers Caused By Attachments And Spare Parts
Safety Dangers caused by attachments and spare parts If you use original attachments and original spare parts from , the compatibility with our equipment is guaranteed. It is, however, essential that the safety regulations of the attachments and spare parts are observed. You can find these safety regulations in the User’s Handbook located with the spare parts lists. -
Page 10: Safety Instructions
Safety Safety instructions Observe the following notes: The spray gun must meet or exceed the maximum operational pressure ➤ ➤ of the paint spraying equipment being used. Because of the electrostatic charges produced by spraying, the spray ➤ ➤ gun may only be mounted to conductive hoses. All original hoses are conductive and matched to spray equipment. - Page 11 Safety spray equipment. Remove the spray gun from the spraying equipment before carrying out ➤ ➤ this work. Never spray solvents or materials containing solvents into a narrow- ➤ ➤ necked can or barrel with bung hole. DANGER OF EXPLOSION! Always use an open container.
-
Page 12: Operating Staff
Safety Operating staff The device may only commissioned, operated and repaired by qualified and trained personnel. Authorised Operators People under the age of 16 should not operate this equipment. operators qualification adjusting work trained operator servicing work trained operator cleaning work trained operator maintenance work personnel trained by... -
Page 13: Safety Measures At Installation Site
Safety Safety measures at installation site Ensure there is sufficient ventilation at the workplace to prevent dam- ➤ ➤ age to health and property as well as to minimize the danger of fire and explosion. The spray gun may not be operated in closed areas lacking ventilation. -
Page 14: Description Of Equipment
Description of equipment If a safety device is not fully functional, the spray gun may not be operated. The spray gun may only be used again when the proper func- tion has been restored. Description of equipment Intended use This pneumatically operated paint spray gun with pump support in the high pressure range (up to max. - Page 15 In case problems can be noticed during operation, the unit must be stopped immediately and contact should be established with WIWA. You must make sure that the unit is earthed separately or together with the unit that it is mounted on (max. resistance 10 Ω).
-
Page 16: Assembly Details
Description of equipment Assembly details Pos. Description Pos. Description air cap with tip trigger union nut trigger lock bolt hook paint tube with filter insert flat jet regulation fluid connection " round jet regulation air connection " spring adjustment Translation of the original operation manual SPAC_Optima2100_1302_en •... -
Page 17: Technical Data
Description of equipment Technical data 3.3.1 Connected loads Maximum permitted air pressure 8 bar Recommended operating pressure 1,5 - 3 bar Operating pressure depends on viscosity, nozzle size and kind of spray system (Airless - Air Combi) Maximum permitted material temperature by operation 40 °C without gloves Maximum permitted material temperature by operation with... -
Page 18: Air Consumption
Description of equipment 3.3.3 Air consumption Air consumption of the high pressure paint spray gun (total air regulating valve adjusted fully on max.) Round jet Flat jet 1 bar 84 l/min 1 bar 4,3 m 72 l/min 2 bar 8,1 m 136 l/min 2 bar 6,9 m... -
Page 19: Setting-Up
Setting-up Setting-up Read and follow additionally the instructions in the user's handbook for the spray equipment! Flush the material passages incl. tip with solvent/cleaning fluid prior to the initial operation. Secure the spray gun with the trigger lock (Fig. 4.1) for ➤... - Page 20 Setting-up Place the spray tip into the air cap so that the groove in the tip matches the pin in the air cap (fig. 4.2). This prevents the tip from rotat- ing in the cap. Place the air cap with tip into the spray gun.
-
Page 21: Operation
Operation Operation Unlock the spray gun. Pressing the lever to the first resistance point activates the atomizing air. Press the lever completely to release the high pressure fluid stream. Take care to maintain contact with the container wall when spraying into metallic containers in order to avoid build-up of a static charge. - Page 22 Operation Tips for Spraying - Painting Hold the spray gun perpendicular (90°) to the surface be coated. ➤ When the gun is held at a different angle, the coating will be spotty and the thickness will vary (Fig. 5.1). Move your arm smoothly. ➤...
- Page 23 Operation Adjusting the flat stream With flat stream control (s. assembly details, Pos. 4) the mixing of the atom- izing air can be adjusted. clockwise less air - minimal atomization counter clockwise more air - maximal atomization Adjusting the round stream Through the mixing of additonal air (round stream regulation, s.
- Page 24 Operation Loosen the swivel nut per hand. Turn the air cap to the desired position. Tighten the swivel nut securely. Flat stream direction adjustment Turn the air cap depending on the desired direction Spray pattern (the spray tip rotates with it) Air cap horizontal Air cap vertical Adjusting the atomizing air...
- Page 25 Operation Screw out the locking tappet (pict. 5.6, pos. 1) and remove the needle (pict. 5.6, pos. 2). Using a 6 mm open-end wrench, loosen the needle carrier (pict. 5.1.5, pos. 2) while holding the needle back piece (Bild 5.1.5, Pos. 3). Adjust the needle.
-
Page 26: Disturbances During Operation And Trouble-Shooting
Disturbances during operation and trouble-shooting Translation of the original operation manual SPAC_Optima2100_1302_en • 0550012 • jw... - Page 27 Disturbances during operation and trouble-shooting Translation of the original operation manual SPAC_Optima2100_1302_en • 0550012 • jw...
-
Page 28: Maintenance And Repair
Maintenance and repair Maintenance and repair Set-up work for production changes, as well as cleaning and mainte- ➤ ➤ nance work, may only be performed by trained operators. Maintenance and repair work may only be performed by trained service ➤ ➤... - Page 29 Maintenance and repair Cleaning the spray tip Close the air supply valve on the spray unit. Perform a complete pressure release on the spray unit. Completely depress the lever of the spray gun to pressure release it. Lock the spray gun. Unscrew the swivel nut.
-
Page 30: Exchanging Parts
Maintenance and repair Exchanging parts Shut down the spray equipment and perform a pressure release. Reduce pump pressure completely and trigger the spray gun to ➤ release pressure. Read and follow the instructions inthe user's handbook for the spray equipment. Spritzpistole von der Pumpe trennen! Replacing the Needle Loosen the gland. - Page 31 Maintenance and repair Replacing the Needle seal (Cap collar) Remove the needle as described in "Replacing the Needle". Remove the trigger by loosening the trigger screw and removing the trig- ger axle along with the flat head screw. Unscrew the retaining cap. Pull the complete connecting piece from the front of the gun.
- Page 32 Maintenance and repair Replacing the spray tip Pos. Description Pos. Description Swivel nut Gasket Atomizer head with seal Gasket holding screw Seal ring Fig. 7.2 Adjust the air pressure regulator to 0 bar and completely depress the trig- ger on the spray gun to pressure release it. Lock the spray gun by placing the trigger lock in the horizontal position.
-
Page 33: Disassembly
Disassembly Replacing the gasket (Gasket holding screw) Adjust the air pressure regulator to 0 bar and completely depress the lever on the spray gun to pressure release it. Lock the spray gun by placing the trigger lock in the horizontal position. Unscrew the swivel nut (Fig. -
Page 34: Disposal
Disposal Disposal The high pressure spray gun is not subject to special disposal regulations. For disposal of auxiliary materials please observe: Take care of the safety and mixing instructions of the manufacturer for ➤ paint, solvents, oils, greases and other chemical substances, as well as the valid regulations. -
Page 35: Spare Parts Lists
No.87 East Suzhou Rd. • Taicang City Tel:+1-419-549-5180 • Fax:+1-419-549-5173 • Jiangsu Province 215400 • P.R.China Gewerbestraße 1-3 • 35633 Lahnau, Germany Toll Free: +1-866-661-2139 Tel:+86-512-5354-8858•Fax:+86-512-5354-8859 Tel.: +49 6441 609-0 • Fax: +49 6441 609-50 E-mail: jwold@wiwalp.com E-mail: info@wiwa-china.com E-mail: info@wiwa.de... - Page 36 Tel.: +49 6441 609-0 • Fax: +49 6441 609-50 E-mail: jwold@wiwalp.com E-mail: info@wiwa-china.com E-mail: info@wiwa.de Translation of the original operation manual Internet: www.wiwa.com Internet: www.wiwa.com Internet: www.wiwa.de SPAC_Optima2100_1302_en • 0550012 • jw © copyright 2008 WIWA Wilhelm Wagner GmbH Co.KG...
- Page 37 Tel.: +49 6441 609-0 • Fax: +49 6441 609-50 Translation of the original operation manual E-mail: jwold@wiwalp.com E-mail: info@wiwa-china.com E-mail: info@wiwa.de Internet: www.wiwa.com Internet: www.wiwa.com SPAC_Optima2100_1302_en • 0550012 • jw Internet: www.wiwa.de © copyright 2008 WIWA Wilhelm Wagner GmbH Co.KG...
-
Page 38: Air Combi Spray Gun (With Tip)
Tel.: +49 6441 609-0 • Fax: +49 6441 609-50 E-mail: jwold@wiwalp.com E-mail: info@wiwa-china.com Translation of the original operation manual E-mail: info@wiwa.de Internet: www.wiwa.com Internet: www.wiwa.com Internet: www.wiwa.de SPAC_Optima2100_1302_en • 0550012 • jw © copyright 2008 WIWA Wilhelm Wagner GmbH Co.KG... - Page 39 Translation of the original operation manual Tel.: +49 6441 609-0 • Fax: +49 6441 609-50 E-mail: jwold@wiwalp.com E-mail: info@wiwa-china.com E-mail: info@wiwa.de SPAC_Optima2100_1302_en • 0550012 • jw Internet: www.wiwa.com Internet: www.wiwa.com Internet: www.wiwa.de © copyright 2008 WIWA Wilhelm Wagner GmbH Co.KG...
- Page 40 Translation of the original operation manual Toll Free: +1-866-661-2139 Tel:+86-512-5354-8858•Fax:+86-512-5354-8859 Tel.: +49 6441 609-0 • Fax: +49 6441 609-50 E-mail: jwold@wiwalp.com E-mail: info@wiwa-china.com SPAC_Optima2100_1302_en • 0550012 • jw E-mail: info@wiwa.de Internet: www.wiwa.com Internet: www.wiwa.com Internet: www.wiwa.de © copyright 2008 WIWA Wilhelm Wagner GmbH Co.KG...
- Page 41 Tel.: +49 6441 609-0 • Fax: +49 6441 609-50 E-mail: jwold@wiwalp.com E-mail: info@wiwa-china.com E-mail: info@wiwa.de Translation of the original operation manual Internet: www.wiwa.com Internet: www.wiwa.com Internet: www.wiwa.de SPAC_Optima2100_1302_en • 0550012 • jw © copyright 2008 WIWA Wilhelm Wagner GmbH Co.KG...
- Page 42 Kuwait, Saudi Arabia, Iran, Oman Headquarter and production Rietgans 38 3752 KH Bunschoten, Netherlands WIWA Wilhelm Wagner GmbH & Co. KG Mobil: +31 6 18 88 40 97 Gewerbestr. 1 - 3 Tel.: +31 33 494 69 81 35633 Lahnau, Germany Fax: +31 33 494 75 83 Tel.: +49 6441 609-0...
Need help?
Do you have a question about the OPTIMA 2100 and is the answer not in the manual?
Questions and answers