
Related Manuals for wiwa 250


Summary of Contents for wiwa 250
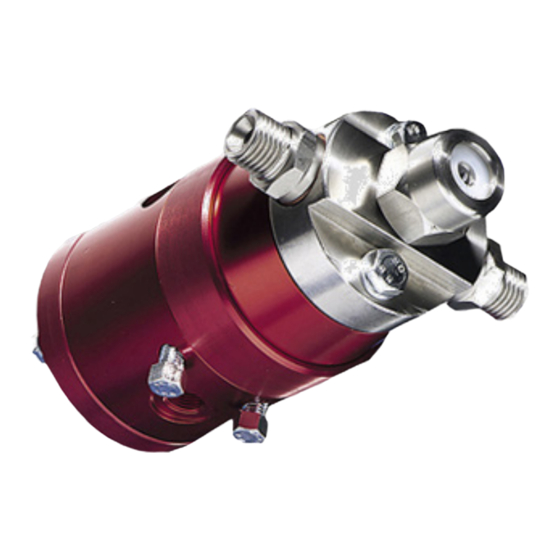
- Page 1 Operation manual WIWA 250 / 300 Original operation manual SPAM250_300_0550002_en_1608 • jw...
- Page 2 Original operation manual WIWA Automatic 250 / 300 SPAM250_300_0550002_en_1608 • jw...
-
Page 4: Table Of Contents
4.1 Assembly ................22 4.1.1 Insert the spray nozzle ..........22 4.1.2 Installing the spray gun..........23 4.1.3 Connecting the material hose ........23 4.1.4 Connecting the control air..........24 Original operation manual WIWA Automatic 100 / 400 SPAM250_300_0550002_en_1608 • jw... - Page 5 6.3 Replacing the sleeves ............29 Troubleshooting ..............30 7.1 Replacing the valve needle ............ 31 7.1.1 For WIWA automatic spray gun 250 ......31 7.1.2 For WIWA automatic spray gun 300 ......32 7.2 Replacing the valve seat ............33 Original operation manual WIWA Automatic 250 / 300 SPAM250_300_0550002_en_1608 •...
- Page 6 The copyright to this operation manual belongs to WIWA Wilhelm Wagner GmbH & Co. KG Gewerbestr. 1-3 • 35633 Lahnau • Germany Tel.: +49 6441 609-0 • Fax: +49 6441 609-50 • Email: info@wiwa.de Website: www.wiwa.de This operation manual is intended exclusively for the preparation, operating and maintenance personnel.
-
Page 7: Foreword
If questions should arise, we shall be happy to assist you. WIWA Wilhelm Wagner GmbH & Co. KG wishes you successful results with your spray gun. Original operation manual WIWA Automatic 250 / 300... -
Page 8: Safety
2.1 Explanation of symbols Safety notes give warning of potential accident risks and describes the measures required for accident prevention. In the operation manual from WIWA, safety notes are highlighted and labeled as follows: DANGER Signals a risk of accidents that are very likely to result in serious... - Page 9 Use ear defenders Signals an instruction to wear ear defenders, in order to prevent damage to hearing caused by noise. Original operation manual WIWA Automatic 250 / 300 SPAM250_300_0550002_en_1608 • jw...
-
Page 10: Safety Notes
Material hoses and hose connections must comply with the ➤ maximum working pressure including the required safety factor. Original operation manual WIWA Automatic 250 / 300 SPAM250_300_0550002_en_1608 • jw... -
Page 11: Risks Due To The Spray Jet
Always use open containers! ➤ Never spray solvents or materials containing solvents into ➤ narrow-mouthed cans or barrels with a bung opening! Original operation manual WIWA Automatic 250 / 300 SPAM250_300_0550002_en_1608 • jw... -
Page 12: Risk Due To Hot Surfaces
➤ container wall. Only use electrically conductive material hoses. ➤ All original material hoses from WIWA are conductive and designed for our devices. WARNING Dirty devices can become electrostatically charged. Fire and explosion can be triggered by severe static discharges. -
Page 13: Health Risks
(CFCs). If you wish to process materials that contain the aforementioned substances, we recommend that you contact the material manufacturer in order to clarify their suitability for use. Original operation manual WIWA Automatic 250 / 300 SPAM250_300_0550002_en_1608 • jw... -
Page 14: Operating And Maintenance Personnel
Qualification Set-up and operation Instructed operator Cleaning Instructed operator Maintenance Trained personnel Repair Trained personnel Young persons under the age of 16 are not permitted to operate this device. Original operation manual WIWA Automatic 250 / 300 SPAM250_300_0550002_en_1608 • jw... -
Page 15: Personal Protective Equipment
2.4 Guarantee instructions Observe our general terms and conditions of business (T&Cs) at www.wiwa.de. 2.4.1 Spare parts When maintaining and repairing the device, only use original ➤ spare parts from WIWA. Original operation manual WIWA Automatic 250 / 300 SPAM250_300_0550002_en_1608 • jw... -
Page 16: Accessories
Safety If spare parts are used, that have not been produced or ➤ supplied by WIWA then the guarantee is voided and all liability shall be excluded. 2.4.2 Accessories If you use original accessories from WIWA, their suitability for ➤... -
Page 17: Device Description
Specifications on the spray gun cover ATEX marking The WIWA Automatic series 250 / 300 spray guns can be used in connection with all known airless spraying devices. 3.1 Intended use The WIWA Automatic series 250 / 300 spray guns are intended for installation on a spraying system in automatic painting and coating mode. -
Page 18: Erroneous Use
(see ➤ type plate). 3.3 Device design Fig.2 WIWA Airless automatic spray gun (cover and side view) No. Designation Through hole Protective cover for the packing screw Double nipple for the connection of the material hose... -
Page 19: Model Overview
Control air G 1 / 8"(I) connection Max. material 80 °C temp. Additional information on the thread and connection variables can be found in the equipment lists. Original operation manual WIWA Automatic 250 / 300 SPAM250_300_0550002_en_1608 • jw... -
Page 20: Optional Expansions And Accessories
The following list contains just some of the most common accessories and expansions. You can find the detailed accessory catalogue at www.wiwa.de. For further information and order numbers, you can also contact a WIWA dealer or WIWA customer service. Standard nozzles The standard nozzles can be used for all airless spray guns. - Page 21 The spray direction is in the direction of the arrow, opposite of flushing. Observe the separate instructions for the installation of the reversing switch. Original operation manual WIWA Automatic 250 / 300 SPAM250_300_0550002_en_1608 • jw...
-
Page 22: Transport And Assembly
Screw the sleeve nut with the nozzle onto the spray gun hand tight. Adjust the sleeve nut according to the desired spray pattern: vertical or horizontal Tighten the sleeve nut with an open end spanner. Original operation manual WIWA Automatic 250 / 300 SPAM250_300_0550002_en_1608 • jw... -
Page 23: Installing The Spray Gun
Use only the double nipple specified in the spare parts list. The automatic gun is not guaranteed to be leak-tight with other connections! Original operation manual WIWA Automatic 250 / 300 SPAM250_300_0550002_en_1608 • jw... -
Page 24: Connecting The Control Air
Fig.5 Opening in the automatic spray gun's cover Original operation manual WIWA Automatic 250 / 300 SPAM250_300_0550002_en_1608 • jw... -
Page 25: Operation
(see fig. 7). Fig.7 Spray angle Ensure that the speed is even and parallel to the surface to be ➤ Original operation manual WIWA Automatic 250 / 300 SPAM250_300_0550002_en_1608 • jw... -
Page 26: Work Interruption
Use only the cleaning agent recommended by the material manufacturer and appropriate for the spraying material. Observe the operation manual for the spraying device. Clean the exterior of the spray gun at the end of work. Original operation manual WIWA Automatic 250 / 300 SPAM250_300_0550002_en_1608 • jw... -
Page 27: Maintenance
Maintenance and repair work on the spray gun may only be ➤ performed by WIWA customer service or personnel trained to do so. Prior to maintenance and repair work: When processing 2 component materials: Flush spray gun together with the spraying device. -
Page 28: Retightening The Packing
Fig.9 Removing the Then tighten another 1/4 turn. protective cover If retightening the packing does not remedy the leakage, replace sleeves (see chap. 6.3). Fig.10 Packing screw Original operation manual WIWA Automatic 250 / 300 SPAM250_300_0550002_en_1608 • jw... -
Page 29: Replacing The Sleeves
Place the upper part of the housing on the lower part of the housing and tighten Fig.12 Packing the screws evenly in small No. Description increments. Packing screw Sleeves Counter ring Original operation manual WIWA Automatic 250 / 300 SPAM250_300_0550002_en_1608 • jw... -
Page 30: Troubleshooting
When disassembling material hoses, cover the screw connection ➤ with a cloth in order to catch possible material sprays. After completing the repair work, check that the spray gun is working properly. Original operation manual WIWA Automatic 250 / 300 SPAM250_300_0550002_en_1608 • jw... -
Page 31: Replacing The Valve Needle
Lightly lubricate the piston plate on the cylindrical outer surface and the valve needle at the largest diameter with grease that is free of acid and silicone. Original operation manual WIWA Automatic 250 / 300 SPAM250_300_0550002_en_1608 • jw... -
Page 32: For Wiwa Automatic Spray Gun 300
– Remove assembly aids. Install the new valve needle in reverse order. 7.1.2 For WIWA automatic spray gun 300 Fig.15 Replacing the valve needle Original operation manual WIWA Automatic 250 / 300 SPAM250_300_0550002_en_1608 • jw... -
Page 33: Replacing The Valve Seat
Before removing the valve seat, the valve needle must be removed so that the valve needle does not get damaged. Unscrew the sleeve nut with nozzle. Unscrew the valve seat with an open end spanner. Original operation manual WIWA Automatic 250 / 300 SPAM250_300_0550002_en_1608 • jw... - Page 34 Troubleshooting No. Description Sleeve nut Valve seat Fig.16 Removing the valve seat Original operation manual WIWA Automatic 250 / 300 SPAM250_300_0550002_en_1608 • jw...
- Page 35 Troubleshooting Original operation manual WIWA Automatic 250 / 300 SPAM250_300_0550002_en_1608 • jw...
- Page 36 Head Office and Production Hauptsitz und Produktion Head Office and Production WIWA Wilhelm Wagner GmbH & Co. KG WIWA Wilhelm Wagner GmbH & Co. KG WIWA Wilhelm Wagner GmbH & Co. KG Gewerbestr. 1 - 3 Gewerbestr. 1 - 3 Gewerbestr.
Need help?
Do you have a question about the 250 and is the answer not in the manual?
Questions and answers