Table of Contents
Advertisement
Advertisement
Table of Contents

Related Manuals for I2M Chrome


Summary of Contents for I2M Chrome
- Page 1 Chrome USER MANUAL Version 1.1 ...
-
Page 2: Table Of Contents
CHROME INSTALLATION ............................. 6 GPS INSTALLATION ............................. 7 CHROME INPUTS .............................. 8 USE OF BUTTONS TO NAVIGATE THROUGH THE MENU ................ 10 MODIFY NUMBERS OR TEXT .......................... 10 ... -
Page 3: Introduction
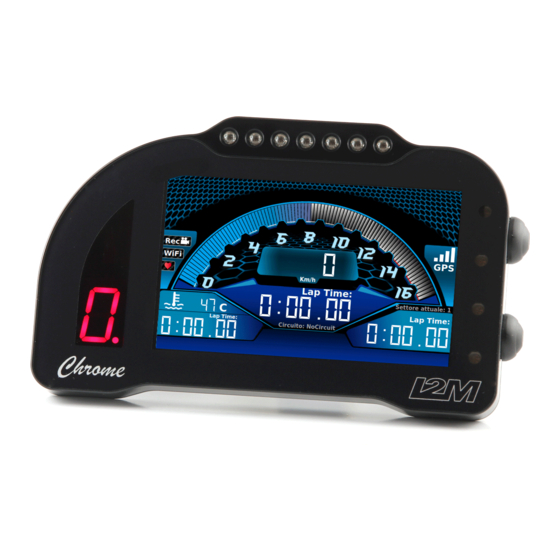
The Chrome dashboard represents a real innovation in the aftermarket motorcycle dashboard field. Thanks to the combination of a 800 x 480 color display and a 400 MHz processor, Chrome is able to provide total flexibility to the designer and therefore to the end user. This new technology allows to design a suitable main screen for “STREET”... -
Page 4: Features
ATTENTION: Since Chrome is based on the GPS technology, it needs an adequate GPS signal to work properly as chronometer and data acquisition device. For this reason, it is suggested to turn on the GPS receiver some minutes before starting to race, in order to properly receive the signal of the GPS satellites. -
Page 5: Box Content
-‐ user manual The Chrome box content is shown in Figure 1. If the plug&play kit is not included, we advise to solder signal cables and to insulate them. In fact, while Quick Slide or T-Taps connectors are fast and easy ways to join cables, on the long run the connection can fail due to vibrations or tarnishing. -
Page 6: Chrome Installation
Connect the main connector of the wire harness to Chrome. The wire harness, on its other side, provides connectors for the USB flash drive (use only the FAT32 formatting), the GPS receiver and the input signal for external buttons. -
Page 7: Gps Installation
Chrome backside flange (use the included clamp). An adhesive tape can be used to fix all the cables and the rubber cover, this way the Chrome is protected from water and moisture. -
Page 8: Chrome Inputs
The 16-pin connector is also connected to the PS2 input that is dedicated to the GPS receiver and to the USB connector. Chrome works with a dual power supply: one is directly connected to the battery, while the other is connected to the key-on voltage. Once the system is turned off, none of the two power supplies adsorbs any current. - Page 9 Chrome includes the following connections: 8 analog inputs 2 speed inputs 1 RPM input 1 water temperature input (with a dedicated warning light that turns on when the temperature exceeds 110°C) 1 oil level input (with a dedicated warning light)
-
Page 10: Use Of Buttons To Navigate Through The Menu
Use of buttons to navigate through the menu Chrome provides two buttons that can be externally replicated through the dedicated connector. UP BUTTON: allows to navigate in the menu selecting the upper entry. If the button is pressed in the startup screen, the “view lap times”... -
Page 11: Startup Screen
If your bike is included in the list of motorcycles for which a Plug & Play harness is available, the Chrome will be provided with the appropriate additional board. All the kits are simply made of a board that allows to connect the wiring of the Chrome directly to the connector of the original... - Page 12 Additional board The additional board is typically a simple board to adapt the wiring of Chrome and the one of the original dashboard. In the cases listed below, the additional board also includes other connections: -‐...
- Page 13 USB key, make sure that the key formatting is FAT32, then copy in the USB key the file ChromeSettings.cfg of your bike model (request it at info@i2m.it). Connect the USB key to the USB input of the Chrome and select "Import settings from USB" in the "Analog and digital inputs" menu.
- Page 14 BMW S1000RR By setting Chrome in BMW S1000RR mode, the first two red LEDs in the upper right acquire the functions of ABS and TC in exactly the same order and with the same modalities of the original instrumentation.
-
Page 15: Basic Settings
BMW HP4 By setting Chrome in BMW HP4 mode, the first two red LEDs in the upper right acquire the functions of ABS and TC with the same modalities of the original instrumentation. The TPS value on the Can-Bus is shown and acquired on channel 1 whereas the red LED above the gear indicator assumes the meaning of general error. -
Page 16: Calculate Gear Ratios
-‐ Configure again the data acquisition as you like Chrome calculates gears referring to the sessions of the day. Therefore the procedure can be performed even simply driving the bike in the street or in the circuit, taking care that all the gears are engaged and executing all the calculations in the same place and day when data have been collected (Chrome checks both place and day). -
Page 17: Exit The Standby Mode And Shutdown
Exit the standby mode and shutdown If a standby time has been set, Chrome turns off the display and some peripherals (not the GPS) in order to reduce power consumption; the system will automatically turn off after the set standby time has elapsed. -
Page 18: Main Menu
1. Main menu Press the DN button from the startup screen to open the Chrome main menu. This menu includes the main system functions, in particular: the chronometer, the settings of the items displayed on the screen, data acquisition, the counters, the input configuration, the alarms and the generic options. -
Page 19: Delete Lap Times
5. Choice of the circuit The “Circuits” menu shows the list of the circuits stored inside Chrome. Chrome is able to store up to 20 different circuits. For each one the best lap, the number of stored laps and the higher speed are collected in a table. - Page 20 If there is no corresponding map stored in the memory, Chrome starts to draw the map the first time the finish line is crossed and it stops...
-
Page 21: Export/Import
Similarly it is possible to load a circuit list by using a USB flash drive, replacing the circuits stored in Chrome. The file must be generated by selecting the proper option in the Danas software and then transferred using a USB flash drive. -
Page 22: Data Acquisition
The “download” menu shows all the files stored in the Chrome memory. Files are arranged by date and circuit. The date, the name of the circuit (if it can be identified by Chrome) and the file dimension are reported in the table, so that it is possible to choose which files have to be downloaded or deleted. -
Page 23: Counters
14. Analog and digital inputs and gears Through this menu it is possible to configure all the Chrome inputs. Use "configure inputs" to manually set each analog and digital input and use "automatic configuration (analogs)" to set the most common sensors for the analog inputs. -
Page 24: Auto Calibration
15. Inputs settings Using this menu it is possible to configure analog and digital inputs. Select "digital input" to scroll through “RPM”, “SPD1” and “SPD2”. “RPM” needs only the number of pulses. The pulse number represents the number of signals the sensor receives for each crankshaft revolution. -
Page 25: Carburetion Analysis
It is then necessary to enable tracing. The analysis will be active all the time the equipment stays on. At the shutdown data will be erased. The collected data can be analyzed directly from the special screen on the Chrome "Table Display results" or can be exported and analyzed on a PC. 18. Alarms management Using the “alarms management”... - Page 26 Chrome in standby mode instead of turning it off, this way the time needed by Chrome to power on from the standby mode is reduced to zero. When the system is in standby mode it absorbs about 150mA, therefore the system can stay in standby mode for no more than 10-12 hours.
-
Page 27: Quick Guide
QUICK GUIDE ATTENTION: When using Chrome in the circuit, always wait until the GPS signal is strong enough (three/four bars) in order to measure correct lap time. Use buttons to browse the menus Chrome provides two buttons that can be externally replicated through the dedicated connector. - Page 28 Exit the standby mode If a standby time has been set, Chrome turns off the display and some peripherals (not the GPS) in order to reduce power consumption and make the restart extremely fast; the system will automatically turn off after the set standby time has elapsed. This time can be set in the “Options”...
Need help?
Do you have a question about the Chrome and is the answer not in the manual?
Questions and answers