Table of Contents
Advertisement
Advertisement
Table of Contents

Related Manuals for Kodak i30 / i40


Summary of Contents for Kodak i30 / i40
- Page 1 / i40 Scanners User’s Guide A-61512...
-
Page 2: Table Of Contents
Kodak Button Manager........ - Page 3 Using the ISIS Driver ......... 53 Scanner Settings dialog box ....... . . 53 Buttons on the Scanner Settings dialog box .
-
Page 4: Introduction
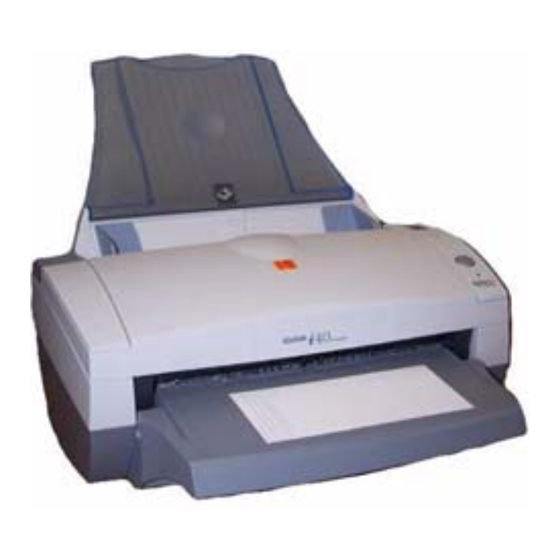
• Kodak i30 Scanner — desktop simplex color scanner Kodak i40 Scanner with output tray • Kodak i40 Scanner — desktop duplex color scanner. The Kodak i40 Scanner also has an optional special document feeder which allows you to manually feed small-sized documents. The special document feeder is designed to scan documents such as credit cards, checks, identifications card, prescription forms, etc. -
Page 5: Scanner Features
Scanner features • Easy to use • Small, compact size • Scans up to 8.5 x 34 inches using the automatic 21.6 x 86 cm / document feeder when the host PC is configured with adequate memory. See the section entitled, “System requirements” for more information. -
Page 6: Safety Information
Kodak locally for more information. • The Kodak i30 and i40 Scanners contain lead in the circuit board solder, glass lens, mercury in the lamps, and Chromium VI used as corrosion protection on the metal frame. -
Page 7: Emc Statements
EMC statements United States Japan This equipment has been tested and found to comply with the limits for a Class B digital device pursuant to Part 15 of the FCC rules. These limits are designed to provide reasonable protection against harmful interference in a residential installation. -
Page 8: Acoustic Emission
This symbol indicates that when the last user wishes to discard this product, it must be sent to appropriate facilities for recovery and recycling. Please contact your local Kodak representative or refer to www.kodak.com/go/recycle for additional information on the collection... -
Page 9: Getting Started
While the memory guidelines above are conservative, your experience may vary depending on your host PC configuration and scanning application. * Kodak Button Manager is not supported for Windows ME. A-61512 May 2006... -
Page 10: Installing The Scanner
7. Install other supplied applications (optional) IMPORTANT: • Install the Kodak Driver Software on the host PC before you connect the scanner. • Some operating systems will only support USB 2.0, and others only support USB 1.1. For best performance, use USB 2.0 when possible. -
Page 11: Installing The Kodak Driver Software
Install the driver software before connecting the scanner to your PC. 1. Insert the Kodak i30/i40 Scanner Installation CD in the CD-ROM drive. The installation program starts automatically. NOTE: If the CD does not start automatically, open the My Computer icon on your desktop. - Page 12 NOTE: This window may or may not be displayed depending upon what was previously installed on your computer. 4. Click Yes. The Welcome window will be displayed: 5. Click Next. The Software License Agreement window will be displayed: 6. After reading the agreement, click I Agree to continue. A-61512 May 2006...
- Page 13 7. Enter your name and company name and click Next. 8. When the installation is complete, the following dialog box will be displayed. 9. Click Finish. A-61512 May 2006...
-
Page 14: Verifying For A Usb Port
Verifying for a USB port A-61512 May 2006 After you install the Kodak Driver Software, check for the presence of a USB port. • Select USB Test. The USB verification tool will check your operating system and hardware capability to determine if you need to install the USB card. -
Page 15: Connecting The Power Cord To The Scanner
When the drivers have been installed, connect the power supply and power cord to the scanner. Make sure that the power outlet is located within 1.52 metres (5 feet) of the scanner and is easily accessible. -
Page 16: Connecting The Usb Cable
Driver Software installation A-61512 May 2006 IMPORTANT: If you have not installed the Kodak Driver Software, do that now before proceeding. The following instructions explain the connection of the USB cable between your scanner and PC. You need to identify the USB port on your PC. - Page 17 During the final installation process, this screen may be displayed: 2. If the above screen is displayed, select Yes. The installation of the Kodak device driver for the scanner is complete. To test the scanner, refer to the section entitled, “Verifying your scanner installation”...
-
Page 18: Installing Application Software
• Kodak Capture Lite Software. • Kodak Scan Validation Tool. Refer the section entitled, “Verifying your scanner installation” in Chapter 3 for installation instructions and use. Other scanning applications are also provided on the CDs packed with your scanner. -
Page 19: Scanner Components
Function window — displays 1 through 9. These numbers correspond to a predefined function of an associated application of your choice. See the section entitled, “Kodak Button Manager” in Chapter 3 for more information. The function window will also display error codes. See Chapter 6, Troubleshooting for a listing of these error codes. - Page 20 Back view Power switch Power port USB port Power switch — turns the scanner on and off. Power port — connects the power cord to the scanner. USB port — connects the scanner to the PC. A-61512 May 2006...
-
Page 21: Using The Scanner
Adjusting the input and output trays • Press the button on the back of the scanner to turn the scanner on (I) or off (O). After you turn on the scanner, wait for it to complete the self-test. When completed, the green indicator light will remain on and constant. -
Page 22: Start And Stop Scanning
• A batch of documents to be fed into the scanner must be arranged so the leading edges of all documents are aligned and centered in the input tray;... -
Page 23: Verifying Your Scanner Installation
Validation Tool or click the Scan Validation Tool icon. The Scan Validation Tool dialog box will be displayed. 2. Select TWAIN (or ISIS) for the Driver Types and Kodak Scanner i30/i40 as the Driver. The Scan Validation Tool dialog box will be displayed. - Page 24 A-61512 May 2006 3. Click the Scanner icon to access the Kodak Scanner Properties dialog box. 4. Select Defaults. A confirmation message, Reset all values to factory defaults will be displayed. 5. Click OK. This resets the software to the factory-installed default settings.
- Page 25 The documents should be placed upside down in the input tray. If you are scanning one-sided documents or if you have a Kodak i30 Scanner, be sure the side you want to scan is facing the input tray. 8. Click the Start button on the Scan Validation Tool. The documents will be scanned and displayed in the Scan Validation Tool window.
-
Page 26: Viewing Test Images
When testing has been completed, delete the test images. Some scanning applications are available on the CDs packed with your scanner. You may also use other capture applications. See the User’s Guide provided with these applications for instructions on how to use the... -
Page 27: Kodak Button Manager
Kodak Button Manager Configuring functions Kodak Button Manager allows you to assign an associated application with the numbers (1 through 9) displayed in the function window on the scanner. Once the numbers are assigned, you can launch scanning applications and utilities by using the Start button on the control panel. - Page 28 Select a Scanner Event box. Four types of applications are supported: • Special Kodak applications — Readiris Pro 9 Corporate Edition is included with the scanner. If this software is installed on the host PC, Readiris: Create PDF will be displayed in the text box.
-
Page 29: Installing And Configuring Readiris
A registration key will be provided via email. NOTE: If you do not register the software now, a reminder box will continue to be displayed every time you launch the Kodak Button Manager and/or the Readiris application. There is no charge for registration. - Page 30 The main Readiris dialog box will be displayed: 4. Click on the Scanner button to display the Scanner dialog box. 5. Select Scanner Model. A-61512 May 2006...
- Page 31 The Type dialog box will be displayed: 6. Select either Kodak i30 (TWAIN) or Kodak i40 (TWAIN) from the Type dialog box. IMPORTANT:Do not select Kodak i30 (User Interface) (TWAIN) or Kodak i40 User Interface (TWAIN). 7. Click OK on the Type dialog box.
-
Page 32: Assigning Function Numbers
Assigning function numbers A-61512 May 2006 1. Click the Scanner icon on the system tray to display the Kodak Button Manager and select Configure. The Configuration dialog box will be displayed. 2. Select the function number from the Select a Scanner Event drop- down box you want to associate with a particular application. -
Page 33: Using Function Numbers
• Place the documents you want to scan into the input tray of the scanner. The documents should be placed upside down in the input tray. If you are scanning one-sided documents or if you have a Kodak i30 Scanner, be sure the side you want to scan is facing the input tray. -
Page 34: Scanning Documents Using The Special Document Feeder
• Place the documents you want to scan onto the special document feeder. The documents should be placed face down on the special document feeder. The document will be drawn into the scanner, scanned, and deposited back onto the special document feeder. -
Page 35: Image Processing
When you use the Kodak Scan Validation Tool, you will need to select which camera(s) you want to use to scan your document to get the desired results. -
Page 36: Making Camera Selections
Making camera selections A-61512 May 2006 When you launch the Kodak Scan Validation Tool, you will be making selections on the dialog boxes to set up your images for scanning test documents. Both TWAIN and ISIS have camera selection boxes that refer to the cameras within the scanners. -
Page 37: Starting The Scan Validation Tool
Imaging>Scan Validation Tool. Enter the filename or choose Browse to locate the ScanValidation.exe file. 2. Select TWAIN (or ISIS) for the Driver Type and the Kodak Scanner i30/40 Scanner as the Driver. The Scan Validation Tool dialog box will be displayed. -
Page 38: Scan Validation Tool Dialog Box
A-61512 May 2006 The Scan Validation Tool (SVT) is a diagnostic application that Kodak provides with most Kodak scanners. The SVT user interface allows access to all the features of the scanner and is a good way to verify that the scanner is working properly. -
Page 39: Using The Twain Datasource
Scanner Properties dialog The TWAIN Datasource is a piece of software that communicates with your scanner. It is provided by Kodak with the i30 and i40 Scanners. Many scanning applications support the TWAIN standard and this datasource can be used to interface with these applications. -
Page 40: The Imaging Tab
Bi-tonal) or any combination of the cameras. This means you can do the front side, rear side or both sides of a document. • If you have a Kodak i30 Scanner, you can select either Front Color and/or Front Bi-tonal. This means you can do the front side of a document depending on how the documents are placed in the feeder. -
Page 41: Scanning Bi-Tonal Images
• iThresholding: selecting iThresholding allows the scanner to dynamically evaluate each document to determine the optimal threshold value to produce the highest quality image. This allows scanning of mixed document sets with varying quality (i.e., faint text,... - Page 42 A-61512 May 2006 When Adaptive Thresholding is selected, Contrast values may range from 1 to 100. Fixed thresholding ATP disabled Fixed Processing used for black-and-white and other high contrast documents. A single level is set to determine the black-and-white transition.
- Page 43 • Majority Rule sets the central pixel value in a matrix according to the majority of white or black pixels in a matrix. No Noise Filter Used Image Filter used to enhance images containing dot matrix text and/ or images printed with shaded or colored backgrounds using halftone screens.
- Page 44 200 dpi. Available resolutions are 75, 100, 150, 200, 240, 300, 400 or 600. Polarity the host PC provides information to the scanner defining whether the image should be stored in standard or reverse polarity. The default polarity is Black on a White background. Reverse polarity is White on a Black background.
-
Page 45: Scanning Color Images
(i.e., scanners, printers, monitors, etc.). You can choose from the three Kodak default color tables: Pictures, Text and Text with Pictures, or if you have created your own custom color tables using the Brightness and Contrast Control, these tables will also be available. -
Page 46: Scanning Grayscale Images
(i.e., scanners, printers, monitors, etc.). The selection of a color table effects how the scanner reproduces the color of a scanned document. You can choose from the three Kodak default color tables: Pictures, Text and Text with Pictures, or if you have created your own custom color tables using the Brightness and Contrast Control, these tables will also be available. -
Page 47: The Paper Tab
• On an i40 Scanner two cropping options can be set per document. • On an i30 Scanner one cropping option can be assigned per document. - Page 48 The following options are only available when Fixed to Transport or Relative to Document is selected. - X-Offset the distance from the left end of the scanner to the left edge of the scanning area. - Y-Offset — the position from the top end of the document to the top end of the scanning area.
-
Page 49: Additional Paper Selections
In addition to cropping values that can be applied using the Paper tab, the following options are available: Preset Front/Rear Size the default paper size is set when a scanner is first selected. You can choose a different paper size using the drop- down list box. -
Page 50: The Compression Tab
These options vary based on the type of scanner. For bi-tonal scanning the following compressions are available: • CCITT Group 4... -
Page 51: The Dropout Tab
The Dropout tab The following color/grayscale compression options are available: • JPEG — JPEG compression offers a JPEG quality of Draft, Good, Better, Best, Superior. - Draft: smallest file size with draft image quality - Good: larger file size with good image quality - Better: larger file size with better image quality - Best: larger file size with the best image quality - Superior: largest file size with superior image quality... -
Page 52: The Multifeed Tab
Multifeed Stops Scanning if this option is not selected, the scanner will log the condition but continue to operate. If selected, the scanner will log the condition and stop the feeder (the scanner will be disabled). When an overlap or multi-feed is detected, the scanner stops the feeder, clears the transport of all pages and then the documents can be refed. -
Page 53: The Options Tab
Transport Timeout allows you to set a transport timeout value. This value is the amount of time the scanner will wait after the last document enters the transport before the transport timeout action is taken. You can specify a time delay setting from 1 to 30 seconds. -
Page 54: The Setup Tab
The Setup tab is only available when running the Scan Validation Tool, via the TWAIN Datasource. Package the scanner firmware runs your Kodak i30/i40 Scanners. The value displayed in the Current field is the version of firmware currently in use by your scanner. Periodically Kodak releases updated versions of firmware which are available through Kodak Service and Support website (www.Kodak.com/go/docimaging). -
Page 55: The Info Tab
The Info tab The Info tab displays the following scanner information. A-61512 May 2006... -
Page 56: Using The Isis Driver
For the purpose of this manual, all displayed dialog boxes assume the features available on the Kodak i40 Scanner. If you have a Kodak i30 Scanner all options are limited to simplex scanning only. - Page 57 Binary. For detailed information about Camera selection, see the section entitled, “Making camera selections” earlier in Chapter 4. On the Kodak i40 Scanner there is a separate camera for each side of the document being scanned. The Kodak scanner drivers allow you to control the camera settings independently.
-
Page 58: Image Processing Settings
The other options on this dialog box allow you to define image processing values that can be applied to your scanner. Scan Source the host PC provides information to the scanner defining whether to scan one or both sides of the document. Simplex indicates that only one side (front side) of the document will be scanned. -
Page 59: Page Size And Layout
(see “System requirements” for more information). The default paper size is set when a scanner is first selected. You can choose a different paper size using the drop-down list box. NOTE: The Page Size and Page Layout selections also appear on the Scan Area dialog box. - Page 60 Available binarization options are: • iThresholding: selecting iThresholding allows the scanner to dynamically evaluate each document to determine the optimal threshold value to produce the highest quality image. This allows scanning of mixed document sets with varying quality (i.e., faint text,...
- Page 61 200 dpi; 80 Threshold; 20 Contrast Contrast % sets the image contrast by adjusting the difference between black-and-white, thereby making an image sharper or softer. Contrast is only available for binary images. In a low contrast setting, the difference between black-and-white is small, so the image is softer.
-
Page 62: More Scanner Settings Dialog Box
PC first when using simultaneous output scanning. For example, if you are scanning front color and front binary and you select Binary First the scanner will return the front binary image, then the front color image. -
Page 63: Image Control Options
When selected, the scanner will convert the color image data to grayscale before making it available to the host. Scan Source the host PC provides information to the scanner defining whether to scan one or both sides of the document. Simplex indicates that only one side (front side) of the document will be scanned. - Page 64 This filter effectively eliminates noise caused by the halftone screen. This option is only applied to binary images. Polarity the host PC provides information to the scanner defining whether the image should be stored in standard or reverse polarity. The default polarity is Black on a White background.
-
Page 65: Color Dropout Options
(pre-thresholded) image for the color being removed. Therefore, this value should be higher than the threshold value selected on the Scanner Settings dialog box for this pixel to become the background color. The default value is 245. For example, if you are scanning a white... -
Page 66: Scanner Control Dialog Box
The settings in this dialog box do not effect the quality of the image. See the section entitled, “Setting scanner controls” later in this chapter. OK saves the values set on the dialog box. -
Page 67: Energy Saving Features Of The Scanner
Transport timeout Blank image detection Defining the Scan area Energy Star allows you to set the amount of time the scanner will remain inactive before the scanner goes into an idle state (sleep mode). Choices are: 0 to 60 minutes. -
Page 68: Scan Area Dialog Box
Area: X the distance from the left end of the scanner to the left-edge of the scanning area. Y — the position from the top end of the document to the top end of the scanning area. -
Page 69: Maintenance
Your scanner needs to be cleaned periodically. If your documents do not feed easily, if several documents feed at the same time or if streaks appear on your images, it is time to clean your scanner. The section entitled, “Supplies and consumables” at the end of this chapter provides a listing of the supplies required to clean your scanner. - Page 70 A-61512 May 2006 Cleaning the rollers 1. With a roller cleaning pad, wipe the feed roller from side to side. Rotate the feed rollers to clean the entire surface. IMPORTANT: The roller cleaning pad contains sodium lauryl ether sulfate which can cause eye irritation. Refer to the MSDS for more information.
- Page 71 Refer to the MSDS for more information. 2. Wipe the upper and lower calibration area again with an almost-dry Staticide wipe to remove any streaks. 3. When finished, close the scanner cover. A-61512 May 2006...
-
Page 72: Replacing The Feed Module
For additional feed modules, see the next section “Supplies and consumables”. 1. Open the scanner cover by pressing the release lever. 2. Squeeze the plastic clamps that hold the feed module in place and lift the feed module out of position. -
Page 73: Supplies And Consumables
Supplies and consumables Contact your scanner supplier to order supplies. Description Kodak Feed Module / for i30/i40 Scanners Kodak Digital Science Roller Cleaning Pads Staticide Wipes for Kodak Scanners NOTE: Items and catalog numbers are subject to change. CAT No. -
Page 74: Troubleshooting
When an error is indicated, the indicator light will blink the same number of times as the number displayed in the function window. Therefore, if the scanner cover is open, the number “6” will be displayed in the function window and the indicator will flash red and blink six times. -
Page 75: Problem Solving
• If you are scanning one side of a document, or if you have a Kodak i30 Scanner, be sure the side you want to scan is placed toward the feed tray (not facing you). - Page 76 First image in a batch appears “washed out” Image appears to be cut off Images are not being cropped correctly • If auto or aggressive cropping is enabled, and your images are not Roller marks appear on the document after scanning Images have black background bleed- through A-61512 May 2006...
-
Page 77: Scanner Not Working
2. Click on the Hardware tab and select Device Manager. 3. From the Device Manager screen, select Imaging devices. If the Kodak i30/i40 Scanner appears, with a ? before the name, you need to reinstall the driver software. A-61512 May 2006... - Page 78 A-61512 May 2006 4. Double-click on the Kodak Scanner i40 (or i30). The Scanner Properties dialog box will be displayed. Select the Driver tab. 5. Click Update Driver. The Upgrade Device Driver Wizard will be displayed. 6. Click Next.
- Page 79 7. Click Next. 8. Insert the Installation CD in the CD-ROM drive and locate the kdssti.in file. 9. Click Open and proceed with the prompts to install the driver. A-61512 May 2006...
-
Page 80: Testing For A Usb Connection
A-61512 May 2006 When the Kodak device drivers for the Kodak i30 and i40 Scanners are installed, a copy of the USB test software will also be installed. It will be located in this folder (by default) along with the Kodak Scan Validation Tool software: C:\program files\Kodak\Document Imaging\usbtst.exe... -
Page 81: Usb Connection Issues
Your operating system only supports USB 1.1 There are some host PC operating systems that will not support USB 2.0, but support USB 1.1 (e.g., Windows 98SE). The Kodak i30 and i40 Scanners are rated and designed to operate with USB 2.0, but will function in a USB 1.1 port, however, the scanner will only perform at a... - Page 82 You do not need to install any additional USB card(s) The host PC operating system will only support USB 1.1 and will not support USB 2.0, but did find a USB port. The Kodak i30 and i40 Scanners are rated and designed to operate with USB 2.0, but will function in a USB 1.1 port, however, the scanner will only perform at a...
-
Page 83: Appendix A Specifications
Appendix A Specifications Scanner Type/Speed • i30 Scanner: simplex color scanner with an automatic document feeder, 25 pages per minute (landscape) • i40 Scanner: duplex color scanner with an automatic document feeder, 25 pages per minute (landscape) Scanning Technology CCD type... - Page 84 A-61512 5/2006 © Eastman Kodak Company, 2006 EASTMAN KODAK COMPANY Document Imaging Rochester, New York 14650 www.kodak.com/go/docimaging Kodak is a trademark of Eastman Kodak Company.
Need help?
Do you have a question about the i30 / i40 and is the answer not in the manual?
Questions and answers