Advertisement
Quick Links
Download this manual
See also:
Quick Manual
Advertisement

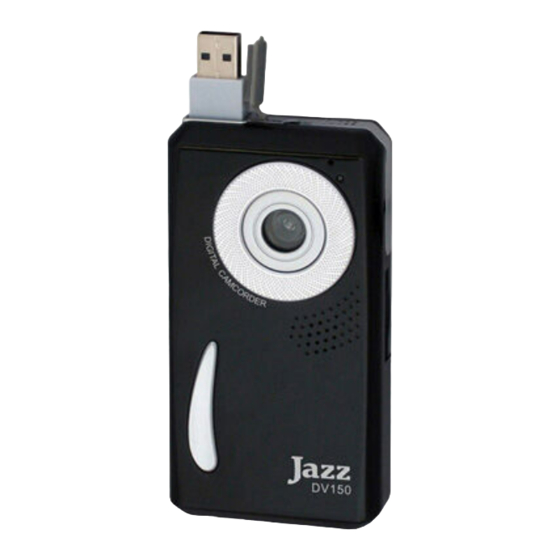
Summary of Contents for Jazz DV150
-
Page 2: Using Your Video Recorder
ICES statement.This class B device complies with ICES standard of Canada Using Your Video Recorder Playback 1. Press " " to enter playback mode. 2. In playback mode, press " " or " " (Left or Power ON/OFF Button Right Button) to select another file. 1. - Page 3 Note: Insert 2 fresh AA batteries and SD/ SDHC card to operate the recorder. Appearance...
- Page 4 Note: Please insert two fresh AA batteries and SD / SDHC Memory card to operate the recorder. Recorder works with SD/SDHC Memory cards up to 8GB capacity a) Installing Batteries . Insert two new AA alkaline Press the Battery Cover Release Button and slide down / remove the battery cover batteries.
- Page 5 d) Selecting the Mode Pressing the Mode Button " " will browse through available Modes: Video recording Taking Still Picture Playback e) Selecting Video / Still Pictures Resolution You can select High or Low resolution of recorded video or taken still pictures. Resolution Button to Press "...
- Page 6 actual recorded scene. • The LCD screen acts as a viewfinder to help you more accurately point at and center the main subject or person while recording. Playback s Mode Button " " to scroll and enter the Playback mode. Pres Press "...
- Page 7 Deleting Video or Still Picture Recorder offers two Delete options; “Delete Current” displayed video or still picture, or, “Delete All” video, pictures, data from the SD Memory card. " once selecting “Delete Current, or press Delete t the Playback mode then press the Delete Button " Selec Button again selecting ”Delete All.”...
- Page 8 Connecting recorder to PC; download Video/ Photos and TV Output Please install application program from supplied installation CD before connecting recorder to PC for the first time 1. Insert supplied CD into computer CD-ROM drive 2. Follow instruction and install programs; see more information inside "Uploading your video clips to YouTube.” Supplied CD contains ArcSoft MediaImpression program which can be used to playback recorded video, pictures and will provide quick access to YouTube to share your video with other Internet users.
-
Page 9: Uploading Your Video Clips To Youtube
Uploading your video clips to YouTube Install the ArcSoft MediaImpression program to get easy YouTube access. 1. Install the ArcSoft MediaImpression program Insert the CD-ROM into the computer CD-ROM drive. The auto-run screen will appear. Click “Install MediaImpression”... - Page 10 (If the screen does not appear as the auto-run, please click on Set up.exe under the CD-ROM drive icon on the computer.) Follow on-screen instructions and complete installation...
- Page 12 ArcSoft MediaImpression icon will appear on computer’s desktop when installation is complete. 2. Using ArcSoft MediaImpression Connect your recorder to the computer. Double click MediaImpression icon on computer’s Desktop and the MediaImpression software main screen will open...
- Page 13 Import Option on the main screen and enter into “Import” screen. Then select the files in the recorder that Click you want to upload to the computer and click Option.
- Page 14 on the “ Importing… ” window and enter into After importing the file has been completed, click “MediaBrowser” window. Note: On the main screen, you can also click other options such as to enter into...
- Page 15 “MediaBrowser” window. Then select the video file in the computer for uploading. Select the video you wish upload to You Tube on“MediaBrowser”screen and then click (???????) option to access your YouTube log-in screen.
- Page 16 On“Login”screen, please enter your YouTube Username and Password (you can select the corresponding option and “save” the Username and Password so that you do not need to input these data next time). Then click option. When“Upload to YouTube”screen appears, fill in Title, Description, etc. Then click option and start uploading selected video.
-
Page 17: Specifications And System Requirements
Specifications And System Requirements Product specifications: Image sensor: 300,000pixels Function mode: Recording Video, Capture Still Images, Play back, Mass storage device Resolution: Video: 640×480, 320×240 Photo: 640×480, 320×240 Lens: F2.8 f=3.0mm 1.2m (4 feet) to infinity Focus range: Digital Zoom: 4×... - Page 18 • • Batteries are depleted. Please reinstall new batteries. can NOT be turned ON. Recorder Batteries are installed incorrectly. Make sure that batteries are inserted carefully matching battery polarity with plus / minus terminal markings. The memory of the SD/MMC storage card is already full. Save and can not record any Recorder then delete some files or replace the card.
- Page 19 (Note:Select ‘FAT’ option under ‘File System’ for SD card with 2GB storage capacity or below. Select ‘FAT32’ option for SD card with 4GB storage capacity or above.) The computer will start formatting the SD card automatically. The process may take some time to complete. DV150 – E 110719...


Need help?
Do you have a question about the DV150 and is the answer not in the manual?
Questions and answers
How do you know if there are pictures stored on it