
Related Manuals for Master MFG MASTER GARDNER PCD‐E3‐009B‐MM


Summary of Contents for Master MFG MASTER GARDNER PCD‐E3‐009B‐MM
- Page 1 123 Industrial Loop Road Paynesville, MN 56362 Phone: 1-800-864-1649 www.master-mfg.com ASTER ASTER ARDNER ANUFACTURING Part Number PCD‐E3‐009B‐MM | Rev 1 Nov. 2010...
- Page 2 INTRODUCTION The purpose of this manual is to assist you in the assembly, operation and maintenance of your Master Gardner sprayer. Please read through this manual completely too fully understand how to operate and maintain your equipment. This product has been manufactured to provide years of dependable service; proper operation and maintenance will ensure its dependability.
- Page 3 Setup Charging the Battery 1.) Obtain the battery charger (Item 27, figure B) and plug the charger into an AC wall outlet and the other end into the charging port located on the sprayer. 2.) Allow the charger to charge the battery until the light on the charger turns green. A green light indicated the battery is fully charged.
- Page 4 Operation Ensure battery is fully charged to provide optimum efficiency from the 12volt pump. Turn the valve located in the back panel to the off position. This will ensure the nozzle does not begin to spray when the pump is activated. The pump can be operated with the switch located on the back panel or from the remote harness if connected.
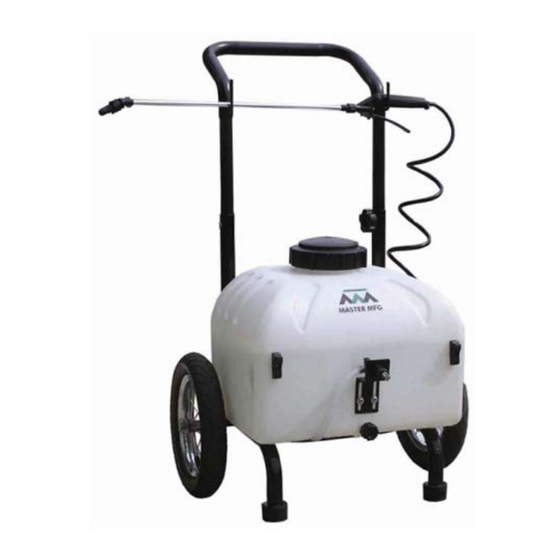
- Page 5 Master Gardner Frame Figure A Parts List Master Gardner Frame Figure A Item # Part Number Description 33-100158 Frame, Handle (Only available as entire frame) 33-100157 Handle adjustment knobs (pair with bolts) 33-100156 Hitch Pin TWA12.5x2-5/8 Wheel and Tire 33-100155 Axel Nut and Washer (pair) 33-100154 Rubber pad (pair with bolts)
- Page 6 Master Gardner Tank Assembly Figure B...
- Page 7 Parts List Master Gardner Tank Assembly Figure B Item # Part Number Description TL-6B Tank Lid TLS-5D Basket Strainer Tl-6B-GAS Gasket SG-4507-14-REC15 Gun hose assembly SG-45ASSY-18 Spray gun Nozzle GC-100-KIT Gun Clips (pair) NTL38-c Nozzle body 31-100249 Nozzle Bracket Nozzle body nut NS-50 Nozzle Strainer DF3.0...
Need help?
Do you have a question about the MASTER GARDNER PCD‐E3‐009B‐MM and is the answer not in the manual?
Questions and answers