Table of Contents
Advertisement
Advertisement
Table of Contents

Related Manuals for SAGEMCOM D790


Summary of Contents for SAGEMCOM D790
- Page 1 D790-D790A User guide...
- Page 2 Dear customer, You have just acquired a new generation Sagemcom telephone. Thank you for placing your confidence in us. This device has been manufactured with the utmost care. If you should have difficulties in operating it, we recommend that you consult this user manual.
-
Page 3: Recommendations And Safety Instructions
Insert the batteries in the handset/base battery compartment respecting polarity. Only use the enclosed Sagemcom power supply unit and connect it to your plug socket as per the instructions in this user guide and on the power supply unit's sticker. As a precaution if there is a risk of danger, the power plug can be pulled out to disconnect the 230 volt power supply. - Page 4 In these cases we recommend adhering to the safety information. Your D790-D790A has anti-skid pads that should leave no traces on your furniture and ensure stability. However, given the the wide variety of finishes used by furniture...
-
Page 5: Table Of Contents
Overview Recommendations and safety instructions ..... 2 Discover..............6 The pack..................6 Your phone ................7 Connecting the base ..............9 Setting up the handset ............. 10 Battery replacement ..............12 Charging your phone ............... 13 Browsing through the menus ........... 13 Making and receiving calls... - Page 6 Setting up.............35 The phone................35 The handset ................39 The base .................. 42 The line ..................44 Answering machine settings ............ 46 Enjoy..............48 The alarm................. 48 The Surveillance mode............. 49 Tracing your calls..........51 Call logs................... 51 The events log................52 Troubleshooting ...........53 FAQ ..................
-
Page 7: Discover
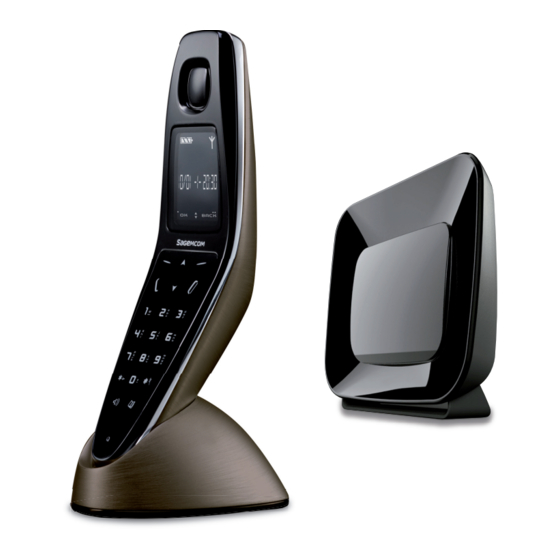
Discover... The pack Make sure that your pack contains the following items: a handset a D790 or D790A base a handset charger according to the model an AC power supply a telephone a quick installation connection cord guide In the case of purchasing a pack DUO or TRIO, you will find in addition:... -
Page 8: Your Phone
Your phone The base Caption Description Indicator light Telephone socket Power socket button Paging/Pairing : • Short press: paging of handsets • Long press: pairing of handsets Note Indicator light operation: • Fixed for 10 seconds: base startup. • Fast flashing: the base is in pairing mode. •... -
Page 9: The Handset
Hands-free key Star key : Long press: keypad lock / unlock Pick-up key / Hands-free. Long press: Switch on handset Programmable/confirm shortcut key. Indicator light *. * Your D790-D790A has an indicator light on the back of the handset. Discover... -
Page 10: Connecting The Base
Indicator light operation: When pressing a keypad button. Flashing: When paging or receiving a call (internal/external) Slow flashing: A new event occured Connecting the base Note Check the safety instructions (page 2) before setting up your phone. Take the base and turn it over. Take the telephone connecting cord, plug the phone into its socket. -
Page 11: Setting Up The Handset
The icon will stop moving when the batteries are fully charged. Note By default, the handset is registered on the base. If your handset is not recognized by the base, launch manual recognition (refer to the section "Associating a new handset to D790 base ", page 39). Discover... - Page 12 The screen HE ICONS DISPLAYED In standby mode or during use, your phone screen informs you of your phone’s current state through icons, and in particular: 13/12 14:05 Calls Caption Description Status icons Indicates your phone’s current state. Battery charge Signal condition Phone in conversation...
-
Page 13: Battery Replacement
OW TRANSMISSION MODE Due to its Low Transmission feature your handset will adjust the power consumption according to the distance to the base station. Battery replacement 13/12 -1- 14:05 15 H 13/12 -1- 14:05 13/12 -1- 14:05 Have your credit card or any plastic card ready to remove the battery compartment.... -
Page 14: Charging Your Phone
Charging your phone To charge your phone, place the handset in the charger, making sure the charger is connected to an AC outlet. During the charging process an animated battery icon progresses from empty to full. Once it has stopped the batteries are charged. Note To ensure optimum performance, charge the handset in the charging unit for at least 15 hours prior to its first use. - Page 15 These keys are also used to confirm or cancel an action in a menu. Programmable Use this key from the Use this key from the key... home screen to... menus to... Directly access • Confirm the current entry. Left associated menu through •...
- Page 16 ETAILED BROWSER EXAMPLE ADJUST THE DATE AND TIME Note It is recommended to set the date and time accurately to allow you to follow the chronological order of your calls and messages. Note If you have the Display number option, the date and time will, depending on your operator, be set automatically when you receive a call.
-
Page 17: Menu Tree Structure
Menu tree structure PHONEBOOK "Menu during a call" < New > SIMPLE CALL Option HANDSFREE CALL TRANSFER (**) VIEW SECOND CALL EDIT PHONEBOOK ADD NUMBER CALLS NEW ENTRY SECRET RECORD DELETE TRANSMIT SECOND CALL SWITCH CALLS 3-PARTY CONF INCOMING CALLS HANDSFREE PHONEBOOK OUTGOING CALLS... - Page 18 SETTINGS PROGRAM KEYS DATE/TIME CONTRAST AUTO HANG UP AUTO PICKUP VOICE BOX NO LANGUAGE KEYPAD LOCK RESTRICTION LIGHT EFFECT ADVANCED SET. SET HANDSET REGISTRATION BASE PRIORITY RESET HANDSET PERSON REGISTR HANDSET NAME SET BASE REGISTR.MODE RESET BASE DELETE HANDSET. RENAME BASE INTRUSION SET LINE NETWORK TYPE...
- Page 19 ANS.MACH MESSAGES PLAY DELETE OLD ANSWERING MODE OUTGOING MESS. PLAY CHANGE DELETE SETTINGS REMOTE CODE MODE ENREG. NO OF RINGS (*) Model D790A. Discover...
- Page 20 Procedures in your booklet This user guide will explain the product features by either: • displaying the direct shortcut keys • displaying the path to certain features XAMPLE means that you can use one of the two buttons offered to access the function.
-
Page 21: Making And Receiving Calls
Making and receiving calls... Managing a call Making a call ETHOD Dial your contact’s number. Press the key ETHOD Press the key Dial the number. - OR - At the end of the call, press the handset key and replace the handset on its charger. - Page 22 Receiving a call Press the key to take the call. At the end of the call, press the handset key and replace the handset on its charger. A beep sounds. Notes Your handset includes AUTO PICKUP AUTO HANG UP functions. For further details, refer to the “Picking up and hanging up calls...
-
Page 23: Managing Several Calls
Managing several calls Your phone allows you to take and manage several calls when you are already on the line. These calls can be managed with the "Menu during a call". Receiving a second call During a call, a beep indicates the arrival of a second call. To take this call, press ACCEPT when the message is displayed on the screen. -
Page 24: Using Additional Handsets
29), • monitor another room (refer to the “The Surveillance mode”, page 49). Notes You first have to pair the handsets with the base. For further details, refer to the “Associating a new handset to D790 base”, page 39. - Page 25 Calling another handset (intercom) Enter the handset’s number directly on the keypad (1-6). Press . The selected handset rings. Take the call from the handset called with the key. End the call by pressing Handset called Handset calling Transferring a call to another handset Notes You must have at least two handsets paired on the same base.
-
Page 26: Options During A Call
Press the key of the handset that you want to include in the conversation (handset Handset Your D790-D790A handset communication (handset emits consecutive beeps to tell you of the intrusion Bip.. - Page 27 Enabling/Disabling the secret mode (during a call) (long press) "Menu during a call" > SECRET > Activ. The secret mode allows you to temporarily mute the line so that you are not heard by the caller. Once enabled, the SECRET MODE message flashes on the screen.
-
Page 28: Locating Your Handset
Recording a conversation (D790A only) ATTENTION According to UK legislation it is prohibited to record a conversation without your conversation partner's knowledge and consent. "Menu during a call" > RECORD > Begin then End Confirm the messages on the screen. Recorded messages are considered as new answering machine messages and are stored in the menu "ANS.MACH... -
Page 29: Organizing Your Contacts
• TRNSF.MODE? : Select if you want to transfer this contact to another handset that has been registred to the D790 base: Press Yes to transfer your contact to other handsets registered on the base (for further details refer to paragraph "Transferring entries from... - Page 30 Deleting an entry Menu > PHONEBOOK > Option > DELETE Confirm the deletion of the entry. Adding another number to an entry Menu > PHONEBOOK > Option > ADD NUMBER Specify the required information by confirming at each step: • NEW NUMBER?: enter the number, •...
-
Page 31: Listening And Recording
Listening and Recording... (model D790A) IMPORTANT Your answering machine is able to record individual messages of up to 2 minutes. Your answering machine will turn itself off once it has reached its recording capacity (12 minutes for high recording quality / 24 minutes for standard recording quality (For further details, see section “Changing the recording... -
Page 32: Answering Machine Message
Answering machine message Note If you have not saved a personal announcement, the answering machine will automatically use the pre-recorded announcement. Recording your outgoing message Menu > ANS.MACH > OUTGOING MESS. > CHANGE Confirm the instructions on the screen. Listening to your outgoing message Menu >... -
Page 33: Messages
Messages Listening to your messages Menu > ANS.MACH > MESSAGES > PLAY A : date of recording of the message. B : time of recording of the message C : control keys while reading messages. * =< 0=P #=> 3=X The messages are played in chronological order (from oldest to newest). - Page 34 Managing your messages When playing back messages, press the following keys: ROM THE HANDSET 1 press Go on to the next message 1 press Return to the start of the message 2 presses Return to the previous message 1 press Pause/Resume playback 1 press Delete the message being played...
- Page 35 When playing back messages, press the following keys: ROM THE REMOTE TELEPHONE 1 press Play / Stop message 1 press Disable the answering/recording machine 1 press Go on to the next message 1 press Return to the start of the message 2 presses Return to the previous message 1 press...
-
Page 36: Setting Up
Setting up... The phone Change the ring tone Your D790-D790A has 17 ring tones. Menu > RING TONE > EXTERNAL CALL INTERNAL CALL You can change the ring tone of: • external calls, • internal "intercom" calls (between handsets). Scroll through the pre-recorded ring tones and confirm. - Page 37 Activate / Deactivate the light effect You can activate or deactivate the indicator light on the back of the handset. Menu > SETTINGS > LIGHT EFFECT Follow the instructions on the screen and confirm. For further details, refer to the section "The handset ", on page 8. Setting up short-cut keys You can define a shortcut for the function(s) you use most.
- Page 38 Changing the display language Menu > SETTINGS > LANGUAGE Select the language to be used and confirm. Changing your voice mail number Note If you do not know your voice mail number, request it from your network provider. Menu > SETTINGS >...
- Page 39 Enabling/Disabling keypad locking This function lets you lock the keypad when you are not calling. (1 long press) Menu > SETTINGS > KEYPAD LOCK Follow the instructions on the screen and confirm. Note To unlock the keypad keep pressed for a few seconds. Changing the default code The base code is required to access certain security functions (banned calls, reinitialising the base, etc.).
-
Page 40: The Handset
The handset Associating a new handset to D790 base You can associate/register up to 6 GAP compatible handsets with your base by following below pairing process. Register an additional D790 handset: Go to Menu > SETTINGS > ADVANCED SET. >... - Page 41 Defining the main base for your handset This function allows you to specify the priority base to be used for making calls. Note Only if you have paired the same handset on several bases. Menu > SETTINGS > ADVANCED SET. >...
- Page 42 Customizing the handset’s registration This function allows you to pair your handset with a phone base (if you have more than one). Menu > SETTINGS > ADVANCED SET. > SET HANDSET > PERSON REGISTR ROM THE HANDSET Select the base number and confirm. Enter the new base name and confirm.
-
Page 43: The Base
Enabling the pairing mode The pairing mode needs to be enabled to pair an additional handset with your D790 base. You can either do this by pressing the button on the back of the base for more than 4 seconds. - Page 44 Resetting the base When you reset your base, all the settings are returned to their initial values (factory settings), except for the phonebook. Menu > SETTINGS > ADVANCED SET. > SET BASE > RESET BASE Enter the base code and confirm. Note The default code is 0000.
-
Page 45: The Line
The line We do not recommend that you change line settings without Important first contacting your operator, as this may result in your phone line being disconnected. Changing the network type You can connect your phone to a public or private network. Menu >... - Page 46 Changing the flash duration You can configure the flash duration if you use your phone abroad or on private PABX network, you may need to modify the flash duration in order to use your telephone correctly with regard to the following functionalities: outgoing 2nd call, incoming 2nd call, 3 way calling.
-
Page 47: Answering Machine Settings
Modifying the country Tihs menu allows you to select the country where you are using the telephone. Menu > SETTINGS > ADVANCED SET. > SET LINE > COUNTRY Follow the instructions on the screen and confirm. Answering machine settings Changing the remote querying code This code allows you and your family remote access to the messages on your answering machine. - Page 48 Changing the number of rings Change the ringing time before your answering machine accepts a call. Menu > ANS.MACH > SETTINGS > NO OF RINGS > > You can choose between 2 and 7 rings. Note Please be aware that some telephone lines do not support this settings.
-
Page 49: Enjoy
Enjoy... The alarm Note The alarm sounds for 60 seconds through the handset speaker. To stop the alarm clock, press any key on the handset. Programming the alarm Menu > ACCESSORIES > ALARM To program the alarm : Depending on the alarm status, enable or disable the ALARM function. -
Page 50: The Surveillance Mode
Changing the ringing tone Menu > ACCESSORIES > ALARM > RING TONE Scroll down the list of available ring tones and confirm. Defining the wake-up time Menu > ACCESSORIES > ALARM > SET TIME Follow the instructions on the screen and confirm. The Surveillance mode This function allows you to use your phone like a baby monitor by using one handset as a transmitter (placed in the room) and another handset as the... - Page 51 N THE TRANSMITTING HANDSET Accept the call from the other handset by pressing Confirm activation of surveillance mode. Note In surveillance mode the transmitting handset will not receive any exernal calls. You can still make or accept a call from the receiving handset however. Disabling the surveillance mode Press Off on the receiving and transmitting handset to deactivate the surveillance mode.
-
Page 52: Tracing Your Calls
Tracing your calls... Call logs Logs are lists of numbers or events received by your phone. Depending on your operator, call logs contain the following information: • your contact’s name or number, • the call time or date. Note Your calls log will display the last 20 incoming and the last 30 outgoing calls. -
Page 53: The Events Log
The events log The NEW EVENTS! message informs you that you missed a call or message. Checking new events Please use the short-cut key: NEW EVENTS! Menu > CALLS > EVENTS > VIEW Enabling/Disabling event notification Disable this function to delete the display of the NEW EVENTS! message. Menu >... -
Page 54: Troubleshooting
(“Changing the recording quality”, page 46). If you require a further help with your product please do not hesitate to contact the friendly Sagemcom Support Team: phone: 0845 0900 316* email: support.service@sagemcom.com *3.95 pence per minute from all fixed lines, tariff cost effective from... -
Page 55: Environment
Environment Environmental protection and sustainable development is an important priority for Sagemcom. Sagemcom has a policy of using environmentally- friendly systems and makes environmental protection an essential part of the life-cycle of its products – from manufacturing, to installation, operation and disposal. -
Page 56: Guarantee
Please make sure that you use your equipment only for the purpose for which it was designed and under normal usage conditions. Sagemcom do not accept any liability for the equipment if used outside the frame of its original designed purpose or any consequence that may arise from this usage. - Page 57 This guarantee does not affect the Customer statutory rights B) General Guarantee conditions Sagemcom shall have no liability under the guarantee in respect of: • Damage, defects, breakdown or malfunction due to one or more of the following:...
- Page 58 In the cases set forth in B) as well as after expiry of the guarantee period, the customer must ask the Authorised Sagemcom Repair Centre for a cost estimation prior to work being carried out. In such cases, the repair and delivery costs will be invoiced to the customer.
- Page 59 253536450A - 07/2013...
Need help?
Do you have a question about the D790 and is the answer not in the manual?
Questions and answers