Table of Contents

Subscribe to Our Youtube Channel
Related Manuals for Viessmann Solar-Divicon-HX


Summary of Contents for Viessmann Solar-Divicon-HX
- Page 1 Installation, Start-up and Service Instructions Solar-Divicon-HX Solar heat transfer station c/w double wall heat exchanger SOLAR-DIVICON-HX IMPORTANT Read and save these instructions for future reference 5724 267 v1.0 08/2010...
-
Page 2: General Information
Regulatory and describe the function, before the heating season begins. installation, startup Installation Solar-Divicon-HX may only be used and operation of the Requirements" in the as a heat transfer station between Installation Instructions. Solar-Divicon-HX heat the solar collector loop and storage transfer stations. -
Page 3: Table Of Contents
Page General Information About these Instructions................2 Safety Important regulatory and safety requirements ..........4 Installation Description....................6 Primary and secondary loop...............7 Mounting the Solar-Divicon-HX..............8 Connection fittings for primary (solar) loop...........9 Pipe and fitting connections................9 Connections...................10 Controller connection................11 Start-up Safety....................12 Commissioning sequence.................12 Flushing and filling the storage tank loop...........13 Flushing and filling the solar loop..............13... -
Page 4: Safety
Leave all literature at the installation site and advise Technical literature the system operator/ultimate owner where the Literature applicable to all aspects of the Vitosol 100-F, literature can be found. Contact Viessmann for 200-F or Vitosol 200-T, Vitosol 300-T: additional copies. Technical Data Manual... - Page 5 Observe the instructions regarding the pressure relief safety and may infringe our warranty conditions. valve. For replacement, use only original Viessmann replacement parts or those which are approved by Viessmann. CAUTION IMPORTANT Install the station at a sufficient distance to the...
-
Page 6: Installation
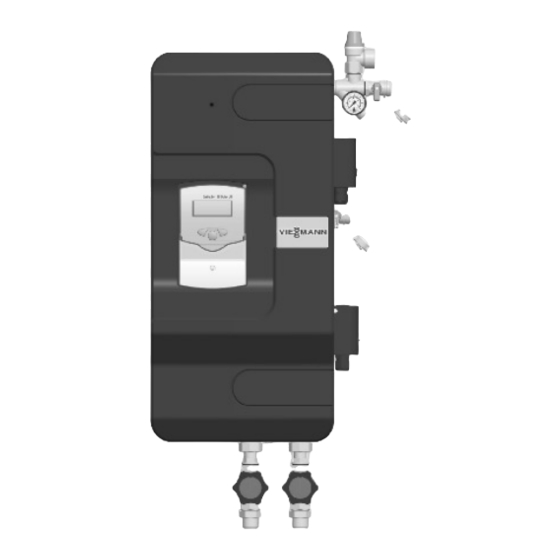
Installation Description Solar-Divicon-HX is a premounted group of fittings and components used to transfer the heat from the primary or solar loop to the secondary or storage tank loop. The primary and secondary loop are separated with a generously sized stainless-steel double wall heat exchanger with visable leak detection. -
Page 7: Primary And Secondary Loop
Installation Primary and secondary loop The primary (solar) loop comprises: a– ball valve with integrated temperature gauge and check valve, solar supply b– ball valve with integrated temperature gauge and check valve, solar return c– pressure relief valve - 87 psig d–... -
Page 8: Mounting The Solar-Divicon-Hx
CAUTION The mounting location must be able to carry the full weight of the Solar-Divicon-HX. Take into account the full weight of the unit. Damage or injury could occur if not mounted securely. The discharge line of the pressure relief valve must lead into a heat-resistant collecting tank with corresponding size. -
Page 9: Connection Fittings For Primary (Solar) Loop
2, 3 and 4 all the way into the housing of the compression fitting (5) mounted on the ball valves of the Solar-Divicon-HX. 4. Tighten the union nut 2 manually to start. 5. Tighten the union nut 2 by rotating with wrench one full turn. -
Page 10: Connections
Installation Connections Fig. 8 Typical system layout... -
Page 11: Controller Connection
Install in an immersion sensor well, if possible. Solar return line sensor (TPRI) to S4. This sensor is pre-installed in the Solar-Divicon-HX. 2. Tighten all union nuts and screw connections. The assembly of the heat transfer station is now completed and you can put the station into operation. -
Page 12: Start-Up
Start-up Safety Observe the following safety instructions regarding the startup of the station: WARNING The valves and fittings can heat to temperatures of more than 212° F (100° C) due to the solar fluid. Therefore, do not flush or fill the system with the collectors heated (intense sunshine). -
Page 13: Flushing And Filling The Storage Tank Loop
Start-up Flushing and filling the storage tank loop The storage tank loop is filled with potable water by means of the valves and fittings of the tank. To avoid that dirt particles are washed into the heat exchanger, close the ball valves of the station and wash the dirt particles and scale residues out of the tank. -
Page 14: Flushing The Heat Exchanger
Start-up Flushing the heat exchanger 1. Disconnect the expansion tank from the solar system and temporarily plug expansion tank pipe connection. This avoids that the dirt particles in the pipes are washed into the expansion tank. 2. Put the check valve temporarily out of operation by turning the solar supply ball valve (a) to position 45°... -
Page 15: Air-Scoop
Start-up Flushing the heat exchanger (continued) 13. Close the fill and drain valves (d) (c). CORRECT 14. Put the check valves into operating position by turning the ball valves (a) (b) to position 0° (see page 10). 15. Connect the controller to the power supply. Set the solar circuit pump in the manual mode to ON. -
Page 16: Setting The Flow Rates
Start-up Setting the flow rates 1. Switch on the pumps at the controller in manual mode. [ Main menu \ Manual operation \ All relays: ON ] 2. Set the desired speed level (I to III) of the solar pump to obtain the required flow rate. -
Page 17: Service
Service Draining the solar circuit WARNING The escaping medium may be very hot. Place the collecting container so that anyone standing nearby are not in danger of scalding when the solar system is being emptied. 1. Disconnect power supply to the controller and make sure that an accidental restart is not possible. -
Page 18: Parts
Order No. DN20 7834 370 DN25 7834 371 Ordering Replacement Parts: Order replacement components from your Viessmann distributor. Parts Wall-mount bracket, 559 x 185 x 2 mm Hose, transparent, d= 10 x 2 mm Insulation jacket Mounting kit, SCU 123... - Page 19 Service Parts Solar-Divicon-HX Split ring compression, fitting, ¾” Ball valve, supply, ¾” x ¾” Thermometer, 32-320°F (red) Heat exchanger Gasket, 24 x 17 x 2 mm Flange elbow G, ¾” x ¾” Plug, 3/8” Stainless steel tube Vent plug, 3/8”...
-
Page 20: Technical Data
Technical Data Characteristics Primary (solar) loop pump charts flow rate (gal/min) Start-up and Maintenance flow rate (L/h) Fig. 17 Pump curve chart and friction chart - DN 20 flow rate (gal/min) Start-up and Maintenance flow rate (L/h) Fig. 18 Pump curve chart and friction chart - DN 25... - Page 21 Technical Data Characteristics Secondary (storage tank) loop pump chart flow rate (gal/min) Start-up and Maintenance Start-up and Maintenance flow rate (L/h) Fig. 19 Pump curve chart - DN 20 and DN 25...
-
Page 22: Specifications
Technical Data Specifications Characteristics Dimensions: Height............30.7“ (780 mm) Width (with safety equipment)...... 15.6“ (396 mm) Depth (with insulation)........9.8“ (~250 mm) Centre distance (supply / return)....3.2“ (81 mm) Pipe connections - primary loop....¾“ copper compression Pipe connections - secondary loop....¾“... - Page 23 5724 267 v1.0...
- Page 24 Viessmann Manufacturing Company (U.S.) Inc. Viessmann Manufacturing Company Inc. 45 Access Road 750 McMurray Road Warwick, Rhode Island · 02886 · USA Waterloo, Ontario · N2V 2G5 · Canada 1-800-288-0667 · Fax (401) 732-0590 1-800-387-7373 · Fax (519) 885-0887 www.viessmann-us.com · info@viessmann-us.com...
Need help?
Do you have a question about the Solar-Divicon-HX and is the answer not in the manual?
Questions and answers