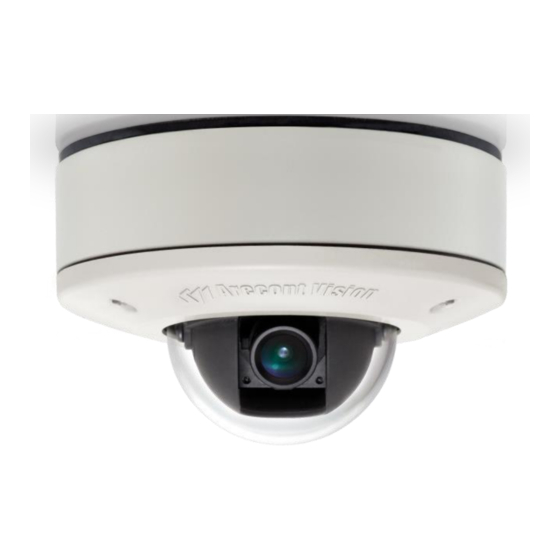
Arecont Vision MicroDome AV1455DN-S Installation Manual
Microdome series ip camera
Hide thumbs
Also See for MicroDome AV1455DN-S:
- Installation manual (18 pages) ,
- Installation manual (18 pages)
Summary of Contents for Arecont Vision MicroDome AV1455DN-S
- Page 1 INSTALLATION MANUAL AV1455DN-S AV2455DN-S AV2456DN-S AV3455DN-S AV3456DN-S AV5455DN-S...
-
Page 2: Table Of Contents
Arecont Vision MicroDome™ Installation Manual MicroDome™ Surface Mount Installation Contents Package Contents ............................... 3 Warranty Information ..............................3 Installation Overview ..............................4 Installation ................................. 5 Focusing the Camera ..............................6 Changing the Lens ..............................7 Focusing Alternate Lenses ............................7 Digital Input and Output ............................ -
Page 3: Package Contents
3 Year Limited Warranty ARECONT VISION warrants to Purchaser (and only Purchaser) (the “Limited Warranty”), that: (a) each Product shall be free from material defects in material and workmanship for a period of thirty-six (36) months from the date of shipment (the “Warranty Period”);... -
Page 4: Installation Overview
Arecont Vision MicroDome™ Installation Manual Installation Overview Ceiling Gasket NPT Port Camera Housing Mounting Screws Gasket Captive Fasteners Dome Cover (Hand Tighten Only) Page | 4 support@arecontvision.com... -
Page 5: Installation
7. After plugging in the network cable check that the indicator LED’s are indicating the desired conditions (see LED Indicator table). 8. Use Arecont Vision software AV100 or AV200 located on the CD or available for download at our website (www.arecontvision.com) for camera discovery and setup (see Instruction Manual located on CD or available on our website). -
Page 6: Focusing The Camera
Arecont Vision MicroDome™ Installation Manual Focusing the Camera 1. Open a live view of the camera from your web browser or the AV Software provided (AV100 or AV200). 2. Loosen the lens lock screw using a phillips head screwdriver (if necessary). Only do so if lens seems very Tech tight when turning. -
Page 7: Changing The Lens
Arecont Vision MicroDome™ Installation Manual Changing the Lens 1. Remove the Dome Cover by loosening the captive fasteners. 2. Loosen the lens lock screw using a phillips head screwdriver (if necessary). Only do so if lens seems very tight when turning. -
Page 8: Digital Input And Output
Arecont Vision MicroDome™ Installation Manual Digital Input and Output Use 4 position connector inside camera housing to interface with Digital I/O. DIGITAL I/O BLACK IN - WHITE IN + YELLOW OUT - ORANGE OUT + Electrical Characteristics Input Voltage (V) (Measured between + and –... -
Page 9: Led Indicators
Arecont Vision MicroDome™ Installation Manual LED Indicators Status Description Yellow Flashing Link has been established. Solid Normal Operation. None No connection. Green Flashing Camera has been accessed. Normal operation. Solid None No Connection. Page | 9 support@arecontvision.com... -
Page 10: Support
Swap the “troubled” camera with a known good camera to see if the problem follows the camera or stays at the location. 3. Contact Arecont Vision Technical Support one of three ways: 1. Online Portal : Support.ArecontVision.com 2. Phone : 1.818.937.0700 (option #1) 3. -
Page 11: Installation Best Practice
Arecont Vision MicroDome™ Installation Manual Installation Best Practice Adding Teflon thread sealing Wind Vinyl electrical Begin Installation tape to all male threads tape on all cables connections Connect ¾” NPT conduit pipe to junction box adapter Does conduit pipe go... -
Page 12: Camera Discovery, Setup, And Configuration
Arecont Vision MicroDome™ Installation Manual Camera Discovery, Setup, and Configuration For camera discovery and setup please use Arecont Vision software AV200 which you can find on the CD included with your camera or at: http://www.arecontvision.com/softwares.php The user manual for the AV200 software is included on the CD and is also located on our website. -
Page 13: Wall Mount Accessory (Mcd-Wmt)
Arecont Vision MicroDome™ Installation Manual Wall Mount Accessory (MCD-WMT) Gasket Alignment features must be aligned for proper installation. Installation Notes: 1. 4x mounting screws are #10x1” wood or sheet metal screws (4x mount anchors also included). 2. Always ensure gaskets are properly seated. -
Page 14: Pendant Mount Accessory (Mcd-Cmt)
Arecont Vision MicroDome™ Installation Manual Pendant Mount Accessory (MCD-CMT) Installation Notes: 1. 3x mounting screws are #10x1” wood or sheet metal screws (3x mount anchors also included). 2. Always ensure gaskets are properly seated. 3. Use Teflon tape on threaded interfaces. -
Page 15: Mount Template: Microdome Camera
Arecont Vision MicroDome™ Installation Manual Mount Template: MicroDome Camera Page | 15 support@arecontvision.com... -
Page 16: Mount Template: Microdome Wall Mount
Arecont Vision MicroDome™ Installation Manual Mount Template: MicroDome Wall Mount Page | 16 support@arecontvision.com... -
Page 17: Mount Template: Microdome Pendant Mount
Arecont Vision MicroDome™ Installation Manual Mount Template: MicroDome Pendant Mount Page | 17 support@arecontvision.com... - Page 18 Arecont Vision MicroDome™ Installation Manual Contact Arecont Vision Technical Support one of three ways: Online Portal : Support.ArecontVision.com Phone : 1.818.937.0700 (option #1) Email : support@arecontvision.com Page | 18 support@arecontvision.com...


Need help?
Do you have a question about the MicroDome AV1455DN-S and is the answer not in the manual?
Questions and answers