Table of Contents
Advertisement
Advertisement
Table of Contents

Subscribe to Our Youtube Channel
Related Manuals for Custom Audio Electronics TG558 Series


Summary of Contents for Custom Audio Electronics TG558 Series
- Page 1 Ticket Printer TG558 serie 35-58 mm User Manual www.custom.it TG558...
- Page 2 All rights reserved. Total or partial reproduction of this manual in whatever form, whether by printed or electronic means, is forbidden. While guaranteeing that the information contained in it has been care- fully checked, CUSTOM ENGINEERING SPA and other entities utilized in the realization of this manual bear no responsibility for how the manual is used.
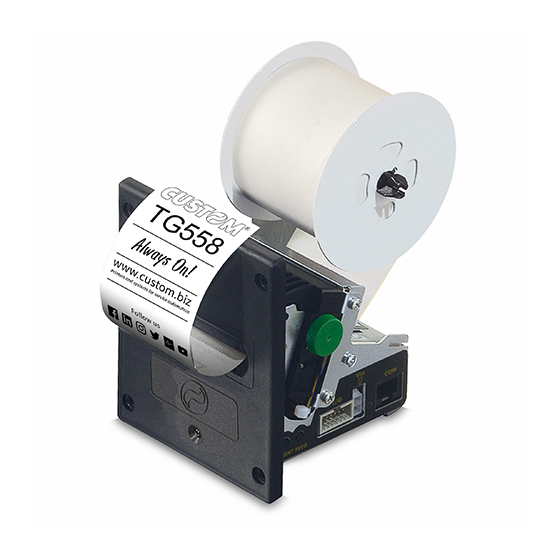
- Page 3 PRINTER COMPONENTS TG558 Exterior view with plastic front panel TG558-x35P ,TG558-x58P , TG558-x35P-0001 , TG558-x58P-0001 1- Printing mechanism 2- “PRINT” key 3- “FEED” key 4- Case 5- Front panel 6- Led 7- Paper output The x suffix indicates the following models : - TG558-S35P (35mm version with RS232 serial interface) - TG558-S58P (58mm version with RS232 serial interface) - TG558-T35P (35mm version with TTL serial interface)
- Page 4 TG558 Exterior view with metallic front panel TG558-x35M ,TG558-x58M , TG558-x35M-0001 , TG558-x58M-0001 1- Printing mechanism 2- “PRINT” key 3- “FEED” key 4- Case 5- Front panel 6- Led 7- Paper output The x suffix indicates the following models : - TG558-S35M (35mm version with RS232 serial interface) - TG558-S58M (58mm version with RS232 serial interface) - TG558-T35M (35mm version with TTL serial interface)
- Page 5 TG558 Exterior view with display TG558-35D 1- Printing mechanism 2- “PRINT” key 3- “FEED” key 4- Case 5- Front panel 6- Paper output 7- Display 8- Led D. TG558 Rear view with plastic front panel 1- Power supply connector 2- RS232 /TTL serial interface connector 3- Paper input 4- Inspection wicket relative to paper roll compartment TG558...
- Page 6 E. TG558 Rear view with metallic front panel 1- Power supply connector 2- RS232 /TTL serial interface connector 3- Paper input 4- Inspection wicket relative to paper roll compartment F. TG558 Rear view with Display 1- Power supply connector 2- TTL serial interface connector 3- Power supply connector and additional signals 4- Paper input 5- Inspection wicket relative to paper roll compartment...
-
Page 7: Table Of Contents
TABLE OF CONTENTS INTRODUCTION MANUAL ORGANIZATION ......................... 1 SYMBOLS USED IN THE MANUAL ....................1 GENERAL SAFETY INFORMATION ....................1 UNPACKING THE PRINTER ......................1 MAIN CHARACTERISTICS ....................... 2 PRINTER DESCRIPTION ......................... 2 1. INSTALLATION AND OPERATION 1.1 CONNECTIONS ........................1-1 1.1.1 Power supply ........................ -
Page 8: Introduction
INTRODUCTION MANUAL ORGANIZATION In addition to the Introduction which contains information regarding the symbols used in the manual, general safety information, instructions for unpacking the printer and a brief description and main characteristics of the machine, this manual is divided into the following chapters: Chapter 1: Contains the information required for correct printer installation and use Chapter 2:... -
Page 9: Printer Description
INTRODUCTION (Fig. 1) Foam packing shell Printer Paper roll Manual (or CD-Rom) Electrical supply cable PRINTER DESCRIPTION Ultra compact thermal printer (only 9cm deep) for dispensing 35 or 58mm tickets width, easy to install (4 fastening holes and ticket presentation to user incorporated). Thanks to the exclusive anti-paper-jam system, the ticket will always be promptly dispensed to the user. -
Page 10: Installation And Operation
1. INSTALLATION AND OPERATION 1.1 CONNECTIONS (Fig.1.1) 1.1.1 Power supply The printer TG558 is equipped with a 2 pin male molex connector serie 5569 (Vertical), for the power supply (J6). The signals on the pins of the feed connector are as follows: Model no. -
Page 11: Setup
1. INSTALLATION AND OPERATION (Tab.1.2) (Fig.1.2) 1.2 SETUP The printer enables the configuration of the printer default parameters (see fig. 1.3). The parameters affected during configuration are: PRINT MODE • Columns: 24 columns , 40 colums e 42 colums. • Print Direction: Normal or Reverse. -
Page 12: Configuration Of Report And Feed Keys
1. INSTALLATION AND OPERATION NOTE: This parameter enable the automatic change of the solar time and summer time. (Fig.1.3) SET UP DEFAULT : 24 COLUMNS (font 16 x 24) PRINT DIR. = NORMAL PRINT MODE. = LITTLE CR-LF HONOR CR AUTO FEED = ENABLE RED INTENSITY = 5 SERIAL PORT SELECTED... -
Page 13: Notes For Installation And Using
1. INSTALLATION AND OPERATION To change the paper roll in the printer, proceed as follows (see the fig. 1.5) : 1) Position the paper roll (1), so that it rotates in the direction shown (fig.1.5); 2) Insert the end of the paper roll in the print mechanism (2) and wait until the roll loads automatically;... -
Page 14: Interfaces
2. INTERFACES 2.1 INTERFACES OF TG558-S AND TG558-T MODELS (Fig.2.1) PIN 1 2.1.1 RS232/TTL Serial The printer with RS232/TTL serial interface is connected by means of a RJ45 connector J4 (see fig. 2.1). In the following table, the signals present on the connector are listed: (Tab.2.1) TG558... - Page 15 2. INTERFACES In the serial protocol, the signals which characterize communication are TD, RD and RTS if the RTS/CTS protocol has been selected; alternatively, if the XON/OFF protocol has been selected, the signals are TD and RD. (Fig.2.2) Transmission format NEXT START STOP...
-
Page 16: Printer Functions
3. PRINTER FUNCTIONS 3. PRINTER FUNCTIONS 3.1 CONTROL CHARACTERS LEGEND : Symbol Function indicates the representation of the command hexadecimal value (for example $40 means HEX 40). indicates an ASCII character not performable. n, m, t, x, y are additionals/optional parameters that can have different values. The command table lists all the commands for the management of the printer functions. - Page 17 3. PRINTER FUNCTIONS i t s c i f t n i t n i n i l s t i t n i l a i n i l t n i s t i l a i c / t t n i t n i i t l...
- Page 18 3. PRINTER FUNCTIONS 3. PRINTER FUNCTIONS • The commands which modify the direction of the characters are only active at the beginning of the line [Default] Setting the “Print mode” parameter in the printer set-up [Reference] $01, $02, $03, $04, $1D $21, $1B $4D [Example] [Name] Double width printing...
- Page 19 3. PRINTER FUNCTIONS [Name] Restore small character printing [Format] ASCII Decimal [Description] The printer resumes printing with small characters [Notes] • The commands $00 - $09 do not cancel the print buffer • the commands which modify the dimensions of the characters are only active at the beginning of the line [Default] Setting the “Print mode”...
- Page 20 3. PRINTER FUNCTIONS 3. PRINTER FUNCTIONS [Name] Forward feeds (n) lines [Format] ASCII Decimal 11 [Description] Carries out the number of line feeds specified in (n) [Notes] •The number must be ASCII and between 0 and 9 (when n=0 the command is ignored) •...
- Page 21 3. PRINTER FUNCTIONS n = 1 transmit printer status n = 2 transmit off-line status n = 3 transmit error status n = 4 transmit paper roll sensor status n = 5 transmit paper sensors status n = 6 transmit input/output status [Notes] •...
- Page 22 3. PRINTER FUNCTIONS 3. PRINTER FUNCTIONS n=4: Paper roll sensor status n=5: Paper sensor status 2 3 , n=6: Input/Output status [Name] Graphic mode [Format] ASCII Decimal [Description] Enables graphic mode: a line in 24 column mode corresponds to 144 horizontal dots divided into 24 blocks of 6 dots each;...
- Page 23 3. PRINTER FUNCTIONS D7 D6 where: X is not used (0 is recommended); R must be fixed at level 1; P1,...,P6 are the graphic dot data (1 prints, 0 does not print). The P6 bit of the string of dots transmitted is printed on the left and the others follow from left to right (P5, P4, P3, P2, P1) as shown: 1st byte 2nd byte...
- Page 24 3. PRINTER FUNCTIONS 3. PRINTER FUNCTIONS [Reference] $12, $14 [Example] To set the time 12:45 on 19-01-93, transmit $31 $32 To set the time A 12:45 on 19-01-93, transmit $41 $31 [Name] Transmit the time and date in serial [Format] ASCII Decimal [Description]...
- Page 25 3. PRINTER FUNCTIONS 0 ≤ nL ≤ 255 [Range] 0 ≤ nH ≤ 255 [Description] Sets the print vertical position based on the current position by using the horizontal or vertical motion unit. • This command sets the distance from the current position to [( nL + nH x 256) x ( horizontal or vertical motion unit )].
- Page 26 3. PRINTER FUNCTIONS 3. PRINTER FUNCTIONS • In standard mode, the vertical motion unit is used. • The maximum line spacing is n = 255 ( ≅ 32mm). [Default] n = 32 (1/6 inch) [Reference] $1B $30, $1B $32 [Example] [Name] Initialize printer [Format]...
- Page 27 3. PRINTER FUNCTIONS transmit DATE : $1B $44 TEST TEST OK $0D to print just the date $1B $44 $0D [Name] Selects Font A [Format] ASCII Decimal [Description] After receives this command the Font A is selected and the printer is ready to use this configuration.
- Page 28 3. PRINTER FUNCTIONS 3. PRINTER FUNCTIONS [Default] Setting by means of the front keys [Reference] $1B $6D [Example] For duoble height printing, transmit : $30 $32 $1B $4D [Name] Set printing in NORMAL [Format] ASCII Decimal [Description] Selects printing in NORMAL mode. [Notes] •...
- Page 29 3. PRINTER FUNCTIONS there is not enough space in the buffer, it will not be printed. • It does not zero-set the line buffer • This command is present only in the printer version with display (TG558-D) and RTCK option. [Default] [Reference] $1B $44, $1B $55...
- Page 30 3. PRINTER FUNCTIONS 3. PRINTER FUNCTIONS Decimal [Description] After receiving this command, the printer prepare itself to print in red. [Notes] [Default] [Reference] [Example] [Name] Select justification [Format] ASCII Decimal 0 ≤ n ≤ 2, 48 ≤ n ≤ 50 [Range] [Description] Aligns all data in one line to the specified position, where n selects the type of justifica-...
- Page 31 3. PRINTER FUNCTIONS Decimal [Description] This command executes a barcode printing depending on the following parameters: [code] = Type of bar code (ASCII character) The values are : Interleved 2/5 Code 39 CodaBar EAN8 EAN13 [height] = Number of dot lines in 1/8 mm units. [position]= Left hand margin, expressed in 1/8 mm units.
- Page 32 3. PRINTER FUNCTIONS 3. PRINTER FUNCTIONS [data] = Expressed in ASCII. [Notes] [Default] [Reference] [Example] In the following example is indicated the command sequence to print a barcode : $1B, ‘N’, $1B, ‘c’, ‘C’, $50, $3C, $14, $06, ‘TG558’ where : $1B, ‘N’...
- Page 33 3. PRINTER FUNCTIONS [Notes] [Default] [Reference] $1B $49, $1B $69 [Example] [Name] Selects Font B [Format] ASCII Decimal [Description] After receives this command the Font B is selected and the printer is ready to use this configuration. the number of columns by row is indicated as follows : [Notes] [Default] [Reference]...
- Page 34 3. PRINTER FUNCTIONS 3. PRINTER FUNCTIONS [Example] The response is on two bytes. E.g. if you receive : $30 $32 it means that printing is in double height mode [Name] Transmits the configuration register in serial [Format] ASCII Decimal [Description] Transmits through serial port the option register byte.
- Page 35 3. PRINTER FUNCTIONS [Name] Prints in black [Format] ASCII Decimal [Description] After receiving this command, the printer prepare itself to print in black. [Notes] [Default] n = 0 [Reference] [Example] [Name] Turn upside-down printing mode on/off [Format] ASCII Decimal 0 ≤ n ≤ 255 [Range] [Description] Turns upside-down printing mode on or off.
- Page 36 3. PRINTER FUNCTIONS 3. PRINTER FUNCTIONS YY -> year • This command is present only in the printer version with display (TG558-D) and RTCK option. [Default] [Reference] [Example] [Name] Sets the real time clock [Format] ASCII n0... n9 n0... n9 Decimal n0...
- Page 37 3. PRINTER FUNCTIONS 256 x 512 for 35mm model [Default] [Reference] [Example] To print from ram bank dotline 10 to dotline 64, send: [Name] Select character size [Format] ASCII Decimal 0 ≤ n ≤ 255 [Range] [Description] Selects character height and width, as follows: •...
- Page 38 3. PRINTER FUNCTIONS 3. PRINTER FUNCTIONS [Name] Visualization on display a string of 4 characters. [Format] ASCII Decimal 48 ≤ s1, s2, s3, s4 ≤ 57 [Range] 65 ≤ s1, s2, s3, s4 ≤ 90 [Description] Visualizes a string of 4 characters on printer display. [Notes] •...
- Page 39 3. PRINTER FUNCTIONS • Each pair of bytes identify a digit, and must be as follows : • This command is present only in the printer version with display (TG558-D). [Default] [Reference] [Example] To visualize the character “+” on all 4 display digits send : [Name] Enabling graphic display effects.
- Page 40 3. PRINTER FUNCTIONS 3. PRINTER FUNCTIONS 1 ≤ n ≤ 3, 49 ≤ n ≤ 51 [Range] [Description] Transmits the printer ID specified by n follows: t n i c i f t n i n = 2, Type ID t t u e i l t t u...
- Page 41 3. PRINTER FUNCTIONS [Default] [Reference] $1D $45 [Example] [Name] Prints n byte of a 203 dpi graphic line [Format] ASCII d1... d1... Decimal d1... 1 ≤ n ≤ 48 [Range] for 58mm model 1 ≤ n ≤ 34 for 35mm model 0 ≤...
- Page 42 3. PRINTER FUNCTIONS 3. PRINTER FUNCTIONS n ≤ 34 for 35mm model [Default] [Reference] [Example] [Name] Management of barcode printing. [Format] ASCII GS Decimal 1 ≤ n ≤ 3, 49 ≤ n ≤ 51 [Range] m = ‘p’, ‘P’ 48 ≤ n ≤ 56 m = ‘t’, ‘T’...
- Page 43 3. PRINTER FUNCTIONS [Name] Enable / Disable scrolling text [Format] ASCII Decimal 29 ASCII d1...dk d1...dk Decimal 29 d1...dk 0 ≤ n ≤ 63, 0 ≤ d1 ≤ 255, 0 ≤ dk ≤ 255 [Range] [Description] This command disable scrolling text . This command visualizes on display a string , that was sent through serial port as scrolling text;...
- Page 44 3. PRINTER FUNCTIONS 3. PRINTER FUNCTIONS [Name] Transmit status [Format] ASCII Decimal [Range] n = 1, 49 [Description] Transmits the status specified by n as follows: Function 1, 49 Transmits paper sensor status (as for $1D $76). Paper sensor status (n = 1, 49) 0 1 , .
- Page 45 3. PRINTER FUNCTIONS In the following table are listed the usable notes and theirs hexedecimal value to send for playing note. NOTES TABLE [Notes] • The NO_SOUND note disable the tones generator must be used to end a melody. • The SOUND_ON note enable the tones generator but no produce any music. This note must be used also when executes a pause.
-
Page 46: Technical Specifications
4. TECHNICAL SPECIFICATIONS 4.1 TECHNICAL SPECIFICATIONS (Tab.4.1) Table 4.1 gives the main technical specifications for the 204 dpi printer model. s l l i t i l l o ± ± Ø ) t r c i t i t n , t h / t h , d l... -
Page 47: Dimensions
4. TECHNICAL SPECIFICATIONS 4.2 DIMENSIONS 4.2.1 Model with plastic front panel The figure 4.1 shows the dimensions of the printer with plastic front panel. (Fig.4.1) TG558... -
Page 48: Model With Metallic Front Panel
4. TECHNICAL SPECIFICATIONS 4.2.2 Model with metallic front panel The figure 4.2 shows the dimensions of the printer with metallic front panel (35mm version). (Fig.4.2) TG558... -
Page 49: Model With Display
4. TECHNICAL SPECIFICATIONS 4.2.3 Model with Display The figure 4.3 shows the dimensions of the printer with display (35mm version). (Fig.4.3) TG558... - Page 50 4. TECHNICAL SPECIFICATIONS The figures 4.4 and 4.5 show the dimensions of TG558 front panel . Front Panel TG558 35 mm (Fig.4.4) Front Panel TG558 58 mm (Fig.4.5) TG558...
-
Page 51: Character Set
5. CHARACTER SET 5.1 CHARACTER SETS The printer has 2 fonts each width 224 characters (font 1 and font 2). Shown below in figure 5.1 is an example. 24 COLUMNS (font 16 x24) (Fig.5.1) TG558... -
Page 52: Appendix A - Accessories And Spare Parts
APPENDIX A - ACCESSORIES AND SPARE PARTS A.1 ACCESSORIES A.1.1 Power Supply The figure below illustrates the 12V power supply provided by Custom to be used for printer operation. (Fig.A.1) GND chassis LED on 0V 12V (Tab.A.1) a t l a t l t i u A.1.2 Adjustable paper holder suport... - Page 53 APPENDIX A - ACCESSORIES AND SPARE PARTS Paper roll holder Kit for 58mm version: (Fig.A.2) - Paper holder support (1) assembled at paper roll pin (2); - Near paper end sensor board (3); - Two M3x6 fixing screws (4); - Two control discs (5). Paper roll holder Kit for 35mm version: - Paper holder support (1) assembled at paper roll pin (2);...
-
Page 54: Assembly Instructions
APPENDIX A - ACCESSORIES AND SPARE PARTS Assembly instructions The position of the roll holder support is not fixed and its rear, lower and upper position may be adjusted as shown in figure A.4. 1 = Upper attachment 2 = Rear attachment 3 = Lower attachment (Fig.A.4) Upper attachement... - Page 55 APPENDIX A - ACCESSORIES AND SPARE PARTS (Fig.A.5) (K) : Beveled part ATTENTION:Verify that the paper roll pivot is positioned as indicated in this enlargement with beveled part (k) facing low; othervwise unloosing the fixing screw of paper roll pivot and so positioning itself in this mode.
- Page 56 APPENDIX A - ACCESSORIES AND SPARE PARTS Rear attachement 58mm Version 1- Attach the support to the printer body using the two M3x6 fixing screws (3) supplied with the kit, as shown in fig. A.7. 2 - Insert the near paper end sensor connector (1) of the roll holder support into the printer connector as shown in fig.
- Page 57 APPENDIX A - ACCESSORIES AND SPARE PARTS Lower attachement 58mm Version 1- Attach the support to the printer body using the two M3x6 fixing screws (3) supplied with the kit, as shown in fig. A.9. 2 - Insert the near paper end sensor connector (1) of the roll holder support into the printer connector as shown in fig.
-
Page 58: Using The Control Discs
APPENDIX A - ACCESSORIES AND SPARE PARTS Using the control discs Assembly the control discs with the paper roll pivot as shown in the fig. A.11. NOTE: The model indicated in fig. A.11 is indicative to show the assembly so the following informations are corrects for all models. - Page 59 APPENDIX A - ACCESSORIES AND SPARE PARTS Printer dimensions with Paper holder support (Fig.A.12) Model with plastic front panel TG558...
-
Page 60: Spare Parts
APPENDIX A - ACCESSORIES AND SPARE PARTS Model with metallic front panel (Fig.A.13) A.2 SPARE PARTS Paper rolls (Tab.A.4) (Tab.A.5) s l l i n i TG558...
Need help?
Do you have a question about the TG558 Series and is the answer not in the manual?
Questions and answers