PARKZONE Extra 300 PNP/BNF Instruction Manual
Hide thumbs
Also See for Extra 300 PNP/BNF:
- Instruction manual (84 pages) ,
- Instruction manual (88 pages)
Table of Contents
Advertisement
Quick Links
Advertisement
Table of Contents

Related Manuals for PARKZONE Extra 300 PNP/BNF


Summary of Contents for PARKZONE Extra 300 PNP/BNF
- Page 1 Extra 300 PNP/BNF Instruction Manual...
-
Page 2: Safety Precautions And Warnings
NOTICE All instructions, warranties and other collateral documents are subject to change at the sole discretion of Horizon Hobby, Inc. For up-to-date product literature, visit http://www.horizonhobby.com and click on the support tab for this product. Meaning of Special Language: The following terms are used throughout the product literature to indicate various levels of potential harm when operating this product: NOTICE: Procedures, which if not properly followed, create a possibility of physical property damage AND little or no possibility of injury. -
Page 3: Table Of Contents
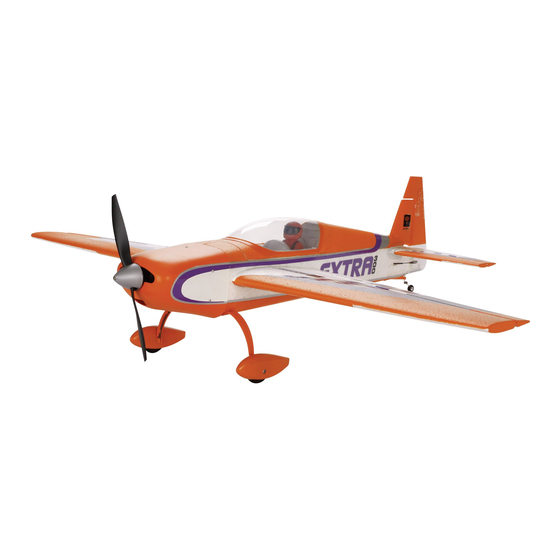
Extra 300 PNP. most recognized full-scale aerobatic aircraft in the world. WARNING: Although your ParkZone® Extra 300 comes Mike McConville designed this park-sized version to give you almost ready to fly, this aircraft is for experienced RC pilots a scale aerobatic experience like no other. -
Page 4: Low Voltage Cutoff (Lvc)
Low Voltage Cutoff (LVC) The Extra 300 receiver features a soft low voltage cutoff (LVC) minimum operating voltage so flight controls do not respond that occurs when the battery reaches 3V per cell under load. to the transmitter. When the soft cutoff occurs, the electronic speed control (ESC) Stay aware of the power level of the battery/aircraft throughout and receiver reduce power to the motor (regardless of the the flight, and when the aircraft requires more throttle than... -
Page 5: Charging The Flight Battery
• Charges 2- to 3-cell Li-Po packs with minimum capacity of 300mAh 3S 11.1V 2200mAh Li-Po Battery Pack The ParkZone 3S Li-Po battery pack features a balancing lead that allows you to safely charge your battery pack when used with the included ParkZone Li-Po balancing charger. -
Page 6: General Assembly And Maintenance Tips
General Assembly and Maintenance Tips Note: This checklist is not a replacement for the content included in this manual. Although it can be used as a quick start guide, we strongly suggest reading through this manual completely before proceeding. First Flight Preparation Activity PNP BNF ... -
Page 7: Transmitter And Receiver Binding
Transmitter and Receiver Binding Binding is connecting a transmitter to an aircraft receiver wirelessly or electronically so the aircraft receiver recognizes the transmit- ter GUID (Globally Unique Identifier) code. Binding is necessary for proper operation. The Extra 300 requires a DSM2 full range (high power) transmitter. The list below is Spektrum™ or JR® DSM2-equipped full range transmitters and modules that can bind to the Extra 300’s receiver: •Spektrum DX5e •Spektrum DX6i... -
Page 8: Installing Landing Gear
Installing Landing Gear Note: Fairings (PKZ5130) may be removed for flying the 3. Install left (marked “L”) and right (marked “R”) landing Extra 300 from a rough runway gear fairings on the landing gear supports and fuselage using four (4) small screws. Note: Before flight, make sure wheel nut is tight. -
Page 9: Installing Wings
Installing Wings 1. Put the wing tube in the round hole in the wing slot of the 6. Attach the two (2) aileron connectors to the aileron Y-harness fuselage. in the fuselage. 2. Put left wing on the wing tube. 3. -
Page 10: Installing Horizontal Tail And Pushrods On Control Horns
Installing Horizontal Tail and Pushrods on Control Horns Installing the Horizontal Tail Installing Pushrods on Control Horns 1. Put the horizontal tail (PKZ5125) in the fuselage, making CAUTION: The installation positions of the pushrods sure the control horn is on the right side of the fuselage. The and clevises directly affect aircraft response. -
Page 11: Installing The Flight Battery
The CG location is 2.75 inches (70mm) back from leading edge of the wing at the root +/- 1/4 inch (6.4mm). This CG location has been determined with the ParkZone 2200mAh 11.1V 25C Li-Po battery installed in the battery cavity. -
Page 12: Control Direction Test
Control Direction Test and Reverse Controls Note: This Control Direction Test does not describe Mode 1 or 5. When the transmitter rudder stick is pushed to the left, the Mode 2 transmitter control assignment. Refer to transmitter rudder should move to the left. instructions for information about Mode 1 and Mode 2 control assignment. -
Page 13: Control Surface Travel Measurement
Control Surface Travel Measurement Factory Setting for Control Surface Travel Note: The following rates are only recommended for use with a transmitter that has dual rates and exponential functions. Factory settings for the DX5e transmitter are Dual rates set at The DX5e transmitter is NOT recommended for aircraft control 100% on high rate and at 70% on low rate. -
Page 14: Installing Propeller Adapter, Propeller And Spinner
Installing Propeller Adapter, Propeller and Spinner Note: The information on this page is for maintenance of the 4. Put the propeller (PKZ5101) on the collet of the propeller Extra 300. Spinner, propeller and propeller adapter damage can adapter (PKZ5102). result from aircraft crashes. Notice: The propeller (PKZ5101) side with the numbers for diameter and pitch (for example 10.5 x 9) should face out from CAUTION: DO NOT handle propeller parts while the... -
Page 15: Motor And Esc Removal
Motor and ESC Removal Note: The information on this page is for maintenance of the Extra 300. Damage to these parts can result from aircraft crashes. Installation of the motor is in reverse order of the steps listed below. The propeller (PKZ5101) must be removed from the motor (PKZ5116) before the cowl (PKZ5126) and motor can be removed from the aircraft. -
Page 16: Pnp Installation
Battery Selection and Installation 1. Install your parkflyer or full range receiver in the fuselage • We recommend the ParkZone 2200mAh 11.1V 25C using hook and loop tape or double-sided servo tape. Li-Po battery (PKZ1029). 2. Attach the elevator and rudder servo connectors to the •... -
Page 17: Flying Tips And Repairs
Note: The Parkzone Extra 3oo is a high performance aircraft. Full power should only be used for vertical climbs. Avoid high power Repairs settings in dives or tight turns. -
Page 18: Troubleshooting Guide
Troubleshooting Guide Problem Possible Cause Solution • Aircraft will not respond to throttle • Throttle not at idle at control setup so • Reset controls with throttle stick and but responds to other controls throttle not armed throttle trim at lowest setting. •... -
Page 19: Replacement Parts And Optional Parts
EC3 Device and Battery Connector, Male/Female Optional EFLC505 1- to 5-cell Li-Po Battery Charger with Balancer Optional PKZ1029 ParkZone 2200mAh 11.1V 25C Li-Po battery Recommended for size, weight and power in Extra 300 PKZ1059 SV80 Aileron Servo, 200mm: Extra 300 Recommended aileron servo PKZ1090... -
Page 20: Warranty And Service
Warranty and Repair Policy Warranty Period Questions, Assistance, and Repairs Your local hobby store and/or place of purchase cannot provide Exclusive Warranty- Horizon Hobby, Inc., (Horizon) warranties that the Products purchased (the “Product”) will be free from defects warranty support or repair. Once assembly, setup or use of the in materials and workmanship at the date of purchase by the Product has been started, you must contact Horizon directly. -
Page 21: Contact Information
Contact Information Country of Horizon Hobby Address Phone Number / Email Address Purchase Horizon Service Center 4105 Fieldstone Rd 877-504-0233 (Electronics and Champaign, Illinois productsupport@horizonhobby.com engines) 61822 USA United States of America Horizon Product 4105 Fieldstone Rd 877-504-0233 Support (All other Champaign, Illinois productsupport@horizonhobby.com products) - Page 22 © 2010 Horizon Hobby, Inc. ParkZone products are distributed exclusively by Horizon Hobby, Inc. ® DSM and DSM2 are trademarks or registered trademarks of Horizon Hobby, Inc. The Spektrum trademark is used with permission of Bachmann Industries, Inc. Spektrum radios and accessories are exclusively available from Horizon Hobby, Inc.
- Page 23 in the manufacturer’s product documentation or Warranty Period of waste electrical and electronic equipment. The • Laden Sie niemals Akkus die zu heiß zum Zusätzliche Warnungen und Sicherheitshinweise Fragen und Hilfe Lithium Ion Battery the rate is preset as part of a specific battery and separate collection and recycling of your waste Anfassen sind ( über 38° ) Lassen Sie die Akkus Wenn Ihr lokaler Modellbauladen Ihnen nicht • Im Falle eines Chrash oder Absturzes trennen Exclusive Warranty- horizon hobby, Inc., (horizon) Safety Guidelines charger combination. DO NOT alter the charge ruhen bis sie abgekühlt sind. equipment at the time of disposal will help to weiterhelfen kann, können Sie sich an uns wenden. Sie schnell und sicher den Akku und entnehmen warranties that the Products purchased (the rate once charging has begun. • Stellen Sie immer das Ladegerät auf die korrekte conserve natural resources and ensure that it is Sie ihn dem Modell. Folgen Sie dann den horizon wird das Produkt bessern nach eigenem “Product”) will be free from defects in materials • Lithium Ionen Akku • Always check the voltage of Batteries before Zellenzahl und/oder Voltzahl ein, die auf dem beschriebenen Sicheheitsrichtlinien.
- Page 24 Directives et avertissements liés à la charge Directives et avertissements liés à la décharge Limites des dommages Linee guida e avvertenze per l’utilizzo e • Prima della carica verificare sempre che la ulteriori linee guida e avvertenze BATTERIE. NON SPEDIRE mAI BATTERIE DANNEGGIATE A HORIZON. hORIZON NE SAURAIT ETRE TENU POUR l’immagazzinaggio batteria abbia il cavetto di bilanciamento e che • Ne déchargez jamais d’accus à des ampérages...
Need help?
Do you have a question about the Extra 300 PNP/BNF and is the answer not in the manual?
Questions and answers