Table of Contents
Advertisement
Quick Links
ParkZone
products are distributed exclusively by
®
Horizon Hobby, Inc.
4105 Fieldstone Road
Champaign, IL 61822
Horizon Hobby UK
Units 1-4 Ployters Rd
Staple Tye
Southern Way
Harlow
Essex CM18 7NS
United Kingdom
Horizon Hobby Deutschland GmbH
Otto Hahn Str. 9a
25337 Elmshorn
Germany
The Spektrum trademark is used with permission of Bachmann Industries, Inc.
© 2008 Horizon Hobby, Inc.
parkzone.com
13485
Advertisement
Table of Contents

Related Manuals for PARKZONE F4U Corsair PNP


Summary of Contents for PARKZONE F4U Corsair PNP
- Page 1 ParkZone products are distributed exclusively by ® Horizon Hobby, Inc. 4105 Fieldstone Road Champaign, IL 61822 Horizon Hobby UK Units 1-4 Ployters Rd Staple Tye Southern Way Harlow Essex CM18 7NS United Kingdom Horizon Hobby Deutschland GmbH Otto Hahn Str. 9a...
-
Page 2: Instruction Manual
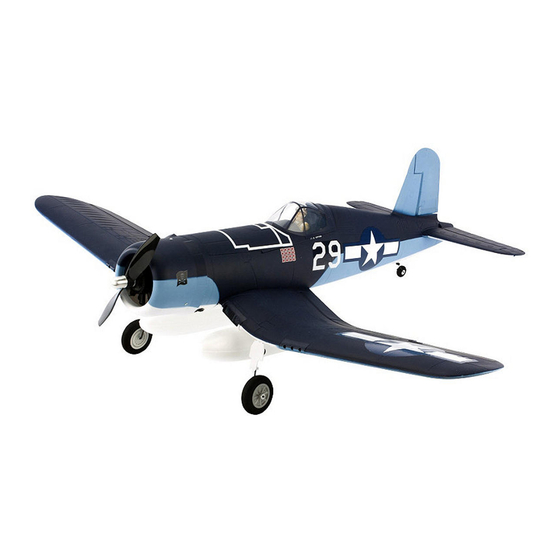
F4U Corsair PNP Instruction Manual Wingspan: 44 in (1118mm) Length: 36 in (914mm) Weight (RTF): 30 oz (875 g) Charge-and-Fly Park Flyer ™ Servos: Four 3-wire servos Motor: PKZ 480-size, 960Kv outrunner brushless motor ESC: E-flite 30A brushless ESC with Switch-Mode BEC (EFLA1030) - Page 3 Warning: Although your ParkZone F4U Corsair PNP comes almost ready to fly, this aircraft is for experienced RC pilots only and is not a toy! Misuse of the plane can cause serious bodily harm and damage to property. Therefore, only an experienced RC pilot should fly it.
-
Page 4: Installing The Receiver
3S Li-Po (PKZ1030) or the ParkZone 1800mAh 3S charger and battery instructions in order to avoid any Li-Po (PKZ1031) to power your F4U Corsair PNP. The damage to the battery, charger, property or yourself. Li-Po battery must be charged with a charger that is... -
Page 5: Attaching The Wing
Step 3 Attaching the Wing In order to attach the wing of your Corsair PNP, please follow these simple instructions: 1. Locate the wing securing screw (3mm x 30mm) in the box. 2. Remove the canopy hatch by gently pulling up on the back of the hatch and set it aside. -
Page 6: Installing The Landing Gear
Step 4 Installing the Landing Gear NOTE: The landing gear is directional. When properly installed, the landing gear will rake forward to add Install the main landing gear by inserting the wire into stability in landing. If the gear does not angle forward the locator hole in the wing. - Page 7 Step 5 a. Confirm the throttle stick is in the full down (idle) Attaching the Horizontal Stabilizer position and turn on the DX5e transmitter. 1. Locate the horizontal stabilizer of the tail. 2. Slide the horizontal stabilizer in the allotted space b.
-
Page 8: Esc Instructions
• Programmable motor braking 15e RTF • Safe power-arm mode prevents accidental starts • 2 ParkZone (PKZ1081) analog sub-micro servos • Programmable low voltage cutoff with settings and 2 ParkZone (PKZ1090) digital metal gear for 3-cell LiPo (9.2V), 4-cell LiPo (12V), or 74% of sub-micro servos—ParkZone T-28 Trojan RTF &... - Page 9 Step 7 cont. Before first use, please refer to “Servo Ratings with BEC When flying in hot weather, we recommend checking on Enabled” notes for BEC usage guidelines. You must the condition of the ESC, battery, and motor after each follow these guidelines for safe operation.
-
Page 10: Entering The Programming Mode
3. When you move the throttle stick upward, the will have 5 seconds to make your selection. motor will run. Continue to move the throttle stick 7. If you want to advance to the next menu, allow the upward to the full throttle (high) position, and the programming to skip to the next menu after the 5 motor will run faster. - Page 11 Step 7 cont. Programming Menu 2 —Brake Type Standard Timing Advance The default setting is Brake Off. This option gives you Timing Degrees – 15 & 20 the choice to have the ESC stop the propeller during Motor Poles – 6 to 12 flight (Brake On) or allow it to windmill (Brake Off).
- Page 12 program selection or leave in full throttle for program selection or leave in full throttle for 5 seconds to advance to the first 5 seconds to advance to the next selection. selection again. b. To select 1 second – You will hear 2 short beeps.
-
Page 13: Troubleshooting
Step 7 cont. Programming Menu 7—Operating Mode Troubleshooting The default setting is set to Normal (airplane) Mode, The controller will beep more quietly than normal if the which is limited to a start-up rate of 0.25 or 1 second. input voltage is below the cutoff voltage when the Alternatively, the Heli Mode can be selected which reduc- battery is connected. -
Page 14: Prior To Each Flying Session
Flying Always choose a wide-open space for flying your ParkZone F4U Corsair PNP. It is ideal for you to fly at an AMA sanctioned flying field. If you are not flying at an AMA approved site, always avoid flying near houses,... -
Page 15: Replacement Parts
Replacement Parts Make sure that you keep your F4U Corsair flying. Replacement parts are available at your local hobby shop or from Horizon Hobby (www.horizonhobby.com). Please try your local hobby shop first. By supporting them, they will be there when you need them! Item #: Description: PKZ1012... - Page 16 Warranty and Follow-Up Procedures Warranty Period: shall the liability of Horizon exceed the individual price of Exclusive Warranty- Horizon Hobby, Inc., (Horizon) the Product on which liability is asserted. As Horizon has no control over use, setup, final assembly, modification warranties that the Products purchased (the “Product”) or misuse, no liability shall be assumed nor accepted for will be free from defects in materials and workmanship...
- Page 17 United States: Request is available at www.horizonhobby.com on the “Support” tab. If you do not have internet access, please Electronics and engines requiring inspection or repair include a letter with your complete name, street ad- should be shipped to the following address: dress, email address and phone number where you can Horizon Service Center be reached during business days, your RMA number, a...
Need help?
Do you have a question about the F4U Corsair PNP and is the answer not in the manual?
Questions and answers