Table of Contents
Advertisement
Quick Links
© 2009 Horizon Hobby, Inc.
4105 Fieldstone Road
Champaign, IL 61822
Horizon Hobby Deutschland GmbH
Hamburger Strasse 10
ParkZone
products are distributed exclusively by Horizon Hobby, Inc.
®
DSM and DSM2 are trademarks or registered trademarks of Horizon Hobby, Inc. The Spektrum trademark is used with permission of Bachmann
Industries, Inc. Spektrum radios and accessories are exclusively available from Horizon Hobby, Inc.
Futaba is a registered trademark of Futaba Denshi Kogyo Kabushiki Kaisha Corporation of Japan.
Printed 10/09 16056
USA
Horizon Hobby UK
Units 1-4 Ployters Rd
Staple Tye
Harlow, Essex
CM18 7NS
United Kingdom
25335 Elmshorn
Germany
www.parkzone.com
Habu BNF & PNP
Instruction Manual
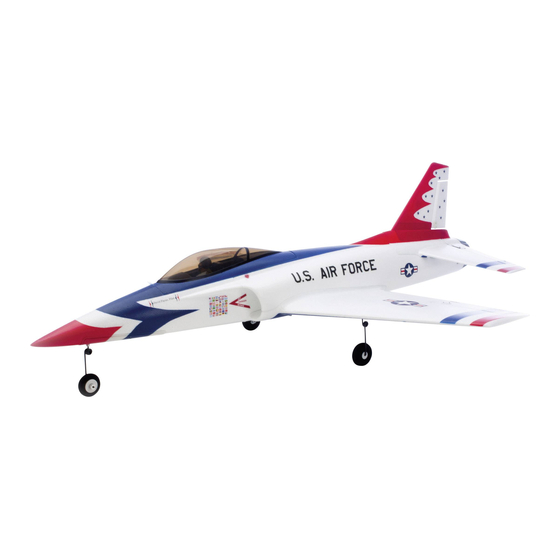
Specifications:
Wingspan: 36.3 in (920mm)
Length: 43.3 in (1100mm)
Weight: 2.8 lb (1300 g)
ESC: E-flite
®
60-Amp Pro Switch-Mode BEC Brushless ESC
Charger: Variable Rate DC Powered Balancing Fast Charger (BNF)
Battery: E-flite 4S 14.8V 3200mAh 30C Li-Po (BNF)
Receiver: Spektrum
AR500 5-channel Sport Receiver (BNF)
™
Advertisement
Table of Contents

Related Manuals for PARKZONE Habu BNF


Summary of Contents for PARKZONE Habu BNF
-
Page 1: Instruction Manual
Habu BNF & PNP Instruction Manual © 2009 Horizon Hobby, Inc. 4105 Fieldstone Road Champaign, IL 61822 Horizon Hobby UK Units 1-4 Ployters Rd Staple Tye Harlow, Essex CM18 7NS United Kingdom Horizon Hobby Deutschland GmbH Hamburger Strasse 10 25335 Elmshorn... -
Page 2: Table Of Contents
Installing the Receiver . . . . . . . . . . . . . . . . . . . . . . . . . . . . . . . . . . . . . . . . . . . . . . . . . . . . . . . . .12 building skills. General Assembly Warning: Although your ParkZone Habu comes almost ready to fly, this aircraft is for experienced RC ®... - Page 3 PNP Contents BNF Contents Fuselage (includes the following): Fuselage (includes the following): 60-Amp Pro Switch-Mode BEC Brushless ESC 60-Amp Pro Switch-Mode BEC ESC Delta-V 15 69mm EDF Fan Unit Delta-V 15 69mm EDF Fan Unit AR500 Receiver Hatch with Canopy Hatch with Canopy Horizontal Stabilizer Horizontal Stabilizer...
-
Page 4: Charging The Aircraft Battery (Bnf Only)
Charging the Aircraft Battery (BNF Only) Your Habu BNF comes with a DC balancing charger and 4S Li-Po battery. You must charge the included 4. Locate the safety charge lead on the battery pack. The charge lead of a 3-cell Li-Po battery will plug into the smaller 4-pin port on the bottom left of the charger. -
Page 5: Installing Flight Battery
Note: Only plug in your flight battery once you have bound the receiver (BNF) , or after you have installed your receiver and plugged the speed control into the throttle channel. (PNP) Habu BNF... -
Page 6: Transmitter And Receiver Binding
Transmitter and Receiver Binding Transmitter-Specific Binding Instructions Dx5e: Binding is the process of programming the receiver of the control unit to recognize the GUID (Globally Unique Identifier) code of a single specific transmitter. It will be necessary for you to ‘bind’ your chosen A. -
Page 7: Habu Pnp
x9303: A. Start with a blank model memory, or the one you have selected for the Habu. B. To bind your Habu to the X9303, plug the bind plug into the Batt/Bind port on the AR500 receiver. C. Plug the battery into the ESC of the airplane. The LED on the receiver will begin flashing. D. -
Page 8: Installing The Receiver
Installing the Receiver 1. Install your full range receiver in the location shown in the photo using hook and loop tape or double-sided servo tape. 2. Plug the elevator and rudder Y-harness into the appropriate ports of the receiver. Plug the Y-harness into the aileron channel of the receiver, and plug the ESC lead into the throttle channel. -
Page 9: Attaching The Wing
5. Slide the aileron leads inside the fuselage so that they will not become pinched in between Attaching the Wing the wing and the fuselage when securing the wing. When the wing is seated, install the wing 1. Locate the included wing mounting screw. mounting screw. -
Page 10: Attaching The Tail
3. Screw the horizontal stab onto the fuselage using two of the self-tapping screws. Attaching the Tail 1. Locate the following: horizontal stabilizer, rudder, two plastic fin mount plates, 7x larger self-tapping screws, the tailcone and the tape for securing the tailcone. 4. - Page 11 6. Secure the plastic fin mount plates with 5 self-tapping screws. 8. Power on transmitter and airplane and adjust clevis so rudder is centered. 7. Reattach rudder pushrod on second outermost servo arm hole, and outermost rudder 9. Once rudder is centered, slide silicone keeper onto clevis to prevent clevis from opening in flight. control horn hole.
- Page 12 10. Slide tailcone on to the rear of the fuselage. Press firmly in place to make sure tailcone is fully seated. Secure in place with the included 4 pieces of tape at the locations shown in the following photos.
-
Page 13: Installing The Landing Gear
The Habu was intentionally designed to provide the choice to fly with or without landing gear. If you prefer 2. Select the nosewheel plate with the servo and nosewheel steering arm installed. Plug the servo into to fly at the highest speed or in the most precise manner, we recommend flying without the LG installed. the servo extension inside the nose cavity, and attach plate to fuselage with the 8 included You will find it is very sleek and fast, as the drag is decreased. -
Page 14: Configuring Without Landing Gear
Configuring without Landing Gear Control Direction Test 1. Place landing gear plate without servo and nosewheel onto the fuselage. 1. Move the elevator stick on the transmitter to check elevator pitch control. When the stick is pushed forward, the elevator should move down. 2. -
Page 15: Flying
Flying should move down. Always choose a wide-open space for flying your ParkZone Habu. It is ideal for you to fly at an AMA sanc- Note: If using a Spektrum transmitter, the ailerons will need to be reversed. tioned flying club. If you are not flying at an AMA approved site, always avoid flying near houses, trees, wires and buildings. -
Page 16: Appendix
Habu Flying Tips First set your timer to 3 minutes and 30 seconds. The Habu will fly for 4 minutes at full throttle. By setting your timer to 3:30 it will give ample time for a go-around if necessary. With throttle management the flight time can be extended significantly. -
Page 17: Warranty Information
Replacement Parts Warranty Information Make sure that you keep your Habu EDF flying. Replacement parts are available at your local hobby shop Age Recommendation: 14 years or over . This is not a toy . This product is not intended for use by or from Horizon Hobby (www.horizonhobby.com). - Page 18 United States Repair Request is available at www.horizonhobby.com on the “Support” tab. If you do not have internet access, please include a letter with your complete name, street address, email address and phone number where you can be reached Electronics and engines requiring inspection or repair should be shipped to the following address: during business days, your RMA number, a list of the included items, method of payment for any non-warranty expenses Horizon Service Center and a brief summary of the problem.
-
Page 19: Compliance Information For The European Union
Declaration of Conformity (in accordance with ISO/IEC 17050-1) No. HH2009101902 Product(s): PKZ Habu BNF and PNP Item Number(s): PKZ7080, PKZ7075 Equipment class: The object of declaration described above is in conformity with the requirements of the specifications listed below, following the provisions of the European R&TTE directive 1999/5/EC:...
Need help?
Do you have a question about the Habu BNF and is the answer not in the manual?
Questions and answers