Table of Contents
Advertisement
Quick Links
Dual mSATA SSD to 2.5in SATA SSD
Converter with RAID
25SAT22MSAT
DE: Bedienungsanleitung - de.startech.com
FR: Guide de l'utilisateur - fr.startech.com
ES: Guía del usuario - es.startech.com
IT: Guida per l'uso - it.startech.com
NL: Gebruiksaanwijzing - nl.startech.com
PT: Guia do usuário - pt.startech.com
For the most up-to-date information, please visit: www.startech.com
Manual Revision: 10/28/2014
*actual product may vary from photos
Advertisement
Table of Contents

Summary of Contents for StarTech.com 25SAT22MSAT
- Page 1 DE: Bedienungsanleitung - de.startech.com FR: Guide de l'utilisateur - fr.startech.com ES: Guía del usuario - es.startech.com IT: Guida per l'uso - it.startech.com NL: Gebruiksaanwijzing - nl.startech.com PT: Guia do usuário - pt.startech.com For the most up-to-date information, please visit: www.startech.com Manual Revision: 10/28/2014...
-
Page 2: Fcc Compliance Statement
StarTech.com. Where they occur these references are for illustrative purposes only and do not represent an endorsement of a product or service by StarTech.com, or an endorsement of the product(s) to which this manual applies by the third-party company in question. Regardless of any direct acknowledgement elsewhere in the body of this document, StarTech.com hereby... -
Page 3: Table Of Contents
Table of Contents Product Diagram ..................1 Front View ..............................1 Back View ..............................2 Introduction ....................2 Packaging Contents ..........................2 System Requirements ..........................2 mSATA SSD Installation .................3 Configure RAID ..................5 RAID Lock/Unlock Jumper Pins ......................5 RAID Mode Setting Jumper Pins ......................5 Set RAID Configuration ........................... -
Page 4: Product Diagram
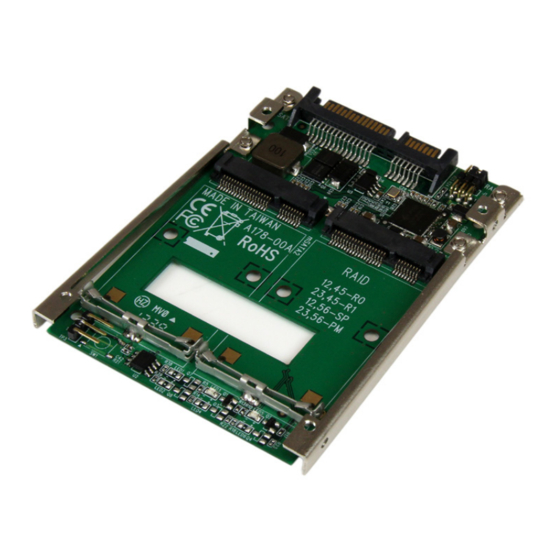
Product Diagram Front View 1. RAID lock/unlock jumper pins 2. Drive Activity/Fail LEDs 3. Drive #1 mSATA connector 4. Drive #2 mSATA connector 5. Drive #1 mounting bracket 6. Drive #2 mounting bracket 7. Top mounting holes Instruction Manual... -
Page 5: Back View
Back View 1. DATA & Power Combo (7+15 pin) 2. RAID setting jumper pins 3. Side mounting holes Introduction Packaging Contents • 1 x Dual mSATA to 2.5in SATA Adapter • 1 x Mounting screw kit • 1 x Installation Manual System Requirements •... -
Page 6: Msata Ssd Installation
(such as the computer case) for several seconds. 1. Slide the mSATA connector on one of your SSDs into the Drive #1 mSATA receprical connector on the 25SAT22MSAT. 2. Press the drive down toward the Drive #1 mounting bracket, until the drive clicks into place. - Page 7 3. Slide the mSATA connector on your other SSD into the Drive #2 mSATA receprical connector on the 25SAT22MSAT. 4. Press the drive down toward the Drive #2 mounting bracket, until the drive clicks into place. 5. The SSDs have now been installed.
-
Page 8: Configure Raid
Configure RAID WARNING! Setting or changing your RAID modes will erase the data or metadata on your existing SSD drives. RAID Lock/Unlock Jumper Pins The RAID lock/unlock jumper pins, located above the drive mounting brackets enable you to lock your RAID configuration so it cannot be changed. Or unlock your configuration so it can be changed. -
Page 9: Set Raid Configuration
RAID Mode Setting Jumper Pins The RAID setting jumper pins, located next to the SATA connector enable you to set your desired RAID configuration between RAID 0, RAID 1, JBOD, and RAID initial Mode. RAID Setting Jumper Pins SATA Connector 4 5 6 1 2 3 Use the included jumpers and the table below, to short the pins and set your desired... -
Page 10: Hard Drive Initialization
2. Using the RAID Mode setting jumper pins to your desired Mode. 3. Connect the SSD RAID card to your SATA host device. Note: Refer to the manual for your SATA host device for installation instructions. The top or side mounting holes and included screw kit may, or may not be required to assist in your installation. -
Page 11: Led Activity And Drive Failure Indicators
4. Follow the on screen prompts to initialize the drive in the format of your choice. LED Activity and Drive Failure Indicators The 25SAT225MSAT includes an LED panel to visually monitor activity and failure of each drive. Please review the table below for a list of each specific indication. Activity for Activity for Drive #1... -
Page 12: Technical Support
Limitation of Liability In no event shall the liability of StarTech.com Ltd. and StarTech.com USA LLP (or their officers, directors, employees or agents) for any damages (whether direct or indirect, special, punitive, incidental, consequential, or otherwise), loss of profits, loss of business, or any pecuniary loss, arising out of or related to the use of the product exceed the actual price paid for the product. - Page 13 StarTech.com is an ISO 9001 Registered manufacturer of connectivity and technology parts. StarTech.com was founded in 1985 and has operations in the United States, Canada, the United Kingdom and Taiwan servicing a worldwide market.


Need help?
Do you have a question about the 25SAT22MSAT and is the answer not in the manual?
Questions and answers