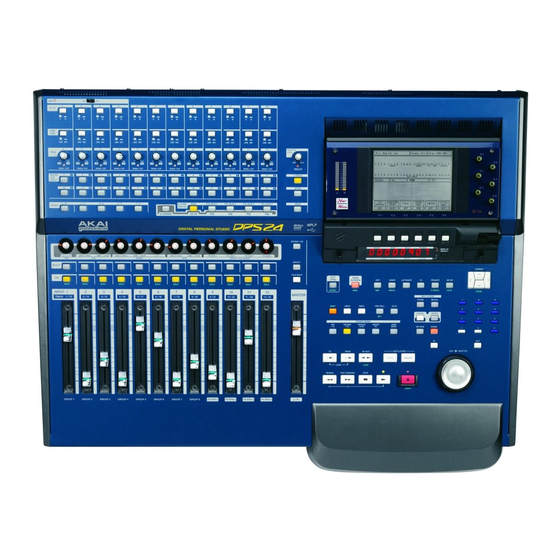
Akai Professional DPS24 Operator's Manual
Digital personal studio
Hide thumbs
Also See for Professional DPS24:
- Reference manual (252 pages) ,
- Operator's manual (123 pages) ,
- Service manual (29 pages)
Table of Contents
Advertisement
Quick Links
Advertisement
Table of Contents

Related Manuals for Akai Professional DPS24


Summary of Contents for Akai Professional DPS24
- Page 1 DIGITAL PERSONAL STUDIO Version 1.20 Addendum...
-
Page 2: Table Of Contents
Version 1.20 Addendum V1.20 FEATURES ............................ 1 MULTI-BAND COMPRESSOR/EXPANDER .................... 2 LOADING/SAVING MBCX PRESETS .................... 6 MASTERING ON THE DPS24 ....................... 7 DOWN SAMPLING PROJECTS FOR CD MASTERING ............... 9 AUTOMATED SCENE RECALL ......................10 USING AUTOMATED SCENE RECALL ..................12 NOTES REGARDING AUTOMATED SCENE RECALL ............... -
Page 3: V1.20 Features
Version 1.20 Addendum This documentation describes new features introduced in V1.20 of the DPS24’s Operating System. These new features are: • A multi-band compressor (MBCX) is introduced which can be used for professional mastering. • Sample Rate Conversion to 44.1kHz/16 bit with Dither function supported. •... -
Page 4: Multi-Band Compressor/Expander
Version 1.20 Addendum MULTI-BAND COMPRESSOR/EXPANDER Included in V1.20 is a multi-band compressor/expander (MBCX) that can be used to improve stereo mixes. The algorithm used is identical to that released in our QuadComp VST plug-in. Whilst it is possible to use an ordinary compressor for tightening up and adding punch to a stereo mix, it is very common that low frequencies can cause ‘pumping’... - Page 5 Version 1.20 Addendum Pressing the COMP button on F2 will show this screen: Each band (LF, LM, HM, HF) is selected using Q1. As you select each band, it is highlighted in the window to the left: In this way, it is clear to see which band of the compressor you are editing.
- Page 6 Version 1.20 Addendum The compressor and expander have almost identical controls. These are: BAND Selects the frequency band. THRESHOLD Sets the level at which the processors have an effect. The results are different for the compressor and the expander. For the compressor, the threshold sets the level at which compression takes place.
- Page 7 Version 1.20 Addendum Another way to look at the relationship between the two is thus: NOTE: The compressor’s threshold cannot be set below the expander’s. Likewise, the expander’s threshold cannot be set above the compressor’s. RATIO Sets the ratio for the compressor or the expander. NOTE: For the expander, a ratio of -INF means that the expander is effectively disabled.
-
Page 8: Loading/Saving Mbcx Presets
Version 1.20 Addendum LOADING/SAVING MBCX PRESETS Several preset MBCX configurations are provided that cover a wide range of applications. These can be selected by pressing PRESETS (F5) in the MBCX page. This will take you to a page where you can select the presets. -
Page 9: Mastering On The Dps24
Version 1.20 Addendum MASTERING ON THE DPS24 Although it is possible to use the MBCX when mixing down your 24-track project, you lose the possibility of using the internal effects. You could, of course, use external effects and the MBCX but if this is not an option, the best way to master your recordings using the MBCX is to first perform a stereo mixdown as normal and as described in the V1.00 operator’s manual (i.e. - Page 10 Version 1.20 Addendum 7 Now press SELECT - this will take you to the this page: Here you can either select a project you want to overwrite (for example, a stereo mix you made previously which you are not happy with) or you can press NEW to create a new mixdown project. Either way, you will automatically be taken to the MAIN screen.
-
Page 11: Down Sampling Projects For Cd Mastering
Version 1.20 Addendum DOWN SAMPLING PROJECTS FOR CD MASTERING If you have made projects at sample rates other than 44.1kHz and/or you have projects that contain recordings made at bit-depths other than 16-bit that you want to master onto CD, you will need to convert them to 44.1kHz/16-bit. -
Page 12: Automated Scene Recall
Version 1.20 Addendum AUTOMATED SCENE RECALL In V1.20 of the DPS24 OS, it is now possible to automate scene recalls - that is, as the dynamic automa- tion is running, scenes can be recalled at any time as part of the automation. This can be used to change EQ settings of one or more channels or to change effects, etc.. - Page 13 Version 1.20 Addendum To insert a scene recall into the dynamics automation, ensuring that the automation is switched ON, as the track is playing, press SCENE RECALL followed by ENTER (or RECALL - F6) at the appropriate moment. Please note that it is the point that the press ENTER/RECALL that is stored NOT the point at which you press SCENE RECALL.
-
Page 14: Using Automated Scene Recall
Version 1.20 Addendum USING AUTOMATED SCENE RECALL Here are just a few things you can use automated scene recall for: • Static EQ changes - change the settings of a channel’s EQ using scene recall at specific points in your project. -
Page 15: Notes Regarding Automated Scene Recall
Version 1.20 Addendum NOTES REGARDING AUTOMATED SCENE RECALL • Because scene recalls take a certain time to be effective, be sure to insert a scene recall a fraction in advance of where you want it to occur. Ideally, scene recalls should be inserted during a moment of silence on the channel(s) selected to be affected. -
Page 16: In Practice
Version 1.20 Addendum IN PRACTICE..The chances are that in practice, you will use the dynamic automation for level control and the rest of the automation will be switching ‘static’ controls such as pan, FX send, EQ, etc. via scene recalls. If this is the case, in the AUTOMATION page, set RECORD EVENTS to FADER and in the SCENE STORE/RECALL prompt, select NO FADER. -
Page 17: Automation Event Editor
Version 1.20 Addendum The VALUE column shows the scene number. In the case of channels and tracks, currently only channel on/off status is shown as: XYZnn on/off where ‘XYZ’ indicates a channel or track and ‘nn’ is the channel/track number. The VALUE column will show ON or OFF accordingly. -
Page 18: Disk-At-Once Cd Writing
Version 1.20 Addendum DISK-AT-ONCE CD WRITING Version 1.20 introduces the ability to write a complete CD in one pass. Previously, it was necessary to write individual tracks one-by-one. With ‘disk-at-once’, you can master an entire CD in one pass. The new function is found in the CD-R page: The new function BURN METHOD allows you to select TRACK-AT-ONCE or DISK-AT-ONCE. - Page 19 Version 1.20 Addendum You could just make your CD from this. However, you will probably want to put track markers on your CD. This is done using the autolocator. At the start of each track, mark an autolocate point and give each locator memory names such as shown below: Those locate points that are prefixed with # will register as track marker points on the CD.
-
Page 20: Midi Controllers / Scenes
Version 1.20 Addendum Once you have set up your track markers, you can proceed to the CD-R page. Set the parameters as follows: NOTE: Write speed should be set SLOW or FAST as appropriate for your particular CD writer. Assuming you have a blank CD-R inserted in the drive, press WRITE. You will be asked if you want to proceed to which you should respond as appropriately. -
Page 21: Reset Mixer
Version 1.20 Addendum RESET MIXER It is now possible to reset the entire mixer. This is done within the SCENE RECALL prompt: Pressing RESET MIXER will reset the entire mixer to ‘flat’ according to the option selected in RECALL CONTROLS as follows: Will reset all controls (faders, pans, sends, EQ, channel dynamics channel on/off, FX/MBCX settings, etc.) STATIC ONLY...
Need help?
Do you have a question about the Professional DPS24 and is the answer not in the manual?
Questions and answers