Table of Contents
Advertisement
Advertisement
Table of Contents

Related Manuals for Boly Media SG550M-8mHD


Summary of Contents for Boly Media SG550M-8mHD
- Page 1 Infrared Mobile Digital Scouting Camera User’s Manual SG550M-8mHD...
-
Page 2: Table Of Contents
Content 1 Instruction ...................1 1.1 General Description ..............1 1.2 Camera Body Interfaces ............2 1.3 Remote Control..............2 1.3.1 Navigating ................3 1.3.2Characters................4 1.4 Shooting Information Display ..........4 1.5 MMS/GPRS function............5 1.6 Supported Format ..............6 2 Cautions ..................7 3 Quick Start Guide ...............8 3.1 Power Supply................8 3.2 Insert the SD card and the SIM card .........9 3.3 Do the Camera Settings............10... -
Page 3: Instruction
SG550M-8mHD 1 Instruction 1 Instruction 1.1 General Description This camera, a digital scouting camera with MMS function, is a digital infrared surveillance camera, triggered by any movement of humans or animals monitored by a high sensitive Passive Infrared (PIR) motion... -
Page 4: Camera Body Interfaces
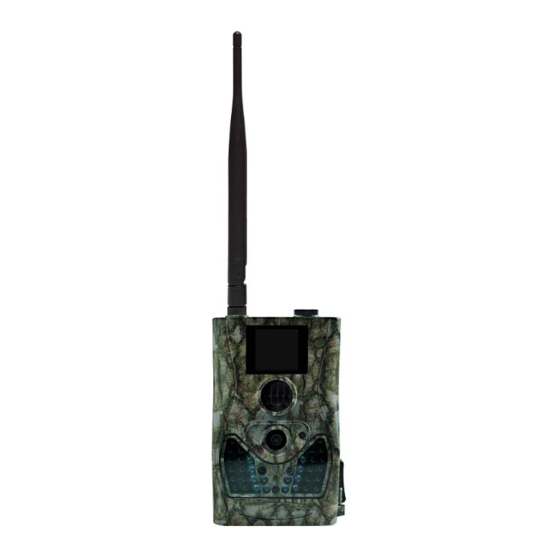
SG550M-8mHD 1 Instruction 1.2 Camera Body Interfaces The camera has the following I/O interfaces: USB connector, SD card slot and external DC power connector. Take a few moments to familiarize yourself with the camera controls and displays. It is helpful to bookmark this section and refer to it when reading through the rest of the manual. -
Page 5: Navigating
SG550M-8mHD 1 Instruction camera and is primarily used for customer settings and password input. This is an infrared type wireless remote control. The maximum remote distance is 30 feet. There are fifteen buttons on the remote control. Menu Menu Cancel... -
Page 6: 2Characters
SG550M-8mHD 1 Instruction 1.3.2 Characters When entering digits, letters or punctuations into an input column, there are some useful characters that can be used by pressing the button continuously: : 1 . / : @ _ : 0 + - Press the punctuation “*”... -
Page 7: Mms/Gprs Function
SG550M-8mHD 1 Instruction Figure 3 Shooting information display 1.5 MMS/GPRS function This camera can send pictures instantly to your mobile device via GSM/GPRS network. You’ll be alerted just when a picture or video has been taken. The camera sends MMS message through GPRS network, so before using this function, you need to open GPRS service from your service provider. -
Page 8: Supported Format
SG550M-8mHD 1 Instruction 1.6 Supported Format Item Format Photo Video File format FAT32 Here are some important notices. The file system format is not a concern of the camera unless you have problems with reading the SD card with other devices. If this happens, please format the SD card in the camera or in a computer and then reinsert the card into your camera. -
Page 9: Cautions
SG550M-8mHD 2 Cautions 2 Cautions ★ The working voltage of the camera is 6V. The camera is supplied by 8 AA batteries. Please install batteries according to shown polarity. ★ Must insert the SD card before power on camera. If no SD card is inserted, the camera will shut down automatically after a continuous indication sound. -
Page 10: Quick Start Guide
SG550M-8mHD 3 Quick Start Guide 3 Quick Start Guide 3.1 Power Supply To supply power for the camera, four or eight AA batteries are needed. Open the bottom cover. Confirm that the power switch is in the OFF position and pull out the battery pack by pulling the silver handle. -
Page 11: Insert The Sd Card And The Sim Card
SG550M-8mHD 3 Quick Start Guide Caution: Risk of explosion if battery is replaced by an incorrect type. Also dispose of used batteries according to the instructions. Correct Disposal of this product. This marking indicates that this product should not be disposed with other household wastes throughout the EU. -
Page 12: Do The Camera Settings
SG550M-8mHD 3 Quick Start Guide upper left. 3.3 Do the Camera Settings Down load the camera setting up software The specified (BMC_config.zip) from our website. website is written in the last page of the manual. 3.4 Enter into the Test Mode Slide the power switch to TEST position and enter into TEST mode. -
Page 13: 1Custom Settings
SG550M-8mHD 3 Quick Start Guide 3.4.1 Custom Settings Press MENU on the remote control to enter into the menu setting. The camera can be adjusted to manually customize the camera settings which display on the LCD screen. The detailed operations will be described in the “Advanced Operations”... -
Page 14: Power On And Enter Into The On Mode
SG550M-8mHD 3 Quick Start Guide worked in ON mode. 3.5 Power on and Enter into the ON Mode Before switching on, please pay attention to the following: 1. Avoid temperature and motion disturbances in front of the camera such as a big leaf, curtain,... -
Page 15: Power Off
SG550M-8mHD 3 Quick Start Guide settings or previous custom settings. The camera has the sound recording function, so the sound will be embedded in the video clip while capturing a video. 3.6 Power Off Slide power switch to OFF position to turn off the camera. -
Page 16: Advanced Operations
SG550M-8mHD 4 Advanced Operations 4 Advanced Operations From the basic operations of the camera previewed in the previous chapter, we know that the camera has three basic operation modes: OFF mode: Power switch is in OFF position. ON mode: Power switch is in ON position. - Page 17 SG550M-8mHD 4 Advanced Operations Shortcut key: Press UP to set the camera mode as Video or press DOWN to set camera mode as Photo in TEST mode. You can change the date and time when necessary, e.g., after every battery change. The date format is...
- Page 18 SG550M-8mHD 4 Advanced Operations timer function is disabled. Changing this parameter to a non-zero value turns on the Time Lapse mode, and camera will take photos at given time interval. Please note that if the PIR Trigger is set to , then the Time Lapse can’t...
- Page 19 SG550M-8mHD 4 Advanced Operations to set a higher sensitivity for high temperature environment. Please note that if the Time Lapse is set to , then the PIR Trigger can’t be set to This parameter indicates how long the PIR (Passive Infrared motion sensor) will be disabled after each triggering in ON mode.
- Page 20 SG550M-8mHD 4 Advanced Operations You should set the right MMS setting parameters. The settings of MMS: URL, APN, IP and Port. Please contact the network service provider if you are not familiar with the settings. The camera sends image through GPRS network with SMTP protocol to Email address.
- Page 21 SG550M-8mHD 4 Advanced Operations Daily Report works only in ON mode, which means that the camera will report the summarized information at the preset time (if the preset time is, eg.20:00PM) on how many pictures it had taken per day.
- Page 22 SG550M-8mHD 4 Advanced Operations the MAX number is 10, the camera will send 10 MMS within 24 hours .And then it continues to capture photos and save them on the SD card. After 24 hours, the camera will send MMS again when it captures photos.
-
Page 23: Default Setting
SG550M-8mHD 4 Advanced Operations Format Format the SD card. All images and videos in the SD card will be deleted. Default Restore all customer settings to default values. 4.2 Default Setting Defaults settings are listed below: Setting Default Options Submenu... -
Page 24: Send Mms Manually
SG550M-8mHD 4 Advanced Operations 0–55 Sec 5 Sec Interval 1-60 min Work 00:00 – Hour 23:59 URL, MMS Set Enter APN, IP, Port Server, GPRS Set Enter Port, Daily Report, Send Manual Mode Instant,Off Phone[M Email[MMS], Send To Email[GPRS] MCU,... -
Page 25: Laser Pointer
SG550M-8mHD 4 Advanced Operations can only be sent and video cannot be sent. If the SIM card is not inserted, the image cannot be sent as well. 4.4 Laser Pointer The laser light pointer beam can be turned on as an additional function for pointing at an object or a certain region of interested (ROI). -
Page 26: Appendix I: Pir Detection Zone
SG550M-8mHD Ⅱ Appendix : Technical Specifications Appendix I: PIR Detection Zone Figure4 shows Bolymedia’s 4 kinds of detection range at different detection angles. Figure 4 Different detection range The PIR detection angle (α) is just smaller than the field of view angle (β). The advantage of this design is to avoid empty pictures and get most, if not all, motions. - Page 27 SG550M-8mHD Ⅱ Appendix : Technical Specifications SG550M-8mHD has a new design of PIR and this new PIR is patented. The new patented PIR’s detection range is extra long range. The figure 6 shows the compared detection zone between normal PIR and the new patented PIR.
-
Page 28: Appendix : Technical Specifications
SG550M-8mHD Ⅱ Appendix : Technical Specifications AppendixⅡ: Technical Specifications 5MP Color CMOS, Image Sensor 8MP Interpolation F/NO=2.2 Lens FOV(Field of View)=60° PIR detection 85ft range Display Screen 1.5” LCD Memory Card From 8 MB to 32 GB 8MP = 3264 ×2448 Picture Resolution 5MP = 2560×1920... - Page 29 SG550M-8mHD Ⅱ Appendix : Technical Specifications Mounting Rope/Belt/Python lock Dimensions 140 x87 x55 mm Operation 5% - 90% Humidity Security FCC, CE, RoHS authentication *without battery Page 27...
-
Page 30: Appendix : Parts List
SG550M-8mHD Appendix Ⅲ: Parts List AppendixⅢ: Parts List Part Name Quantity Digital Camera Wireless Remote Control USB Cable Belt User Manual Antenna Warranty Card Website information: Download the APP software from here: http://www.bolyguard.com/Download.htm (Version 1.3) Page 28...
Need help?
Do you have a question about the SG550M-8mHD and is the answer not in the manual?
Questions and answers