Table of Contents
Advertisement
Advertisement
Table of Contents

Related Manuals for Carrier 53P100C


Summary of Contents for Carrier 53P100C
- Page 3 Thank you for selecting Carrier! You can be justifiably proud of your purchase because the same pride in craftsmanship and engineering know-how that goes into Carrier equip- ment for cooling the Astrodome sports complex in Texas, the United States Capitol’s Halls of Congress and countless other installations world- wide have been built into your unit.
-
Page 4: Table Of Contents
CONTENTS PRECAUTIONS OWNER’S MANUAL BEFORE OPERATION INSTALLATION TIPS UNIT OPERATION INDOOR UNIT INSTALLATION GENERAL OPERATION INSTALLING THE WALL HANG BRACKET ○ ○ ○ ○ ○ ○ ○ ○ ○ ○ ○ ○ ○ ○ ○ ○ ○ ○ ○ ○ ○... -
Page 5: Precautions
• Do not install by connecting them to other indoor or outdoor units without consulting a Carrier or other competent air conditioning engineers. Mismatching of the units and incompatibility between control devices in the two units could lead to damage of both unit and voiding of the Carrier warranty. - Page 6 PRECAUTIONS WARNING Do not use flammable sprays near the unit. Do not put hands or objects into The unit can be damaged by gasoline, the discharge grille of outdoor unit. benzene, thinner, This unit has a fan running at high speed. insecticide and other chemical agents.
- Page 7 PRECAUTIONS WARNING Do not obstruct the front of the discharge Use the correct voltage. grille of both units. Using voltage other than specified will This will block air flow, reduce the cooling damage the unit. effect and may result in unit malfunction. Keep heat sources away from the unit, Do not use the power cord as a means high temperature can cause damage.
-
Page 8: Before Operation
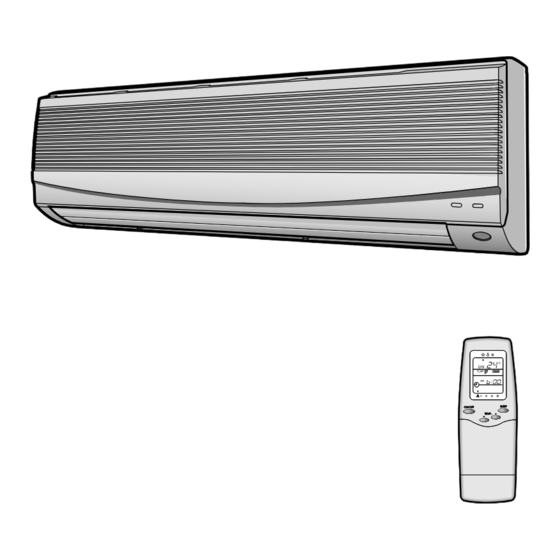
BEFORE OPERATION Indoor Unit Display • UNIT ON(Green): When the unit is switched on by the remote control, a green light will be displayed. • TIMER(Orange) : When the unit is in reservation mode, an orange light will be displayed. UNIT ON TIMER Emergency Operation When the remote control is lost, damaged or the battery is discharged, the EMER. - Page 9 BEFORE OPERATION BEFORE OPERATIO Replacing Batteries Remove the cover of the battery Remove the used batteries and insert new Press the RST button with a sharp object compartment at the back of the remote batteries. The remote control uses two to reset the remote control before closing control by sliding it out in the direction of the batteries.(1.5V(L)R03x2)
- Page 10 BEFORE OPERATION Matching Address between Indoor Unit and Remote Control Remote control When two units are used in the same room, you can match the address of Remove the lid of the battery case. Assign the address switch of one the remote control to that of the unit.
- Page 11 BEFORE OPERATION Remote Control Display For Cooling Only Model Indicates the selected Indicates flap modes operating mode. Automatic position AUTO COOL User selected position Lights up when the signal from the remote control is transmitted. SWING Swing up and down A receiving beep is heard from the unit.
-
Page 12: Unit Operation
UNIT OPERATION 1 2 3 4 5 6 7 8 9 0 1 2 3 4 5 6 7 8 9 0 1 2 3 4 5 6 7 8 9 0 1 2 1 2 3 4 5 6 7 8 9 0 1 2 3 4 5 6 7 8 9 0 1 2 3 4 5 6 7 8 9 0 1 2 3 4 5 6 7 8 9 0 1 2 3 4 5 6 7 8 9 0 1 2 3 4 5 6 7 8 9 0 1 2 1 2 3 4 5 6 7 8 9 0 1 2 3 4 5 6 7 8 9 0 1 2 3 4 5 6 7 8 9 0 GENERAL OPERATION 1 2 3 4 5 6 7 8 9 0 1 2 3 4 5 6 7 8 9 0 1 2 3 4 5 6 7 8 9 0 1 2 1 2 3 4 5 6 7 8 9 0 1 2 3 4 5 6 7 8 9 0 1 2 3 4 5 6 7 8 9 0... -
Page 13: Automatic Operation(For Heat Pump Model)
UNIT OPERATION 1 2 3 4 5 6 7 8 9 0 1 2 3 4 5 6 7 8 9 0 1 2 3 4 5 6 7 8 9 0 1 2 1 2 3 4 5 6 7 8 9 0 1 2 3 4 5 6 7 8 9 0 1 2 3 4 5 6 7 8 9 1 2 3 4 5 6 7 8 9 0 1 2 3 4 5 6 7 8 9 0 1 2 3 4 5 6 7 8 9 0 1 2 1 2 3 4 5 6 7 8 9 0 1 2 3 4 5 6 7 8 9 0 1 2 3 4 5 6 7 8 9 1 2 3 4 5 6 7 8 9 0 1 2 3 4 5 6 7 8 9 0 1 2 3 4 5 6 7 8 9 0 1 2 1 2 3 4 5 6 7 8 9 0 1 2 3 4 5 6 7 8 9 0 1 2 3 4 5 6 7 8 9 AUTOMATIC OPERATION... -
Page 14: Timer Operation
UNIT OPERATION 1 2 3 4 5 6 7 8 9 0 1 2 3 4 5 6 7 8 9 0 1 2 3 4 5 6 7 8 9 0 1 2 1 2 3 4 5 6 7 8 9 0 1 2 3 4 5 6 7 8 9 0 1 2 3 4 5 6 7 8 9 1 2 3 4 5 6 7 8 9 0 1 2 3 4 5 6 7 8 9 0 1 2 3 4 5 6 7 8 9 0 1 2 1 2 3 4 5 6 7 8 9 0 1 2 3 4 5 6 7 8 9 0 1 2 3 4 5 6 7 8 9 1 2 3 4 5 6 7 8 9 0 1 2 3 4 5 6 7 8 9 0 1 2 3 4 5 6 7 8 9 0 1 2 1 2 3 4 5 6 7 8 9 0 1 2 3 4 5 6 7 8 9 0 1 2 3 4 5 6 7 8 9 TIMER OPERATION... -
Page 15: Combination Of On, Off And Everyday Timer
UNIT OPERATION Combination of ON, OFF and EVERYDAY Timer PROCEDURE ............................CANCELLATION ..............For example, when you want the operation to start at 5:30 Press the ON TIMER button to cancel the ON Timer P.M. and stop at 10:30 P.M.. or press OFF TIMER button to cancel the OFF Timer. -
Page 16: Sleep Timer
UNIT OPERATION Sleep Timer This function enables the user to automatically switch off the unit. PROCEDURE ..........................If you want to stop the operation after 3 hours from now, Press the SLEEP button 3 times, 3:hr will be displayed and the signal SLEEP will be flashing. -
Page 17: Discharge Air Louver Control
UNIT OPERATION 1 2 3 4 5 6 7 8 9 0 1 2 3 4 5 6 7 8 9 0 1 2 3 4 5 6 7 8 9 0 1 2 1 2 3 4 5 6 7 8 9 0 1 2 3 4 5 6 7 8 9 0 1 2 3 4 5 6 7 8 9 0 1 2 3 4 5 6 7 8 9 0 1 2 3 4 5 6 7 8 9 0 1 2 3 4 5 6 7 8 9 0 1 2 1 2 3 4 5 6 7 8 9 0 1 2 3 4 5 6 7 8 9 0 1 2 3 4 5 6 7 8 9 0 1 2 3 4 5 6 7 8 9 0 1 2 3 4 5 6 7 8 9 0 1 2 3 4 5 6 7 8 9 0 1 2 1 2 3 4 5 6 7 8 9 0 1 2 3 4 5 6 7 8 9 0 1 2 3 4 5 6 7 8 9 0 DISCHARGE AIR LOUVER CONTROL... -
Page 18: Air Cleaning Operation
UNIT OPERATION 1 2 3 4 5 6 7 8 9 0 1 2 3 4 5 6 7 8 9 0 1 2 3 4 5 6 7 8 9 0 1 2 1 2 3 4 5 6 7 8 9 0 1 2 3 4 5 6 7 8 9 0 1 2 3 4 5 6 7 8 9 0 1 2 3 4 5 6 7 8 9 0 1 2 3 4 5 6 7 8 9 0 1 2 3 4 5 6 7 8 9 0 1 2 1 2 3 4 5 6 7 8 9 0 1 2 3 4 5 6 7 8 9 0 1 2 3 4 5 6 7 8 9 0 1 2 3 4 5 6 7 8 9 0 1 2 3 4 5 6 7 8 9 0 1 2 3 4 5 6 7 8 9 0 1 2 1 2 3 4 5 6 7 8 9 0 1 2 3 4 5 6 7 8 9 0 1 2 3 4 5 6 7 8 9 0 AIR CLEANING OPERATION... -
Page 19: Care And Maintenance
CARE AND MAINTENANCE 1 2 3 4 5 6 7 8 9 0 1 2 3 4 5 6 7 8 9 0 1 2 3 4 5 6 7 8 9 0 1 2 1 2 3 4 5 6 7 8 9 0 1 2 3 4 5 6 7 8 9 0 1 2 3 4 5 6 7 8 9 0 1 2 3 4 5 6 7 8 9 0 1 2 3 4 5 6 7 8 9 0 1 2 3 4 5 6 7 8 9 0 1 2 1 2 3 4 5 6 7 8 9 0 1 2 3 4 5 6 7 8 9 0 1 2 3 4 5 6 7 8 9 0 1 2 3 4 5 6 7 8 9 0 1 2 3 4 5 6 7 8 9 0 1 2 3 4 5 6 7 8 9 0 1 2 1 2 3 4 5 6 7 8 9 0 1 2 3 4 5 6 7 8 9 0 1 2 3 4 5 6 7 8 9 0 POINTS TO NOTE... -
Page 20: Cleaning The Filters And Front Panel
CARE AND MAINTENANCE 1 2 3 4 5 6 7 8 9 0 1 2 3 4 5 6 7 8 9 0 1 2 3 4 5 6 7 8 9 0 1 2 1 2 3 4 5 6 7 8 9 0 1 2 3 4 5 6 7 8 9 0 1 2 3 4 5 6 7 8 9 0 1 2 1 2 3 4 5 6 1 2 3 4 5 6 7 8 9 0 1 2 3 4 5 6 7 8 9 0 1 2 3 4 5 6 7 8 9 0 1 2 1 2 3 4 5 6 7 8 9 0 1 2 3 4 5 6 7 8 9 0 1 2 3 4 5 6 7 8 9 0 1 2 1 2 3 4 5 6 1 2 3 4 5 6 7 8 9 0 1 2 3 4 5 6 7 8 9 0 1 2 3 4 5 6 7 8 9 0 1 2 1 2 3 4 5 6 7 8 9 0 1 2 3 4 5 6 7 8 9 0 1 2 3 4 5 6 7 8 9 0 1 2 1 2 3 4 5 6 CLEANING THE FILTERS AND FRONT PANEL... -
Page 21: Cleaning The Main Unit
CARE AND MAINTENANCE 1 2 3 4 5 6 7 8 9 0 1 2 3 4 5 6 7 8 9 0 1 2 3 4 5 6 7 8 9 0 1 2 1 2 3 4 5 6 7 8 9 0 1 2 3 4 5 6 7 8 9 0 1 2 3 4 5 6 7 8 9 0 1 2 1 2 3 4 5 6 1 2 3 4 5 6 7 8 9 0 1 2 3 4 5 6 7 8 9 0 1 2 3 4 5 6 7 8 9 0 1 2 1 2 3 4 5 6 7 8 9 0 1 2 3 4 5 6 7 8 9 0 1 2 3 4 5 6 7 8 9 0 1 2 1 2 3 4 5 6 CLEANING THE MAIN UNIT 1 2 3 4 5 6 7 8 9 0 1 2 3 4 5 6 7 8 9 0 1 2 3 4 5 6 7 8 9 0 1 2 1 2 3 4 5 6 7 8 9 0 1 2 3 4 5 6 7 8 9 0 1 2 3 4 5 6 7 8 9 0 1 2 1 2 3 4 5 6... -
Page 22: Standard Installation Accessories
STANDARD INSTALLATION ACCESSORIES The following installation accessories are supplied with unit. Use them as required. Page 1 2004.3.30, 6:35 PM... -
Page 23: Choosing The Unit Location
CHOOSING THE UNIT LOCATION 1 2 3 4 5 6 7 8 9 0 1 2 3 4 5 6 7 8 9 0 1 2 3 4 5 6 7 8 9 0 1 2 1 2 3 4 5 6 7 8 9 0 1 2 3 4 5 6 7 8 9 0 1 2 3 4 5 6 7 8 9 0 1 2 1 2 3 4 5 6 7 8 9 0 1 2 3 4 5 6 7 8 9 0 1 2 3 4 5 6 7 8 9 0 1 2 1 2 3 4 5 6 7 8 9 0 1 2 3 4 5 6 7 8 9 0 1 2 3 4 5 6 7 8 9 0 1 2 1) Indoor Unit 1 2 3 4 5 6 7 8 9 0 1 2 3 4 5 6 7 8 9 0 1 2 3 4 5 6 7 8 9 0 1 2 1 2 3 4 5 6 7 8 9 0 1 2 3 4 5 6 7 8 9 0 1 2 3 4 5 6 7 8 9 0 1 2... -
Page 24: Installation Tips
INSTALLATION TIPS The following points should be avoided. Excessive distance between the indoor and the Slack connections on the electrical cables for cooling only model & heat pump model. outdoor unit. (Max 15m) Installing the outdoor unit on grassy or soft Kinking the connection pipes. -
Page 25: Indoor Unit Installation
INDOOR UNIT INSTALLATION • The piping can be connected to the four directions indicated by ³, ·, », ¿. When the piping is connected to the direction of , detach the knock-out either at the side or at the bottom of the unit. ( Fig. 3 ) »... -
Page 26: Making The Wall Penetration For The Interconnecting Piping
INDOOR UNIT INSTALLATION 1 2 3 4 5 6 7 8 9 0 1 2 3 4 5 6 7 8 9 0 1 2 3 4 5 6 7 8 9 0 1 2 1 2 3 4 5 6 7 8 9 0 1 2 3 4 5 6 7 8 9 0 1 2 3 4 5 6 7 8 9 0 1 2 1 2 3 4 5 6 7 8 9 0 1 2 3 4 5 6 7 8 9 0 1 2 3 4 5 6 7 8 9 0 1 1 2 3 4 5 6 7 8 9 0 1 2 3 4 5 6 7 8 9 0 1 2 3 4 5 6 7 8 9 0 1 2 1 2 3 4 5 6 7 8 9 0 1 2 3 4 5 6 7 8 9 0 1 2 3 4 5 6 7 8 9 0 1 2 1 2 3 4 5 6 7 8 9 0 1 2 3 4 5 6 7 8 9 0 1 2 3 4 5 6 7 8 9 0 1 1 2 3 4 5 6 7 8 9 0 1 2 3 4 5 6 7 8 9 0 1 2 3 4 5 6 7 8 9 0 1 2 1 2 3 4 5 6 7 8 9 0 1 2 3 4 5 6 7 8 9 0 1 2 3 4 5 6 7 8 9 0 1 2 1 2 3 4 5 6 7 8 9 0 1 2 3 4 5 6 7 8 9 0 1 2 3 4 5 6 7 8 9 0 1 2) Making the Wall Penetration for the Interconnecting Piping... -
Page 27: Indoor Unit Wiring
INDOOR UNIT INSTALLATION 1 2 3 4 5 6 7 8 9 0 1 2 3 4 5 6 7 8 9 0 1 2 3 4 5 6 7 8 9 0 1 2 1 2 3 4 5 6 7 8 9 0 1 2 3 4 5 6 7 8 9 0 1 2 3 4 5 6 7 8 9 0 1 2 1 2 3 4 5 6 7 8 9 1 2 3 4 5 6 7 8 9 0 1 2 3 4 5 6 7 8 9 0 1 2 3 4 5 6 7 8 9 0 1 2 1 2 3 4 5 6 7 8 9 0 1 2 3 4 5 6 7 8 9 0 1 2 3 4 5 6 7 8 9 0 1 2 1 2 3 4 5 6 7 8 9 1 2 3 4 5 6 7 8 9 0 1 2 3 4 5 6 7 8 9 0 1 2 3 4 5 6 7 8 9 0 1 2 1 2 3 4 5 6 7 8 9 0 1 2 3 4 5 6 7 8 9 0 1 2 3 4 5 6 7 8 9 0 1 2 1 2 3 4 5 6 7 8 9 3) Indoor Unit Wiring... -
Page 28: Forming The Drain Hose And Refrigerant Piping
INDOOR UNIT INSTALLATION 1 2 3 4 5 6 7 8 9 0 1 2 3 4 5 6 7 8 9 0 1 2 3 4 5 6 7 8 9 0 1 2 1 2 3 4 5 6 7 8 9 0 1 2 3 4 5 6 7 8 9 0 1 2 3 4 5 6 7 8 9 0 1 2 1 2 3 4 5 6 7 8 1 2 3 4 5 6 7 8 9 0 1 2 3 4 5 6 7 8 9 0 1 2 3 4 5 6 7 8 9 0 1 2 1 2 3 4 5 6 7 8 9 0 1 2 3 4 5 6 7 8 9 0 1 2 3 4 5 6 7 8 9 0 1 2 1 2 3 4 5 6 7 8 1 2 3 4 5 6 7 8 9 0 1 2 3 4 5 6 7 8 9 0 1 2 3 4 5 6 7 8 9 0 1 2 1 2 3 4 5 6 7 8 9 0 1 2 3 4 5 6 7 8 9 0 1 2 3 4 5 6 7 8 9 0 1 2 1 2 3 4 5 6 7 8 4) Forming the Drain Hose and Refrigerant Piping... - Page 29 INDOOR UNIT INSTALLATION CONNECTING TH [mm] Wall hang bracket Hook Hole Figure 11 • Next, check the drainage of the unit by pouring some water into the unit drain pan and ensure that the water drains out through the drain hose and that there is no leakage from the other parts.
-
Page 30: Connecting The Piping
CONNECTING THE PIPING Table 1 Pay careful attention to the following points when installing the refrigerant pipes. Flare nut Tightening torque(kgf-cm) • Hold the pipe with one wrench while tightening the connections with a torque 6.35mm (1/4”) 150 ~ 200 wrench or double-ended wrench. -
Page 31: Air Purge
Valve core CAUTION Refrigerant charging • In case of refrigerant charging due to refrigerant leak or service refer to the table 1.(page.35) • Please do not install over 10m between indoor and outdoor unit for 53P100C/H Page 10 2004.3.30, 6:35 PM... -
Page 32: Gas Leak Check
GAS LEAK CHECK After connecting the pipe, check the joints for gas leakage with gas leak detector or soapy water. FINISHING • Wrap the piping joints with the pipe insulation and fasten it with vinyl tape. ( Figure. 17, 18) •... -
Page 33: Outdoor Unit Wiring
OUTDOOR UNIT WIRING • Remove the service cover of the outdoor unit, and connect the end of the connection cord with screws to the terminal block. ( Refer to wiring diagram inside the top cover and caution label on the service cover) •... -
Page 34: Electrical Connection
ELECTRICAL CONNECTION For Cooling Only Model For Heat Pump Model CONNECTING THE POWER SUPPLY • Power is provided to the unit through the indoor unit power cord. • The rating of time delay fuse. • Plug into the wall outlet. CAPACITY (Btu/h) AMPERE RATING(A) 7000... -
Page 35: Test Running
TEST RUNNING • Perform the test operation after the units have been installed in position and the gas leak test has been completed. The normal time guard is ignored and the unit will start immediately. • To test the unit, press the EMER button continuously during 5 ~10 sec. ( Figure. 21) •... -
Page 36: Pump Down
PUMP DOWN Pump down means collecting all the refrigerant in the system back into the outdoor unit without losing any refrigerant gas. Pump down is used when the unit is moved or for servicing the refrigerant circuit. • Close three-way valve halfway. •... -
Page 37: Troubleshooting
TROUBLESHOOTING Trouble Check Points Action Check that the power cord is plugged Insert the power cord into the wall outlet. into the wall outlet. Unit does not Has the circuit breaker tripped or has the Reset the circuit breaker or replace the operate fuse blown? fuse with the specified replacement fuse. - Page 38 • Table 1. The Method of Refrigerant charging Refrigerant charging amount (g) Compressor Model model 7.5m or less 7.5 to 10m 10m to 15m less 53P100C Not Allowed SCF130111H 53P100C Not Allowed PH120T1-5C 53P150C SCF160113A 53P100H Not allowed SCF130111H 53P150H...
- Page 39 P/N: 42KP5P5402B...
Need help?
Do you have a question about the 53P100C and is the answer not in the manual?
Questions and answers