SVAT CLEARVU11 Instruction Manual
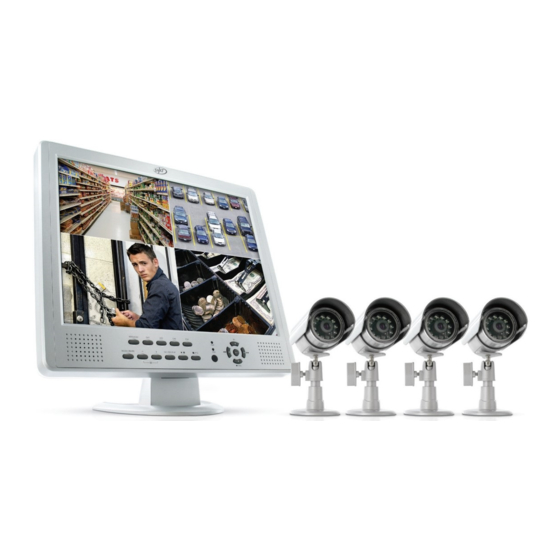
4ch 15" lcd-dvr all-in-one system h.264 dvr with 4 indoor/outdoor hi-res night vision security cameras
Hide thumbs
Also See for CLEARVU11:
- Instruction manual (74 pages) ,
- Specifications (4 pages) ,
- User manual (23 pages)
Table of Contents

Related Manuals for SVAT CLEARVU11


Summary of Contents for SVAT CLEARVU11
- Page 1 SVAT ELECTRONICS now you can see 4CH 15" LCD-DVR All-In-One System H.264 DVR with 4 Indoor/Outdoor Hi-Res Night Vision Security Cameras COMPLETE SYSTEM INSTRUCTION MANUAL Version 1.0 Model #: CLEARVU11 www.svat.com www.svat.com...
- Page 2 NEED HELP? DO NOT RETURN THIS PRODUCT TO THE STORE Please contact a SVAT customer support representative first regarding any additional information on product features, specifications or assistance with set-up. Please contact us via one of the methods below: Email: support@svat.com...
-
Page 3: Product Warranty Information
This warranty does not cover shipping costs, insurance, or any other incidental charges. You MUST call SVAT before sending any product back for repair. You will be sent a Return Authorization form with return instructions. When returning the product for warranty service, please pack it carefully in the original box with all supplied accessories, and enclose your original receipt or copy, and a brief explanation of the problem (include RA #). -
Page 4: Table Of Contents
TABLE OF CONTENTS SVAT ELECTRONICS now you can see Table of Contents INTRODUCTION ................................3 WHAT IS INCLUDED ................................. 3 BUTTON FUNCTIONS AND CONNECTIONS ........................4 15” LCD/DVR ............................5 REMOTE CONTROL ........................... 6 BASIC SETUP ................................6 TIPS BEFORE ASSEMBLING........................6 MOUNTING THE CAMERA ......................... - Page 5 TABLE OF CONTENTS SVAT ELECTRONICS now you can see HDD FORMAT/CLEAR ..............30 PASSWORD ......................31 SYSTEM SETUP ......................32 RS-232/422/485 SETUP ...................33 NETWORK SETUP .....................34 EMAIL SETUP ................35 ADVANCED NETWORK SETUP ............36 FACTORY DEFAULTS ....................37 SOFTWARE UPGRADE ..........................37 SYSTEM SHUTDOWN ..........................37 NETWORKING GUIDE ...............................38 CONNECTING YOUR DVR TO THE ROUTER....................38...
-
Page 6: Introduction
Your new Clearvu11 is designed to be easy to setup and easy to configure to all your surveillance needs. If at any time you have questions, we are always here to help. Call our 24/7 live customer support line to get intelligent and understandable answers to any questions you may have about your new product. -
Page 7: Button Functions And Connections
BUTTON FUNCTIONS AND CONNECTIONS SVAT ELECTRONICS now you can see 15" LCD/DVR 6 7 8 CLEARVU11... - Page 8 BUTTON FUNCTIONS AND CONNECTIONS SVAT ELECTRONICS now you can see 1. Monitor Speaker 2. MENU/ESC – Displays the main menus & returns you to the previous set of menus 3. Camera Selection Buttons (Ch1-Ch4) – Switches from full screen for selected camera 4.
-
Page 9: Remote Control
BUTTON FUNCTIONS AND CONNECTIONS SVAT ELECTRONICS now you can see REMOTE CONTROL 1. Alarm Reset – Cancels alarm activation/silences buzzer 2. REC – Force manual recording 3. Rewind (◄ ◄ ) – Rewinds in playback mode 4. Fast Forward (► ► ) – Fast forwards in playback mode 5. -
Page 10: Mounting The Camera
BASIC SETUP SVAT ELECTRONICS now you can see MOUNTING THE CAMERA 1. Screw the mounting bracket into the camera’s mounting hole, turning it clockwise. 2. Mount the camera in the desired location no more than 60 feet from the DVR unless you have purchased additional wiring. You may wall mount or desk mount these cameras. -
Page 11: Powering The System
BASIC SETUP SVAT ELECTRONICS now you can see POWERING THE SYSTEM 1. Insert the power supply wire 2. Plug the mouse into the PS2 3. Insert the power cord into the into the rear DC 12V Port on the port at the back of the LCD/DVR power supply. -
Page 12: General Information
GENERAL INFORMATION SVAT ELECTRONICS now you can see MAIN SCREEEN NOTE: The following instructions are described for use with the remote control. Front panel buttons may not match with the following directions. It is recommended that you use the included mouse or remote for full function. -
Page 13: Text Input
GENERAL INFORMATION SVAT ELECTRONICS now you can see TEXT INPUT (To be used with remote control) There are certain circumstances where the system requires the user to enter text, such as system login, camera title setup, and so on. Below are the instructions on how to enter text using the remote control: 1. -
Page 14: Using The Mouse
GENERAL INFORMATION SVAT ELECTRONICS now you can see USING THE MOUSE To make use of the mouse when operating the DVR please move the cursor to the bottom of the screen. You will see the icons of the mouse functions displayed. When you move the cursor over the icons, you will see the name of that icon. -
Page 15: Motion Detection Setup Using The Mouse
GENERAL INFORMATION SVAT ELECTRONICS now you can see COMMON ICONS VIDEO ADJUSTMENT ICONS USING THE MOUSE MOTION DETECTION SETUP USING THE MOUSE Move the cursor to Menu -›Setup -› Camera -› Motion setting -› Detection setting Move the cursor to the bottom of the screen, the icons of motion detection will be displayed. -
Page 16: Alpha-Numeric Key
GENERAL INFORMATION SVAT ELECTRONICS now you can see ALPHA-NUMERIC KEYBOARD MAIN MENU While in the split-window display, press MENU (MENU/ESC) to call up Menu display as shown. We recommend using the mouse. With the mouse the menu is found by dragging the cursor to the bottom of the screen. If you are using the remote, simply press the menu button. -
Page 17: Status Display
MAIN MENU SVAT ELECTRONICS now you can see In Login/Logout menu, follow the Text Input method to enter the Login name and Password • Press ▲▼ to highlight login name, Use the text input method to enter the login name. Press Enter •... -
Page 18: Video Adjustment
MAIN MENU SVAT ELECTRONICS now you can see VIDEO ADJUSTMENT In Menu display, press ▲▲ to change the highlighted option to Video Adjustment, and then press ENTER to call up Video Adjustment display as shown. There are 4 items which can be adjusted, including Brightness, Contrast, Hue, and Saturation. The operations are as below: •... -
Page 19: Setup
MAIN MENU SVAT ELECTRONICS now you can see NOTES: 1. DO NOT format the DVD disc for better performance and compatibility. 2. Before using USB pen drive, please format it to FAT32 file system by Windows XP or higher. 3. The backup device has to be connected by the system software before it can be used to read/write. -
Page 20: Pre-Camera Setup
MAIN MENU SVAT ELECTRONICS now you can see From the setup menu, you can access various aspects of the system, including camera setup, schedule setup, network setup and password setup. ▲▼- Press these buttons to change the highlighted item. •... -
Page 21: Camera Setup
MAIN MENU SVAT ELECTRONICS now you can see CAMERA SETUP In Setup Menu display, press ▲▼ to change the highlighted option to Camera, and then press ENTER to call up Camera Setup display as shown. The Camera Setup allows the administrator to define the attributes for each camera. - Page 22 Video loss settings are very important for surveillance, since anytime you lose footage, you lose valuable information. The Clearvu11 can perform various tasks when it detects loss of any video, depending on howit is setup. You can adjust the settings for each individual camera.
-
Page 23: Motion Detection
SVAT ELECTRONICS now you can see MOTION DETECTION The Clearvu11 has bulit in motion detection available for each camera . Press ENTER or +/- to check/uncheck this item. The default setting is “” - checked. MOTION SETTINGS This is the link used to setup the motion settings for this camera. Press ENTER on Settings to call up Motion Setup menu for the camera. - Page 24 MAIN MENU SVAT ELECTRONICS now you can see • Detection Settings - Calls up a grid system used for masking areas of the camera’s view. Fully explained on the next page. • Buzzer – this option allows you to choose to activate the internal buzzer (or not) when motion of this camera is detected.
-
Page 25: Covert
MAIN MENU SVAT ELECTRONICS now you can see DETECTION SETTINGS This menu allows you to setup the motion detection settings, including detection area and sensitivity, when motion is detected for this camera. 10 being the most sensitive and 1 being the least sensitive. -
Page 26: Dwell Time
MAIN MENU SVAT ELECTRONICS now you can see DWELL TIME Dwell time refers to how long the video of the motion detection will stay on the screen. If Call By Event is set to Motion, Alarm, or Both. Press +/- buttons to adjust the value (3 seconds-60 minutes, discrete) to choose the “dwell time”.
Need help?
Do you have a question about the CLEARVU11 and is the answer not in the manual?
Questions and answers