SVAT CLEARVU11 Instruction Manual
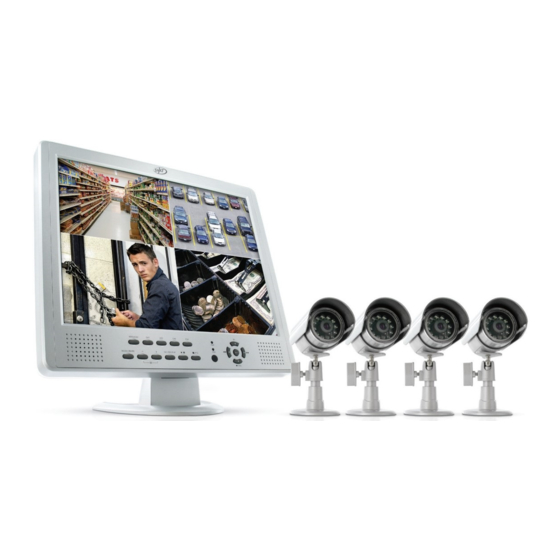
4ch 15" lcd-dvr all-in-one system h.264 dvr with 4 indoor/outdoor hi-res night vision security cameras
Hide thumbs
Also See for CLEARVU11:
- Specifications (4 pages) ,
- User manual (23 pages) ,
- Instruction manual (26 pages)
Table of Contents
Advertisement
Quick Links
Download this manual
See also:
User Manual
Advertisement
Table of Contents
Troubleshooting

Related Manuals for SVAT CLEARVU11


Summary of Contents for SVAT CLEARVU11
- Page 1 SVAT ELECTRONICS now you can see 4CH 15" LCD-DVR All-In-One System H.264 DVR with 4 Indoor/Outdoor Hi-Res Night Vision Security Cameras COMPLETE SYSTEM INSTRUCTION MANUAL Version 1.0 Model #: CLEARVU11 www.svat.com www.svat.com...
- Page 2 1.866.946.7828 Toll free fax: 1.888.771.1701 For more product information visit www.svat.com Note: This is manual version 1.1 for this product, you may find updated versions by visiting our website. CLEARVU11 NEED HELP? DO NOT RETURN THIS PRODUCT TO THE STORE...
-
Page 3: Product Warranty Information
RISK OF ELECTRIC SHOCK, DO NOT OPEN MONITOR TO REDUCE THE RISK OF ELECTRIC SHOCK, DO NOT REMOVE THE COVER (BACK). NO USER SERVICEABLE PARTS INSIDE. REFER SERVICING TO QUALIFIED SERVICE PERSONNEL. CLEARVU11 SVAT USA 60 Industrial Parkway #Z64 Cheektowaga, NY... -
Page 4: Table Of Contents
LOGIN/LOGOUT ... 13 STATUS DISPLAY ... 14 VIDEO ADJUSTMENT ... 15 BACKUP DEVICE ... 15 SETUP ... 16 CLEARVU11 Table of Contents MOTION DETECTION SETUP USING THE MOUSE ... 12 PTZ SETUP USING THE MOUSE ... 12 VIDEO ADJUSTMENT ICONS ... 12 COMMON ICONS ... - Page 5 PDA/MOBILE PHONE REMOTE ACCESS ...57 CD SOFTWARE AND ARCHIEVED VIEWING ...57 KEYBOARD CONTROL SIMULATOR...58 TROUBLE SHOOTING ..59 SPECIFICATIONS ...66 CAMERA SPECIFICATIONS ...68 NOTES AREA ...70 CLEARVU11 HDD FORMAT/CLEAR ...30 PASSWORD ...31 SYSTEM SETUP ...32 RS-232/422/485 SETUP ...33 NETWORK SETUP ...34 EMAIL SETUP ...35 ADVANCED NETWORK SETUP ...36...
-
Page 6: Introduction
Your new Clearvu11 is designed to be easy to setup and easy to configure to all your surveillance needs. If at any time you have questions, we are always here to help. Call our 24/7 live customer support line to get intelligent and understandable answers to any questions you may have about your new product. -
Page 7: Button Functions And Connections
BUTTON FUNCTIONS AND CONNECTIONS 15" LCD/DVR 6 7 8 CLEARVU11 SVAT ELECTRONICS now you can see... - Page 8 BUTTON FUNCTIONS AND CONNECTIONS SVAT ELECTRONICS now you can see 1. Monitor Speaker 2. MENU/ESC – Displays the main menus & returns you to the previous set of menus 3. Camera Selection Buttons (Ch1-Ch4) – Switches from full screen for selected camera 4.
-
Page 9: Remote Control
60ft from the TV/monitor/VCR/DVR. • We recommend using a surge protected power bar to protect the cameras internal circuitry. CLEARVU11 1. Alarm Reset – Cancels alarm activation/silences buzzer 2. REC – Force manual recording 3. Rewind (◄ ◄ ) – Rewinds in playback mode 4. -
Page 10: Mounting The Camera
BNC connectors on the channel inputs (1-4) on the back of the DVR. 7. Plug the other end into the female end of the 3.5 mm wire from the camera. CLEARVU11 SVAT ELECTRONICS now you can see... -
Page 11: Powering The System
DC 12V Port on the LCD/DVR. 4. Plug the power cord into a power outlet. CLEARVU11 2. Plug the mouse into the PS2 port at the back of the LCD/DVR (recommended). 5. Turn on the master switch on the back right of the system. -
Page 12: General Information
(4) Current Zoom – x1, x2, or x4. (5) Mute state –Speaker icon shown for not mute, not shown for mute. (6) Alarm recording percentage. (7) Normal recording percentage. CLEARVU11 SVAT ELECTRONICS now you can see NOTE: The following instructions are described for use with the remote control. -
Page 13: Text Input
7. In text editing mode, internal code box, and mark list, press ENTER to exit and save changes, press ESC/ PTZ to exit without making changes. CLEARVU11 SVAT ELECTRONICS now you can see... -
Page 14: Using The Mouse
Clicking thw yellow box with zoom in 2x on what was selected by the yellow box. This can be done up to 4x digital zoom Volume – Turns muting on or off CLEARVU11 SVAT ELECTRONICS now you can see... -
Page 15: Motion Detection Setup Using The Mouse
GENERAL INFORMATION SVAT ELECTRONICS now you can see COMMON ICONS VIDEO ADJUSTMENT ICONS USING THE MOUSE MOTION DETECTION SETUP USING THE MOUSE Move the cursor to Menu -›Setup -› Camera -› Motion setting -› Detection setting Move the cursor to the bottom of the screen, the icons of motion detection will be displayed. -
Page 16: Alpha-Numeric Key
To login/logout of the system, press MENU when in the split-window display to call up the Menu display, and then press ENTER when the Login/Logout option is highlighted to enter the Login/Logout display as shown. CLEARVU11 The user’s operations are described as the followings: •... -
Page 17: Status Display
• Alarm Input Status • Product Serial Number • Product Version Number Press ESC (MENU/ESC) to exit from the Status display, and return to Menu display. CLEARVU11 SVAT ELECTRONICS now you can see In Menu display, press ▲▼ to change the highlighted option to Status, and then press ENTER to call up Status display as shown. -
Page 18: Video Adjustment
If the device is already connected (E.g. R/W - Read/write, as shown in Current Status), please press ENTER to command the system software to disconnect with the device, and then unplug the device from the backup port. CLEARVU11 SVAT ELECTRONICS now you can see In Menu display, press ▲▲... -
Page 19: Setup
NOTE: The DVR is not limited to only these backup devices. Other backup devices may work normally. SETUP (Administrator mode only) CLEARVU11 In Menu display, press ▲▼ to change the highlighted option to Setup, and then press ENTER to call up Setup Menu display as shown. -
Page 20: Pre-Camera Setup
Please refer to the manual of the camera for the ID settings. Press +/- buttons to change the value (N/A or 0-255). The default setting is “N/A” – Not Available, which means that it’s not a PTZ camera. CLEARVU11 SVAT ELECTRONICS... -
Page 21: Camera Setup
The title (Max. 8 characters) of this camera. Please follow the Text Input method to name each camera. Naming the cameras will help you immediately identify the location you are viewing (e.g.backdoor, office, etc.). VIDEO LOSS SETTINGS CLEARVU11 SVAT ELECTRONICS now you can see In Setup Menu display, press ▲▼... - Page 22 Video loss settings are very important for surveillance, since anytime you lose footage, you lose valuable information. The Clearvu11 can perform various tasks when it detects loss of any video, depending on howit is setup. You can adjust the settings for each individual camera.
-
Page 23: Motion Detection
MAIN MENU MOTION DETECTION The Clearvu11 has bulit in motion detection available for each camera . Press ENTER or +/- to check/uncheck this item. The default setting is “” - checked. MOTION SETTINGS This is the link used to setup the motion settings for this camera. Press ENTER on Settings to call up Motion Setup menu for the camera. - Page 24 • ESC (MENU/ESC) - Press this button to escape from this screen, and return to Camera Setup display. If the Save dialog is shown, press ENTER to exit and save, ESC (MENU/ESC) to exit without saving. CLEARVU11 SVAT ELECTRONICS now you can see...
-
Page 25: Covert
This option allows you to switch the monitor display to show just the video of this camera if certain events occur for this camera. There are 4 options, including Off, Motion, Alarm, Both (Motion & Alarm). Press +/- buttons to select one. CLEARVU11 SVAT ELECTRONICS... -
Page 26: Dwell Time
NOTE: The total Event Record IPS/Pre-record IPS can not exceed the system recording capacity (NTSC: 120/CIF, 60/Half-D1, 30/Full-D1; PAL: 100/CIF, 50/Half-D1, 25/Full-D1), or the system will lower the actual rate automatically at recording. CLEARVU11 SVAT ELECTRONICS now you can see... -
Page 27: Alarm Setup
IPS. Press +/- buttons to adjust the value (0-10 seconds, discrete). Please note that the actual pre-record time may be shorter than the value set if the total size of the pre-record pictures exceeds the pre-record buffer size of the system. CLEARVU11 SVAT ELECTRONICS now you can see In Setup Menu display, press ▲▼... -
Page 28: Seq Display Setup
The SEQ Display Setup allows the administrator to define the display pages while in SEQ Display for main monitor and call monitor. There are 1 display type - 1-Window for main monitor, and 1 display type for call monitor. CLEARVU11 SVAT ELECTRONICS now you can see In Setup Menu display, press ▲▼... - Page 29 • ESC (MENU/ESC) - Press this button to escape from this screen, and return to Setup Menu display. If the Save dialog is shown, press ENTER to exit and save, ESC (MENU/ESC) to exit without saving. CLEARVU11 SVAT ELECTRONICS now you can see...
-
Page 30: Scheduled Record Setup
• Motion – record mode (No, Video, or Audio/Video) when motion is detected for a selected camera. Press +/- buttons to change the value. CLEARVU11 SVAT ELECTRONICS now you can see In Setup Menu display, press ▲▼... -
Page 31: Hdd Setup
HDD SETUP The Clearvu11 has a unique function that allows you to adjust the DVR to partition your hard drive to store a certain amount of normal recording and a certain amount of alarm recording. In the surveillance applications, alarm video/ audio can be much more important than normal video/audio. - Page 32 • ESC (MENU/ESC) - Press this button to escape from this screen, and return to Setup Menu display. If the Save dialog is shown, press ENTER to exit and save, ESC (MENU/ESC) to exit without saving. CLEARVU11 SVAT ELECTRONICS now you can see...
-
Page 33: Hdd Format/Clear
HDD for the first time. NOTE: The HDD will be physically formatted and split up with default record size, 30% for Alarm record and 70% for Normal record. All the previously recorded will be erased. CLEARVU11 SVAT ELECTRONICS now you can see... -
Page 34: Password
ENTER to exit and save, ESC (MENU/ESC) to exit without saving. NOTE: If the asterisk (*) is removed from all users there is no default username or password saved when loggin into the DVR CLEARVU11 SVAT ELECTRONICS now you can see In Setup Menu display, press ▲▼... -
Page 35: System Setup
ENTER to exit and save, ESC (MENU/ESC) to exit without saving. Please note that if the selected language is changed, the user will be asked to reboot the system for the newly selected language to take effect. CLEARVU11 SVAT ELECTRONICS now you can see In Setup Menu display, press ▲▼... -
Page 36: Rs-232/422/485 Setup
• ESC (MENU/ESC) - Press this button to escape from this screen, and return to Setup Menu display. If the Save dialog box is shown, press ENTER to exit and save, ESC (MENU/ESC) to exit without saving. CLEARVU11 SVAT ELECTRONICS... -
Page 37: Network Setup
• DDNS Password – DDNS password for the system if PPPoE is used. Please follow the Text Input method described in the begining of this manual to modify this item. • Use the ◄► keys to navigate over to E-mail or Adv. CLEARVU11 SVAT ELECTRONICS now you can see... -
Page 38: Email Setup
5 different receivers. • Attachment – attached picture for the e-mail sent. The value could be (N/A, Original picture, QCIF picture). Press +/- buttons to change this item. CLEARVU11 SVAT ELECTRONICS now you can see In Network Setup, press ENTER to call up E-mail Setup as shown when the highlighted option is E-mail. -
Page 39: Advanced Network Setup
67/68. NOTE: If the control port or data port is not available or accessible during remote access, the system will reset the ports to their default values, i.e. 67/68. CLEARVU11 SVAT ELECTRONICS now you can see... -
Page 40: Factory Defaults
NOTE : After the software is upgraded, the system will restart immediately. The split window display will be shown after restart, this may take a few minutes to complete. SYSTEM SHUTDOWN (Administrator mode only) CLEARVU11 SVAT ELECTRONICS now you can see In Menu display, press ▲▼... -
Page 41: Networking Guide
CONNECTING YOUR DVR TO THE ROUTER 1. Power off the DVR by using the power switch on the back of the DVR. CLEARVU11 2. Connect the included network cable to the back of the DVR in the LAN port. 3. Connect the other end of the network cable to an available port on the router. -
Page 42: Finding The Dvr's Ip Address
DVR on your computer and also assist in being able to view the DVR over the Internet. 8. Press “ESC” to exit out of Menu. Press ENTER to save changes. 9. Once you see confirmation, Press ENTER again. You have successfully configured your network settings. CLEARVU11 SVAT ELECTRONICS now you can see... -
Page 43: Preparing Your Computer For Viewing The Dvr
Low. This is done by sliding the slider security level to the bottom. (This will allow ActiveX controls to be downloaded and installed on your computer). 10. Click Apply. 11. Click OK. CLEARVU11 SVAT ELECTRONICS now you can see... -
Page 44: Viewing Your Dvr On Your Computer
* The IP address used in the example above is for internal network viewing. If you are trying to access the DVR from a location other than where the DVR is located than you will be typing in the External Address (see “Finding the DVR’s IP Address”). CLEARVU11 SVAT ELECTRONICS now you can see... -
Page 45: Install The Activex Controls
DVR. By default the username is “aa” and the password is “11”. Follow any instructions on screen and then log into the DVR by using a proper username and password. CLEARVU11 SVAT ELECTRONICS now you can see... -
Page 46: Configuring Your Router (Port Forwarding)
Your default gateway is the router your computer and the DVR are connected to. The subnet mask and default gateway on your computer should be the same as the DVR. CLEARVU11 and press letter “R” on your keyboard. -
Page 47: Connecting The Dvr Using A Router
You need to configure the router to forward the port numbers that the DVR uses. This will allow a computer over the internet to properly communicate with the DVR. The CLEARVU11 by default uses ports 67, 68, 80. All 3 ports need to be configured. -
Page 48: Finding Your External Ip Address
The simplest way is to go to www.whatsmyip.org. This site will display your External IP Address in the top portion of the screen. If you go to www.portforward.com, it will also display this IP address. * Port forwarding needs to be configured properly before being able to view the DVR externally.* CLEARVU11 SVAT ELECTRONICS now you can see... -
Page 49: Dynamic Dns
You need to click the link in the body of this message in order to activate your account. 7. When you click the link, a window appears that displays “Account Confirmed”. Click the “login” link and enter the username and password you created. CLEARVU11 SVAT ELECTRONICS now you can see... - Page 50 IP address”, which will fill your IP address in for you. 14. Leave all of the other options as is, and click “Create New Host”. If you are having difficulty setting up this account contact DynDNS.com. This service is not supported by SVAT-USA CLEARVU11 SVAT ELECTRONICS now you can see...
-
Page 51: If You Cannot Connect
If using a http port other then 80 the IP address must be entered with the port number at the end. (ex. http://74.11.213.177:2000 or http://74.11.213.177 :2000) some Internet Explorer browesers require a space before the port number. CLEARVU11 SVAT ELECTRONICS now you can see... -
Page 52: Viewing Your Dvr Oustide Your Network
- Click on this icon to toggle between live mode and playback mode for all the video windows. - Click on this icon to freeze/unfreeze the video images for all the video windows. CLEARVU11 SVAT ELECTRONICS now you can see... - Page 53 Click on the OK button to search the recorded video/audio for the highlighted event log. Now, you may use the playback buttons to play the recorded video/audio. CLEARVU11 SVAT ELECTRONICS now you can see...
- Page 54 • Monitor - 1024 x 768 or above. • Memory (DRAM) - 512MB. • Network Interface - Ethernet, 10/100 Base-T. • Web Browser - MicroSoft® Internet Explorer® 6.0 or above. • DirectX - MicroSoft® DirectX® 9.0 or above. CLEARVU11 SVAT ELECTRONICS now you can see...
-
Page 55: Search Menu
The Status field will show the ‘Recorded from’ time based on the selected Video/Audio before searching - alarm section if Alarm, Motion, or Video Loss, is checked, and normal section if Normal is checked. CLEARVU11 SVAT ELECTRONICS now you can see... -
Page 56: Playback/Archive For Serach By Time
Each time this button is pressed, the forward playback speed will become faster, from 2X, 4X, 8X, up to 16X, and then back to 2X. • Fast Backward (◄ ◄ /◄ on the remote controller, ◄ on the front panel) - Press this button for fast CLEARVU11 SVAT ELECTRONICS now you can see... - Page 57 COPY button to start copying. Press +/- buttons to modify each item. Except the playback buttons, the user can still do all the other operations in split-window display as if there is no playback. CLEARVU11 SVAT ELECTRONICS now you can see...
-
Page 58: Serach By Event
(2) press Play Button (► ) to playback directly, or (3) press Copy Button ( backup device without playback. CLEARVU11 The screen for Search By Event - Log display, is shown below: ) to backup (copy) the selected recorded video/audio to the connected... -
Page 59: Playback/Archive For Search By Event
ENTER to enter the Archived File Playback display of the selected file in this list, or press Play Button ( ) to playback it directly. You may press MODE to delete the selected file. CLEARVU11 SVAT ELECTRONICS now you can see The screen for Search Archived Files is shown to the left. -
Page 60: Playback For Archived Files
ID- Insert Login name here PSWD - Insert Login name password PIC Size - Choose the resolution to use with your phone browser. CLEARVU11 ) is not effective in this display. Please enter the correct login name and password for the digital video/ audio recorder to login the system, and the screen to the left will be shown on your mobile device. -
Page 61: Keyboard Control Simulator
PC successfully. If not, please log on to http://www. microsoft.com to get the free download of it. 2. Please go to Start->Setup->Control, select Display->Settings, and set the Screen Resolution to at least 1024x768 and Color to 32-bit. CLEARVU11 SVAT ELECTRONICS now you can see... -
Page 62: Cd Software And Archieved Viewing
OFF to switch on/off the output of the controlled DVR. NOTE: UP-LEFT, UP-RIGHT, DOWN-LEFT, and DOWN-RIGHT are to control the PTZ cameras diagonally. CLEARVU11 The user may print the whole player screen (including the current video image) or the current video image by selecting File menu, and then select Print or Print Video respectively. - Page 63 Subnet Mask: ___________________________________________________________ DVR IP (Internal IP Address):__________________________________________http:// Port #: ___________ External IP:________________________________________________________ Example: 14.14.243.113 DynDNS Username:___________________________________________________ Example: myname1234 DynDNS Password:___________________________________________________ Example: 123ABC DynDNS Domain Chosen:________________________________________________Example: dyndns.org Sign-In URL:___________________________________________________Example:myname1234.dyndns.org CLEARVU11 SVAT ELECTRONICS now you can see Example: 192.168.1.101 Example: 2000...
-
Page 64: Trouble Shooting
Blue Screen while loading up. • The DVR will display a blue screen while booting up. Please be patient as this Cannot hear recorded audio when playing back CLEARVU11 • Move the mouse cursor to the bottom of the screen. A task bar of available options will appear. You will need to login before you can utilize most of the functions. - Page 65 DVR over a remote connection CLEARVU11 • This grey screen is one of the viewing modes the DVR can go into. From the live viewing mode press the “Mode” button to change the selected camera to a playback screen. Press the “Mode” button once more to switch to a full screen playback screen.
- Page 66 Cannot connect SD Card Cannot set Normal Record IPS to 30 IPS CLEARVU11 • You first need to log in to the DVR before being able to use the remote control functions On the Remote control: 1. Press Menu 2.
- Page 67 • Make sure you are logged into the computer as an administrator to install the required application and ActiveX controls. CLEARVU11 SVAT ELECTRONICS now you can see...
-
Page 68: Camera Troubleshooting
• Check all connections to make sure they are secure and properly connected. displayed on the Live • Check your power supply to ensure that the camera is powered up Display screen. It is just 4 blue boxes CLEARVU11 SVAT ELECTRONICS now you can see... -
Page 69: Specifications
Post-record time Display Resolution Split windows Frame rate Freeze Sequential switch Digital Zoom CLEARVU11 Embedded Linux 2.6 Sixfold operation - simultaneous record, live, playback, backup, control, & remote access FCC, CE, LVDS, etc. NTSC/EIA or PAL/CCIR 4-CH, BNC, 1Vp-p/75ohm 15”LCD BNC x 1, 1Vp-p/75ohm Yes, with configurable detection area &... -
Page 70: Alarm Input
Setup Local Remote Multi-lingual CLEARVU11 NTSC – 30 / 720*480, 60 / 720*240, 120 / 360*240 PAL – 25 / 720*576, 50 / 720*288, 100 / 360*288 Date/time, Camera, Alarm, Motion, & Video Loss Play, Fast Forward, Backward, Pause, Stop, etc. -
Page 71: Camera Specifications
Housing Color Electronic shutter speed Signal/Noise Ratio Operating Temperature Camera Power Input Dimensions Weight CLEARVU11 Auto power on after power loss recovery Built-in real time clock Multi-level password (3 levels, up to 18 accounts) DC12V-5A 18W Max. 1/4” CMOS Color... - Page 72 Sun Shield Camera Power Input Housing Material Housing Color Signal/Noise Ratio Camera Bracket Operating Temperature Operating Humidity Dimensions/Weight CLEARVU11 1/4 “ CCD Color 420 TV Lines IP65 3.6 mm Fixed 12, up to 15 ft Automatic, CDS Sensor 0 Lux...
-
Page 73: Notes Area
NOTES AREA SVAT ELECTRONICS now you can see CLEARVU11... - Page 74 SVAT product is in use by the consumer. Specification Sheets Software Updates Firmware Upgrades Model# CLEARVU11 www.svat.com SVAT ELECTRONICS now you can see...
Need help?
Do you have a question about the CLEARVU11 and is the answer not in the manual?
Questions and answers