
Related Manuals for SVAT CLEARVU1


Summary of Contents for SVAT CLEARVU1
-
Page 1: Instruction Manual
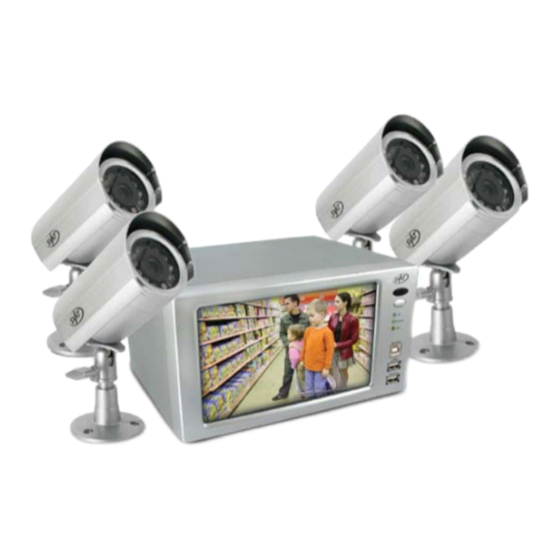
SVAT ELECTRONICS now you can see Web Ready DVR System w/ Integrated 7" LCD and 4 Outdoor Night Vision CCD Cameras COMPLETE SYSTEM INSTRUCTION MANUAL Model# CLEARVU1 www.svat.com... - Page 2 SVAT ELECTRONICS now you can see CLEARVU1 www.svat.com...
- Page 3 Website: www.svat.com Warranty Terms 1. SVAT products are guaranteed for a period of one year from the date of purchase against defects in workmanship and materials. This warranty is limited to the repair, replacement or refund of the purchase price at SVTAT’s option.
-
Page 4: Table Of Contents
SVAT ELECTRONICS now you can see TABLE OF CONTENTS WHAT IS INCLUDED ....................1 DVR, CAMERA & REMOTE FUNCTIONS ..............3-4 SECTION 2: INSTALLATION ..................5-7 2-1: CAMERA INSTALLATION ..................5 2-2: EXTERNAL TV/MONITOR INSTALLATION ............6 2-3: MOUSE INSTALLATION ..................6 2-4: POWERING ON ....................7 SECTION 3: OPERATION ...................8-15... - Page 5 SVAT ELECTRONICS now you can see CAUTION • For your safety, unplug the power before moving the DVR, installing, or replacing any parts or hard drive. • Make sure all the power cable and wires are properly set up before using the DVR. Contact your distributor immediately if there is any defect. • To avoid a short circuit, don’t leave any unnecessary parts inside the DVR. • Please avoid dramatic changes of the environment, such as dust, temperature, and humidity. Keep the DVR in a temperature ranging from 41ºF ~ 104ºF • Keep the DVR in a well-ventilated place and away from any heat-generating objects.
-
Page 6: Dvr, Camera & Remote Functions
SVAT ELECTRONICS now you can see DVR & Camera 1. 7” LCD Screen ......Watch your footage directly on the DVR. 2. Infrared Remote Sensor ....Receives the signal from the remote control. 3. Screen On/Off Button ....Turns LCD Monitor On / Off. - Page 7 SVAT ELECTRONICS now you can see Remote Control 1. Menu....Enters onscreen menu. 2. Number Keys ..Switches to a specific camera; password entering. 3. SEQ ....Automatically displays full screen or split screen in sequence. 4. PIP ...... Enters picture-in-picture mode. 5. ENTER ....Confirms selection during setup.
-
Page 8: Section 2: Installation
SVAT ELECTRONICS now you can see SECTION 2: INSTALLATION 2-1: CAMERA INSTALLATION Things To Consider Before You Install Your Cameras • Camera(s) should be installed between 8 and 13 feet above the area to be monitored. • Ensure there are no obstructions in the camera’s view, to maximize viewing area. • Ensure that the sunshade is positioned to avoid glare and position cameras away from direct sunlight. • Decide whether the camera will be wall-mounted or sit on a desk/table top. If wall mounting, use the mounting hardware in the package. The camera can be adjusted for either mounting scenario by rotating the camera to the required position. -
Page 9: 2-2: External Tv/Monitor Installation
SVAT ELECTRONICS now you can see 2-2: EXTERNAL TV/MONITOR INSTALLATION (OPTIONAL) 1. Connect an RCA male wire (not included) to the VIDEO OUT Monitor port on the DVR. Plug the other end of the RCA wire to the RCA VIDEO IN port on the TV/monitor. -
Page 10: 2-4: Powering On
SVAT ELECTRONICS now you can see 2-4: POWERING ON POWER SUPPLY DC 12V PORT POWER CORD 1. Insert the power supply wire into the rear DC 12V Port on the DVR. 2. Insert the power cord into the power supply. -
Page 11: Section 3: Operation
SVAT ELECTRONICS now you can see SECTION 3: OPERATION 3-1: DISPLAY CONFIGURATION 1. Date & Time - Shows the current system time or the recorded time in playback. 2. Record mode - Shows the current recording mode (motion, continuous, scheduled or alarm record). -
Page 12: 3-2: Mouse Control
SVAT ELECTRONICS now you can see 3-2: MOUSE CONTROL 1. Left button - Confirms all selections when clicking icons. It also increases the setup value in the Menu mode. 2. Right button - Decreases the setup value on in the Menu mode. 3. Mouse wheel - Increases and decreases the values while in MENU mode, and adjusts the playback speed. It also allows you to zoom in and zoom out in the PTZ camera control mode. -
Page 13: 3-5: Zoom View
SVAT ELECTRONICS now you can see 3-5: ZOOM VIEW 1. This icon allows you to zoom in on the selected camera channel. Left click the ZOOM icon to enlarge the picture up to 200%. You can then move the enlargement area by moving the mouse. -
Page 14: 3-7: Open Setup Menu
SVAT ELECTRONICS now you can see 3-7: OPEN SETUP MENU • Move the mouse cursor to the bottom of the screen to activate the system menu. 3-8: RECORD • Recording (RED): The Recording (RED) icon indicates that the DVR is in scheduled record, motion record or alarm record. • Stop record (WHITE): The white icon is displayed when the record schedule is set to “not record” at this time. • Record mode icons: Motion record: The DVR records when motion is detected. Continuous record: The DVR records continuously. -
Page 15: 3-9: Playback
SVAT ELECTRONICS now you can see Record Percentage Entire HDD storage percentage Hard Drive Space Used This represents the percentage of hard drive space used for recording data. Under the following circumstances, the system stops recording: 1. When no video inputs are connected. - Page 16 SVAT ELECTRONICS now you can see 3-9-1: PLAY & STOP 1. Left click the play icon to start playback. This starts from the last playback time. 2. Left click the “EXIT” icon to stop playback. 3-9-2: SEARCH MODE 3. Left click the SEARCH icon to open the search dialog window. There are 3 modes for search: PERCENT, TIME/DATE and EVENT.
- Page 17 SVAT ELECTRONICS now you can see 3-9-3: PLAY & STOP • Using the mouse, you can select recording percentages of the search bar to play. Click “PLAY” to confirm and start the playback. 3-9-4: TIME/DATE SEARCH 1. START - Choose the start time and date of the recording. 2. END - Choose the end time and date of the recording.
- Page 18 SVAT ELECTRONICS now you can see 3-9-6: PLAYBACK SPEED ADJUSTMENT • While playing back, click the playback icons to adjust the playback speed. ▲ Speeds up the playback ▼ Slows down the playback ◄ Rewind ► Plays in forward direction The speed adjustment range is: 1/16X~1X, 1X~32X • The mouse wheel can be used to adjust the playback speed as well. 3-9-7: ADJUST PLAYBACK SPEED BY IR REMOTE CONTROLLER Note: While playing back, you can select the direction keys of the remote control to adjust the speed. Adjust the speed by using REW key (High-speed backward playback) or FF key (High-speed forward Playback). Press the keys repeatedly to adjust the speed rate. Adjust the speed by using the SLOW-Motion keys (Slow playback in backward or in forward direction). Press the keys repeatedly to adjust the speed rate. Playback frame by frame by using the STEP keys (Step playback in backward or in forward direction).
-
Page 19: Section 4: Setup
It is strongly recommended that you create a password after the initial setup. Please keep a record of your password. Rebooting the DVR and resetting the factory defaults will not reset the password to the default. If you forget the password, please contact SVAT for support. 4-1-2: SYSTEM MENU 1. -
Page 20: 4-2: Display Setup
SVAT ELECTRONICS now you can see 4-2: DISPLAY SETUP 4-2-1: SCREEN SETUP 1. VERTICAL POSITION - Used to adjust the vertical position of image. 2. HORIZONTAL POSITION - Used to adjust the horizontal position of image. 3. BORDER ENABLE - Enables the display of border. 4. BORDER WIDTH - Used to adjust the width of the borders. 5. BORDER COLOR - Used to adjust the color of the border 4-2-2: ON SCREEN DISPLAY SETUP (OSD) 1. TOP OSD OFFSET - Adjusts the position of the top OSD. - Page 21 SVAT ELECTRONICS now you can see 4-3-1: RECORD SETUP This screen allows you to adjust quality settings for each camera independently. 1. CHANNEL - Select the camera channel you want to configure. 2. RESOLUTION - Set recording resolution. 704×240 (NTSC) / 720×288(PAL) 352×240 (NTSC) / 360×288(PAL) 3. QUALITY - This sets up the recording picture quality. The quality levels are: Low / Mid / High / Super / Hyper.
-
Page 22: 4-4: Configuration
SVAT ELECTRONICS now you can see 1. If the DVR is set to MOTION RECORDING and the DVR keeps recording continuously or is not triggered to record as you expect, please check the sensitivity settings and the motion mask setup in CONFIGURATION►MOTION SETUP. 2. If the motion settings are not sensitive enough, you may want to lower the sensitivity level and define a motion detection area for more accuracy. If the motion is not... - Page 23 SVAT ELECTRONICS now you can see 4-4-2: CAMERA SETUP 1. CHANNEL - Selects the camera to be modified. 2. TITLE - Inputs the camera title, maximum of 8 characters. 3. BRIGHTNESS - Adjusts the image brightness (-32~31). 4. CONTRAST - Adjusts the color contrast (-32~31). 5. SATURATION - Adjusts the color saturation (-32~31). 6. HUE - Adjusts the color hue (-32~31). 4-4-3: MOTION SETUP 1. CHANNEL - Select the channel to which you want to make adjustments. 2. SENSITIVITY GRADE - Adjusts the motion detection sensitivity. 1 (LOW) ~ 5 (VERY HIGH) 3.
- Page 24 SVAT ELECTRONICS now you can see 4-4-4: ALARM SETUP 1. CHANNEL Select a channel for the setup. 2. ALARM INPUT Set up the Alarm Input type. NORMAL CLOSE- when the alarm is triggered, the circuit turns closed (ON). NORMAL OPEN- when the alarm is triggered, the circuit turns opened (OFF).
-
Page 25: 4-5: External Device
4. CONFIRM PW - Enter the new password again for confirmation. Note: Always write down your password and keep it in a safe location. If you lose your password, contact SVAT Electronics for support. 4-4-8: BUZZER SETUP 1. KEY TONE - Turns the beeps on or off while operating the DVR. - Page 26 SVAT ELECTRONICS now you can see 4-5-1: TCP/IP CONFIGURATION IP SETUP 1. MAC ADDRESS - Shows the DVR’s MAC address. This is a unique address that is assigned to your DVR. You cannot change the MAC address. Please write it down.
- Page 27 SVAT ELECTRONICS now you can see 4-5-2: PAN/TILT SETUP COMMAND SETUP 1. CHANNEL Select PTZ channel. 2. MODEL Select PTZ protocol. 3. PTZ ID Select PTZ ID. 4. BUADRATE Select Baud Rate of PTZ control code. 5. CMD DELAY Set up a delay time to run the command.
-
Page 28: 4-6: Backup
SVAT ELECTRONICS now you can see 4-5-4: RS232C SETUP 1. PAN SPEED Set the PANing speed. 2. TILT SPEED Set the TILTing speed. 3. ZOOM SPEED Set the speed of ZOOM IN/OUT. 4. FOCUS SPEED Set the speed of FOCUS NEAR/FAR. -
Page 29: 4-7: Language
SVAT ELECTRONICS now you can see 4-7: LANGUAGE Selects a language for the OSD. Press enter to cycle through the languages. 4-8: FACTORY DEFAULT Reset the DVR to factory defaults. CLEARVU1... -
Page 30: Section 5: Usb Backup Player
SVAT ELECTRONICS now you can see SECTION 5: USB BACKUP PLAYER 5-1: BACKUP STATUS System status messages: USB STORAGE IS CHECKING 1. USB STORAGE IS AVAILABLE 2. START WRITE IN USB STORAGE 3. FINISH WRITE IN USB STORAGE 5-2: BACKUP PLAYER SOFTWARE INSTALLATION 1. - Page 31 SVAT ELECTRONICS now you can see 3. Select a destination folder 4. Copy files to the destination folder. The computer system will build a new icon of for the BACKUP PLAYER on the desktop. Double click the icon of Backup Player from the desktop to run the program. CLEARVU1...
-
Page 32: 5-3: Backup Player Software Interface
SVAT ELECTRONICS now you can see 5-3: BACKUP PLAYER SOFTWARE INTERFACE 1. DISPLAY SCREEN - Displays the backup image 2. TIME DISPLAY - Indicates the current time 3. INFORMATION WINDOW - Indicate the file’s start/end time and date, and the backup video quality (resolution). 4. SPEED ADJUSTMENT: Speed - Select a playback speed (2X, 4X, 8X, 16X, 32X) - Page 33 SVAT ELECTRONICS now you can see 5-3-1: OPENING AJP FILES 1. Select OPEN and the window below will show up on the screen. 2. Select the file and click OPEN to play the AJP file. 5-3-2: SAVE JPG FILE 1. During playback and under FULL SCREEN MODE, when you see the picture you want to save, click EDIT.
-
Page 34: Section 6: Network Installation & Setup
SVAT ELECTRONICS now you can see SECTION 6: NETWORK INSTALLATION & SETUP 6-1: NETWORK INSTALLATION & SETUP IMPORTANT: If you have an existing computer connected to the internet, you will need to use a router to connect your DVR to the network so both your computer and DVR can access the internet at the same time. - Page 35 SVAT ELECTRONICS now you can see 6-1-2: VIA ADSL VIA ADSL WITH STATIC IP ADDRESS 1. Connect the network cable from the ETHERNET port of your DVR to an open LAN port on your router. 2. Enter SYSTEM MENU ► EXTERNAL DEVICE ► TP/IP SETUP ► IP SETUP. Enter the IP address, gateway, and subnet mask provided by your ISP.
-
Page 36: 6-2: Router Port Forwarding Guide
SVAT ELECTRONICS now you can see Tip: If you have computers running Windows connected to the router, you can find the subnet mask and gateway information from the computers. From the Windows desktop Start Menu, choose Run. Type "cmd" to open a command prompt. In the command prompt window, type “ipconfig” and press "ENTER." The window will display the computer’s IP configuration. Your DVR should have the same subnet mask and gateway as the... - Page 37 SVAT ELECTRONICS now you can see Step 1: Open your web browser. Enter the router IP address 192.168.2.1 in the address bar, followed by pressing Enter. Step 2: In the status page, select the Virtual Servers option located down the left hand side of the page.
- Page 38 SVAT ELECTRONICS now you can see 6-2-3: LINKSYS WIRELESS ROUTER Enable the system by checking the enabled box. The port forwarding process is dependant on the brand and model number of the router being used. Port forwarding of a router is required with your system to allow user access to your DVR.
- Page 39 SVAT ELECTRONICS now you can see Step 4: - Select the Port Range Forwarding tab. - In the Application column enter a description of your DVR. - In the Start entry field enter the first number of the port you need to port forward (e.g. 50000) - In the End entry field enter the last number of the port you need to port forward (e.g. 50000) - In the Protocol field, select Both. - In the IP address field, enter the computer network IP address you recorded previously during the Quick Set Up Guide process.
- Page 40 SVAT ELECTRONICS now you can see 6-2-6: NETGEAR ROUTER The port forwarding process may vary depending on the brand and model number of the router being used. Port forwarding of a router is required to allow user access to your DVR.
- Page 41 SVAT ELECTRONICS now you can see Step 2: Enter ‘admin’ in the User Name and ‘1234’ in the Password dialog box followed by ‘OK’ to enter the Netopia configuration page. Step 3: Select Expert Mode. Step 4: - Select the Yes, enter expert mode button - Select Configure followed by selecting NAT.
- Page 42 SVAT ELECTRONICS now you can see Step 5: Select In the Add New Port Forward Entry screen, proceed as follows: - In the Template field, select Custom - In the Name field, select DVR - In the Port Start field, enter the first number of the port you need to port forward (e.g. 50000). - In the Port End field, enter the ending port number (e.g. 50000). - In the LAN IP Address field enter the IP address (192.168.0.1). - Check the Enable button - Finally, click the Add button, followed by selecting the Apply button.
-
Page 43: 6-3: Client Software
SVAT ELECTRONICS now you can see 6-2-10: PPPOE SETUP - Select the mode in WAN connection Type - Enter the static IP Address, Subnet Mask, Gateway, DNS provided by your ISP - Select PPPoE in WAN connection Type - Enter User Name and Password provided by your ISP - The router will get the IP address upon connection. - Page 44 SVAT ELECTRONICS now you can see 6-3-2: INSTALL CLIENT SOFTWARE - Select a destination folder. - When finished, the software will create a shortcut on the desktop. - Click the shortcut to run the client software. CLEARVU1...
- Page 45 SVAT ELECTRONICS now you can see 6-3-3: CLIENT SOFTWARE INTERFACE Use this client software to access your DVR on your internal network. 1. Live Display Remote DVR Live display 2. Current Status To show the current connection status 3. Screen Split To select Full/4/9/16 split screen display 4.
- Page 46 SVAT ELECTRONICS now you can see 6-3-4: CLIENT SOFTWARE SETUP Click SETUP to set up a connection to your DVR on your internal network, and click on the [IP/PORT] tab. If you are setting up a new DVR to connect, follow these steps: 1. Choose a name for your DVR. 2. Enter the DVR’s IP address (the one you wrote down earlier in Section 6-1) and port number (default: 50000).
- Page 47 SVAT ELECTRONICS now you can see DDNS 1. User Name Enter the User Name registered on the DDNS Server. Please refer to 7-5 DDNS setup and operation for details. You MUST set up the DDNS service before configuring this tab. 2. DVR Name Enter the DVR name registered on DDNS Server. If the DVR name is entered and saved before, click LOAD to browse the list.
- Page 48 SVAT ELECTRONICS now you can see PTZ / SAVE 1. Set Path to Save Recorded Images Set a path to save the video clips. If you do not specify a path, the program will save all files to its default location. 2. Run in Full Screen Mode Check the box to enlarge the interface to fullscreen.
-
Page 49: Remote Playback
SVAT ELECTRONICS now you can see 6-3-6 REMOTE PLAYBACK When the DVR is connected, click PLAYBACK to enter the Playback interface. REMOTE PLAYBACK INTERFACE 1. Playback Picture To show the playback video 2. Time/Date Selection To select time/date of playback 3. -
Page 50: Search Button
SVAT ELECTRONICS now you can see SEARCH BUTTON 1. Fast Reward (RW) 2. Fast Forward (FF) 3. RW (Speed 1X) 4. Stop / Pause 5. Playback (Speed 1X) 6. Go to the beginning of recording 7. Jump to the previous hour 8. - Page 51 SVAT ELECTRONICS now you can see - Select an event from Event List and click twice to start playback 6-3-7: BACKUP VIA CLIENT SOFTWARE Save the recorded data as single JPEG picture or AVI format. Save the recorded data as a single JPEG picture - Press “STOP”...
-
Page 52: 6-4: Ddns Setup & Operation
SVAT ELECTRONICS now you can see 6-4: DDNS SETUP & OPERATION This section explains how to set up the DDNS service that allows you to access the DVR through Internet Explorer, from any Windows-based computer connected to the Internet. 6-4-1: INSTALL ACTIVE X... - Page 53 SVAT ELECTRONICS now you can see 3. Under ActiveX, set “Download Unsigned ActiveX Controls” to “PROMPT” as seen in Figure A. 4. Under ActiveX, set “Initialize and script ActiveX controls not marked as safe” to “PROMPT” as seen in Figure B.
- Page 54 6-4-2: DDNS SERVER SETUP 1. Open Internet Explorer and type www.svat.com/dvr in the address bar. 2. Select REGISTER to register a new account 2. Add a new account (choose a User Name and password. This information is used to login to the DDNS server and does need to match the login information on your DVR).
- Page 55 SVAT ELECTRONICS now you can see 5. Select “ADD DVR” to add the DVR information 6. Add DVR information: • DVR NAME: Set a DVR name MAC ADDRESS: Enter the DVR’s MAC address. The DVR’s MAC address can be found in the DVR’s [SYSTEM MENU]►[EXTERNAL DEVICE]►[TCP/IP SETUP]►...
- Page 56 SVAT ELECTRONICS now you can see 6-4-3: DVR DDNS INTERNET SETUP This section explains how to set up DDNS on your DVR to make it accessible over the Internet. 1. You only have to configure the DDNS settings once. First, make sure your DVR can be accessed over the Internet. Please refer to Section 6: Network Installation and Setup for details.
- Page 57 SVAT ELECTRONICS now you can see 2. Select DDNS in IP/PORT setup 3. Go to DDNS setup DDNS INFO User Name: Enter User Name registered on DDNS Server. DVR NAME: Enter DVR name registered on DDNS Server. If the DVR name is entered and saved before, click LOAD to browse the list.
- Page 58 SVAT ELECTRONICS now you can see Password: Enter the DVR Admin’s password and click OK to complete the DDNS setup. Click “CONNECT” to view the DVR. 6-4-5: CONFIGURATION OF DDNS CONNECTION 1. The DVR connects to the DDNS server automatically and updates the IP address periodically.
-
Page 59: 6-5: Remote Live View Via Internet Explorer
SVAT ELECTRONICS now you can see 6-5: REMOTE LIVE VIEW VIA INTERNET EXPLORER Users can access the DVR from Internet Explorer for remote viewing, remote backup, and playing backup files. 6-5-1: IE VIEWER INTERFACE 1. Logon to DDNS server and go to the DVR List 2. - Page 60 SVAT ELECTRONICS now you can see CH: Select the channel of PTZ camera ZOOM: Zoom in/out FOCUS: Focus in/out IRIS: IRIS open/close 6-5-2: WEB NETWORK BACKUP This feature will allow you to backup your footage to a computer over the Internet.
- Page 61 SVAT ELECTRONICS now you can see 3. THE INFORMATION OF DVR SERVER: Recording Start Time: Indicate the recording start time Recording End Time: Indicate the recording end time Update: Update the recording time 4. BACKUP STATUS Message: Displays the backup status...
- Page 62 SVAT ELECTRONICS now you can see 6-5-4: PLAY BACKUP FILE 1. Click Backup Player 1. Displays the backup image 2. Displays the present time of monitoring 3. Displays the start/end time of backup file 4. Switch multi-screen mode 5. Channel Selection (1~4) 6. SPEED: Playback Speed DELAY: Slow Motion Speed 7.
- Page 63 SVAT ELECTRONICS now you can see 8. Function keys: OPEN: Open the backup file EDIT: Edit the backup image AVI SAVE: To save the AVI file EXIT: Log out of the program 6-5-5: SAVE AVI FILE Saving as an AVI file will make your video footage compatible on most computers, which makes it ideal for sending. However, you can only save one camera channel at a time in this format.
-
Page 64: Section 7: Advanced Device Installation
SVAT ELECTRONICS now you can see SECTION 7: ADVANCED DEVICE INSTALLATION These features require wiring and advanced installation. Only qualified users should install these devices. SENSOR AND ALARM INSTALLATION Input & Output 1. D1~D4 Alarm Input/GND for Location 4 Sensor inputs, for sensor input installation 2. Relay Output NO/NC/COM The application of relay output is NO+COM + NC+COM... -
Page 65: Ptz Camera Installation
SVAT ELECTRONICS now you can see RELAY OUTPUT INSTALLATION - Alarm output can be NO or NC, depending on the settings. - NO-COM: the NO and COM terminals are open-circuit, and it’ll become closed-circuit when alarm is triggered. - NC-COM: the NC and COM terminals are closed-circuit, and it’ll become open-circuit when alarm is triggered. -
Page 66: Serial Port Setup
The serial port is designed for factory programming. However, advanced users may use it to control the DVR directly from a PC. Please note that any damages to the DVR caused by the incorrect use of this port will not be covered under warranty. Furthermore, SVAT does not offer technical support for serial port configuration, beyond the instructions provided below. -
Page 67: Appendix: System Configuration
SVAT ELECTRONICS now you can see APPENDIX: SYSTEM CONFIGURATION APPENDIX 2: RECORD TIME TABLE CLEARVU1... -
Page 68: Specifications
SVAT ELECTRONICS now you can see SPECIFICATIONS 7" LCD DVR Display ..........7" Color TFT-LCD Functionality ........Triplex Video Compression ......MJPEG File Format ........AJP Resolution......... NTSC : 704 X 480 / PAL: 704 X 576 Recording Frame Rate ..... 30FPS (Fully Adjustable) Recording Time ........ - Page 69 SVAT ELECTRONICS now you can see Operating Temperature ..... 41°F ~ 104°F Operating Humidity ......Under 90% Dimensions ........8.5" x 6.5" x 4.75" Weight ..........5.5lbs OTHER USB Port........... For Firmware Upgrade, Backup, Mouse Remote Control ........ Yes Supported Peripherals ...... PS/2 Mouse, USB Mouse, Remote Control, USB Flash Drive Alarm Sensor Inputs ......
-
Page 70: Warranty Information
SVAT ELECTRONICS now you can see IR Cut Filter ........No Housing Material....... Anodized Aluminum Housing Color ........Platinum Silver Signal/Noise Ratio ......>48dB Camera Bracket........ Yes Operating Temperature ..... -14°F ~ 122°F Operating Humidity ......98% Camera Power Input......DC 12V 300mA Power Adapter Input ...... - Page 71 SVAT ELECTRONICS now you can see SVAT SUPPORTS CRIME STOPPERS Crime Stoppers programs are operated as non-profit charities and are managed by a volunteer board of directors who raise funds and pay rewards to individuals who anonymously call with information that helps solve crime. Rewards are paid for tips that lead to the arrest and indictment of people charged with felony offenses, and to date Crime Stoppers statistics show a conviction rate of approximately 95%.
- Page 72 SVAT ELECTRONICS now you can see SVAT SUPPORTS CRIME STOPPERS To receive more information about Crime Stoppers or to make a charitable donation please fill in the fields below, cut on the dotted line an mail in. CLEARVU1 www.svat.com...
- Page 73 SVAT ELECTRONICS now you can see NOTES CLEARVU1 www.svat.com...
- Page 74 SVAT ELECTRONICS now you can see NOTES CLEARVU1 www.svat.com...
- Page 75 SVAT ELECTRONICS now you can see NOTES CLEARVU1 www.svat.com...
- Page 76 Disclaimer SVAT does not endorse any of SVAT products for any illegal activities. SVAT is not responsible or liable in any way shape or form for any damage, vandalism, theft or any other action that may occur while a SVAT product is in use by the purchaser.
Need help?
Do you have a question about the CLEARVU1 and is the answer not in the manual?
Questions and answers