
Subscribe to Our Youtube Channel
Related Manuals for Currys Essentials C50BW12


Summary of Contents for Currys Essentials C50BW12
- Page 1 FRIDGE FREE ZER I N ST R UC T I O N MA NUA L C 5 0B W 1 2 C50BW12_IB_1200321_Zell.indd 1 21/03/2012 5:24 PM...
- Page 2 C50BW12_IB_1200321_Zell.indd 2 21/03/2012 5:24 PM...
-
Page 3: Table Of Contents
Contents Unpacking ............................ 4 Installation ........................... 5 Location ..................................5 Reversing the Door Swing ........................... 5 Levelling the Unit ..............................9 Cleaning Before Use .............................. 9 Before Using Your Unit ............................9 Interior Accessories ..............................9 Product Overview ........................10 Operation ........................... -
Page 4: Unpacking
Thank you for purchasing your new Currys Essentials Fridge Freezer. We recommend that you spend some time reading this instruction manual in order that you fully understand all the operational features it offers. Read all the safety instructions carefully before use and keep this instruction manual for future reference. -
Page 5: Installation
Installation INSTALLATION Location When selecting a position for your unit you should make sure the floor is flat and firm, and the room is well ventilated with an average room temperature of between 16°C and 38°C. Avoid locating your unit near a heat source, e.g. cooker, boiler or radiator. Also avoid direct sunlight as it may increase the electrical consumption. - Page 6 INSTALLATION 2. At the top of the refrigerator, use a flat bladed screw driver to remove the 4 screw covers from the refrigerator lid. 3. Remove the 3 bolts and upper hinge that hold the upper door in place. Carefully lift the upper door out and place on a padded surface to prevent from scratching.
- Page 7 INSTALLATION 7. Unscrew the bottom hinge pin from the bottom bracket. Securely refit the pin onto the opposite side of the bottom hinge bracket. 8. Remove the screw cap from the bottom section of the refrigerator and transfer them to the left side of the lower door. Tighten securely.
- Page 8 INSTALLATION 12. Remove the top cover plate from the top left corner of the unit and transfer it to the corresponding position on the opposite side. 13. Reattach the upper door and ensure the middle hinge upper pin is properly positioned in the bottom bushing (hole) of the upper door.
-
Page 9: Levelling The Unit
INSTALLATION Levelling the Unit To do this adjust the two levelling feet at the front of the unit. If the unit is not level, the doors and magnetic seal alignments will not be covered properly. Cleaning Before Use Wipe the inside of the unit with a weak solution of bicarbonate soda. Then rinse with warm water using a ‘wrung-out’... -
Page 10: Product Overview
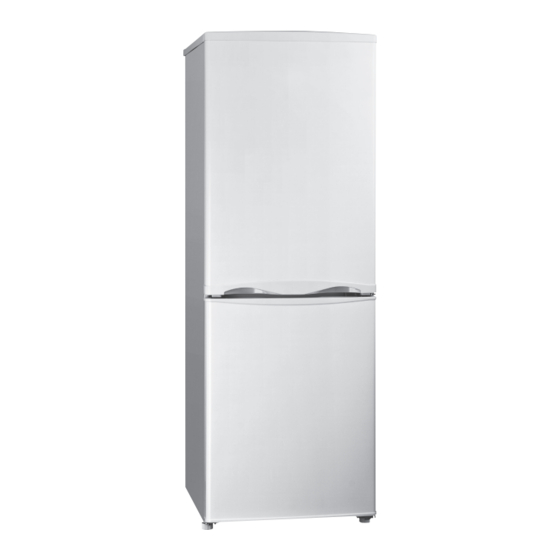
Product Overview Fridge Door Thermostat and Bulb Glass Shelves Door Shelves Salad Bin Cover Salad Bin Freezer Drawers Freezer Door Adjustable Feet Egg Tray Ice Tray C50BW12_IB_1200321_Zell.indd 10 21/03/2012 5:24 PM... -
Page 11: Operation
Operation Switching On Your Unit 1. Connect the mains cable to the mains socket. The internal temperature of your unit is controlled by a thermostat. There are seven settings, of which position 7 is the coldest and position 0 turns the unit off. -
Page 12: Shopping For Chilled Foods
Shopping for Chilled Foods • Take a quick look at the chilled food package and make sure it is in perfect condition. • Try to keep chilled food together whilst shopping and on the journey home as this will help to keep the food cold. -
Page 13: Preparations For Freezing
Preparations for Freezing • Use quality food and handle it as little as possible. Freeze food in small quantities as it freezes faster, takes less time to defrost and enables you to control the quantity you need better. • Leave cooked food to cool completely. Chill food before freezing if possible. • Consider how you will want to cook the food before freezing it. -
Page 14: Cleaning
Cleaning Defrosting Frost might build up in the freezer compartment after it has been used for a period of time. Scrape away the frost using a plastic scraper (not included). Do not use a metal or sharp instrument to scrape away the frost, nor should you use any electrical appliances to aid defrosting. -
Page 15: Maintenance
Maintenance Changing the Internal Light 1. Before carrying out the bulb replacement always adjust the thermostat control dial to Position 0, then disconnect the mains supply. 2. Use a flat bladed screwdriver to gently pry the translucent light cover away. 3. -
Page 16: Specifications
Specifications Model C50BW12 Appliance Category Category 7 (Refrigerator – Freezer) Unit Dimensions Without Handle 495 x 569 x 1438 mm (W x D x H) Fresh Food Storage Compartment 112L Volume Frozen Food Storage Volume Defrosting Type Manual Defrosting Climate Class N/ST This appliance is intended to be used at an ambient temperature between 16°C and 38°C. -
Page 17: Safety Warnings
Safety Warnings For your continued safety and to reduce the risk of injury or electric shock, please follow all the safety precautions listed below. • Read all instructions carefully before using the unit and keep them for future reference. • Retain the manual. If you pass the unit onto a third party, make sure to include this manual. • Keep ventilation openings in the unit enclosure clear of obstructions. - Page 18 Normal energy consumption Increased energy consumption Installation site In a ventilated room. In an enclosed, unventilated room. Protected from direct sunlight. In direct sunlight. Not situated near to a heat source Situated near to a heat source (radiator, oven). (radiator, oven). Where the ideal ambient room Where there is a high ambient room temperature is approx 20°C.
- Page 19 C50BW12_IB_1200321_Zell.indd 19 21/03/2012 5:24 PM...
- Page 20 If you require a replacement for any of the items listed below, please quote their corresponding part numbers: Replacement Part Part Number Adjustable Glass Shelf 1106161 Salad Bin Cover 1106160 Salad Bin 1120159 Upper Fridge Door Shelf 1112950 Lower Fridge Door Shelf 1112955 Upper Freezer Drawer 1120160...
Need help?
Do you have a question about the C50BW12 and is the answer not in the manual?
Questions and answers