Table of Contents
Advertisement
Quick Links
Advertisement
Table of Contents

Related Manuals for Maxplus Industries HTS 9300

Summary of Contents for Maxplus Industries HTS 9300
- Page 1 HTS 9300...
-
Page 2: Table Of Contents
Contents 1. Introduction 1.1 Overview 1.2 Main Features 2. Safety/Precautions 2.1 Safety 2.2 Precautions 3. Check Point before Use 3.1 Accessories 4. Controls/Functions 4.1 Front Panel 4.2 Rear Panel 4.3 Remote controller 5. How to Connect 6. Operation 6.1 Getting Started 6.2 System Setting 6.3 Channels 6.4 Guide... -
Page 3: Introduction
Introduction Safety/Precaution 1.1 Overview 2.1 Safety This satellite receiver is designed for using digital free-to-air channel reception. Enjoy the rich choice of more than 4,000 different channels, broadcasting a large range of culture, Be sure to read the user's manual before Do not touch the power cord with wet sports, cinema, news, events, etc. -
Page 4: Precautions
2.2 Precautions Check Points before Use When installing the unit 3.1 Accessories Install the unit horizontally. An uneven Do not put heavy items such as a TV installation may cause the unit to be on the unit. That may cause the unit to Accessories of this are as below damaged. -
Page 5: Controls/Functions
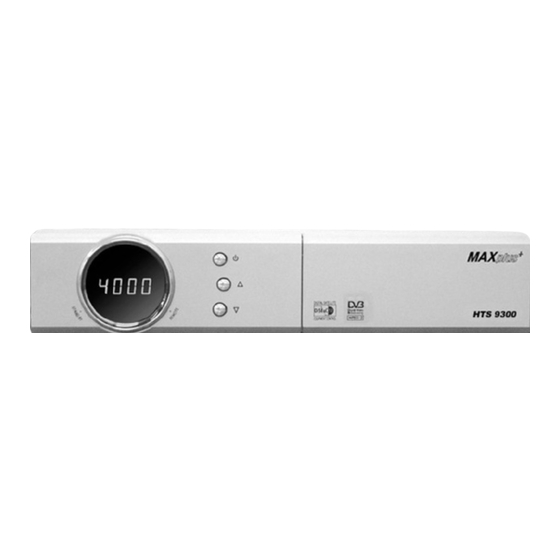
4.2 Rear Panel Controls/Functions 4.1 Front Panel LNB INPUT 950-2150MHz 400mA max. RF OUT AC 90-250V UHF 21-69 47-63Hz, 30W LOOP OUT TV ANT IN AUDIO VIDEO RS-232C No. Name Connector Function 1 RF OUT UHF 21-69 IEC 169-2 male Output to TV. - Page 6 4.3 Remote Control 4.3 Remote Control Up & Down ( ) : Changes POWER : Turns the receiver On/Off. channels in non-menu mode and moves MUTE : Turns the sound On/Off. the cursor up/down in menu mode. Numeric Keys ( 0-9 ) : Controls the Left &...
-
Page 7: How To Connect
How to Connect Operation 5.1 When Connecting IRD to TV with RF, AV connectors 6.1 Getting Started After your receiver is powered on, proceed with installation as follows: Connect the TV antenna to TV ANT IN Connect the RF-IN of TV to RF-OUT 1) Menu Language Setting Connect the Video and Audio of TV to the Video and Audio. - Page 8 6.1 Getting Started 6.1 Getting Started 2) Antenna Setup - Sat Degree : Satellite location. - Antenna Position : Press Press the MENU button to display the main menu. - Goto Reference : Move the dish to the 0 position. Use the to move in menu.
- Page 9 6.1 Getting Started 6.1 Getting Started <Figure 6-4> <Figure 6-5> <Figure 6-6> <Figure 6-7> Note : Now you have complete all steps needed for watching programs. If you could not see the program after finishing these procedures, please contact a shop where you bought your receiver or installer who installed Manual Scan <Figure 6-6>...
- Page 10 6.1 Getting Started 6.1 Getting Started In the right side of screen, detailed information of the selected channel will be TV / RADIO switching displayed. You can use this menu when you change a TV channel to a Radio channel or vice (Satellite Name, Frequency(polar) and Channel Name) versa.
-
Page 11: System Setting
6.2 System Setting 6.2 System Setting 1) Time Setting 2) A/V Output Setting This sub menu allows you to set your local time, wake up time, wake up channel and sleep This sub menu allows you to set audio/video output setting. <Figure 6-10> time. - Page 12 6.2 System Setting 6.2 System Setting <Figure 6-12> <Figure 6-11> 4) Security Setting 5) Database Reset This sub menu allows you to change the password option to unlock or lock some menu This sub menu allows you to restore the factory set values in case the user has encountered entry and to change password.
-
Page 13: Channels
6.3 Channels 6.3 Channels 1) Set Favorites Note : The VIDEO PID, AUDIO PID and PCR PID are very important for optimal satellite signal reception. We recommend you get professional advice This sub menu allows you to set up favorite name and favorite lists as you want. where available. - Page 14 6.3 Channels 6.3 Channels 4) Lock Channels Press the on the "Skip Channels". The following menu will be displayed. <Figure 6-19> This sub menu allows you to lock the channels for prevent watching this channel. Press to select the channel that you want to skip. Skip icon will be displayed. Once the channel is locked, every time you try to watch the channel, you will be asked to enter password.
-
Page 15: Guide
6.3 Channels 6.4 Guide <Figure 6-20> <Figure 6-21> 2) Timer This sub menu allows you to set the on/off time of your receiver. 6.4 Guide If you press RED button in guide menu, timer menu will be displayed. <Figure 6-22> Press the to move to other items. -
Page 16: Games
6.5 Games 6.5 Games 1) Tetris Press the to move. Press the on the "Tetris". The following menu will be displayed. <Figure 6-23> Press RED button to undo previous move. You can undo only one step. You can select skill using Press GREEN button to restart. -
Page 17: System Information
6.5 Games Trouble Shooting There may be various reasons for the abnormal operation of the unit.Therefore,if the unit does not work properly,check it according to the procedures shown in the table below : Problem Possible causes Remedy LED on front panel AC power cord Connect power cord properly does not light. -
Page 18: Specifications
Specifications System capabilities Fully DVB compliant Power supply Power consumption max 30W LNB/Tuner input Connector IEC 169-24,female Supply voltage 90V ~ 250V Frequency range 950MHz ~ 2150MHz Supply frequency 47Hz ~ 63Hz Signal level -65dBm ~ -25dBm Rear Panel Video out 1 X RCA cinch connectors LNB supply...
Need help?
Do you have a question about the HTS 9300 and is the answer not in the manual?
Questions and answers