Sign In
Upload
Download
Table of Contents
Contents
Add to my manuals
Delete from my manuals
Share
URL of this page:
HTML Link:
Bookmark this page
Add
Manual will be automatically added to "My Manuals"
Print this page
×
Bookmark added
×
Added to my manuals
Manuals
Brands
Doosan Manuals
Engine
G430 LP
Service manual
Doosan G430 LP Service Manual
G430 lp engine
Hide thumbs
1
2
3
Table Of Contents
4
5
6
7
8
9
10
11
12
13
14
15
16
17
18
19
20
21
22
23
24
25
26
27
28
29
30
31
32
33
34
35
36
37
38
39
40
41
42
43
44
45
46
47
48
49
50
51
52
53
54
55
56
57
58
59
60
61
62
63
64
65
66
67
68
69
70
71
72
73
74
75
76
77
78
79
80
81
82
83
84
85
86
87
88
89
90
91
92
93
94
95
96
97
98
99
100
101
102
103
104
105
106
107
108
109
110
111
112
113
114
115
116
117
118
119
120
121
122
123
124
125
126
127
128
129
130
131
132
133
134
135
136
137
138
139
140
141
142
143
144
145
146
147
148
149
150
151
152
153
154
155
156
157
158
159
160
161
162
163
164
165
166
167
168
169
170
171
172
173
174
175
176
177
178
179
180
181
182
page
of
182
Go
/
182
Contents
Table of Contents
Troubleshooting
Bookmarks
Table of Contents
Important Safety Information
Table of Contents
General Information
Shop Safety
Fuel Information
What Is LPG
Air Temperature Versus Power Output
Altitude Versus Power Output
General Description & Operation
Engine Component Description
Lubrication
Thread Repair
Cleanliness and Care
Replacing Engine Gaskets
Use of RTV and Anaerobic Sealer
Separating Parts
Tools and Equipment
Specifications
Technical Data
General Description
Fuel System
Cooling System
Lubrication System
Engine Electrical
Exhaust System (Low Emission Version Only)
Engine Mechanical Data
Fastener Tightening Specifications
Sealer, Adhesives and Lubricants
Engine Mechanical Specifications
Maintenance
Test Fuel System for Leaks
Inspect Engine for Flluid Leaks
Engine Crankcase Oil
Oil Recommendations
Checking/Filling Engine Oil Level
Changing Engine Oil and Filter
Accessory Drive Belts
Inspect Electrical System
Inspect Vacuum Lines and Fittings
Inspect Fuel Lines and Fittings
Engine Compression Check
Cooling System
Checking Coolant Level
Inspect Coolant Hoses
Inspect Ignition System
Replace Spark Plugs
Replace LP Fuel Filter Element
Test Fuel Lock (Electric)
Inspect Pressure Regulaator/Vaproizer
Inspect LP Mixer (Standard LP Truck)
Inspect Variable Venturi Air/Fuel Mixer (Low Emission LP Truck)
Inspect Complete Exhaust System for Leaks, Damage
Engine Control Unit (ECU) and Others (Low Emission LP Truck)
Maintenance Schedule
Troubleshooting
Engine Performance
Engine Starting Problems
Charging System Problems
Instrument Problems
Engine Noise
Oil Pressure Diagnostics
Oil Pressure Problems
Water in Engine
Engine Overheating
LP Fuel System
(Sandard And/Or Low Emission Version)
Starting System
General Description
Start Relay Tests
Starting Motors
Charging System
General Description
Alternators
Remove & Install Alternator
Ignition System
General Information
Conventional Ignition Systems
High Energy Ignition Systems
Module
Pulse Generator
Magnetic Flux Path
Current Limiting Circuit
Dwell Control Circuit
Ignition Coil
Hel Models
Electronic Spark Timing (EST) Distributor
Spark Plug Wires
Spark Advance Curves
Delco Electronic Spark Timing (EST) Distributor Service
General Description
EST Distributor Component Testing
EST Distributor Removal
Cleaning and Inspection
EST Distributor Disassembly
EST Distributor Installation (Engine Not Disturbed)
EST Distributor Installation (Engine Disturbed)
Ignition Timing - EST System
Lp Fuel System
General Information
Electric Fuelock Models
Converter
Fuel Tank
LP Relief Valve
Carburetor
Tests or Adjustments
Carburetor Adjustment
Fuel System Leak Check
Recommendation for Lpfuel Systems
LP Converter - Check, Clean
Disassembly & Assembly
LP Gas Carburetor
LP Gas Fuelock
LP Gas Converter
Lp Fuel System (Low Emission Version)
General Description
System Overview
Fuel Lock (Electric)
Pressure Regulator/Vaporizer
Pressure Regulator Theory of Operation
Variable Venturi Air/Fuel Mixer
Variable Venturi Air/Fuel Mixer Theory of Operation
Catalytic Muffler
Engine Control (ECU)
Oxygen Sensor
Vacuum Switch
Fuel Control Valve
Tests or Adjustments
LP Carburetor-Check, Clean
LP Converter-Check, Clen
Inspection of Fuel Lock Valve
Inspection of Fuel Control Valve
Inspection of Vacuum Switch(MAP)
Inspection of Oxygen Sensor
Disassembly & Assembly
LP Converter
Governor System
General Description
Governor Operation
Adjustment Procedures
Lubrication System
General Description
Testing & Adjusting
Lubrication System Problems
Oil Pressure Check
Cooling System
General Description
Testing & Adjusting
Cooling System Visual Inspection
Cooling System Tests
Thermostat
Cooling System Heat Problems
Cooling System Recommendation
Belt Adjustment
V-Belt Diagnosis
Service Procedures
Draining and Filling the Cooling System
Flushing the Cooling System
Radiator Service
Thermostat Replacement
Water Pump Replacement
Remove & Install Water Temperature Sender
Base Engine Service Procedure
Disassembled View (1 of 4)
Disassembled View (2 of 4)
Disassembled View (3 of 4)
Disassembled View (4 of 4)
Draining Fluids and Oil Filter Removal
Engine Flywheel Removal
Distributor Removal
Ignition Coil Removal
Lift Bracket Removal
Spark Plug Removal
Intake/Exhaust Manifold Removal
Crankshaft Pulley Removal
Valve Rocker Arm Cover Removal
Pushrod Cover Removal
Intake/Exhaust Manifold Disassemble and Assemble
Intake/Exhaust Manifold Clean and Inspect
Water Pump Removal
Valve Rocker Arm and Pushrod Removal
Measuring Camshaft Lobe Lift
Valve Train Components Inspect (Cylinder Head)
Valve Lifter Removal
Cylinder Head Removal
Oil Pan Removal
Oil Pump Removal
Oil Level Indicator and Tube Removal
Engine Front Cover Removal
Measuring Crankshaft and Camshaft Sprocket Runout
Measuring Timing Sprocket Teeth Backlash
Crankshaft Sprocket Removal
Camshaft Removal
Crankshaft and Camshaft Sprocket Inspect
Timing Gear Oil Nozzle Removal
Piston, Connecting Rod and Bearing Removal
Crankshaft and Bearings Clean and Inspect (Connecting Rod Bearing Clearance)
Crankshaft Rear Oil Seal and Housing Removal
Crankshaft, Bearings and Bearing Cap Removal
Crankshaft and Bearings Clean and Inspect
Crankshaft and Bearings Clean and Inspect (Main Bearing Clearance)
Camshaft Bearing Removal
Distributor Lower Bushing and Thrust Washer Removal
Oil Filter Bypass Valve Removal and Installation
Cylinder Block Clean and Inspect
Cylinder Bore Measurements
Cylinder Boring and Honing
Distributor Lower Bushing and Thrust Washer Installation
Piston and Connecting Rod Disassemble
Piston and Connecting Rod Clean and Inspect
Piston Selection
Piston and Connecting Rod Assemble
Camshaft and Bearings Clean and Inspect
Camshaft Sprocket and Retainer Removal and Installation
Camshaft Bearing Installation
Oil Pump Disassemble
Oil Pump Clean and Inspect
Oil Pump Assemble
Cylinder Head Disassemble
Cylinder Head Clean and Inspect
Valve Guide Reaming/Valve and Seat Grinding
Rocker Arm Stud Removal and Installation
Cylinder Head Assemble
Crankshaft, Bearings and Bearing Cap Installation
Crankshaft Rear Oil Seal and Housing Installation
Piston, Connecting Rod and Bearing Installation
Timing Gear Oil Nozzle Installation
Crankshaft Sprocket Installation
Camshaft Installation
Engine Front Cover and Oil Seal Installation
Oil Pump Installation
Oil Pan Installation
Crankshaft Pulley Installation
Cylinder Head Installation
Valve Lifter Installation
Valve Rocker Arm and Pushrod Installation
Pushrod Cover Installation
Valve Rocker Arm Cover Installation
Oil Level Indicator and Tube Installation
Water Pump Installation
Intake/Exhaust Manifold Installation
Spark Plug Installation
Lift Bracket Installation
Ignition Coil Installation
Distributor Installation
Engine Flywheel Installation
Engine Block Coolant Plug/Oil Filter Installation
Special Tools and Equipment
Low Emission Version Only
Advertisement
Quick Links
1
Engine Electrical
Download this manual
Service Manual
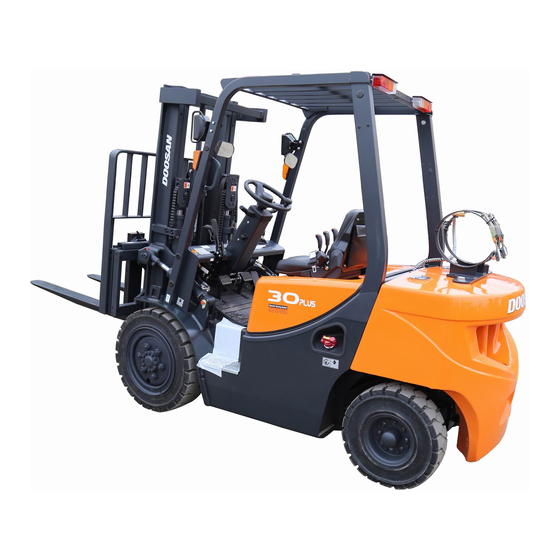
G430 LP Engine
Standard Version
Low Emission Version
G20P-3,
GC20P-3, GC25P-3, GC30P-3
G25P-3,
G30P-3
SB4005E01
Oct. 2001
Table of
Contents
Previous
Page
Next
Page
1
2
3
4
5
Advertisement
Table of Contents
Need help?
Do you have a question about the G430 LP and is the answer not in the manual?
Ask a question
Questions and answers
Related Manuals for Doosan G430 LP
Engine Doosan G420F Service Manual
Lp/gasoline and lp/dual fuel engines (326 pages)
Engine Doosan G424FE Service Manual
Lp and lp/dual fuel engines (306 pages)
Engine Doosan G30P-3 Service Manual
G430 lp engine (182 pages)
Engine Doosan G25P-3 Service Manual
G430 lp engine (182 pages)
Engine Doosan A2300 Service Manual
(242 pages)
Engine Doosan G643E Service Manual
Lp engine for g35s-5, g40s-5, g45s-5, g50c-5, g55c-5, gc35s-5, gc40s-5, gc45s-5, gc50c-5, gc55c-5, g40sc-5, g45sc-5, g50sc-5, g55sc-5, g50s-5, g60s-5, g70s-5 (261 pages)
Engine Doosan GV158TIC Operation & Maintenance Manual
Gas generator engine (162 pages)
Engine Doosan GV222TIC Operation & Maintenance Manual
Gas generator engine (162 pages)
Engine Doosan GL08K Operation & Maintenance Manual
Gas vehicle engine (206 pages)
Engine Doosan DV11 Operation And Maintenance Manual
(221 pages)
Engine Doosan D35S-5 Service Manual
(152 pages)
Engine Doosan DP158LCF Operation & Maintenance Manual
Generator diesel engine (160 pages)
Engine Doosan DE12T Operation & Maintenance Manual
(176 pages)
Engine Doosan D35S-5 Service Manual
(366 pages)
Engine Doosan DL06 Operation Manual
Interim tier iv (211 pages)
Engine Doosan DL06 Manual
(207 pages)
This manual is also suitable for:
G30p-3
G20p-3
G25p-3
Gc20p-3
Gc25p-3
Gc30p-3
...
Show all
G430
Table of Contents
Save PDF
Print
Rename the bookmark
Delete bookmark?
Delete from my manuals?
Login
Sign In
OR
Sign in with Facebook
Sign in with Google
Upload manual
Upload from disk
Upload from URL


Need help?
Do you have a question about the G430 LP and is the answer not in the manual?
Questions and answers