Table of Contents
Advertisement
Advertisement
Table of Contents

Related Manuals for Ancona Gas cooktop


Summary of Contents for Ancona Gas cooktop
-
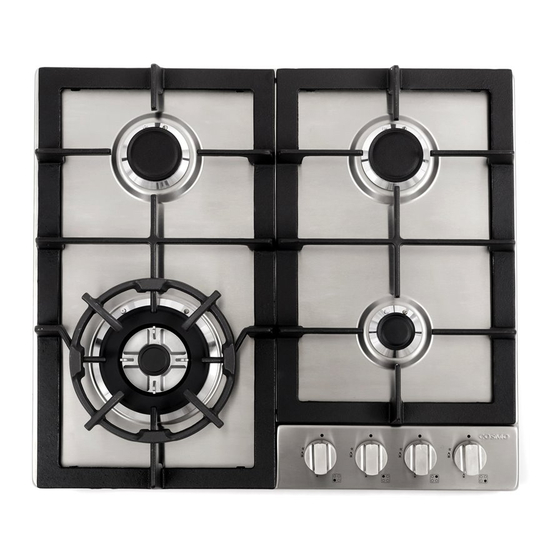
Page 1: Gas Cooktop
GAS COOKTOP 23” (580 mm) USER MANUAL & INSTALLATION INSTRUCTIONS IMPORTANT SAFETY INSTRUCTIONS Carefully read the following important information regarding installation safety and maintenance. Keep these instructions for future reference. 2014-09-15 MAAN2124-4... -
Page 2: Table Of Contents
Table of Contents Table of Contents..........................2 Safety ..............................3 Parts Supplied ............................ 8 Getting Started ........................... 8 Grounding Instructions ........................9 Liquefied Petroleum (Propane) Gas Conversion ................10 Surface Cooking ..........................10 Flame Size ............................ 10 Proper Burner Adjustments ......................11 Location of the Burners ......................... -
Page 3: Safety
Safety IMPORTANT SAFETY NOTICE READ ALL INSTRUCTION BEFORE INSTALLING AND OPERATING THIS APPLIANCE • Remove all tape and packaging before using the cooktop. Never allow children to play with packaging material. Do not remove the model/serial plate attached to the cooktop. •... - Page 4 • Installation and service must be performed by a qualified installer, servicer or the gas supplier. Ask your dealer to recommend a qualified technician and an authorized repair service. Know how to shut off gas supply at the meter and disconnect the electrical power to the cooktop at the circuit breaker or fuse box in case of an emergency.
- Page 5 • DO NOT TOUCH THE COOKTOP SURFACE, THE BURNERS, GRATES OR ANY AREAS NEAR THEM. Surface burners or cooktop may be hot even though flames are not visible. Areas near surface burners or cooktop may become hot enough to cause burns. During and after use, do not touch, or let clothing or other flammable materials touch these areas until they have had sufficient time to cool.
- Page 6 • Never use this appliance as a space heater to heat or warm the room. Doing so may result in carbon monoxide poisoning and overheating of the oven. • Know which knob controls which surface burner. Visually check that the burner has lit. Then adjust the flame so it does not extend beyond the edge of the utensil.
- Page 7 Proper relationship of utensil to the surface unit will also improve efficiency. • Do not use stove top grills on your gas cooktop. If you use a stove top grill on a sealed gas burner, it will cause incomplete combustion and can result in exposure to carbon monoxide levels...
-
Page 8: Parts Supplied
Parts Supplied 1 x Foam Gasket 1 x Regulator 4 x Mounting Clips 1 x Fitting 7 x LPG Nozzles 1 x 3/32” Screwdriver 1 x 7mm Nut Driver 8 x Rubber Grate Supports 1 x Triple Ring Igniter 1 x Igniter 1 x Triple Ring Thermocouple 1 x Thermocouple 1 x Triple Ring Grate... -
Page 9: Getting Started
Getting Started Grounding Instructions • This cooktop features a pilotless electric ignition for energy savings and reliability. It operates on a 120 volt, 60 Hz power supply. A separate circuit, protected by a 15 amp time delay fuse or circuit breaker, is required. For personal safety, the cooktop must be properly grounded. -
Page 10: Liquefied Petroleum (Propane) Gas Conversion
• Any additions, changes or conversions required in order for this appliance to satisfactorily meet the application needs must be made by a qualified service technician in accordance with the manufacturer’s instructions and all codes and requirements of the authority having jurisdiction. Failure to follow the instructions could result in serious injury or property damage. -
Page 11: Proper Burner Adjustments
• Never extend the flame beyond the outer edge of the utensil (see Figure 2). A higher flame simply wastes heat and energy, and increases your risk of being burned by the flame. Figure 2 Proper Burner Adjustments • The color of the flame is the key to proper burner adjustment. A good flame is clear, blue and hardly visible in a well-lighted room. -
Page 12: Placement Of Burner Heads And Caps
Placement of Burner Heads and Caps For all burners: • Place a burner cap on each burner head (see Figure 4), matching the cap size to the head size. The cap for each burner has an inner locating ring which centers the cap correctly on the burner head. -
Page 13: Setting Surface Controls
Burner Minimum Diameter of Pan Maximum Diameter of Pan Semi-rapid 120 mm (4 ¾ inches) 200 mm (8 inches) Auxiliary 100 mm (4 inches) 160 mm (6 ¼ inches) Triple-ring 220 mm (8 ¾ inches) 260 mm (10 ¼ inches) Note: Always use a utensil for its intended purpose. -
Page 14: Knob Symbols
Knob Symbols • Off - No gas flow On –Maximum gas flow Minimum gas flow Lighting the Burners 1) To obtain a flame more easily, light the burner before placing a cooking utensil on the burner grate. 2) To light a burner, press the knob of the burner fully down and turn it anti-clockwise to the “maximum flow”... -
Page 15: Care And Cleaning
Care and Cleaning IMPORTANT To avoid possible burns use care when cleaning the cooktop. DO NOT attempt to clean the cooktop whenever the cooktop or burner heads are still hot. To avoid possible burns DO NOT attempt any of the following cleaning instructions before turning OFF ALL of the surface burners and allowing them to cool. -
Page 16: Solutions To Common Problems
Solutions to Common Problems IMPORTANT Before calling for service, review this list. It may save you both time and expense. This list includes common experiences that are not the result of defective workmanship or material in your cooktop. PROBLEM POSSIBLE REASONS SOLUTIONS Burner cap The burner is not installed correctly. -
Page 17: Installation Instructions
PROBLEM POSSIBLE REASONS SOLUTIONS The thermocouple is contaminated The flame Clean the thermocouple. by food residue. goes out Thermocouple during The flame is too low and cannot Adjust the flame a little higher. operation reach the thermocouple. Change the natural gas nozzle to a liquid propane nozzle. -
Page 18: Advance Preparation
Advance Preparation • For proper operation of a gas appliance, the air necessary for the combustion of the gas must be able to flow into the room naturally. The air must flow into the room directly through openings in the outside walls. -
Page 19: Provide An Adequate Gas And Electrical Supply
Provide an Adequate Gas and Electrical Supply • Installation must comply with local codes. In the absence of local codes, the gas cooktop must comply with the National Fuel Gas Code ANSI Z223.1—latest edition in the United States, or in Canada CAN/CGA B149.1, and CAN/CGA B149.2, and the National Electrical Code ANSI/NFPA No. -
Page 20: Tools And Materials Needed
Tools and Materials Needed MATERIALS YOU WILL NEED: Joint Sealant Pipe Fittings Shut-Off Valve CSA-Approved Flexible ½” or ¾” Gas Line TOOLS YOU WILL NEED: Pencil Phillips-Head Screwdriver Ruler Safety Glasses 1/8″ Drill Bit & Electric or Hand Drill Saber Saw Pipe Wrench Cutting the Countertop 1) Use a 24”... - Page 21 2) Cut the opening in the countertop. To ensure accuracy it is best to make a template (see Figure 9) for the opening. Make sure the sides are parallel also rear and front cuts are exactly perpendicular to the sides. Observe all minimum clearances.
-
Page 22: Installing The Pressure Regulator
5) Secure cooktop from underneath with the supplied clips and screws (see Figure 12). Figure 12 Installing the Pressure Regulator WARNING: Never reuse old flexible connectors. The use of old flexible connectors can cause gas leakage and personal injury. Always use new flexible connectors when installing a gas appliance. To reduce the possibility of gas leakage, apply Teflon tape or a thread compound approved for use with LP or Natural gases to all threaded connections. - Page 23 • The gas supply line must be equipped with an approved manual shut-off valve. In an easily accessible location in the same room as the cooktop. Do not block access to the shutoff valve. Be sure you know how and where to shut off the gas supply to the cooktop.
-
Page 24: Electrical Connection
6) After connecting the cooktop to the gas supply, make sure all burners knobs are in the OFF position and check the system for leaks with a manometer. If a manometer is not available, turn on the gas supply and use a liquid leak detector (or soap and water) at all joints and connections to check for leaks. -
Page 25: Assembling The Burners
Figure 15 Assembling the Burners The electrode of the electronic ignition system is positioned above the surface of the burner base. Do not remove a burner cap or touch the electrode of a burner while another is turned on. Damage or electrical shock may occur. -
Page 26: Lp/Propane Gas Conversion
Figure 17 3. Operation of the electric igniters should be tested after the cooktop and supply line have been carefully checked for leaks and the cooktop has been connected to the electrical power. To check igniters, push and turn a burner valve to the LITE position. All spark igniters will make a series of sparks (ticking sounds), but only the burner turned to LITE will light. - Page 27 WARNING Failure to make the appropriate conversion can result in serious personal injury and property damage. TOOLS YOU WILL NEED FOR CONVERSION Wrench 7mm Nut Driver Safety Glasses Small Flat-head Screwdriver (2 to 2.4 mm or 3/32″ tip size, 60 mm long) A.
- Page 28 2) This is how the retainer pin looks for Natural Gas usage (see Figure 20). Figure 20 3) Remove the retainer pin (see Figure 21). Figure 21 4) Reverse the retainer pin and put back into the regulator cap. This is how the regulator pin looks for LP gas usage (see Figure 22).
- Page 29 5) Screw the regulator cap back into the regulator and re-attach the regulator to the nipple and flare union (see Figures 14 and 23). Figure 23 B. CHANGE BURNER NOZZLES INSTALLATION TIP: First remove all nozzles and then start replacing them. This will help to prevent the possibility that some may not be replaced.
- Page 30 NOZZLES Figure 24 TRIPLE RING BURNER AUXILARY BURNER 5 NOZZLES SEMI-RAPID BURNER RAPID BURNER 1 NOZZLE EACH 3) Install the proper nozzles in the exact locations as noted in the illustrations above (see Figure 24). 4) Replace the burner bases, heads, caps and top grates. Make sure burner caps are properly seated on the burner head (see Figure 17).
- Page 31 To adjust the flame, remove the knobs, insert a screwdriver through the access hole in valve shaft as shown (see Figure 25). Make the adjustment by slowly turning the screw until flame appearance is correct. Figure 25 If the flames are too small or fluttered, open the valve more than the original setting. If the flames are too large, close the valve more than the original setting.
-
Page 32: Limited Product Warranty
Subject to the limitations, exclusions and disclaimers hereof, AMS warrants exclusively to the original purchaser (the “Purchaser”) of this Ancona product (the “Product”) that it shall be free from defects in material or workmanship (the “Limited Product Warranty”). The duration of the Limited Product Warranty is 12 months from the date of original purchase (the “Warranty Period”). - Page 33 WARRANTY CLAIM PROCEDURE In the event a claimable defect occurs, the Purchaser shall call AMS’ customer service department at 1-800- 350-4562 in order to obtain a return authorization number and shipping instructions (the “Authorized Shipping Instructions”). The Purchaser shall then promptly ship the Product, in accordance with the Authorized Shipping Instructions with the following documentation/information: ...
Need help?
Do you have a question about the Gas cooktop and is the answer not in the manual?
Questions and answers