Blaupunkt Los Angeles MP71 Operating Instructions Manual
Radio / cd
Hide thumbs
Also See for Los Angeles MP71:
- Operating instructions manual (31 pages) ,
- Installation instructions manual (6 pages) ,
- Installation instructions manual (7 pages)
Table of Contents
Advertisement
Advertisement
Table of Contents

Subscribe to Our Youtube Channel
Related Manuals for Blaupunkt Los Angeles MP71


Summary of Contents for Blaupunkt Los Angeles MP71
- Page 1 Radio / CD Los Angeles MP71 Operating instructions...
- Page 2 Bitte aufklappen Open here Ouvrir s.v.p. Aprite la pagina Hier openslaan a.u.b. Öppna Por favor, abrir Favor abrir Åbn her...
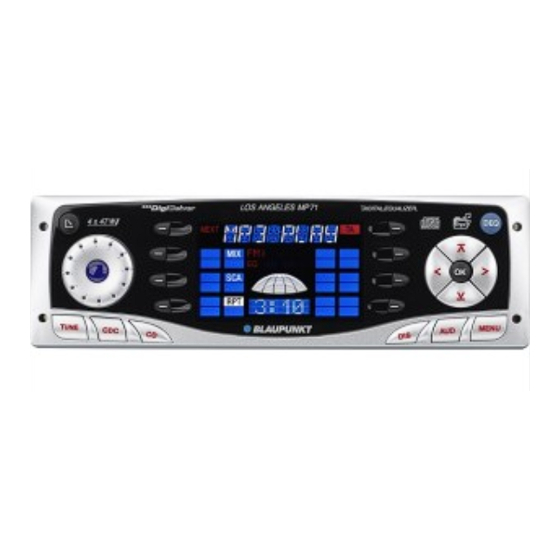
- Page 4 CONTROLS button, to open the control panel Button, to switch the unit on/off and operate the volume mute feature Volume control Softkeys, the function of the softkeys depends on the display content. OK button, to confirm menu entries and close the menu DEQ button, to open the equalizer menu Multifunction rocker switch...
-
Page 5: Table Of Contents
CONTENTS Fast searching (audible) ......48 Notes and accessories ....34 Random track play (MIX) ...... 48 Road safety ........... 34 Scanning tracks (SCAN) ....... 48 Installation ..........34 Repeating tracks (REPEAT) ....48 Accessories ........... 34 Changing the display ......49 Theft protection KeyCard .... -
Page 6: Notes And Accessories
NOTES AND ACCESSORIES Accessories Notes Only use accessories approved by Blaupunkt. Thank you for deciding to use a Blaupunkt product. We hope you enjoy using this new Remote control piece of equipment. The optional RC 08, RC 10 or RC 10H re-... -
Page 7: Theft Protection Keycard
If a KeyCard is lost or damaged, you can purchase a replacement KeyCard from a Note: Blaupunkt dealer. If you insert a card which the unit does not recognize, e.g. a cash card, If you use two KeyCards, the second Key- “WRONG KC”... -
Page 8: Lost Or Damaged Keycard
THEFT PROTECTION Press the MENU button 8. Preparing a new KeyCard / entering the master code button 7 un- Keep pressing the If you no longer have a valid KeyCard for your til “LEARN KC” appears in the display. unit and you want to prepare a new KeyCard: button 7. -
Page 9: Looking After The Keycard
THEFT PROTECTION SWITCHING ON/OFF To close the menu, Switching on/off press the OK button 5 or MENU but- There are various ways of switching the unit ton 8. on/off. The settings are saved. Switching on/off using button 2 Displaying the radio passport To switch the unit on, press button 2. -
Page 10: Activating Mute
VOLUME Activating mute Adjusting the volume This feature allows you to instantaneously The volume can be adjusted in steps from 0 reduce the volume (mute). (off) to 66 (maximum). Briefly press button 2. To increase the volume, turn the volume “MUTE”... -
Page 11: Sound And Volume Distribution Settings
SOUND AND VOLUME DISTRIBUTION SETTINGS Adjusting the right/left volume Sound and volume distribution (balance) distribution settings To adjust the balance, press the AUD button 9. Note: You can adjust the bass, treble and “BASS” appears in the display. loudness individually for each audio button 7 un- Keep pressing the source. -
Page 12: Adjusting The Display
DISPLAY Night-time display brightness Adjusting the display Press the MENU button 8. You can adjust the display to suit the installa- button 7 un- tion position in your vehicle and your own pref- Keep pressing the erences. til “DIM NGHT” appears in the display. Set the brightness using the Adjusting the viewing angle buttons 7. -
Page 13: Radio Mode
RADIO MODE Radio mode Switching the RDS function on/off To use the RDS functions (AF and REG), This unit is equipped with an RDS radio re- press the TUNE button > in radio ceiver. Many of the receivable FM stations transmit a signal that not only carries the pro- mode. -
Page 14: Selecting The Frequency Range / Memory Level
RADIO MODE Selecting the frequency range / Tuning into stations manually memory level You can also tune into stations manually. button 7. This unit can receive programmes broadcast Press the over the FM and MW frequency ranges. There Note: are three memory levels available for the FM You can only tune into stations manually range and an additional one for the MW range. -
Page 15: Storing Station Presets
RADIO MODE Storing station presets Scanning stations Storing stations manually Scanning receivable stations (Radio-SCAN) Select the required memory level FM I, You can briefly play (scan) all the receivable FM II, FMT or the MW frequency range. stations. You can set the scanning time (scant- Tune into the required station as de- ime) to between 5 and 30 seconds in the scribed in the section entitled “Tuning... -
Page 16: Setting The Scantime
RADIO MODE Note: Stopping SCAN and continuing listening If no station is found that corresponds to to a station the selected programme type, you will Press the softkey 4 that corresponds hear a beep sound and “NO PTY” ap- to the “SCA” display item again. pears briefly in the display. -
Page 17: Optimising Radio Reception
RADIO MODE Optimising radio reception To select a stored programme type, press one of the softkeys 4 corre- Treble reduction feature during sponding to the “ST1” – “ST6” display interference (HICUT) items. The HICUT function improves the sound dur- The selected programme type is displayed ing poor radio reception. -
Page 18: Switching Between Stereo And Mono
RADIO MODE TRAFFIC INFORMATION To close the menu, Traffic information press the OK button 5 or MENU but- Your unit is equipped with an RDS-EON re- ton 8. ceiver. The settings are saved. EON (Enhanced Other Network) is a feature that involves the broadcasting of radio sta- Switching between stereo and tion information within a broadcasting net-... -
Page 19: Cd Mode
OK button 5 or MENU but- can generally also be played. Due to the var- ton 8. ying quality of CDs, Blaupunkt cannot guar- antee that this will work properly. If problems The settings are saved. occur with your own burned CDs, you should try another brand of CD blank or choose an- other blank colour. -
Page 20: Ejecting A Cd
CD MODE Random track play (MIX) Gently close the control panel whilst ex- erting a little pressure until you feel it Press the softkey 4 that corresponds click into place. to the “MIX” display item. The CD menu appears and CD playback “MIX CD”... -
Page 21: Changing The Display
MP3 MODE Changing the display MP3 mode You can switch between various display On the Los Angeles MP71 you can also play modes in CD mode: CD-Rs containing MP3 music files. Track number and clock display. MP3 is a process developed by the Fraun- Track number and playing time display. -
Page 22: Switching To Mp3 Mode
T005 T006 maximum of 256 kB/sec. T007 T001 T001 Only MP3 files with the “.MP3” file extension T008 T002 T002 can be played on the Los Angeles MP71. T009 T003 T003 T010 T004 T004 T011 Note: T005 T005... -
Page 23: Selecting Tracks
MP3 MODE Scanning tracks (SCAN) directory D02 will be skipped and D03 will be played. The display will then au- You can briefly play all the tracks on the CD. tomatically switch from “D02” to “D03”. Press the softkey 4 that corresponds Selecting tracks to the “SCA”... -
Page 24: Setting The Display
MP3 MODE Setting the display To close the menu, press the OK button 5 or MENU but- There are various options available for dis- ton 8. playing the name of the artist, track, directory and file. The settings are saved. Displaying the directory name and ID- Note: TAG (artist and track name) -
Page 25: Cd Changer Mode (Optional)
To find out which CD changers can be used CD number, track number and clock with this unit, please refer to page 34 of these display. instructions or contact your Blaupunkt deal- CD number, track number and playing time display. Note:... -
Page 26: Scanning All Tracks On All Cds (Scan)
CD CHANGER MODE CLOCK Note: Clock - Time In the case of the CDC A 08 and the IDC A 09, all the CDs and all the tracks Setting the clock in the changer are picked randomly. In The clock can be set automatically using the the case of any other changer, all the RDS signal. -
Page 27: Equalizer
CLOCK EQUALIZER Equalizer Adjust the minutes using the but- tons 7. This unit is equipped with a parametric digital To close the menu, equalizer. In this case, parametric means that press the OK button 5 or MENU but- a frequency range can be increased or de- ton 8. -
Page 28: Setting The Equalizer
EQUALIZER Setting the equalizer CLASSIC Press the DEQ button 6. VOCAL The settings for these music styles have al- button 7, select the Using the ready been programmed. filter “LOW EQ”, “MID EQ” or “HIGH Press the DEQ button 6. EQ”. -
Page 29: Help Adjusting The Equalizer
EQUALIZER Help adjusting the equalizer Sound Impression / problem Measures Bass sound is too weak Increase bass with Filter: “LOW EQ” Frequency: 50 to 100 Hz Level: +4 to +6 dB Dirty bass Reduce the lower mid level with Booming sound Filter: “LOW EQ”, “MID EQ”... -
Page 30: External Audio Sources
Power-on delay for external source, you will need an adapter cable. You preamplifier can obtain this cable from a Blaupunkt deal- You can set a power-on delay for an amplifier connected to the pre-amp output. The maxi- Switching the AUX input on/off mum delay is four seconds. -
Page 31: Specifications (Excerpts)
4 x 47 watts max. pow- If the statutory guarantee period in your coun- try is less than 12 months, Blaupunkt will grant a 12-month manufacturer’s guarantee. This Tuner guarantee does not cover damage due to wear, incorrect usage or commercial use. - Page 32 01-333 9575 01-324 8756 Poland (PL) 0800-118922 022-8771260 Turkey (TR) 0212-3350677 0212-3460040 (USA) 800-2662528 708-6817188 Brasil (Mercosur) (BR) +55-19 3745 2769 +55-19 3745 2773 Malaysia (Asia Pacific) (MAL) +604-6382 474 +604-6413 640 Blaupunkt GmbH 12/01 TRO CM/PSS 8 622 403 067...
Need help?
Do you have a question about the Los Angeles MP71 and is the answer not in the manual?
Questions and answers