Blaupunkt Toronto MP73 Operating Instructions Manual
Radio / cd / mp3 / mmc
Hide thumbs
Also See for Toronto MP73:
- Operating and installation instruction (50 pages) ,
- Service manual (68 pages)

Related Manuals for Blaupunkt Toronto MP73


Summary of Contents for Blaupunkt Toronto MP73
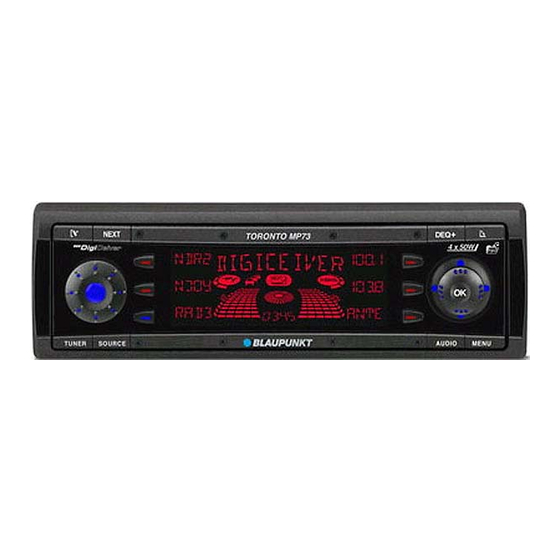
- Page 1 Radio / CD / MP3 / MMC Radio / CD Los Angeles MP72 7 642 804 310 Toronto MP73 7 643 813 310 US version Operating instructions http://www.blaupunkt.com http://www.blaupunkt.com http://www.blaupunkt.com...
- Page 2 Open here...
- Page 4 CONTROLS AUDIO button, to adjust the Button, to switch the unit on/off, bass, treble, balance, fader and adjust the volume X-BASS (short press) and oper- Button, to unlock the remova- ate the volume mute feature ble control panel (release panel) (long press) NEXT button to display the other Display...
-
Page 5: Table Of Contents
CONTENTS Radio mode ......17 Notes and accessories .... 7 Road and traffic safety ..... 7 Setting the tuner ......17 Safety information ......7 Switching to radio mode ....17 RDS function ......... 17 Installation ........7 Selecting the waveband / Accessories ........ - Page 6 CONTENTS MMC mode ......27 Inserting/removing an MMC ..27 Switching to MMC mode ....27 CD changer mode (optional) . 27 Switching to CD changer mode ..27 Selecting CDs ....... 27 Selecting tracks ......28 Fast searching (audible) ....28 Repeating individual tracks or whole CDs (REPEAT) ....
-
Page 7: Notes And Accessories
You should always be able to hear The Blaupunkt editors are constantly police, fire and ambulance sirens working on making the operating in- from afar. For this reason, set the... -
Page 8: Theft Protection
Removable control panel Amplifier As a way of protecting your car radio All Blaupunkt amplifiers can be used. against theft, the unit is equipped with a removable control panel (flip-release CD changer panel). Without this control panel, the The following CD changers can be ob- car radio is worthless to a thief. -
Page 9: Attaching The Control Panel
THEFT PROTECTION button 2. KeyCard Press the The control panel latch mechanism In addition to the removable control pan- opens. el, your car radio is equipped with a KeyCard for added security. The Key- First, pull the control panel straight Card is required to activate the unit if off the unit and then out towards the device was disconnected from the... -
Page 10: Preparing A Second Keycard
Close the control panel. additional KeyCard. This means you Switch the unit off if it is not already can create a “spare key”. You can ob- tain KeyCards from your Blaupunkt off. dealer. Simultaneously press and hold the TUNER button < and the top left If you want to prepare a second Key- softkey 4. -
Page 11: Looking After The Keycard
THEFT PROTECTION SWITCHING ON/OFF do so, repeatedly press the joystick Switching on/off up or down until the required There are various ways of switching the number appears in the display. unit on/off. You can move the input cursor by Switching on/off using button pressing the joystick 7 to the left or right. -
Page 12: Adjusting The Volume
Note: instructions. To avoid damage to your hearing, the You can find out from your Blaupunkt power-on volume is limited to a value dealer which navigation systems can be of “40”. used with your car radio. -
Page 13: Automatic Sound
ADJUSTING THE VOLUME Note: Set the required volume using the volume control 1. The optimum setting for the speed-re- lated sound adjustment feature de- Press the joystick OK 7 or the pends on how noise levels develop in MENU button 8 to close the your particular vehicle. -
Page 14: Sound And Volume Distribution Settings
SOUND AND VOLUME DISTRIBUTION SETTINGS Sound and volume X-BASS distribution settings The X-BASS feature can be used to boost the bass at low volume levels. Note: Press the AUDIO button 9. You can adjust the bass, treble and X- BASS individually for each audio “AUDIO 1”... -
Page 15: Adjusting The Front/Back Volume Distribution (Fader)
VOLUME DISTRIBUTION ADJUSTING THE DISPLAY Adjusting the front/back volume Adjusting the display distribution (fader) You can adjust the display to suit the installation position in your vehicle and To adjust the fader, press the AU- DIO button 9. your own preferences. “AUDIO 1”... -
Page 16: Setting The Button Illumination Colour
ADJUSTING THE DISPLAY Press the joystick OK 7 or the Setting the level display MENU button 8 to close the The level display briefly provides a sym- menu. bolic display of the volume, the sound The settings are saved. control settings and the equalizer set- tings whilst you are making your chang- Night-time display brightness Press the MENU button 8. -
Page 17: Radio Mode
RADIO MODE ER button < in radio mode again. If Radio mode you are in any other mode, you can Setting the tuner open the radio functions menu by press- ing the MENU button 8 followed by the To ensure that the tuner works proper- softkey 4 that is assigned to the ly, the device must be configured for “TUNE”... -
Page 18: Selecting The Waveband / Memory Bank
RADIO MODE Selecting the waveband / Repeatedly press the NEXT button 3 until the required memory bank memory bank appears in the display. This unit can receive programmes The memory banks are accessed in the broadcast over the FM and AM wave- following order: FM1, FM2, FM3, FMT bands. -
Page 19: Storing Stations
RADIO MODE The display shows the currently set sen- Starting the Travelstore function sitivity level. “SENS 6” is the highest press the TUNER button < in ra- sensitivity setting and means the tuner dio mode. can receive distant stations. “SENS 1” The radio functions menu appears in the is the lowest setting. -
Page 20: Optimising Radio Reception
RADIO MODE that corresponds to the selected pro- Activating PTY gramme type, you will hear a beep and To use the PTY function, “NO PTY” appears briefly in the display. press the TUNER button < in ra- The radio will then retune to the station dio mode. -
Page 21: Setting The Radiotext Display
“burned” yourself) can generally press the TUNER button < in ra- also be played. Due to the varying qual- ity of CDs, Blaupunkt cannot guaran- dio mode. tee that this will work properly. The radio functions menu appears in the To ensure the system functions proper- display. -
Page 22: Removing A Cd
CD MODE The control panel closes automatically. Random track play (MIX) The CD menu appears and CD play- Press the softkey 4 assigned to back begins. the “MIX” display item. If a CD is already inserted in the “MIX ON” appears briefly in the display. unit, The next track to be played will be picked at random. -
Page 23: Setting Scrolling Text
CD MODE MP3 MODE Activating CD text MP3 mode Press the softkey 4 assigned to You can also use this car radio for play- the “TAG” display item. ing CD-Rs and CD-RWs containing MP3 music files. Deactivating CD text MP3 is a process developed by the Press the softkey 4 assigned to Fraunhofer Institute for compressing CD the “TAG”... -
Page 24: Switching To Mp3 Mode
MP3 MODE If you like your files to be in the correct Fig. 1 Fig. 2 order, you should use burner software that places files in alphanumerical or- der. If your software does not provide this feature, you can also sort the files manually. -
Page 25: Selecting Tracks
MP3 MODE quired directory appears in the dis- “MIX DIR” appears in the display. play alongside “D”. To play all the tracks on the inserted MP3-CD in random order, Note: press the softkey 4 assigned to Any directories that do not contain MP3 files will be skipped automati- the “MIX”... -
Page 26: Setting The Display
MP3 MODE Setting SCROLL Setting the display Keep pressing the softkey 4 as- There are various options available for displaying the name of the artist, track signed to the “SCRL” display item and album (ID3 tag) or the directory and until the required setting appears. -
Page 27: Mmc Mode
SL45). You can write MP3 music tracks chapter in these instructions or contact to the MMCs that you want to use with your Blaupunkt dealer. this device with the help of the Velocity Note: MMC Driver 01 or another MMC read/ Information on handling CDs, inserting write device and your PC. -
Page 28: Selecting Tracks
CD CHANGER MODE changer menu using the NEXT but- To repeat the whole CD, ton 3. press the softkey 4 assigned to the “RPT” display item again. keep pressing the joystick 7 up or “RPT CD” appears briefly in the display. down until the number of the re- Cancelling REPEAT quired CD appears in the display. -
Page 29: Naming Cds
CD CHANGER MODE Cancelling MIX To save a name, press the softkey 4 assigned to the “NAME” display To cancel MIX, item. keep pressing the softkey 4 that is assigned to the “MIX” display Deleting a CD name item until “MIX OFF” appears brief- Listen to the CD whose name you ly in the display. -
Page 30: Clock - Time
CD CHANGER MODE CLOCK - TIME The process can take up to 45 seconds CLOCK - Time depending on how many CD names Setting the clock have been stored. The clock can be set automatically us- Note: ing the RDS signal. You can also set This function is not available for the the clock manually if you cannot receive Compact Drive MP3. -
Page 31: Displaying The Time Continuously
CLOCK - TIME EQUALIZER To adjust the minutes, Equalizer press the softkey 4 assigned to This unit is equipped with a digital sound the “MIN” display item. calibration feature (DSA – Digital Sound Adjustment). It provides you with three The minutes flash. self-calibrating 5-band equalizers and Adjust the minutes using the joy- five sound presets. -
Page 32: Automatically Calibrating The Equalizer
EQUALIZER Press the softkey 4 assigned to Automatically calibrating the the display item of the equalizer equalizer that you want to configure. You can electronically calibrate and Press the softkey 4 assigned to store values for three different situations. the “AUTO” display item. EQ 1 for the driver only EQ 2 for the driver and front You will hear a test sound, and calibra-... -
Page 33: Manually Adjusting The Equalizer
EQUALIZER Press the softkey 4 assigned to Making adjustments the “PRE” display item. Press the DEQ+ button 5. Select one of the presets using the Press the softkey 4 assigned to corresponding softkeys 4. the “USER” display item. Press the joystick OK 7 or the Press the softkey 4 assigned to DEQ+ button 5 to close the the display item of the equalizer... -
Page 34: Help Adjusting The Equalizer
EQUALIZER Help adjusting the equalizer Measures Sound Impression / problem Increase bass with Bass sound is too weak Frequency: 32 to 160 Hz Level: +4 to +6 dB Reduce the lower mid level with Dirty bass Frequency: 400 Hz Booming sound Level: approx. -
Page 35: Amplifier / Sub-Out
The AUX input must be activated in the We recommend you use well-matched setup menu. products from the Blaupunkt or Veloci- If you want to connect an external au- ty product ranges. dio source, you will need an adapter cable. -
Page 36: Specifications
SPECIFICATIONS Specifications Amplifier Output power: 4 x 26 watts sine in accordance with DIN 45 324 at 14.4 V 4 x 50 watts max. power Tuner Wavebands: 87.5 – 107,9 MHz MW : 530 – 1 710 kHz FM frequency response: 20 - 16,000 Hz Frequency response: 15 - 20,000 Hz... - Page 37 01-333 9575 01-324 8756 Poland (PL) 0800-118922 022-8771260 Turkey (TR) 0212-3350677 0212-3460040 (USA) 800-2662528 708-6817188 Brasil (Mercosur) (BR) +55-19 3745 2769 +55-19 3745 2773 Malaysia (Asia Pacific) (MAL) +604-6382 474 +604-6413 640 Blaupunkt GmbH 10/03 CM/PSS 8 622 403 259...
Need help?
Do you have a question about the Toronto MP73 and is the answer not in the manual?
Questions and answers