
Related Manuals for Blaupunkt Bremen MP74 US


Summary of Contents for Blaupunkt Bremen MP74 US
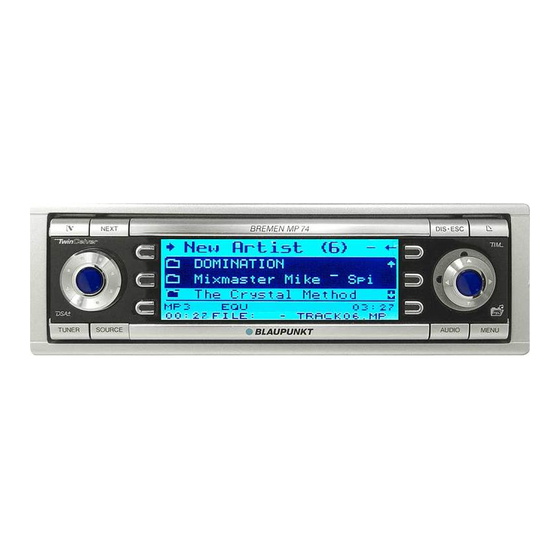
- Page 1 Radio / CD / MP3 Bremen MP74 US 7 644 821 310 Operating and installation instructions !"#$ = = = = = = = = = = = = = = = http://www.blaupunkt.com http://www.blaupunkt.com...
- Page 2 Caution: The device’s tuner is already configured at the factory for the North/South Amer- ica region (“AREA USA”). If you are outside North/South America, please select the “AREA EUR” setting. For further details, please read the section entitled “Adjusting the tuner settings” in the “Radio mode” chapter. !"#$%&'() *+,-./01231456AREA USA !"#$%#&'()*+,-./AREA EUR !"#$%&'(...
- Page 4 CONTROLS MENU button to open the basic Button, to switch the device on/ settings menu (short press) off, Activate/deactivate demo mode and mute the device’s volume (long press) Volume control AUDIO button to adjust the button, to unlatch the detach- bass, treble, balance, fader and able control panel X-BASS (short press)
-
Page 5: Table Of Contents
CONTENTS Notes and accessories .... 7 Radio mode ......17 Road safety ........7 Adjusting the tuner settings ... 17 Safety notice ........7 Setting the number of antennas ..18 Installation ........7 Switching to radio mode ....18 Accessories ........ - Page 6 CONTENTS MP3 mode ......27 Selecting sound presets ....40 Setting the stage effect ....40 Preparing an MP3-CD ....27 Selecting the sound effect ..... 41 Switching to MP3 mode ....28 Selecting a directory ...... 29 DNC - Selecting tracks ......
-
Page 7: Notes And Accessories
NOTES AND ACCESSORIES Road safety Notes and accessories Thank you for choosing a Blaupunkt Road safety has absolute prior- product. We hope you enjoy using this ity. Only operate your car sound sys- new piece of equipment. tem if the road and traffic conditions allow you to do so. -
Page 8: Accessories
You cannot switch the device on/off us- onds to activate/deactivate demo ing the remote control. mode. Amplifiers You can use all Blaupunkt and Velocity amplifiers. CD changers You can obtain the following CD chang- ers from accessory retailers for connec- tion to this device: CDC A 03, CDC A 08 and IDC A 09. -
Page 9: Theft Protection
THEFT PROTECTION Theft protection First, pull the control panel straight off the device and then out towards Detachable control panel the left. Your device is equipped with a detach- The device switches off after the able control panel (flip-release panel) as control panel is detached. -
Page 10: Switching On/Off
SWITCHING ON/OFF ADJUSTING THE VOLUME Adjusting the volume Switching on/off You can adjust the volume in steps from There are various ways of switching the 0 (off) to 50 (maximum). device on/off. To increase the volume, turn the Switching on/off using button volume control 2 clockwise. -
Page 11: Volume Mute
You can find out from your Blaupunkt announcement after the call is finished dealer which navigation systems can be (in so far as the traffic announcement is used with your car sound system. - Page 12 ADJUSTING THE VOLUME Press the softkey 5 assigned to Activating navigation audio the “NAVI DIFF” display item in or- You can either connect a second exter- der to adjust the volume. nal audio source or a navigation sys- tem to this device. If you do, you must Set the volume level that you want specify which device is connected to this using the volume control 2.
-
Page 13: Sound And Volume Distribution Settings
SOUND AND VOLUME DISTRIBUTION SETTINGS Sound and volume Adjusting the right/left volume distribution (balance) distribution settings To adjust the balance, press the Note: AUDIO button :. You can adjust the bass and treble indi- “AUDIO MENU” appears in the display. vidually for each audio source. -
Page 14: X-Bass
X-BASS ADJUSTING THE DISPLAY SETTINGS X-BASS Adjusting the display settings The X-BASS feature can be used to boost the bass at low volume levels. You You can adjust the display settings to can set the X-Bass boost for one of the suit the installation position in your ve- following frequencies: 32 Hz, 40 Hz, 50 hicle and your own preferences. -
Page 15: Setting The Button Illumination
ADJUSTING THE DISPLAY SETTINGS DAY and NIGHT are displayed in the Setting the display illumination top display line together with the cur- colour rently set values. When setting the display illumination, Move the flashing selection marker you can choose one of four preset col- behind DAY or NIGHT by pressing ours or mix a colour yourself from the the joystick 8 to the left or right. -
Page 16: Configuring The Spectrum Analyser
ADJUSTING THE DISPLAY SETTINGS Press the softkey 5 assigned to Press the joystick OK 8 or the MENU button 9 to close the the “COLOR” display item. menu. Press the softkey 5 assigned to The settings are saved. the “USER” display item. In the following menu you can set Configuring the spectrum the red, blue and green colour... -
Page 17: Inverting The Appearance Of The Display Content
ADJUSTING THE RADIO MODE DISPLAY SETTINGS Inverting the appearance of the Radio mode display content This device is equipped with an RDS radio receiver. Many of the receivable You can invert the appearance of the FM stations broadcast a signal that not display content. -
Page 18: Setting The Number Of Antennas
RADIO MODE Setting the number of antennas Switching to radio mode This device is equipped with two RDS If you are in CD/MP3 mode or CD- radio receivers (TwinCeiver). changer/Compact Drive MP3 mode, press the TUNER button =. You can connect one or two antennas to the device. - Page 19 This process Press the softkey 5 assigned to developed by Blaupunkt has a the “TUNER 2” display item. similar effect to using a directional Press the softkey 5 assigned to antenna. Reception quality is im- proved considerably, particularly in the “DYN LIST”...
-
Page 20: Rds Function
RADIO MODE The settings are saved. ory bank. RDS function Selecting the waveband To select the FM, AM or SW waveband, The RDS function extends your radio’s range of functions (only in FM radio press the TUNER button = while mode). -
Page 21: Tuning Into A Station
RADIO MODE or AM1, AM2, AMT. the “SENS” display item. Press the softkey 5 assigned to Tuning into a station the “FM” or “AM” display item to There are various ways of tuning into a adjust the sensitivity for “FM” or station. -
Page 22: Setting The Scanning Time
RADIO MODE Storing stations automatically Setting the scanning time (Travelstore) Press the MENU button 9. In static radio mode you can automati- Press the softkey 5 assigned to cally store the six stations providing the the “VARIOUS” display item. best reception in the region (only FM Press the softkey 5 assigned to and AM). -
Page 23: Programme Type (Pty)
RADIO MODE Programme type (PTY) Deactivating PTY To switch off the PTY function, Besides transmitting the station name, some FM stations also provide informa- Whilst the programme types are tion on the type of programme that they being displayed, press the softkey are broadcasting. -
Page 24: Optimising Radio Reception
RADIO MODE Optimising radio reception Activating/deactivating the radio text display Treble reduction feature during Some stations use the RDS signal to interference (HiCut) broadcast scrolling texts known as ra- The HiCut function has the effect of re- dio texts. You can allow radio texts to ducing interference noise during poor be displayed or you can block them. -
Page 25: Cd Mode
“burned” yourself) can generally also be starts playing. played. Due to the varying quality of CD If a CD is already inserted in the blanks, Blaupunkt cannot guarantee device, that this will work properly. To ensure press the SOURCE button < re-... -
Page 26: Fast Searching (Audible)
CD MODE Fast searching (audible) Scanning tracks (SCAN) To fast search backwards or forwards, You can briefly play (scan) all the tracks on the CD. press and hold down the joystick 8 in one direction (up or right for Press and hold down the joystick OK 8 for longer than two forwards or down or left for seconds. -
Page 27: Setting Scrolling Text
CD MODE MP3 MODE MP3 mode Switching CD text on/off Repeatedly press the softkey 5 You can also use this car sound sys- assigned to the “TEXT” display tem to play CD-Rs and CD-RWs that item until “CD TEXT ON” or “CD contain MP3 music files. -
Page 28: Switching To Mp3 Mode
MP3 MODE order, you should use burner software that places files in alphanumerical order. If your software does not provide this feature you also have the option of sorting the files manually. To do so, you T001 should place a number (e.g. “001”, T002 “002”, etc.) at the beginning of each file T003... -
Page 29: Selecting A Directory
MP3 MODE files will be skipped automatically. Selecting from the directory list If, for instance, you are listening to You can display a list of all the directo- tracks in directory D01 and you se- ries on the inserted CD and then con- lect the next directory by pressing veniently select a directory from it. -
Page 30: Fast Searching (Audible)
MP3 MODE again from the beginning. ry in random order, press the softkey 5 assigned to Fast searching (audible) the “MIX” display item. To fast search backwards or forwards, “MIX DIR” appears in the display. press and hold down the joystick To play the tracks contained in all the 8 to the left or right until fast directories on the inserted MP3-CD in... -
Page 31: Configuring The Display
MP3 MODE rectory from being repeated, until the display that you want ap- pears in the bottom line of the repeatedly press the softkey 5 display. that is assigned to the “REPEAT” display item until “REPEAT OFF” Note: appears briefly in the display. If the information on the artist, track and album is not available in the form of an Configuring the display... -
Page 32: Cd-Changer Mode (Optional)
“Accessories” want (CD1 - CD10). To do so you chapter in these instructions or contact might need to switch “pages” in the your Blaupunkt dealer. main CD-changer menu by press- ing the softkey 5 assigned to the Note: “NEXT”... -
Page 33: Scanning Tracks (Scan)
CD-CHANGER MODE “REPEAT CD” appears briefly in the dis- Scanning tracks (SCAN) play. You can briefly play (scan) all the tracks on the CD. Cancelling REPEAT Press and hold down the joystick To stop the current track or current CD OK 8 for longer than two from being repeated, seconds. -
Page 34: Naming Cds
CD-CHANGER MODE Naming CDs Deleting a CD name The car sound system allows you to Listen to the CD whose name you assign names for up to 99 CDs (not with want to delete. the Compact Drive MP3) so that you can Press the NEXT button 4. -
Page 35: Clock Time
CLOCK TIME CLOCK time Adjust the minutes by moving the joystick 8 up or down. Setting the clock time Press the joystick OK 8 or the The clock can be set automatically us- MENU button 9 to close the ing the RDS signal. You can also set menu. -
Page 36: Continuously
CLOCK TIME DSA MAX EQUALIZER continuously DSA Max - Digital Sound Adjustment You can make the system display the clock time when the device is off and This device is equipped with a digital the vehicle ignition is on. sound calibration feature (DSA - Digital Press the MENU button 9. -
Page 37: Automatically Calibrating The Equalizer
DSA MAX EQUALIZER Note: For Situation 3, you should position the You can activate/deactivate each calibration microphone at head height equalizer module individually (user in the centre of the vehicle interior (left/ EQ, sound presets, DNC, stage ef- right, front/rear). fects and sound effects) in the cor- Really quiet surroundings are required responding menu. -
Page 38: Viewing The Vehicle Acoustics With/Without Equalization
DSA MAX EQUALIZER period. Calibration begins as soon as any of the softkeys that are de- the countdown is finished. scribed below. If you want to select the equalizer view Proceed as described for all the without equalization, equalizers. press the softkey 5 assigned to When calibration has ended, the menu for the selected equalizer is displayed the “VIEW PRE”... -
Page 39: Selecting An Equalizer
DSA MAX EQUALIZER Press the softkey 5 assigned to Press the softkey 5 assigned to the “USER EQ” display item. the “ADJUST” display item. Press the softkey 5 assigned to Press the softkey 5 assigned to the display item of the equalizer the “MANUAL”... -
Page 40: Selecting Sound Presets
DSA MAX EQUALIZER Selecting sound presets Selecting a stage effect Press and hold down the AUDIO You can select sound presets for vari- button : for longer than two ous music styles. To ensure optimum seconds. sound, the presets are “added” to the Press the softkey 5 assigned to settings of the active user equalizer, i. -
Page 41: Selecting The Sound Effect
DSA MAX EQUALIZER front and “LF” is left front. DNC - Dynamic Noise Turn the volume control 2 or Covering move the joystick 8 to adjust the The Dynamic Noise Covering feature distance. increases the volume whilst the vehicle is driving. As its starting point it uses a Proceed in the same way for all the volume level that is considered pleas- loudspeakers and press the joy-... -
Page 42: Switching Off Dnc
Selecting the DNC boost Starting DNC calibration Press and hold down the AUDIO You can select the DNC boost (i.e. the button : for longer than two sensitivity of the volume and sound boost) to five levels. seconds. Press the softkey 5 assigned to The “DNC 1”... -
Page 43: Subwoofer And Centre Speaker
SUBWOOFER AND CENTRE SPEAKER Subwoofer and centre Adjusting the subwoofer phase speaker You can adjust the phase of the sub- woofer output to suit your subwoofer. You can connect a subwoofer and a The phase setting can be adjusted in centre speaker to this device. -
Page 44: Setting Up The Subsonic Filter
SUBWOOFER AND CENTRE SPEAKER Press the AUDIO button :. Press the AUDIO button :. “AUDIO MENU” appears in the display. “AUDIO MENU” appears in the display. Press the softkey 5 assigned to Press the softkey 5 assigned to the “SUBOUT” display item. the “SUBOUT”... -
Page 45: Setting Up The High-Pass Filter For The Front/Rear Channels
SUBWOOFER AND CENTRE SPEAKER Press the AUDIO button :. Press the AUDIO button :. “AUDIO MENU” appears in the display. “AUDIO MENU” appears in the display. Press the NEXT button 4. Press the NEXT button 4. “AUDIO MENU 2” appears in the “AUDIO MENU 2”... -
Page 46: Amplifier/Sub-Out
(AUX1) instead of a CD installation instructions. We recommend changer. you use well-matched products from the You can connect the second external Blaupunkt or Velocity product ranges. audio source (AUX2) in addition to the CD changer or AUX1. Switching the internal amplifier on/off Instead of AUX2, you can connect a navigation system. -
Page 47: Naming The Aux Input
EXTERNAL AUDIO SOURCES Press the softkey 5 assigned to By pressing the “AUX1” softkey you can switch between the “AUX- the “EDIT” display item under ILIARY 1 ON” and “AUXILIARY 1 “AUX1” or “NAV/AUX2”. OFF” settings. The default text for the selected input Press the softkey 5 assigned to appears in the display. -
Page 48: Entering The Power-On Message
The factory default for this Press the MENU button 9. text is “BLAUPUNKT-THE ADVAN- Press the softkey 5 assigned to TAGE IN YOUR CAR”. Instead of this the “VARIOUS” display item. -
Page 49: Resetting The Device
RESETTING SPECIFICATIONS Specifications Resetting the device You can reset the device to its factory Amplifier default settings. All custom settings will Output power: 4 x 18 watts sine then be cleared. at 14.4 V and 1% Press the MENU button 9. distortion factor at Press the softkey 5 assigned to 4 ohms. - Page 50 !"#$%&'( !"#$%&'() MENU !"# ! "#$% !"#$%&'()* !" !"#$%&'()* !"#$%&$% AUDIO !"#$=X-BASS !"#$%&' NEXT !"#$ =DSA Max !"#$%&'()* !"#$%&'() < !"=CD CD SOURCE !"#$%&' DIS•ESC !"#$%&'("# !"# !"#$%&%'( !"#$%&'()* !" !"#$%& !"#$%&'&()* !=OK !"#$%&'( TUNER !"#$%&'()*+ !"#$%&'()
- Page 51 !"#$ KKKKKKKKKKKKKKKKKKKKKK 53 !" KKKKKKKKKKKKKKKKKKKKKKKKKKKKK 63 ! KKKKKKKKKKKKKKKKKKKKKKKKKKKKKKKKKKKKKKKKKKKKKK 53 !"#$ KKKKKKKKKKKKKKKKKKKKKKKKKKKKK 63 ! KKKKKKKKKKKKKKKKKKKKKKKKKKKKKKKKKKKKKKKKKKKKKK 53 !"# KKKKKKKKKKKKKKKKKKKKKKKKKKKKKKKKKKKKK 64 !"#$% KKKKKKKKKKKKKKKKKKKKKKKKKKKKK 64 KKKKKKKKKKKKKKKKKKKKKKKKKKKKKKKKKKKKKKKKKKKKKKKKKKKKKKK 53 !"#!$%&'( KKKKKKKKKKKKKKKKKKKKKKKKKKKKKKKKKKKKKKKKKKKKKKKKKKKKKKK 54 !"#$%& KKKKKKKKKKKKKKKKKKKKKKKKK 54 KKKKKKKKKKKKKKKKKKKKKKKKKKKKK 64 KKKKKKKKKKKKKKKKKKKKKKKKKKKKKKKKKKKKKKKKKKKKK 66 ! KKKKKKKKKKKKKKKKKKKKKKKKKKKKKKKKK 55 !"#$%& KKKKKKKKKKKKKKKKKKKKKKKKK 66 !"#$ KKKKKKKKKKKKKKKKKKKKKKKKKKKKKKKKK 55 ! KKKKKKKKKKKKKKKKKKKKKKKKKKKKKKKKKKKKKKKKKKKKKK 67 !"# KKKKKKKKKKKKKKKKKKKKKKKKKKKKKKKKKKKKK 55 !"#$%&'() KKKKKKKKKKKK 67...
- Page 52 !"# KKKKKKKKKKKKKKKKKKKKKKKKKKKKKKKKKKKKK 86 KKKKKKKKKKKKKKKKKKKKKKKKKKKKKKKK 73 !"# KKKKKKKKKKKKKKKKKKKKKKKKKKKKKKKKKKKKK 86 =MP3-CD KKKKKKKKKKKKKKKKKKKKKKKKKKKKKKKKKKKKK 73 !"# KKKKKKKKKKKKKKKKKKKKKKKKKKKKKKKKKKKKK 87 =MP3= ......74 !" KKKKKKKKKKKKKKKKKKKKKKKKKKKKKKKKKKKKKKKKKK 75 DNC - ! KKKKKKKKKKKKKKKKKKKKKKKKKKKKKKKKKKKKKKKKKKKKKK 75 !"# KKKKKKKKKKKKKKKKKKKKKKKKKK 87 !"#$%& KKKKKKKKKKKKKKKKKKKKKKKKK 76 DNC ........87 !"SCAN KKKKKKKKKKKKKKKKKKKKKKKKKK 76 =DNC ........88 !"#$MIX KKKKKKKKKKKKKKKKKKKKKK 76 =DNC=...
- Page 53 Blaupunkt= !"#$% &'()*+ !" #$%&'()*+, ! "#$% &'() !"# $%&'()*+,- !"#$%&'(")*# !"#$%&'()$%*+% !"#$%&'()*"+ !"#$%&'()*+,-. !"# !"#$%& !"#$%&'()*+,- !"#=www.blaupunkt.de !"#$%&'()* !"#$%&'()*+,-. !"#$%& '()* !"#$ !" Blaupunkt GmbH !"#$%&'()* + !"#$%&'()*+, Robert Bosch Str. 200 !"#$%&'()*+, 31139 Hildesheim !"#$%&' Germany !"#$%&'()*+,- !"#$%&'()*+,-...
- Page 54 !"#$%&'()* +,- !"#$%&'()*#&'+ !"#$%&'() RC 08 RC 10 =RC 10H !"#$%!&'()*+, !"#$ =MENU !"#$%"&'()*+", !"#$%&'()* !" !" !"#$%&'()*+,-. !"#$%=Blaupunkt= = Velo- city !"#$%&'()*+,-. =CD= CDC A 03 =CDC =IDC A 09 A 08 !" MP3= !=MP3 !"#$%=MP3 !"#$%&=CD !"# !"=MP3 !"#$%&...
- Page 55 !"#$%&'()*+, !"#$%& !"#$ !"#$%&'()*+ !"!#$%&'()*+,- !"#$%&'()* !"#$%&'() !"#$%&'()*+,-. !"#$%=CD !" !"#$%&$ '()$*+ !"#$%&'()*+,-. !"#$%&'()*+,-. !"# !"#$%&'()*+,- !"#$%&'()*+ !"#$%&'()*+, !"#$%& !"#$%&'()* !"#$%&'()*+, !" !"#$%&'()*+, !"#$$%&'()*% !"#$%&'()*+, !"#$ !"# !"#$%&'()*+, !" = =3= !"#$%&'(...
- Page 56 !" !" !"=50 !"# !"#$%&'()*+ !" !" !"#$%&'()!"* !"#$=1 !" !"#$%&'()!"* !"#$#%=1 !" !"# !=J= !" !"#$%&'()*+,-" !"#$%&'( !"#$% ! " # $ % & ' ( ) * + , =MENU= =9 !"#$%&'=1= !" !"VOLUME !"# !"#$%&'()*+, !"#$%&'()*+,- !"ON VOL !"#$ !"#$=2 !"#$...
- Page 57 !=OK=8= =MENU= =9= !" !"#$%&'(%)* !"#$ !"#$%& MUTE !"#$%&'()*+,-. !" ! "=1 !"#$%&'()*+,!" !"#$=2 !"#$%&AUX2 !"#$% !"#$%&'()*+,- !"#$%&'()*+,-. !"#$ %&'()*+ , !" #$%&'(!)*+, !"#$%&'()"*+, !"#$% &'()*!"+ !"#$%&'()*+,-. !"#$%&'()*+,-. !"#$%&'()*+,-. !"#$% !"#$%&'()*+,-. !"#$%&'()F !"#$%&'()*+,-. !" !"#$ %&'()#*+ !" #$%&'() ! "=Blaupunkt !"# !"#$%&'()*+,-#...
- Page 58 !"# !"NAVI DIFF !"# !"# !"#$%&'()*+,-. !"#$%&'()*+,- !"#$=2= !"# !"#$%&'(")*+,- !"#$ !"#$%&'()*(+,- !=OK=8= =MENU= =9= =MENU= =9 !" !"AUX !"#$% !"#$ !"# !"#$%&'()*$+ !"#$%&'(= !"#$%&' !"NAV AUX2 !"#$%&'()*+ !"#NAVIGA- TION ON !=OK=8= =MENU= =9= !" !"#$ !"#$%& !"#$%&'()*+,-. !" !"#$%&'()*+, !"#$%&'()*+, !"# =MENU= =9...
- Page 59 !"#$% !"#$% !"#$%&'()* !"#$%=AUDIO= =: !"#$%&'()*$+, !"#$% AUDIO MENU !"BALANCE !"# !"# $%&'()=8= =AUDIO= =: !"#$%&' !"#$% AUDIO MENU !"#$% !"BASS !"#$% !=OK=8= =AUDIO= =: !"#$%=8= !"# !"#$%&'()*+ !"#$%&&'( !"#$%&= AUDIO= !"#$% !=OK=8= =AUDIO= =: !"#$% AUDIO MENU !"FADER !"#$ =AUDIO= =: !"# $%&'()=8= !"#$%...
- Page 60 !" !"# X-BASS !" !"# X-BASS !"#$%&'( )*+,- !"#$%&'()* X-BASS !"#$%&'()* !"#$%&%'()*+ =X-Bass !"# Hz =40 Hz 50 Hz 63 Hz= =80 Hz !"#=0= !=X-Bass =MENU= =9 !"DISPLAY !"# =AUDIO= =: !"#$% AUDIO MENU !"ANGLE !"#$ !"X-BASS !"#$ !"# $%&'()=8= !"#$=8 !"#$ !"#$...
- Page 61 !"# !"#$%& !"#$%& ==NIGHT !"#$% !"#$%&'()*+,-. !"#$%=8= =DAY !"#$%&'()*+,-. ! "#$%& ! "#$%&'()* NIGHT !"#$ %&'()* !"#$%&'()*+, !"# !"#$%& !=OK 8= MENU= =9= !" !"#$%&'()*+,- !"#$%& '(!& !"#$ !"#$%&'()* !"#$%& !"#$%&'()*+,-. !" !"#$%&'()*+, =MENU= =9 !"DISPLAY !"# =MENU= =9 !"DISPLAY !"# !"COLOR !"#$...
- Page 62 !"# !"COLOR !"#$ !=OK 8= MENU= =9= !" !"#$ !"USER !"#$ !"#$ !"#$%&'()*+, !"# $%&'()*+, !"#$%&'()*+, !"#$%&'()*+,-. !"=5= !"#$%& !"#$%&'(') *+, !"# $%&'()#*+, !=OK 8= MENU= !"# !"#$%&'()*+, !"#$ !"#$%&' !"#$%&'()* =MENU= =9 =MENU= =9 !"DISPLAY !"# !"DISPLAY !"# !"#$SPECTRUM !"COLOR !"#$ !"= 5...
- Page 63 !"# !" !" !"#$%&' !"#=RDS= ! "#$ !"#$%&'()*+ !"=FM= !"#$%&' =MENU= =9 !"# $%&'!()*+, !"DISPLAY !"# !"#$PTY !"#$ %&'()*+,- !"#$%&'() !"INVERT !"#$ !"#$%&'()*+,-. !"#$PTY !"# !=OK 8= MENU= =9= !" !"#$ !"#$ !"#$%&'()*+,- !"#$%&'()*+",- ! " # $ # % & ' ( ) * + !"#!$AREA AREA EUR !"#$%&'()*+...
- Page 64 !" !"# !"#$% ! "#$=RDS ! " !"=CD MP3 !"#$ !"#$% !"#$%&'()*+), =TUNER= == !"#$%&' ()*+,- !"#$%&'()*+,-. !"#$%&'()*=DDA !"#$%&' () !"#$%&'()*+,- !"#$%&'() !" !" #$%&'()*+,- ! =TUNER !" !"#$%&' !"# !"#!$%&'()*+ !"#$%&'()*+,-. !"#$%&'( !"#$% !=FM !"#$%&'( =MENU= =9 !"TUNER !"#$ !"#$ PRESETS !"#$%&'()*+,...
- Page 65 !"#$%&' !"#!$%&'()* !"#$%&'()*" !"#$%=TUNER= == !"#$%&'(F !"#$%&'()*+, !"#$%&' =DDA !"#$%&'()!"* =NEXT !"#$%&'()*+, !"#$%&'()*+, !"#$%&'()*+, !"#$%&%'()* !"TUNER 2 !"# !"#$%&'( Blaupunkt !"#$%&'() *+ !"#$%&'()*+, !"#$%&'()*+, !"#$% DYN LIST !"#$%&'()*+, !"#$%&'()*++ !"#$%&'()*+, !"#$%&'()!* !"#$%&'()*+, PRESETS !"#=5 !"#$%&'()*+, !"#$%&'()*+ !=OK 8= MENU= =9= !"...
- Page 66 !" RDS= !"#$%&# =FM AM != F M !"#$%& !"#$%$= TUNER !"#$%&'()*+ !"#$"%&'(")*+, !"#$%&'()*+, !"=RDS= !"BAND !"#$ =RDS= !"#$%$= TUNER !"FM !"#$=FM !"=5 !"#$%&'()*+, !"AM !"#$=AM !"=5 !"#$RDS !"# !"#$%&'RDS !"#$%SW RDS OFF !"#$=5 ! "#$%&'( !"#$%&'()*+,- !=OK 8 =TUNER= === !"#$ =FM AM !=FM=...
- Page 67 !" !"FM ! = 5 ! F M !"#$%&'() !" !"#$% !"# $%&'()=8= !"# !"#$%&=8 !"#$%& !"#$%&' ()*+ !"#$%&'(SENSITIVI- !"# !"#$%&SENSITIVI- TY 1 !"#$%&' !"#$%&' TY 6 !=OK 8= MENU= =9= !" !"#$%&'() =RDS !"#$ !"#$=8 !"#$=ESCANF !"#$%&'() !"#$%&'()*+,-. !"# !"#$%&'()*+,-.
- Page 68 !" !"#$%& !' !"# !"#$%&'()*+,-. =MENU= =9 !"#$%&'(=6= !" !"VARIOUS !"# !"#$%&'( !"# =AMT !"SCANTIME !" !"#$%#"&'()*+, !" #$%&'(=8= !"#$ !" !"#$% !=OK 8= MENU= =9= !"#$%=TUNER= == !" !"#$%&'()*+, !"#$ !"T-STORE !"# !"#$%&'()*+, !"#$%TRAVEL STORE !"# CD MP3 !"#$%&'()*+,-. !"# !"#$=FMT =AMT...
- Page 69 !" !"PTY =PTY !"#$%&'(=FM= =PTY !"#$%&'()*+",- !"# $%&'()*+ !"#$%&'() !"#$% PTY OFF !"#$%&'( CULTURE TRAVEL JAZZ !"#$%&'()* SPORT NEWS !"#$%&'()*+ ROCK CLASSICS !"#$%&'()*+PTY !"=PTY= !"#$%& !"# !" !"# =NEXT= =4 !"#$%&'() !"#$%&'()*+,-. !"#$%&'()*%+ !"#$%&'())*$+, !" #NO PTY !" !"# $%&'()=8= !"#$%&'()* !"#$ =PTY...
- Page 70 !" !" #$%& !"#$%&'() !"#=RDS !"#$% !"#$%&'()*Hicut !"# $%&'()*+, !"#$%&'()#* HiCut !"#$% & !"#$%&'( )*+,- !"#$% &'( !"#$%$= TUNER= HiCut !"#$%&'()*+, !"#$%&$=TUNER !"#$R-TEXT !" !"#$%& !"#$%&'()*+, RADIO TEXT ON RADIO =NEXT= =4 TEXT OFF !"#$HIGH CUT !=OK 8 =TUNER= === !"=5= !"#$%&...
- Page 71 !"#=CD= !"#$%& !"#$%&'()*+,=12 !"#$%&'( !"=CD CD-R =CD-RW E !"#$=CDF !"#CD= !"# !"#Blaupunkt !"# !"#$=CD !"# !"# !" =SOURCE= = = = = =< !"#$%&'(()$*+ !"#$J CD = =CD= !"#$Blaupunkt= !" !"#$%& '()*+ !"#$%&' !"#$% =CD= !"#$%&'( !"=CD = = =7 !"#$%...
- Page 72 !"#$%& !=ESCANF !"#!$%&'( !"#$%&'()CD !"=8= !"#$%& !"=OK 8= !"#=2 !"!# $%&'()* !"# !" !"#$%!&'()*+ !"#$MIX !"MIX !"#$% !"#$%&'()*+, !"#$%&'()*+, !"#$%&'() !"#$%&'()* + MIX CD !"#$%& '()*+, !"#$ =MIX SCAN !"#MIX !"#$ !=OK 8 !"#$%&'( MIX OFF !"#$%& '()* !"REPEAT =CD= !"REPEAT !"# =CD=...
- Page 73 MP3= !" MP3= !"#$TEXT !"# !"#$%&'()*+,- = 5 = !"#CD TEXT !"=CD-R MP3 = =CD-RW !CD TEXT OFF =MP3-CD !"# !"=CD !"=CD= !"#$%&' !"#$%&'()*+,=CD !"#$% "#$%&'()*+ !"#$%&&'()*+ !"#$ !"#$%&'(=CD !"#$SCROLL !"#=CD !"#$%& !"#SCROLL !"=CD =16= SCROLL OFF !"#=ISO 9660= !"#$%&'( = Joliet !"#$%&'()*+!", !"#$%&'()*+,...
-
Page 74: Mp3
MP3= !"#$%&'()*+ ,- !"#$%&'( !"#$%&'()* +,- !"#$%&'()*+,-. !"#$%&'()*001 !"#$%&'()=0 T001 !"#$%&'()*+ T002 !"#$%&'ID3 !" T003 !"#$%&'=ID3 T004 T005 !"#$%.MP3 !" T006 T007 T001 T001 T008 T002 T002 T009 T003 T003 T010 T004 T004 !"#$%&' T011 T005 T005 !"#$=MP3 !" T006 T007 !"#$.MP3 !"#... - Page 75 MP3= !" !"=MP3= !"#$% !"#$%& !"#$%&'()*+, !"#$%=CD !"#$ !"#$%&'( =D01= !"#$%&'()*+,-. !"#$%&'(=D02 "#$%&=CD !"= MP3= !"#$ !" !"#$%&'()* D03= ! " # D 0 2 !"=NEXT =MP3 !"#$%&'()* !"#$=8= !"# !"#$% !"#=8= !" !"#$%&'()*+,-) !"#$%&'()*+, !"#$%&'()*+, !"#$%&=NEXT !"#$%&'()*+, !"#$%&=OK 8 !"#=8 !"#$% !"#$%&"'()*+...
-
Page 76: Scan
MP3= !"#$%=8= !"#$ !"#=EMIXF !"#$%&' !"#$%&'()*+,-. !"#$%& !"MIX !"#$% !"#!$%&'( !"=8= !"#$% !"#$%& MIX DIR !" #$%&'( !"#$%=MP3-CD !=ESCANF !"#$ !"#$%&'()=CD !"#$MIX !"# !"=OK 8 !"#$ !"#$%& MIX CD !"# =MIX !"#$%&!'()* =MIX= !"#$MIX !"# !"#$%&'MIX !"#$%&'()*+, !"#$%&'()*+, !"#$%&'() !"#$% &'( EREPEATF !"#$ =SCAN... -
Page 77: Repeat
MP3= !"#$INFO !"# =REPEAT !"#$%&'() !"#$%&'#$()*+, !"# !"#$REPEAT != 5 !"#$%& !"#$%&'()*+=ID3= REPEAT OFF !"#$%&'()*+ ! "#$%&'() !"#$%&'()*+ID3 !"#$%&'()*+,-. !"#$%&'() !*+, !"#$%&'()%&*+, !"#$ID3 !"#$% !"#$%&'()* !"#$%&'()=CD= =MP3 !"SHOW ALL !" !"#$%&'()* !"#$%&'()*+"*+ !"#$%&'(%&)*+, !"#$%&'#$()*+, !"#$%&'()*+,-. !"#$%&'SHOW ALL !"# !"#$%&'()*+ !"# !"#$%&'(=ID3= !"#$%&'() !*+, !"#$%&'()*... -
Page 78: Cd= Cd
!" !"#$%&' !=CD= !MP3= !"#$%&'=CD !"#$%&'()*+,-. !"#$%= C D C D 1 = J !"#$%&=Blaupunkt= !"#$%=5 CD10 !"#$%&'()*+, NEXT PREVIOUS !=CD !"#=5= !=CD =CD= =CD= !"#$%=CD= !"#$ !"#$% !"#$ !=MP3= !"#$%&' !"#$%=8 !"# !"#$=Microdri- =MP3= !"#$%&' !"#$%&=MP3= !"#$%&'()* !" !"#$%=CD= !"#... -
Page 79: Scan !"#$%&=Cd
!" !"SCAN !"#$%& REPEAT CD !"#$%&'()CD =REPEAT !"#$%!"=CD= !" #$%=OK 8= !"# !"#$REPEAT !"#$%!&'()*+ !"#CD !"#$%&'()*%& !"#$%&'()*+ !"REPEAT OFF !"#$%&'()*+, !"#$MIX !"#$%&'()*+, !"#$%&'=CD= !" !"#$% =SCAN !"# =NEXT= =4 !=OK 8 !"#$% !"#$%&'() *+,- !"MIX !"#$% !"#$%&=CD !"#$%& MIX CD REPEAT !"#$=CD= !"#$%... - Page 80 !" =CD= =CD= !"#$%&=CD !"#$%&'()=99= =CD !"=MP3= !"#$%& =NEXT= =4 !"#$%&'()*=7 !"#$% !"CD NAME !"# !"#$%&=99 !"# !"#FULL !"CLEAR CD !" !"=CD= !"#$=2= !"#$=CD !"#$ =NEXT= =4 !"#$% !"=CD= !"CD NAME !"# =NEXT= =4 !" !#$%&'( !"#$% !"#$%&=7= !"CD NAME !"# !"EDIT !"#$%...
- Page 81 CLOCK !"#$=8 !"# CLOCK !=OK 8= MENU= =9= !" !"#$%&'( =RDS= !"#$ !"#$%&'!()*+,- !"#$%& !"# !"# =MENU= =9 !"#$#% !"CLOCK !"#$ =MENU= =9 !"CLOCK !"#$ !"DATE !"#$% !"#$AUTOSYNC !"DD !"=5 !"#$%& !"#$ AUTOSYNC ON !"#$%& !=RDS= AUTOSYNC ON !"#$% !"#$= 8 !"# !"04 2004...
-
Page 82: Clock !J
CLOCK DSA MAX !"#$ !"#"$ DSA Max - " # $ % & ' ( ) * !"#$%&'()*+,-. !"#$%&' !"#$#%& !"#=3 !"#$%& =MENU= =9 !"#$ EQ1 EQ2= =EQ3 !"CLOCK !"#$ !"=27 !"#$% !"#$%=4 !"#$% !"OFFCLOCK !" !"#$%&'(EQ1=J=EQ3 !"#$%&'()*+,-. !"#$%&'()!*+,- "#" SHOW CLOCK !"#$%&"'() !"... - Page 83 DSA MAX !"#$%&'() ! " # $ % & ' ( ) * !"#$%&'()*+(,- !"#$%&'()*+ ! "#$ !" DNC !"# !"#$%&'()*+,-. !"# !"#$%&'()*'+, !" #$ %&'()*+, =DSA !"#$ %&'( !"#$%& !"#$ =AUDIO !"#$%&'()*+, !"# !"#$%&'()*+, !" =DSA !"#$%&'()* !"#$%&'()=DNC !"USER EQ !"# !"...
- Page 84 DSA MAX !"#$ !"#$ !"#$%&'!()*+ !"#$%&'()*+, !"#$%&'()*'+, !"# !"#$ VIEW PRE !"#$%&'()* !"#$%&'()* !"#$%&'()*+,!" !"#$%& !"#$%&'(E POST !"#$ !"#$ !"E PRE EQ F EQ F !"#$%&'()*+, !"#$%&'( !"#$ VIEWPOST !"#$ =AUDIO !"#$%&'()* !"# !"USER EQ !"# !"#$%& !"# !"#$%&'()*'+ !=OK 8= =AUDIO= =: !"#=5 !"#$%&...
- Page 85 DSA MAX !"#$%&'()*'+ !"ADJUST !"# !"#=5 !=OK 8= !"MANUAL !"# AUDIO= !"# !"#$ !"#$%&'%()*+,- !" !"FRONT EQ !" !"#$%&'()*'+,- !"#$REAR !"#$ !"#$ =AUDIO !"#$%&'( !"# !"# !"USER EQ !"# !"#$%=8 !"# !"# !"#$%&'()*'+ !"#$= 8 !"# !"#=5 !"ADJUST !"# !"#$%&'()*+,-. !"...
- Page 86 DSA MAX !"# !"# !"#$ =AUDIO !"#$%&'()*$+,- !"# !"#$%&'()*+,-. !"!#$%&"'()*+ !"STAGING !"# !"#$%&' ()*+,- !"#$%&'()*+ !"#$ %&'()*+,- !"#$%=5 LEFT !"#$%&'()*+, VOCAL !"#$%=5 RIGHT DISCO !"#$%&'()*+, ROCK !"FRONT !"#$ JAZZ E CLASSIC !=OK 8= AUDIO= !"#$%&'()*+, !"# !"#$ =AUDIO !"#$ !"# !"# !"PRESET !"#...
- Page 87 DSA MAX !"# !"#$=2= !"# DNC - !"# !"#$DNC= !"#$ !"#$%&'()*+, !"#$%&' !()*&+ !"#$%&'()* !"=OK 8= =AUDIO !"# !"#$%&'()*+,-. !"#$%&' !"#$ !"#$%&'()*+,-. !"# !"#$%&'()*+,-. "#$%&'("#)* !"#$%&'()*+,- !"#$%& CATHEDRAL E =DNC THEATER E !"# $%&'()*+,$ CONCERT E !"#$%&'"#()*+ !"=DNC !"# CLUB E !"#$%&'()*+, STADIUM E !"#$%&'()*+,-"...
-
Page 88: Dnc
=DNC =DNC !"#$ =AUDIO !"#$=DNC !"#$ !"# !"# $%&'( !"DNC !"#$% !"#$%&'() DNC 1 !"#$%&'&()*DNC !"#$%&'()*+,- !"ADJUST !"# !"#$%&'()*+,-. !"#$% !"#$%&'()$%&* !" =DNC !"#$% !"#$ =AUDIO !=OK 8= AUDIO= !"# !"# !"DNC !"#$% =DNC !"LEVEL !"#$ !"#$ =AUDIO !"# !"=8= !"# !"DNC !"#$%... - Page 89 !"#$%&' !"#$%&' !""#$% !"#$$%&'()*+,- !"#$%%&'()*+ , ! " # # $ % & ' ( ) * + !"#$ !"#$%%&'()*+,- =-135°= = = 180° !"# !"#$%&'()*+,-# =45° !"#$%&'()*+,-! =AUDIO= =: !"# $!%&'( !"#$%& AUDIO MENU !""#$%&'($)* !"SUBOUT !"# !"#$%&''()=-6 !"#$%&'()$*+,- !"PHASE !"#$ !"#$%$&&'($&...
- Page 90 !"#$%&' =AUDIO= =: =AUDIO= =: !"#$%& !"#$%& AUDIO MENU AUDIO MENU !"SUBOUT !"# !"SUBOUT !"# !"LOWPASS !" !"SUBSONIC !" !"=8 !" !"#$=8 !"#$ ! "#$%& !"#$=8 !"#$ !=OK 8= AUDIO= =: !"#$%&'( !"#$ !"#$%&'()*+, !"#$%&'()*+,- !"#$%&'()*+,-. !"#$%&'()*+ !"#$%&'() *+,- !"#$ "%&'()*+, ! "#$%&...
- Page 91 !"#$%&' =AUDIO= =: =AUDIO= =: !"#$%& !"#$%& AUDIO MENU AUDIO MENU =NEXT= =4 =NEXT= =4 !"#$ !"#$ AUDIO MENU 2 AUDIO MENU 2 !"CENTRE !"# !"HIPASS F !"# ! "#$%&' !"#=8 !"#$% !"HIPASS R !"# ! "#$%&' !"#=8 !"#$% !"#=8 !"#$% ! "#$%&...
- Page 92 !"#$% !"#$% !"#$%&'()*+,-. !"#$%&'()*+,-. !"#$%&'()* !"#$%&'=CD !"#$%&'()*+,-. !"=MP3 !"#$%&'##()*+, !"#$%&'()*AUX1 !"#$%&'()*+,- !"#$ Blaupunkt= =Velocity= !=AUX1 !" !"# !"#$%&'()AUX2 !"#$%&' !"#$%&'()*=AUX 2 !"#$%&'()*+,-. !"#$%&'( )*+,- !"#$%&'()*!+,- !"#$%INTERNAL AMP !"=AUX !"#$%& !" !"#$% !"#$%&' ( )*+, !"#$%&'()*+, !"#=Blaupunkt= !"# !" =MENU= =9 !"...
- Page 93 !"#$%&AU- ! " A U X 1 AUX1 N AV !"EDIT !" XILIARY 1 ON AUXILIARY 1 AUX2 !"#$%& !"#$%&'()*+, "#$%&$'()*+ !"#$%&'()*+, !"#$%&'()*+, !"#$% AUX2 !"# !"NAV AUX2 !"#=8 !"#$% !"#$AUXILIARY 2 ON !" NAVIGATION ON !"#=8 !"#$% !"#$%&'()*+, !"=CD !"#$% =OK 8= =MENU...
- Page 94 !"# !"# !"#$%&'()*+,)* !"#$%&'() ! " # $ % & ' ( ) =MENU= =9 BLAUPUNKT-THE ADVANTAGE IN !"VARIOUS !"# !"#$%&=35= YOUR CAR !" #$%&' !"SER NUM !"# =MENU= =9 !"VARIOUS !"# !"#$%&'%&()*+, !=OK 8= MENU= =9= !"ON MSG !"# !"...
- Page 95 !"#$%&'()*+",- !"#$%&'()*+ !" !" 14.4 =MENU= =9 !"=4 x 18 !"VARIOUS !"# !" ! " # $ !"NORMSET !" DIN 45324 !"#$%&=2= =14.4 !" ! " # $ !"#$%&'() != 4 x 26 !"#$=4 x 50 FM : 87.7 – 107.9 MHz AM : 530 –...
- Page 96 MENU = = I= !"# AUDIO X-BASS NEXT !"= = = = !"= = DSA= !"# < W=CD=L=CD- SOURCE = I= !"# DIS•ESC !=MP3E !"= = = = !"E !" F = = = TUNER !"= !"=...
- Page 97 ! ! ! ! != = = = = = = = = = KKKKKKKKKK KKKKKKKKKK = = = = = KKKKKKKKKKKKKKKKKK KKKKKKKKKKKKKKKKKK KKKKKKKKKK KKKKKKKKKK KKKKKKKKKK 99 KKKKKKKKKKKKKKKKKK KKKKKKKKKKKKKKKKKK 109 KKKKKKKKKKKKKKKKKK ! KKKKKKKKKKKKKKKKKKKKKKKKKK 99 ! KKKKKKKKKKKKKK 109 ! KKKKKKKKKKKKKKKKKKKK 99 != = ! KKKKKKKKKKK 110 ! KKKKKKKKKKKKKKKKKKKKKKKKKK 99...
- Page 98 ! KKKKKK 132 KKKKKKKKKKKKKKKKKKKKK KKKKKKKKKKKKKKKKKKKKK KKKKKKKKKKKKKKKKKKKKK KKKKKKKKKKKKKKKKKKKKK KKKKKKKKKKKKKKKKKKKKK 119 ! KKKKKKKKKKKKKK 132 ! KKKKKKKKKKKKKKK 119 MP3-CD ! KKKKKKKKKKK 133 ! KKKKKKKKKKK 120 !"= ! KKKKKKKKKKKK 121 ! ! ! ! != = = = = = = = = = = = = = = DNC - ! KKKKKKKKKKKKKKKKKKK 121...
- Page 99 !"= !"= ! ! ! ! ! = = = = = != = !"= !"= !"= =www. !"#= blaupunkt.de= != = !"= Blaupunkt GmbH Robert Bosch Str. 200 31139 Hildesheim ! ! ! ! ! Germany !"I= !"= !"...
- Page 100 =RC 10H= RC 08I=RC 10= !"E !"= =9= =4= = MENU= !"#= = Blaupunkt= =Velocity CD= = = = = !"= != = !W=CDC A 03I=CDC A 08 =IDC A 09K ! ! ! ! != = = = = MP3...
- Page 101 = = = = = !"#= = = = = = !" !" !" !" !" = = = = = !"#= !"E !"= !"= !"# != = !"# !"# !"# !"# !"#= = = = = ! ! ! ! ! !"#K= !"#= !"#=...
- Page 102 ! ! ! ! ! = = = = = L L L L L = = = = = ! ! ! ! ! = = = = = = = = = = L L L L L =0=E =50=E L = =...
- Page 103 = = = = = !" !" !"= = = = = !" !" E AUX2 I !"=2= = = = = = = !"= !"= !"#= !"= = !"K= !"#$= !"K !"= = !"= !"= !"= !"#= !"= !"= !"= Blaupunkt= !"= !"=...
- Page 104 ! ! ! ! ! = = = = = ➮ !" !"= = = = = !" !" !" !" !" !" !" !" = = = = = NAVI DIFF 5= = !"K !"= !"= ➮ !"=2= !"K !"#$= ➮...
-
Page 105: Audio Menu
= = = = = = = = = = = = = = = = = = = = = = = = = = = = = = = = = = = = = = = = L L L L L = = = = = = = = = =... - Page 106 !" !" ! ! ! ! ! !" !" !" = = = = = X-BASS =E =E =E =E =EX J J J J J F F F F F = = = = = !" !" ! ! ! ! ! !"...
- Page 107 !" !" ! ! ! ! ! !" !" !"= = = = = = = = = = ! ! ! ! != = = = = ! ! ! ! != = = = = ! ! ! ! ! != = =DAY =NIGHT...
- Page 108 !" !" ! ! ! ! ! !" !" = = = = = !" = = = = = ! OK 8 =MENU “COLOR” 9= = !"= !"K !=5= “USER” ! ! ! ! != = = = = !"...
- Page 109 !" !" ! ! ! ! ! !" !"= = = = = !" = = = = = = = = = = ! ! ! ! != = = = = = = = = = = = = = = ! ! ! ! ! =RDS= !=FM=...
- Page 110 = = = = = ! ! ! ! != = = = = = = = = = ! ! ! ! ! ! ! ! ! ! = = = = = = = = = = =RDS= =CD/MP3= =CD= !"#$...
- Page 111 !"#= !=TUNER= !"= = !" !=DDA= !"K=TwinCeiver 4= = NEXT !"#= !"= = != = !"K=Blaupunkt “TUNER 2” !"= !" K= = DYN LIST !"= =5= = I= = ! D D A ! P R E - I= = !=5= !"=...
- Page 112 = = = = = !" !" !"= = = = = ! ! ! ! ! !" !" RDS= = = = = !"#= =SW= FMI=AM= RDS= !"#=EFM= !=TUNER= FK=RDS= RDS= = = = = = = = = = L L L L L !=5= “BAND”...
- Page 113 = = = = = ! ! ! ! ! = = = = = = AM “FM” FM = !"= ! ! ! ! != = = = = ! ! ! ! ! !=8= = !"=1 !K= SENSITIVITY ! ! ! ! != = = = = ! ! ! ! ! SENSITIVITY 6...
- Page 114 = = = = = ! ! ! ! != = = = = ! ! ! ! ! ! ! ! ! != = = = = ! ! ! ! ! = = = = = E E E E E = = = = = =F =F =F =F =F 9= =...
- Page 115 = = = = = ! ! ! ! != = = = = ! ! ! ! ! =E =E =E =E =EPTYF F F F F PTY= =FM= !"= !"= !"# !I= PTY OFF !"= = !" !" !"...
- Page 116 = = = = = !" !" !" !"# !"# !"#= = = = = !" !" !" !" !" !"# !"# !" !" = = = = = = = = = = ! ! ! ! ! L L L L L ! ! ! ! != = = = = = = = = = ! ! ! ! != = = = = ! ! ! ! !=E =E =E =E =EHiCutF F F F F...
- Page 117 CD= = = = = CD= = = = = !"= =12 cm !"#= =CD-R= =CD-RW E =CD= !=CDF = !"K = =CD !I=Blaupunkt !"= !"#= < SOURCE= =CD= !"#= CD= = !K=Blaupunkt= =CD= = CD= = = = = >=CD=...
- Page 118 CD = = = = = ! ! ! ! !=E =E =E =E =E !"# !"# !"#F F F F F ! ! ! ! ! (SCAN) !"# !"# = = = = = CD = !"#= !"= !" F = = ! OK 8 =2= =...
- Page 119 CD= = = = = MP3= = = = = ! ! ! ! ! MP3= = = = = = = = = = L L L L L = = = = = “CD TEXT ON” CD TEXT !"#=MP3= = TEXT =CD-R...
- Page 120 MP3 = = = = = W W W W W !"#= !"= !"I= T001 !" T002 !"#= T003 T004 !"K !"#= T005 T006 T007 != = T001 T001 T008 !"I= = T002 T002 T009 T003 T003 E W= 001 I= 002 = F == T010 T004 T004...
- Page 121 MP3= = = = = !" !" ! ! ! ! ! !" !"= = = = = !" W W W W W MP3= !" !" !"= = = = = !" !"= = = = = !" ! ! ! ! ! !"...
- Page 122 MP3 = = = = = !=8= = != = = ! ! ! ! != = = = = ! ! ! ! !=E =E =E =E =EMIXF F F F F !"#= !"I !"# !"#F F F F F !"# !"# !"#...
- Page 123 MP3= = = = = ! ! ! ! ! != = REPEAT= = = = = !" INFO !=5= = !"I REPEAT OFF W W W W W = REPEAT !=5= = =ID3= !" !" !" ! ! ! ! ! !"...
- Page 124 =E =E =E =E =E CD= = = = = =CD= !"I =CD= = !=MP3= =CDECD1 - CD10F !"= = !"#$%&' !=5= = !"=Blaupunkt= != NEXT = PREVIOUS W W W W W =5= = =CD= !=CD= = !"#= CD= = !"#=...
- Page 125 CD= = = = = = = = = = ! ! ! ! != = = = = E E E E E SCANF F F F F = = = = = REPEAT CD !"K ! ! ! ! ! REPEAT= = = = = F = = !=CD=...
- Page 126 CD = = = = = = = = = = CD= = = = = = = = = = CD= = = = = = = = = = =CD= = !"#= =99= !=MP3= =4= = NEXT= !"= !"K CD NAME !"=...
- Page 127 CLOCK -= = = = = CLOCK -= = = = = !"K ! ! ! ! ! = = = = = = = = = = ! OK 8 MENU 9= = RDS= !K= = !"= !"K ! ! ! ! ! = = = = = !"I ! ! ! ! != = = = =...
- Page 128 CLOCK - = = = = = ! ! ! ! != = = = = ! ! ! ! ! = = = = = !"= !"#$%= EDSA - Digital Sound Adjustment)F MENU= !EEQ1I=EQ2= =EQ3F = CLOCK !K= = !"=OTJ !"= OFFCLOCK...
- Page 129 !"I= W W W W W !"= = !"E =EQI= !I=DNCI= != = !"= !"= !"= DSA = = = = = !"= = = = = =2= = AUDIO= K= = !"= !=DSA= W W W W W !"= USER EQ 5= = !"=...
- Page 130 ! "#= !"= = = = = = !"= !"K !"= !"K ! "# ! "#= = = = = ! "# ! "# ! "# L L L L L = = = = = !"= ! ! ! ! != = = = = !"...
- Page 131 ADJUST USER EQ 5= = 5= = !"= !"= MANUAL 5= = ! OK 8 !"#$= AUDIO !"= !"= !"K !"#$= !" ! ! ! ! != = = = = !" !" !" !" !" FRONT EQ I= !"= REAR !"= != = =2= =...
- Page 132 ! ! ! ! != = = = = ! ! ! ! ! ! ! ! ! != = = = = ! ! ! ! ! = = = = = =2= = AUDIO= !"= STAGING !"= 5= = !"== !"#$I= !"=...
- Page 133 ! ! ! ! != = = = = !" 2 = = = = = = = = = = DNC - E E E E E Dynamic Noise CoveringF F F F F Dynamic Noise Covering !"# !"K ! OK =AUDIO= !"=...
- Page 134 ! ! ! ! ! ! ! ! ! ! DNC= = = = = = = = = = = = = = = =2= = AUDIO= =DNC DNC 1 = ADJUST K= DNC 5 = 5= = ! "= !"K !"= ! "=...
- Page 135 ! ! ! ! != = = = = = = = = = = = = = = ! ! ! ! != = = = = = = = = = !" !" ! ! ! ! ! !"...
- Page 136 ! ! ! ! ! = = = = = = = = = = = = = = = !"= AUDIO= = = = = AUDIO MENU AUDIO= = = = = AUDIO MENU SUBOUT 5= = SUBOUT SUBSONIC 5= = 5= = LOWPASS...
- Page 137 ! ! ! ! != = = = = = = = = = = = = = = AUDIO= = = = = AUDIO= = = = = AUDIO MENU AUDIO MENU NEXT= = = = = NEXT= = = = = AUDIO MENU 2 AUDIO MENU 2 CENTRE...
- Page 138 = = = = = !"= !"= =CD= Elow-pass filterF = =MP3= !"= !"= EAUXF = K= = =AUX1= =Blaupunkt= =Velocity EAUX2F !"#= !"K = = = = = = = = = = L L L L L !"= AUX2= !"#= !"#=...
- Page 139 = = = = = = = = = = !"= AUX1 = AUX1 = = NAV/AUX2 = XILIARY 1 ON AUXILIARY = EDIT != = 5= = 1 OFF !"= !"K= !"= !"K !"= NAV/AUX2 !"I ! 5 = !K= NAV !"= /AUX2 =...
- Page 140 !"#$ !"#$ J J J J J = = = = = = = = = = !"= !"#= !"K= !"= BLAUPUNKT- MENU= = = = = THE ADVANTAGE IN YOUR CAR VARIOUS !K= = 5= = =35= SER NUM...
- Page 141 !" !" ! ! ! ! ! !" !" !" ! ! ! ! ! !" !" !" !" !" = = = = = !"#= !"#= = 4 x 14.4= V MENU= = = = = VARIOUS DIN 45324= 5= = =14.4 V x 26=...
-
Page 142: Installation Instructions
!" #$% &'(&) If the information provided here is not suitable for your specific installation requirements, please contact your Blaupunkt dealer, your vehicle manufacturer or our telephone hotline. When installing an amplifier or changer, you must first connect the device earth connections before con- necting the plugs for the line-in or line-out jacks. - Page 143 = = = = = ! ! ! ! != = = = = ! ! ! ! !> > > > > = = = = = =BLAUPUNKT !"= I=Blaupunkt= !"= ! ! ! ! != = = = =...
- Page 144 Supplied Mounting Hardware !"#$% ! ! ! ! ! = = = = = = = = = = 2. Antenna...
- Page 145 7 607 621 . . . 1 2 V Car-specific adapter cable which is available at your dealer. !"#$%&' ()*+, !"# !"= 1-20 ○ ○ ○ ○ ○ ○ ○ ○ ○ ○ ○ ○ ○ ○ ○ ○ ○ ○...
- Page 146 2. Antenna 1. Antenna 1 2 V 1 Antenna Antenna uninstalling !"# 8 601 910 003...
-
Page 147: Remote Control
Aut. antenna 7 10 13 16 19 FB +12V / RC +12V 9 12 15 18 +12V Amplifier 8 11 14 17 20 400 mA AUX 2 NF L (Navi NF ) Speaker out RR+ AUX 2 NF R (Navi Mute) Center out Speaker out RR- AUX 2 GND (Navi GND) - Page 148 Microphone black, Radio red, Pin 9 MIC GND Pin 10 MIC INPUT !"# !"#$ =MIC GND =MIC=...
- Page 149 Sub Out (color-BN) !"#$=BN JBNF Sub Out =Sub Relais Amplifier 1 3 5 Kl. 15 +12V 2 4 6 4 Ohm 4 Ohm 4 Ohm 4 Ohm 1 2 V This information is subject to change without notice! !"#$%&'()*+, !"...
- Page 150 01-333 9575 01-324 8756 Poland (PL) 0800-118922 022-8771260 Turkey (TR) 0212-3350677 0212-3460040 (USA) 800-2662528 708-6817188 Brasil (Mercosur) (BR) +55-19 3745 2769 +55-19 3745 2773 Malaysia (Asia Pacific) (MAL) +604-6382 474 +604-6413 640 Blaupunkt GmbH 02/04 TRO CM/PSS 8 622 404 xxx...
Need help?
Do you have a question about the Bremen MP74 US and is the answer not in the manual?
Questions and answers