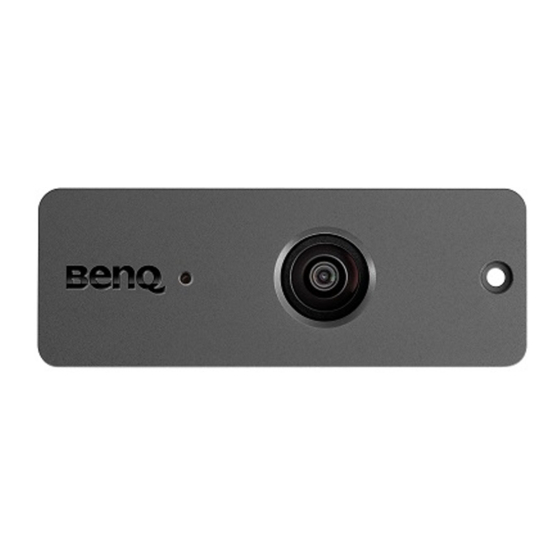
BenQ PointWrite User Manual
Pointwrite is a built in interactive whiteboard on the projector
Hide thumbs
Also See for PointWrite:
- User manual (16 pages) ,
- Quick start manual (8 pages) ,
- Calibration manual (6 pages)
Table of Contents
Advertisement
Quick Links
Advertisement
Table of Contents

Summary of Contents for BenQ PointWrite
- Page 1 PointWrite User Manual...
-
Page 2: Table Of Contents
Table of contents Shipping Contents..3 Attaching the PointWrite to the Projector....... 4 Connecting the PointWrite to PC..5 Pen Action ....5 Exchanging the Pen Tip......5 Driver Installation ..6 Configuration Setting .. 8 The PointWrite Configuration ....8 Alignment View .........9 PointWrite Calibration......10... -
Page 3: Shipping Contents
Shipping Contents The PointWrite is a built in Interactive Whiteboard on the projector. To use the PointWrite correctly, please find the standard accessories below and follow the instructions in this manual. PointWrite Installation CD Quick manual Two PointWrite pens Mini USB cable... -
Page 4: Attaching The Pointwrite To The Projector
Attaching the PointWrite to the Projector Attach the PointWrite to the projector as illustrated and tighten the screw to secure the PointWrite. Remove the cover on the projector as illustrated. Connect the cable to the PointWrite and install the PointWriter as illustrated. -
Page 5: Connecting The Pointwrite To Pc
Connecting the PointWrite to PC Use the USB cable to connect the PointWrite to PC. Plug the USB mini-B end into the projector and plug the USB type-A end into PC. Pen Action The PointWrite Pen provides the following 4 actions: Click: Touch an icon or a menu on the screen. -
Page 6: Driver Installation
Driver Installation Insert the PointWrite CD into your CD/DVD-ROM driver. The Installation assistant will run automatically. Follow the instructions on the screen. If the assistant does not run automatically, double click on the “setup.exe” under CD/DVD-ROM directory and the Installation assistant will display. - Page 7 , the PointWrite icon appears on the system tray area. • Click on the PointWrite icon on system tray area and a popup menu will appear. When using the PointWrite for the first time, the configuration window will appear on the desktop to help you configure the PointWrite.
-
Page 8: Configuration Setting
Configuration Setting The PointWrite Configuration To use the PointWrite, the proper setting of the PointWrite configuration is needed. The Configuration setting window will help you to set up PointWrite correctly. PointWrite configuration: Select the PointWrite type you’re going to use. -
Page 9: Alignment View
Alignment View The PointWrite Alignment function is to set the orientation of the PointWrite to the screen. Alignment View: When clicking on the “Alignment View”, the screen image is displayed on the alignment view as illustrated. If the screen image is not in the center, the calibration will fail. Please make sure the PointWrite module is attached to the projector properly. -
Page 10: Pointwrite Calibration
PointWrite Calibration PointWrite provides two kinds of calibration methods: auto calibration and manual calibration. Auto calibration : click on and the calibration process will run automatically. When you choose this method, white image is shown on the screen and the pattern image is displayed. - Page 11 Click on and the calibration window will be projected on the screen. Use the PointWrite pen to click on the center of calibration cursor immediately after it appears. Then the next cursor will display. Repeat this process until the last calibration cursor disappears.
-
Page 12: Running The Pointwrite
PointWrite icon will be created on the system tray area. Right click on the PointWrite icon on the system tray area and a pull-up menu appears. Configuration: Choose this when you want to change the installation position of the projector. -
Page 13: Specifications
Storage Temperature -20°C ~ 60°C Operating Temperature 5°C ~ 40°C Dimensions 84.3mm x 31.7mm x 23.8mm Weight 30.4 g Compatible model Selected BenQ Ultra short throw models PointWrite Pen Power AAA Battery*2 Length 176 mm Diameter 15 mm Weight 35 g... -
Page 14: Trouble Shooting
Trouble Shooting The PointWrite pen doesn't operate as mouse on the screen after calibration. • Check the configuration menu is set correctly. • Projector type - Short throw model or ultra short throw model. • Mounting type - Desktop or Ceiling mount.


Need help?
Do you have a question about the PointWrite and is the answer not in the manual?
Questions and answers