Table of Contents
Advertisement
Quick Links
Advertisement
Table of Contents

Subscribe to Our Youtube Channel
Related Manuals for BenQ PointWrite PW31U


Summary of Contents for BenQ PointWrite PW31U
- Page 1 PW31U...
-
Page 2: Table Of Contents
Table of contents Shipping Contents..3 Prepare for Setup ..4 Environmental Condition ......4 Instructions for Surface ......5 PointWrite Module Installation on Projector....... 7 About PointWrite Pen......... 8 Installing the Batteries......8 Replacing the Pen Tip.......8 Setup Software Installation ....9 Setup Software Installation Complete .... -
Page 3: Shipping Contents
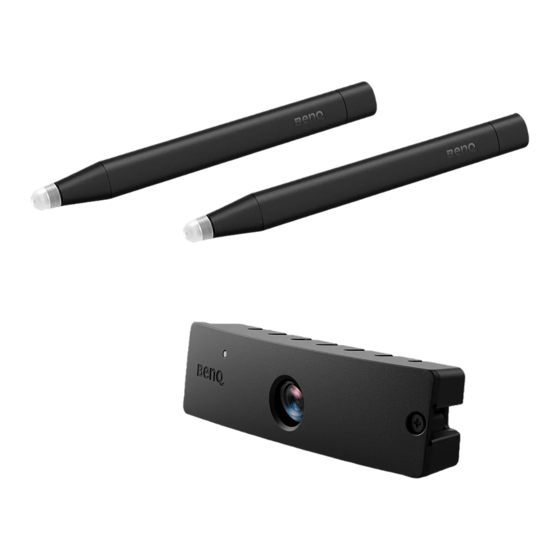
Shipping Contents The PointWrite is a built in Interactive Whiteboard on the projector. To use the PointWrite correctly, please find the standard accessories below and follow the instructions in this manual. PointWrite Quick manual Two PointWrite pens (PointWrite Pen G2) Mini USB cable Two sets of batteries Extra pen tips... -
Page 4: Prepare For Setup
Prepare for Setup Environmental Condition For an BenQ projector with the scalable interactive functionality, transforming any flat surface into a virtual interactive whiteboard. For an optimal interactive writing quality, follow these guidelines: Close window curtains. Select a projection area away from direct sunlight to prevent writing interference. -
Page 5: Instructions For Surface
Instructions for Surface Optimal interactive quality will be dependent on the selected surface condition. It is important to choose a flat and non-reflective surface to secure the writing performance. Selecting a wall surface • Select a wall that is straight and flat, avoid any protruding objects on it. •... - Page 6 Instructions for a board surface Consider the following factors when selecting a board to project to optimized the interactive quality. • The board surface require to be semi-glossy or matt. • The board with glossy and reflected surface is not recommended, the surface will increase the external light intensity and unexpected interference may happen.
-
Page 7: Pointwrite Module Installation On Projector
PointWrite Module Installation on Projector Attach the PointWrite to the projector as illustrated and tighten the screw to secure the PointWrite. Remove the cover on the projector as illustrated. Connect the cable to the PointWrite and install the PointWriter as illustrated Tighten the screw to secure the PointWrite. -
Page 8: About Pointwrite Pen
About PointWrite Pen The PointWrite Pen provides the following 4 actions: Click: Touch an icon or a menu on the screen. Double Click: Touch an icon or a menu on the screen two times. Right Button Click: Touch an icon or menu for at least 1.5 seconds. Drag: Touch and drag an object on the screen. -
Page 9: Setup Software Installation
When you are the first time to use this PointWrite Module, please install set-up Software for Configuration setting. https://www.benq.com/en-us/business/support/products/projector/pointwrite- pw31u/download.html Go to BenQ Website >> Search PW31U >> Go to “Download Page”. Follow the on-screen instructions to setup software. Complete the installation. Setup Software Installation... -
Page 10: Setup Software Installation Complete
The PointWrite icon will be created on the desktop. The installation folder will be created on C: directory. • 64-bit Windows: C:\Program Files (x86)\BenQ\PointWrite 3.0 • 32-bit Windows: C:\Program Files\BenQ\PointWrite 3.0 Remark: Only First time using the PointWrite module need to install set-up Software for Configuration setting, the subsequent users can only plug the USB cable to connect to PC to start the interaction quickly without Setup Software installation. -
Page 11: Connecting The Pointwrite To Pc
Connecting the PointWrite to PC Use the USB cable to connect the PointWrite to PC. Plug the USB mini-B end into the projector and plug the USB type-A end into PC. Check "Device Manager" from your computer to make sure that PointWrite device is recognized by your computer. -
Page 12: Set Up For Interactive Function
• Pen Mode: Default selection • Finger Touch Mode: Only available when PointWrite Module works with BenQ PointWrite Touch module. When selecting Finger Touch mode, pen and finger can be used simultaneously. PointWrite Option: • Ceiling Mount Mode: Click this item if you mount the projector on the ceiling. -
Page 13: Alignment Instructions
Alignment Instructions Alignment View The PointWrite Alignment function is to set the orientation of the PointWrite to the screen. Alignment View: When clicking on the "Alignment View", the screen image is displayed on the alignment view as illustrated. If the screen image is not in the center, the calibration will fail. Please make sure the PointWrite module is attached to the projector properly. -
Page 14: Pointwrite Calibration
PointWrite Calibration PointWrite provides two kinds of calibration methods: auto calibration and manual calibration. Auto calibration: Click on and the calibration process will run automatically. When you choose this method, white image is shown on the screen and the pattern image is displayed. -
Page 15: Start For Interactive Function
After completing calibration, you can use PointWrite pen as mouse function or launch QWrite software for writing and annotation. Remark: *QWrite™ is BenQ exclusive annotation software, please go to BenQ Website to Download QWrite software. Notice: To secure the quality of interactive function, we suggest users to adjust projector's input signal (computer output signal) to the same as projector's Native resolution. -
Page 16: Specifications
5°C ~ 40°C / 10%~85% RH (Max.) non-condensing, inside Operating Temp/Humidity projector Dimensions 118.3 mm x 31.3 mm x 23.6 mm Weight 45.0 g +/- 2 g Selected BenQ Ultra short throw models (Throw ratio 0.35 Compatible model and 0.33) PointWrite Pen Power AAA Battery*2 Length...
Need help?
Do you have a question about the PointWrite PW31U and is the answer not in the manual?
Questions and answers