Table of Contents
Advertisement
Advertisement
Table of Contents

Related Manuals for Brady BBP12


Summary of Contents for Brady BBP12
- Page 1 BBP12 ThermalTransferPrinter UserGuide...
-
Page 2: Table Of Contents
Contents CHAPTER1 Introduction ............................5 ProductIntroduction ..............................5 Compliance ................................5 CHAPTER 2 Operations Overview .......................... 6 Unpacking and Inspection ............................6 Printer Overview ..............................7 CHAPTER 3 Setup ..............................10 SettingUpthePrinter .............................. 10 Open/ClosetheTopCover ............................11 LoadingtheRibbon ..............................12 LoadingtheMedia .............................. - Page 3 Copyright Thismanualiscopyrightedwithallrightsreserved.Noportionofthismanualmaybecopiedorreproducedby anymeanswithoutthepriorconsentof Brady Worldwide,Inc. Whileeveryprecautionhasbeentakeninpreparationofthisdocument, Brady assumesnoliabilitytoanypartyf oranylossordamagecausedbyerrorsoromissionsorbystatementsresultingfromnegligence,accident,oran yothercause. Brady furtherassumesnoliabilityarisingoutoftheapplicationoruseofanyproductorsystemdes cribed,herein;noranyliabilityforincidentalorconsequentialdamagesarisingfromtheuseofthisdocument. Br disclaimsallwarrantiesofmerchantabilityorfitnessforaparticularpurpose. reservestherighttomakechangeswithoutfurthernoticetoanyproductorsystemhereintoimproverelia Brady bility,function,ordesign. Reproductionofthismaterial,inpartorwhole,isstrictlyprohibitedwithoutthewrittenpermissionof BradyWo ..Formoreinformation,contact: BradyWorldwide,Inc. Signmark® Division,2221W.Camden rldwide,Inc Road,Milwaukee,WI53209. Disclaimer Everyefforthasbeenmadetomakethisguideasaccurateandcompleteaspossible. BradyWorldwide,Inc. isn otresponsibleforinaccuraciesandomissionsoccurringduringtheuseofthisguide. Thismanualisproprietaryto BradyWorldwide,Inc. andmayberevisedfromtimetotimewithoutnotice. BradyW orldwide,Inc. disclaimsanyunderstandingtoprovideyouwithrevisions,ifany. Allbrandorproductnamesreferencedinthismanualaretrademarksorregisteredtrademarksoftheirrespectiv ecompaniesororganizations. © 2015Brady Worldwide,Inc.Allrightsreserved.www.bradycorp.
-
Page 4: Revision History
Revision History Date Content BPP12UserManual... -
Page 5: Chapter1 Introduction
CHAPTER1 Introduction ProductIntroduction ThankyouforpurchasingtheBRADYBBP12seriesbarcodeprinter.Althoughtheprinteriss mall,itdeliversreliable,superiorperformance. Thisprinterprovidesboththermaltransferanddirectthermalprintingatuser- selectablespeedsof2.0, 3.0 or 4.0ips.Itacceptsrollfeed,die-cut,andfan- foldlabelsforboththermaltransferanddirectthermalprinting.Allcommonbarcodesformatsarea vailable.Fontsandbarcodescanbeprintedin4directions,8differentalphanumericbitmapfontsa ndbuilt-intruetypefontcapability.Youwillenjoyhighthroughputforprintinglabelswiththisprinter. Compliance FCC ClassB, CE Class B, C-Tick Class B, UL, cUL, TÜ V/safety, CCC, EAC, Note: Continuousprintingwillcauseprintermotoroverheat.Printerwillstopprintingautomat icallyabout10~15minutesuntilmotoriscooleddown.Donotturnoffpowerwhenprinter pausesorthedatatransferedtoprinterbufferwillbelost. Note: Themaximumprintingratioperdotlineis15%forthisprinter.Toprintthefullwebblacklin e,themaximumblacklineheightislimitedto40dots,whichis 3.3 mmfor300dpiresolutionprinter. BPP12UserManual... -
Page 6: Chapter 2 Operations Overview
CHAPTER 2 Operations Overview UnpackingandInspection Thisprinterhasbeenspeciallypackagedtowithstanddamageduringshipping.Pleasecareful lyinspectthepackagingandprinteruponreceivingthebarcodeprinter.Retainthepackagingm aterialsincaseyouneedtoreshiptheprinter. UnpackingthePrinter Thefollowingitemsareincludedinthecarton: • (1) Printer unit • (1) Product CD, including drivers • (1) Quick installationguide • (1) Power cord • (1) Auto switchingpower supply • (1) USB interface cable • (1)Adapter (for narrow continuous sleeves) Ifanypartsaremissing,pleasecontactcustomerservice. -
Page 7: Printeroverview
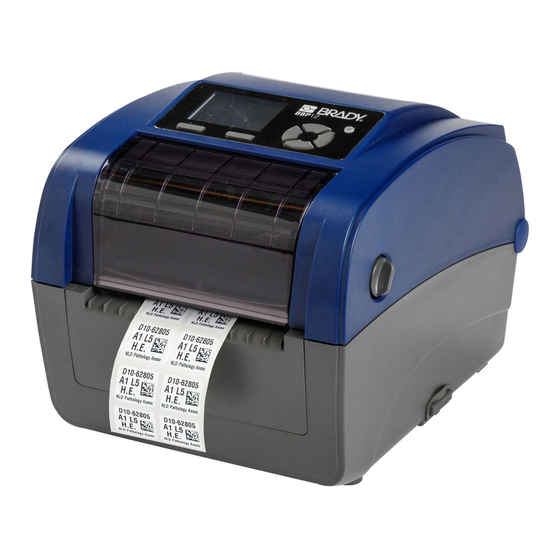
PrinterOverview Front View LCD display Menu button Feed button LED indicator Navigation button Ribbon access cover Top cover open lever SD card socket BPP12UserManual... - Page 8 Interior View 1. Ribbon rewind hub 2. Ribbon rewind gear 3. Gap sensor (receiver) 4. Media holder 5. Media holder lock switch 6. Gap sensor (transmitter) 7. Printhead 8. Ribbon supply hub 9. Top cover support 10. Media guide adjustment knob 11.
- Page 9 Rear View 1. Ethernet interface 2. USB interface 3. USB host interface 4. Serial/COM interface 5. Power jack socket 6. Power switch 7. Fan-fold paper entrance chute BPP12UserManual...
-
Page 10: Chapter 3 Setup
Setup CHAPTER 3 SettingupthePrinter 1. Placetheprinteronaflat,securesurface. 2. Makesurethepowerswitchisoff. 3. ConnecttheprintertothecomputerwiththeprovidedUSBcable. 4. PlugthepowercordintotheACpowercordsocketattherearoftheprinter,andthenplugthepo wercordintoaproperlygroundedpoweroutlet. Note: Please switch OFF printer power switch prior to plug in the power cord to printer power jack. Ethernet RJ-45 interface Plug Power Switch USB interface USB host interface Serial/COMInterfac Power Supply BPP12UserManual... -
Page 11: Open/Closethetopcover
Open/ClosetheTopCover 1. Opentheprintertopcoverbypullingthegrey tabslocatedoneachsidetowardthefrontoftheprinter,thenliftthetopcovertothemaximumo penangle. 2. Atopcoversupportattherearoftheprinterwillengagewithlowerinnercovertoholdtheprintert opcoveropen. 3. Holdthetopcoverandpressthetopcoversupporttodisengagethetopcoversupportwithlo werinnercover.Gentlyclosethetopcover. BPP12UserManual... -
Page 12: Loadingtheribbon
LoadingtheRibbon 1. Openthetopcoverontheprinterbypullingthegreenopenleverslocatedoneachsideofthepri nterandliftingthetopcovertothemaximumopenangle. 2. Opentheribbonaccesscover. Note:Innormalprintmode,theribbonaccesscovercanbeopenedwhileopeningthet opcover.Theribbonaccesscovercanbeclosedwhilethetopcoverisopenorclosed. 3. Inserttherightsideoftheribbonrightontothesupplyhub.Alignthenotchesontheleftsideand mountontothespokes. BPP12UserManual... - Page 13 4. Inserttherightsideofthepapercoreontotherewindhub.Alignthenotchesontheleftsideand mountontothespokes. 5. Attachtheribbonleaderontotheribbonrewindpapercore. 6. Turntheribbonrewindgearuntiltheplasticribbonleaderisthoroughlywoundandtheblack sectionoftheribboncoverstheprinthead. BPP12UserManual...
- Page 14 7. Closetheribbonaccesscoverandthetopcover. RibbonLoadingPath BPP12UserManual...
-
Page 15: Loadingthemedia
Loading theMedia LoadingMedia 1. Opentheprintertopcoverbypullingthegreytabs,locatedoneachside,towardthefrontofthep rinter,thenliftthetopcovertothemaximumopenangle. 2. Separateandholdopenthemediaholders. 3. Placetherollbetweentheholdersandclosethemontothecore. 4. SetthemediaholderlockswitchtoLock(down)toholdthelabelrollfirmly. BPP12UserManual... - Page 16 5. Optional:Ifusingeitheranexternalmediaholderorfoldedlabels,feedthemediathrou ghtherearexternallabelentrancechute. 6. Placethe paper,printsidefaceup,throughthemediasensor. 7. Placethelabelleadingedgeontotheplatenroller. 8. Movethemediaguidestofitthelabelwidthbyturningtheguideadjusterknob. 9. Disengagethetopcoversupportandclosethetopcovergently. 10. UsetheDiagnosticToolor LCD menu tosetthemediasensortypeandcalibratetheselectedsensor(seethediagnosticutilityquicks tartguideformoreinformation): a. StartDiagnostictool. BPP12UserManual...
- Page 17 b. Select sensor onCalibrationtab. c. ClickCalibratebutton. Note:Pleasecalibratethegap/blackmarksensorwhenchangingmedia. Loading Path for Roll Labels BPP12UserManual...
- Page 18 External Label Roll Mount Installation (Option) 1. Attachanexternal paperrollmountonthebottomoftheprinter. 2. Insertalabelspindleintoapaperrollandinstallitontheexternalpaperrollmount. 3. Openthetopcoverandseparatethemediaholderstofitthemediawidth. 4. Pressdownthemediaholderlockswitchtofixthemediaholder. 5. Feedthemediathroughtherearexternallabelentrancechute: a. Placethe paper,printsidefaceup,throughthemediasensor. b. Placethelabelleadingedgeontotheplatenroller. BPP12UserManual...
- Page 19 6. Movethemediaguidestofitthelabelwidthbyturningtheguideadjusterknob. 7. Disengagethetopcoversupportandclosethetopcovergently. 8. UsetheDiagnosticTool or LCD menutosetthemediasensortypeandcalibratetheselectedsensor. a. StartDiagnostictool. b. Select sensor onCalibrationtab. c. ClickCalibratebutton. BPP12UserManual...
-
Page 20: Diagnostictool
DiagnosticTool TheDiagnosticUtilityisatoolboxthatletsusersexploretheprinter'ssettingsandstatus;changepri ntersettings;downloadgraphics,fonts,andfirmware;createprinterbitmapfonts;andtosendadditi onalcommandstotheprinter.Usingthisconvenienttool,youcanexploretheprinterstatusandsetti ngsandtroubleshoottheprinter. Start the Diagnostic Tool 1. Tostartthesoftware,doubleclicktheDiagnostictoolicon. Note:ThediagnostictoolislocatedatD:\DiagTool. 2. Select the PC interface connected with bar code printer. Default setting is USB interface. No further setting is required. If RS-232 port is selected, further setup is required to select the serial port, baud rate, parity check, data bits, stop bit and flow control. -
Page 21: Installsdmemorycard
3. Thereare7featuresincludedintheDiagnosticutility. BPP12UserManual... - Page 22 Calibration: This uses tocalibrate the media sensor. feature Network Configuration: This uses tosetup the IP address, subnet mask, gateway for the on board feature Ethernet System Settings: This uses tosetup the RTC, Initialize the printer, reboot printer, print a test page feature orprint printer configuration.
- Page 23 File Manager: manager File feature is to help users to generate the file header, download the file into printer, explore what files are downloaded in printer memory and delete all files in the memory. Bitmap Font Manager: Bitmap font manager is used to convert the selected TTF font into printer format bitmap font. Both fixed pitch and variable pitch bitmap font are supported.
- Page 24 Command Tool: The additional features that are not yet supported in the Diagnostic Utility can be achieved by sending out printer commands to printer from the Command Tool. Specify the editor and enter the commands in the editor. Please be reminded to hit the PC keyboard Enter key at the end of each command line.
- Page 25 InstallSDMemoryCard 1. OpentheSDmemorycardcover. 2. InserttheSDcarduntilitisfullyseated.Closethememorycardcover. BPP12UserManual...
-
Page 26: Chapter 4 Ledandbuttonfunctions
CHAPTER 4 LEDandButtonFunctions Thisprinterhassixbuttonsandonethree- colorLEDindicator.BythebuttonwhentheLEDindicatesadifferentcolor,theprintercanbesettofee dlabels,pausetheprintingjob,selectandcalibratethemediasensor,printaprinterself- testreport,resettheprintertodefaults(initialization).Seethefollowingbuttonoperationdescription sforfunctions. LEDIndicator LEDColor Description Green/Solid Illuminateswhenpowerisonandthedeviceisreadytouse. Green/Flash IlluminateswhenthesystemisdownloadingdatafromPCtomem oryortheprinterispaused. Amber Illuminateswhenthesystemisclearingdatafromprinter. Red/Solid Illuminateswhentheprinterheadisopen,oracuttererror. Red/Flash Illuminateswhenthereisaprintingerror,suchasheadopen,paperempty, paperjam,ribbonempty,ormemoryerroretc. RegularButtonFunction Feed button Feed one label when the printer on ready mode Pause/Resumethe printing process ... -
Page 27: Poweronutilities
PoweronUtilities Therearesixpower- onutilitiestosetupandtestprinterhardware.TheseutilitiesareactivatedbypressingFEED,thentu rningontheprinterpowersimultaneouslyandreleasingthebuttonatadifferentLEDcolor. Followthesestepsforvariouspower-onutilities: 1. Turnoffthepowerswitch. 2. HoldtheFeedbuttondown,thenturnthepowerswitchON. 3. ReleasethebuttonwhenLEDindicatesacolorforadifferentfunction. PoweronUtilities LEDcolorchangesasfollows: LEDColor Amber Amber(5 Green Green/Amber Red/Amber Solid (5blinks) blinks) (5blinks) (5blinks) (5blinks) green Functions 1.RibbonSensorCalibrationa Release ndGap/blackmarksensorc alibration 2.Gap/blackmarksensorcal Release ibration,Self- testandenterdumpmode 3.Printerinitialization Release 4.Setblackmarksensorasme Release diasensorand calibratetheblackmar ksensor 5.Setgapsensorasmediase... - Page 28 Ribbon and Gap/Black Mark Sensor Calibration Calibrategap/blackmarksensorsensitivityatthefollowingconditions: • Newprinter • Changelabel stock • Printer initialization Followthesestepstocalibratetheribbonandgap/blackmarksensor: 1. Turnoffthepowerswitch. 2. HoldtheFeedbuttondown,thenturnthepowerswitchON. 3. ReleasethebuttonwhenLEDturnsredandblinks.(Anytimeduringthe5blinks). • Theribbonsensor and gap/blackmark sensor sensitivitywill becalibrated. • TheLEDcolor will change in the followingorder: Amber→Red(5blinks)→Amber(5blinks)→Green(5blinks)→Green/Amber(5blin ks)→Red/Amber(5blinks)→SolidGreen Note:SelectgaporblackmarksensorbysendingGAPorBLINEcommandtotheprinterbef orecalibratingthesensor. BPP12UserManual...
- Page 29 Gap/Black Mark Calibration, Self-test and Dump Mode Whilecalibratingthegap/blackmarksensor,theprinterwillmeasurethelabellength,printtheinter nalconfiguration(self- test)onalabelandthenenterthedumpmode.Calibratingthegaporblackmarksensordependson thesensorsettinginthelastprintjob. To calibrate the sensor: 1. Turnoffthepowerswitch. 2. HoldtheFeedbuttondown,thenturnthepowerswitchON. 3. ReleasethebuttonwhenLEDturnsamberandblinks(anytimeduringthe5blinks). TheLEDcolorwillchangeinthefollowingsequence: • Amber→Red(5blinks)→Amber(5blinks)→Green(5blinks)→ Green/Amber(5blinks)→Red/Amber(5blinks)→SolidGreen 4. Theprintercalibratesthesensor,measuresthelabellengthandprintsinternalsettingsthen entersthedumpmode. Note:SelectgaporblackmarksensorbysendingGAPorBLINEcommandtotheprinterbef orecalibratingthesensor. Self-Test Theprinterwillprinttheprinterconfigurationafteragap/blackmarksensorcalibration.Theself- testprintoutcanbeusedtocheckifthereisanydotdamageontheheaterelement,printerconfigur ationsandavailablememoryspace. Self-test printout Model name F/W version Firmware checksum Printer S/N Configuration file...
- Page 30 Print speed (inch/sec) Print darkness Label size (inch) Gap distance (inch) Gap/black mark sensor intension Code page Country code ZPL setting information Print darkness Print speed (inch/sec) Label size Control prefix Format prefix Delimiter prefix Printer power up motion Printer head close motion Note: ®...
- Page 31 Dump Mode Theprinterentersdumpmodeafterprintingtheprinterconfiguration.Inthedumpmode,allchara ctersareprintedin2columnsasshown.TheASCIIcharactersarereceivedfromyoursystemandr ightsidedatashowsthecorrespondinghexadecimalvalueofthecharacters.Itallowsusersoren gineerstoverifyanddebugtheprogram. Hexdecimaldatarelatedtoleftcolumn ASCII Data ofASCIIdata Notes: • 1.Dumpmoderequires4”wide paperwidth. • 2.Turnoff/onthepowertoresumeprinterfornormalprinting. • 3.PressFEEDbuttontogobacktothepreviousmenu. BPP12UserManual...
- Page 32 Printer Initialization PrinterinitializationisusedtoclearDRAMandrestoreprintersettingstodefaults.Theonlyexcep tionisribbonsensitivity,whichwillnotberestoredtodefault. ToactivatePrinterinitialization: 1. Turnoffthepowerswitch. 2. HoldtheFeedbuttondown,thenturnthepowerswitchON. 3. ReleasethebuttonwhentheLEDturnsgreenafter5amberblinks.(Anytimeduringthe5 blinks). TheLEDcolorchangesasfollows: • Amber→Red(5blinks)→Amber(5blinks)→Green(5blinks)→ Green/Amber(5blinks)→Red/Amber(5blinks)→SolidGreen BPP12UserManual...
- Page 33 Set Black Mark Sensor as Media Sensor and Calibrate the Black Mark Sensor To set Black Mark Sensor: 1. Turnoffthepowerswitch. 2. HoldtheFeedbuttondown,thenturnthepowerswitchON. 3. ReleasetheONbuttonwhenLEDturnsgreen/amberafter5greenblinks.(Anygre en/amberwilldoduringthe5blinks). TheLEDcolorchangesasfollows: • Amber→Red(5blinks)→Amber(5blinks)→Green(5blinks)→ Green/Amber(5blinks)→Red/Amber(5blinks)→SolidGreen Set Gap Sensor as Media Sensor and Calibrate the Gap Sensor TosetGapSensor: 1.
- Page 34 Skip AUTO.BAS TSPL2programminglanguageletsusersdownloadanautoexecutionfiletoflashmemory.Thepr interwillruntheAUTO.BASprogramimmediatelywhenprinterpoweristurnedon.TheAUTO.BA Sprogramcanbeinterruptedwithoutusingthepower-onutilitytoruntheprogram. ToskipanAUTO.BASprogram: 1. Turnoffprinterpower. 2. PresstheFEEDbuttonandthenturnonpower. 3. ReleasetheFEEDbuttonwhenLEDturnssolidgreen. TheLEDcolorchangesasfollows: • Amber→Red(5blinks)→Amber(5blinks)→Green(5blinks)→ Green/Amber(5blinks)→Red/Amber(5blinks)→SolidGreen 4. PrinterwillbeinterruptedtoruntheAUTO.BASprogram. BPP12UserManual...
-
Page 35: Chapter 5 Lcd Menu Function
CHAPTER 5 LCD Menu Function Enter the Menu Press the “Menu” button to enter the main menu. Use the navigation button to scroll the item on main menu. The selected item will turn red. Press the “Feed” button to enter the setting list. BPP12UserManual... -
Page 36: Main Menu Overview
Main Menu Overview There are 8 categories for the main menu. You can easy to set the settings of printer without connecting the computer. Please refer to following sections for more details. Menu File TSPL ZPL2 Sensor Interface Advanced Service Diagnostics Manager Auto... -
Page 37: Tspl2
TSPL2 This “TSPL2”category can set up the printer settings for TSPL2. Speed Density None Direction Batch Mode Print mode Peeler Mode Offset Cutter Mode Menu TSPL Shift X Cutter Batch Shift Y Reference X Reference Y Code Page Country Item Description Default Speed... - Page 38 Batch Mode Once image is printed completely, label gap/blackmark will be fed to the tear plate location for tear away. Peeler Enable the label peel off mode. Mode Cutter Mode Enable the label cutter mode. Cutter Batch Cut the label once at the end of the printing job. This item is used to fine tune media stop location.
-
Page 39: Zpl2
ZPL2 This “ZPL2”category can set up the printer settings for ZPL2. Darkness Print Speed Tear Off Tear Off Print Mode Peel Off Print Width Cutter List Fonts List Images List Formats List Setup Control Prefix Format Prefix Feed Delimiter Char Menu ZPL2 Calibration... - Page 40 Item Description Default Use this item to setup printingdarkness. The available setting is Darkness from 0 to 30, and the step is 1. You may need to adjust your density based on selectedmedia. Use this item to setup print speed. The increase or decreaseis 1 Print Speed 4 (300dpi) ips.
- Page 41 This option is used to set the action of the media when you close the print head. Selections Description Head Close Feed Printer will advance one label Motion Printer will calibration the sensor levels, Calibration determine length and feed label Length Printer determine length and feed label No Motion...
-
Page 42: Sensor
Sensor This option is used to calibrate the selected sensor. Werecommend calibrate the sensor before printing when changing the media. Auto Black Mark Calibration Continuous Manual Setup Black Mark Menu Sensor Continuous Auto Threshold Detect Fixed Maximum Length Advanced Item Description Default Printer will feed 2 to 3 gap labels to calibrate the sensor sensitivity... -
Page 43: Interface
Interface This option is used to set the printer interface settings. Serial Ethernet Menu Interface Bluetooth Wi-Fi Serial Comm. This option is used to set the printer RS-232 settings. 1200 bps 2400 bps 4800 bps 9600 bps Baud Rate 19200 bps 38400 bps 57600 bps 115200 bps... - Page 44 Ethernet Use this menu to configure internal Ethernet configuration check the printer’s Ethernet module status, and reset the Ethernet module. Status Menu Interface Ethernet DHCP Configure Static IP Item Description Default Use this menu to check the Ethernet IP address and Status MAC setting status.
- Page 45 Bluetooth (Option) This option is used to set the printer bluetooth settings. Bluetooth Name Menu Interface Bluetooth Bluetooth PIN code Item Description Default Bluetooth This item is used to set the local name for Bluetooth. BT-SPP Name Bluetooth This item is used to set the local PIN code for 0000 Code Bluetooth.
-
Page 46: File Manager
File Manager This feature is used to check the printer available memory and file list. DRAM Menu File Manager FLASH CARD Item Description Use this menu to show, delete and run (.BAS) the files saved in DRAM the printerDRAM memory. Use this menu to show, delete and run (.BAS) the files saved in FLASH the printerFlash memory. -
Page 47: Diagnostics
Diagnostics Print Config. Dump Mode Menu Diagnostics Print Head Display Sensor Print Config. This feature is used to print currentprinter configuration to the label. On the configuration printout, there is a print head test pattern, whichis useful for checking if there is any dot damage on the print head heater element. - Page 48 ZPL setting information Print darkness Print speed (inch/sec) Label size Control prefix Format prefix Delimiter prefix Printer power up motion Printer head close motion Note: ® ZPL is emulating for Zebra language. RS232 serial port configuration Numbers of download files Total &...
- Page 49 Dump Mode Captures the data from the communications port and prints out the data received by printer. In the dump mode, all characters will be printed in 2 columns.The left side characters are received from your system and right side data are the corresponding hexadecimal value of the characters.
- Page 50 Print Head This feature is used to check print head’s temperature, resistance and bad dots. Menu Diagnostics Print Head Display This feature is used to check LCD’s color state. Menu Diagnostics Display BPP12UserManual...
-
Page 51: Advanced
Advanced This feature is used to set the printer LCD settings. Display Brightness Menu Advanced Date & Time Language Item Description Display This item is used to setup the brightness for display. Brightness Date & Time This item is used to setup the date and time on display. (Option) (RTC) Language... -
Page 52: Service
Service This feature is used to restore printer settings to defaults and checking information for printer. Initialization Menu Service Printer Information Contact Us Item Description Initialization This feature is used to restore printer settings to defaults. Printer This feature is used to check the printer’s serial number, printed Information mileage (m), printed labels (pcs.) and cutting counter. -
Page 53: Chapter 6 Troubleshooting
CHAPTER 6 Troubleshooting Thefollowingguideliststhemostcommonproblemsthatmaybeencounteredwhenoperatingthi sbarcodeprinter.Iftheprinterstilldoesnotfunctionafterallsuggestedsolutionshavebeentried,pl easecontacttheCustomerServiceDepartmentofyourpurchasedresellerordistributorforassist ance. LEDStatus ThissectionprovidessolutionstocommonproblemsindicatedbytheLEDstatusthatyoumayenc ounterwhenoperatingtheprinter. LEDStatus/ Printe Possible RecoveryProcedure Color rStatu Cause • Turnonthepowerswitch. Norespo Nopower • CheckifthegreenLEDislitonpowersupply.Ifitis notlit,thepowersupplyisbroken. • Checkifboththepowerconnectionsfromthepow ercordtothepowersupplyandfromthepowersup plytotheprinterpowerjackareconnectedsecure • Noactionnecessary. SolidGreen Theprinterisr eadytouse • PresstheFEEDbuttontoresumeprinting. Greenwith Pause Theprinterisp blinking aused 1. -
Page 54: Printquality
PrintQuality Problem PossibleCause RecoveryProcedure NotPrinting Checkifinterfacecableisproperlyconne Re-connectcabletointerface. ctedtotheinterfaceconnector. Replacethecablewithpintopinconne Theserialportcablepinconfiguratio nisnotapin-to-pinconnection. ction. Theserialportsettingisnotconsistentbetw Resettheserialportsetting. eenhostandprinter. TheportspecifiedintheWindowsdriveri Selectthecorrectprinterportinthedri snotcorrect. ver. TheEthernetIP,subnetmask,gatewayis ConfiguretheIP,subnetmaskandgatew notconfiguredproperly. Noprintonthelabel Labelorribbonloadednotcorrectly. Followtheinstructionsinloadingthem ediaorloadingtheribbon. OutofRibbon. Loadnewribbon. Continuousfeeding Theprintersettingmaybewrong. Performtheinitializationandgap/ blackmarkcalibration. labels PaperJam Gap/blackmarksensorsensitivityisnotse Calibratethegap/blackmarksen sor. tproperly(sensorsensitivityisnotenough) Labelsizeisnotsetproperly. Setlabelsizeexactlyasinstalledpaperi nthelabelingsoftwareorprogram. -
Page 55: Chapter 7 Maintenance
CHAPTER 7 Maintenance Thissessionpresentsthecleaningtoolsandmethodstomaintainyourprinter. 1. Useoneoffollowingmaterialstocleantheprinter: • Cotton swab(Head cleaner pen) • Lint-free cloth • Vacuum/ Blower brush • 100%ethanol 2. Cleantheprinterusingthefollowingprocess: Printer Part Method Interval 1. Always turn off the printer before cleaning Clean the print head when changing a the print head. - Page 56 Notes: • Donottouchtheprinterhead.Ifyoutouchit,useethanoltocleanit. • Use100%AcetoneorEthenol.DONOTusemedicalalcohol,whichmaydamagetheprinte rhead. • To maintain printer performance and extend printer life, clean the print head and supply sensors whenever you change a new ribbon. • Continuousprintingwillcausetheprintermotortooverheat.Printerwillstopprintingautom aticallyabout10~15minutesuntilmotoriscooleddown.Datatransferedtoprinterbufferwil lbelostifpowertotheprinteristurnedoffwhentheprinter pauses. BPP12UserManual...
- Page 57 BPP12UserManual...
- Page 58 Copyright2015BradyWorldwide,Inc. AllRightsReservedBRA DYWORLDWIDE,INC. 2221W.CamdenRoad,Milwaukee,WI53209...
Need help?
Do you have a question about the BBP12 and is the answer not in the manual?
Questions and answers