Table of Contents
Advertisement
Quick Links
AUDIO VIDEO SURROUND RECEIVER
VRS - 7200
INSTRUCTION MANUAL
KENWOOD CORPORATION
Quick Start Reference
Please read the following pages so that you can enjoy the surround sound at the best
condition.
(These pages give shortcut explanations on how to connect the speaker system to the
receiver, set up the speakers and play a source.)
"Let's play DVD video software" ^&
About the supplied remote control
Compared to standard remote controls, the remote control supplied with this receiver has
several operation modes. These modes enable the remote control to control other audio/video
components. In order to effectively use the remote control it is important to read the operating
instructions and obtain a proper understanding of the remote control and how to switch its
operation modes (etc.).
Using the remote control without completely understanding its design and how to switch the
operation modes may result in incorrect operations.
B60-5585-00 00 CS ( K, P, E, X ) KW 0410
Advertisement
Table of Contents

Related Manuals for Kenwood VRS-7200


Summary of Contents for Kenwood VRS-7200
-
Page 1: Instruction Manual
AUDIO VIDEO SURROUND RECEIVER VRS - 7200 INSTRUCTION MANUAL KENWOOD CORPORATION Quick Start Reference Please read the following pages so that you can enjoy the surround sound at the best condition. (These pages give shortcut explanations on how to connect the speaker system to the receiver, set up the speakers and play a source.) -
Page 2: Before Applying Power
Before applying power Caution : Read this page carefully to ensure safe operation. Units are designed for operation as follows. U.S.A. and Canada ... AC 120 V only Australia ... AC 240 V only Safety precautions WARNING: TO PREVENT FIRE OR ELECTRIC SHOCK, DO NOT EXPOSE THIS APPLIANCE TO RAIN OR MOISTURE. -
Page 3: How To Use This Manual
Before applying power How to use this manual This manual is divided into four sections, Preparations, Operations, Remote Control, and Additional Information. Preparations Shows you how to connect your audio and video components to the receiver and prepare the surround processor. Since this receiver works with all your audio and video components, we will guide you in setting up your system to be as easy as possible. -
Page 4: Table Of Contents
Before applying power Contents Caution : Read the pages marked Before applying power ... 2 Safety precautions ... 2 How to use this manual ... 3 Unpacking ... 3 Special features ... 3 Contents ... 4 Names and functions of parts ... 5 Main unit ... -
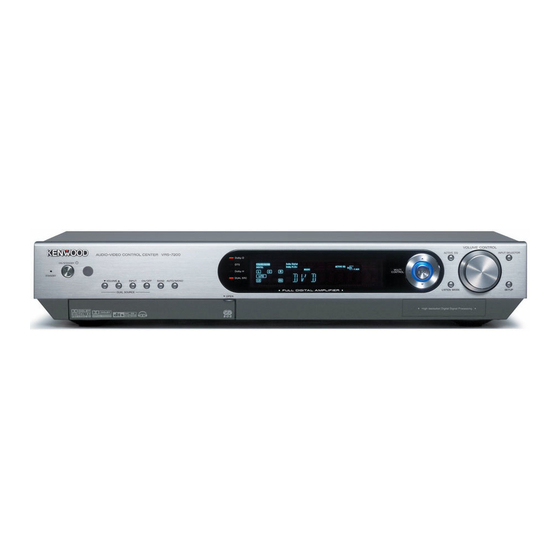
Page 5: Names And Functions Of Parts
Names and functions of parts Main unit Input mode indicators CLIP indicator Speaker selection indicators, Input channel indicators (The Input channel indicators lights up to indicate the channels contained in the input signal. The "S" indicator lights when the surround component consists of a single channel.) View when the GAME/ FRONT AUX jack cover is open. -
Page 6: Remote Control Unit
Names and functions of parts Remote control unit This remote control unit can be used not only for Kenwood products but also for other non-Kenwood products by setting the appropriate manufacturer’s setup codes. qr RECEIVER SOURCE SLEEP INPUT MODE ACTIVE EQ DIMMER DISC SEL. - Page 7 Names and functions of parts Input selector keys (TUNER, DVD, VIDEO 1, VIDEO 2, AUX, F. AUX, GAME) Use to select input sources. £ Sources keys (DVD, VIDEO 1, VIDEO 2, AUX, F. AUX, GAME) To control one of the registered sources without switching the receiver's input selector to that source, press and hold the desired input selector key for more than 3 seconds.
-
Page 8: Setting Up The System
Setting up the system CAUTION Make sure that the power cord plug is disconnected from the AC wall outlet before proceeding to connections. Also be sure to disconnect the power cord plug from the AC wall outlet before changing connections. For the connections of other system components, see pages 9 to 15. -
Page 9: Connecting A Dvd Player
Setting up the system Connecting a DVD player If you have connected a DVD player to the receiver with digital connection, be sure to read the "Input mode settings", "Re-assignment of rear panel jacks" section carefully. 8™ Monitor TV COMPONENT VIDEO IN COMPONENT VIDEO... -
Page 10: Connecting Video Components, Audio Components
Setting up the system Connecting video components, audio components Audio components AUDIO LINE OUT (Audio cord) Monitor TV MONITOR VIDEO IN (Yellow RCA pin cord) VIDEO IN VIDEO OUT VIDEO IN VIDEO (Yellow RCA pin cord) Video deck, Cassette deck or MD recorder VIDEO IN (Yellow RCA pin cord) Satellite Receivers... -
Page 11: Digital Connections
Setting up the system Connecting video components (S VIDEO) Use the S VIDEO jacks to make connections to video compo- nents with S VIDEO IN/OUT jacks. ¶ If you connect a video playback component such as a VCR through a S VIDEO cord, be sure to use a S VIDEO cord in connection to the monitor TV. -
Page 12: Connecting The Speakers
Setting up the system Connecting the speakers CAUTION Make sure that the power cord plug is disconnected from the AC wall outlet before proceeding to speaker cord connections. If the conductor wires on the extremity of speaker cord are untwisted, there is a risk of short-circuiting. Be sure to twist them well before connecting the speaker cord. -
Page 13: Connecting The Speaker Terminals
Setting up the system Connecting the speaker terminals Front 1 Strip coating. 3 Insert. Twist 2 Loosen. 4 Secure. Center, Surround, Surround back, Subwoofer 1 Strip coating. 3 Insert the cord. Twist 4 Return the lever. 2 Push the lever. ¶... -
Page 14: Pre Out Jacks Connections
Setting up the system PRE OUT jacks connections The receiver has additional PRE OUT jacks. Note that the output from the PRE OUT jacks needs to be connected to an external power amplifier. If you want to connect surround back speakers to these jacks, be always sure to connect two surround back speakers for the left and right. -
Page 15: Connecting The Antennas
Setting up the system Connecting the antennas The broadcast reception cannot be made unless the antennas are connected. Connect the antennas correctly as instructed below. AM loop antenna The supplied loop antenna is for use indoors. Place it as far as possible from the receiver, TV set, speaker cords and power cord, and adjust the direction for best reception. -
Page 16: Let's Play Dvd Video Software
Press the SETUP key, press the MULTI CONTROL @ / # to select "SP SETUP" and press the ENTER. If you connect KENWOOD speaker system: 1 Press the MULTI CONTROL @ / # to select the model of the connected speaker system and press the ENTER. - Page 17 Let’s play DVD video software If you use another speaker system want a setup according to it: 1 Press the MULTI CONTROL @ / # to select "CUSTOM" and press the ENTER to select each of the speaker setup items. 2 Press the MULTI CONTROL @ / # to select the speaker setup item.
-
Page 18: Preparing For Playback
÷ Select "CANCEL" to return to the status before setup. ÷ When you use a KENWOOD speaker system and select "HTB1 6.1CH", "HTB1 5.1CH", "HTB2 6.1CH", "HTB2 5.1CH", "HTB3 6.1CH" or "HTB3 5.1CH" set the speaker setup, the audio will be corrected automatically according to the speaker characteristics. - Page 19 Preparing for playback Select a speaker system. 1 Use the MULTI CONTROL % / fi (or the % / fi keys) to select the appropriate subwoofer setting. 1 "SUBW ON" : When a subwoofer is connected. 2 "SUBW OFF" : When no subwoofer is connected.
- Page 20 Preparing for playback ! Use the MULTI CONTROL % / fi (or the % / fi keys) to select the appropriate BS/SW amp setting. 1 "BS/SW BS": Select this setting when a surround back speaker is connected to the SURR BACK/SW terminals. In this case, the subwoofer signal will be output from the PRE OUT SUBWOOFER jack.
- Page 21 Preparing for playback Input the distance to the speakers. This setting allows the signals output from different speakers to reach the listening position simultaneously. ÷ In steps 7, indications appear only for the selected channels of the speakers that require adjusting. Measure the distance from the listening position to each of the speakers.
-
Page 22: Input Level Adjustment (Analog Sources Only)
Preparing for playback Input level adjustment (analog sources only) If the input level of an analog source signal is too high, the "CLIP" indicator will lights up. Adjust the input level. 1 Press the RCV MODE key on the remote control unit to set it to the receiver control mode. -
Page 23: Normal Playback
Normal playback Some preparatory steps are needed before starting playback. RECEIVER INPUT MODE RCV MODE ON/STANDBY Turning on the receiver 1 Turn on the power to the related components. 2 Turn on the power to this receiver by pressing the ON/ STANDBY key (or the RECEIVER key). -
Page 24: Listening With Headphones
Normal playback Listening with headphones DUAL SOURCE VOLUME 5/∞ DUAL SOURCE INPUT VOLUME CONTROL "DUAL SRC" indicator PHONES DUAL SOURCE ON/OFF 1 Connect headphones to the PHONES jack. 2 Use the VOLUME CONTROL knob (or the VOLUME %/fi keys) to adjust the volume. Playing difference sources through speakers and headphones (DUAL SOURCE function) While you enjoy audio listening through the speakers, another person... - Page 25 Normal playback ACTIVE EQ mode You can enjoy a more impressive sound effect when ACTIVE EQ is turned ON. Press the ACTIVE EQ key for the following selections: 1 "EQ MUSIC " : (The "ACTIVE EQ" indicator lights up) Effective when listening to music. 2 "EQ CINEMA"...
-
Page 26: Recording
Recording Analog sources INPUT SELECTOR 1 Use the INPUT SELECTOR key (or the input selector key) to select the source (other than "VIDEO 1") you want to record. 2 Put the component connected to the VIDEO 1 jacks to the record-pause mode. -
Page 27: Listening To Radio Broadcasts
Listening to radio broadcasts The receiver can store up to 40 stations in the memory and recall them by one-touch operation. Radio stations can be classified into RDS (Radio Data System) stations and other stations. To listen to or store RDS stations in the preset memory see "Using RDS (Radio Data System) (For Europe and Australia)". Tuning (non-RDS) radio stations RECEIVER %/fi... -
Page 28: Receiving Preset Stations
Listening to radio broadcasts Receiving preset stations Numeric keys TUNER Use the INPUT SELECTOR key (or the TUNER key) to select tune as the source. Enter the number of the preset station you want to receive (up to "40"). Press the numeric keys in the following order: For "15", press 0,0,) For "20", press... -
Page 29: Using Rds (Radio Data System)
Using RDS (Radio Data System) Before using a function utilizing the RDS, be sure to perform the RDS Auto Memory operation by referring to the description in "Presetting RDS stations (RDS AUTO MEMORY)". RDS is a system that transmits useful information (in the form of digital data) for FM broadcasts along with the broadcast signal. -
Page 30: Tuning By Program Type (Pty Search)
Using RDS (Radio Data System) (For Europe and Australia) Tuning by Program TYpe (PTY search) This function lets you set the tuner to automatically search for stations which are currently broadcasting the type of program (genre) you want to listen to. Under certain receiving conditions, it may take more than 1 minute to complete the search. -
Page 31: Ambience Effects
Front Speakers. However, in order to enjoy the benefit of true 6.1 channel Dolby Digital Surround EX sound, KENWOOD recommends that you connect a full set of speakers. Dolby PRO LOGIC II x/ Dolby PRO LOGIC II... - Page 32 Ambience effects DTS-ES The DTS-ES (Digital Theater System-Extended Surround) represents 6.1-channel Discrete Surround format, expanding upon 5.1 surround. DTS-ES format is a 6.1 channel sound system for movie theaters that includes an additional surround center channel matrixed within sur- round left and surround right. It’s compatible on predecessor DTS 5.1 system.
-
Page 33: Virtual Modes
Ambience effects Dolby Virtual Speaker The Dolby Virtual Speaker features a virtual surround sound field. This implements an effect as if there are multiple speakers in the listening room. Dolby Headphone When headphones are used in music listening, the audio of the left (or right) channel reaches only the left (or right) year so the listener cannot feel the presence of acoustic images on the front. -
Page 34: Surround Play
Ambience effects Surround play The desired listen mode can be selected according to the input signal. INPUT MODE Input selector keys LISTEN MODE %/fi STEREO fi "Dolby D" indicator "DTS" indicator Preparations ÷ Turn ON related components. ÷ Complete "Preparing for playback" (Speaker settings). * ÷... - Page 35 Ambience effects Listen modes available with analog or PCM playback: Main example of medium: Digital sources including DVD 96 kHz linear PCM and CD. Analog source such as VCR or radio broadcasting. 1 "PL IIx MOVIE": DOLBY PRO LOGIC IIx surround MOVIE mode *1 2 "PL IIx MUSIC": DOLBY PRO LOGIC IIx surround MUSIC mode *1 *2 3 "PL IIx GAME":...
-
Page 36: Convenient Functions
Convenient functions You can make further adjustments to the sound while listening to playback in the surround mode. ÷ The mode using the SOUND key is defeated when the REC MODE is ON. § DIMMER ° SLEEP ° % / fi / @ / #, ENTER SOUND LISTEN MODE % / fi... -
Page 37: Panorama Mode
Convenient functions Switching between main audio and sub audio (DOLBY DIGITAL mode only) When listening to audio multiplex broadcasting such as two-language satellite digital broadcasting, the main and sub audio can be switched over. 1 Press the RCV MODE key on the remote control unit to set it to the receiver control mode. -
Page 38: Display Dimmer Adjustment
Convenient functions Center Image mode (Only when the input signal is a 2-channel signal in the DTS NEO:6 MUSIC mode.) In the CENTER IMAGE setting mode of the NEO:6 MUSIC listen mode, it is possible to enhance the center channel audio by adjusting the center signal component. -
Page 39: Basic Remote Control Operations For Other Components
Refer to the setup code lists to find the setup code for the component to be registered. qr Example: To register a DVD made by KENWOOD, you would enter "0490" or "0534". Press the input selector key (DVD, VIDEO 1, VIDEO 2, AUX, F.AUX, GAME or TV MODE) you want to register a system component. -
Page 40: Checking The Codes
Basic remote control operations for other components Checking the codes The 4-digit setup codes registered in the input selector keys can be checked as follows. Press the input selector key in which the setup code of the desired component is registered. Press and hold the REMOTE SETUP key until the LED blinks twice, then release the REMOTE SETUP key. -
Page 41: Setup Code Chart (Rc-R0920) (For U.s.a. And Canada)
Even when a component is manufactured by a maker listed in the setup code chart, it may be unable to be registered depending on the model and year of production. Also, when a setup code of a non-KENWOOD maker is registered, certain component models may be unable to be controlled or only the limited functions may be controllable. - Page 42 1145, 0145 Infinity 0054 Inteq 0017 0054 0000 Jensen 0761, 1933 0053, 1253, 1923, 0731 0180 Kenwood 0030 0765 0180, 0030 0178, 0856, 0700, 1934 0047, 0054, 0154, 0156, 0178 Magnavox 1454, 0054, 0030, 0706 Marantz 0054, 0030, 0704 Matsushita...
- Page 43 Basic remote control operations for other components VCR (Continued) Manufacturer Setup Codes Kenwood 0067 Kodak 0035, 0037 Lloyd's 0000 0037 Magnavox 0035, 0039, 0081, 0000 Magnin 0240 Marantz 0035, 0081 Marta 0037 Matsushita 0035, 0162 Media Center PC 1972 0035...
-
Page 44: Setup Code Chart (Rc-R0920E) (For Europe And Australia)
Even when a component is manufactured by a maker listed in the setup code chart, it may be unable to be registered depending on the model and year of production. Also, when a setup code of a non-KENWOOD maker is registered, certain component models may be unable to be controlled or only the limited functions may be controllable. - Page 45 ITT Nokia 0723, 0873, 0455 Jaeger 1334 0710 Kamm 0880 Kaon 1300 KaTelco 1111 Kathrein 0173, 0200, 0658, 0123, 0249, 1221 Kenwood 0853 Key West 0132, 0794, 0243 KeyWest 0794 Klap 0710 Konig 0607 Koscom 1043 Kreiling 0249, 0658 Kreiselmeyer 0173 L&S Electronic...
- Page 46 Basic remote control operations for other components Satellite Receivers (Continued) Manufacturer Setup Codes 0847, 0856, 0887, 1014, 1175, 0711 Sky Television 1014 SKY+ 1175 Skymaster 1200, 1085, 1075, 0880 Skymax 0200 Skyplus 1334, 1412 SkySat 0607 Skyvision 1334 0132, 1294, 0299, 0243 SM Electronic 1200 Smart...
- Page 47 Basic remote control operations for other components TV (Continued) Manufacturer Setup Codes Concorde 0009 Condor 0037, 0264, 0370, 0418, 0247, 0282, 0009 Conrac 0808 Contec 0037, 0036, 0009 Continental 0487, 0198, 0196, 0109 Edison Cosmel 0037, 0009, 0337 Crosley 0084, 0074, 0247, 0087 Crown 0037, 0714, 0486, 0715, 0487, 0606, 0712, 0370,...
- Page 48 Basic remote control operations for other components TV (Continued) Manufacturer Setup Codes Isukai 0037, 0218, 0455, 0282 0037, 0264, 0218, 0282, 0371 0548, 0610, 0361, 0473, 0193, 0163, 0346, 0480, 0208 ITT Nokia 0548, 0610, 0606, 0361, 0346, 0480, 0208, 0473, 0163 0037, 0264, 0374, 0247 Jean...
- Page 49 Basic remote control operations for other components TV (Continued) Manufacturer Setup Codes Phoenix 0037, 0486, 0087 Phonola 0037, 0012, 0193, 0087 Pioneer 0037, 0486, 0361, 0512, 0011, 0163, 0109, 0170 Pionier 0486, 0370 Plantron 0037, 0264, 0009 Playsonic 0037, 0714, 0715 Polytron 0697, 0282 Poppy...
- Page 50 Basic remote control operations for other components TV (Continued) Manufacturer Setup Codes Tevion 0037, 0714, 0668, 1037, 1137, 0648 Texet 0218, 0009, 0374 Thomson 0037, 0625, 0560, 0196, 0109, 0335, 0198 Thorn 0037, 0361, 0036, 0499, 0084, 0190, 0074, 0535, 0109, 0335, 0073, 0512, 0104, 0193, 0072 Thorn-Ferguson...
- Page 51 Joyce 0000 0081, 0384, 0067, 0041 Kaisui 0072 Kambrook 0037 Karcher 0081, 0278 0278, 0037 Kendo 0278, 0348, 0642, 0072, 0315, 0106 Kenwood 0067, 0041, 0038 0000 Kneissel 0278, 0037, 0348, 0352 Korpel 0072 Kuwa 0226 Kyoto 0072 Lenco 0278...
- Page 52 Basic remote control operations for other components VCR (Continued) Manufacturer Setup Codes Roadstar 0081, 0278, 0037, 0072, 0240, 0742 Royal 0072 Saba 0278, 0320, 0384, 0321, 0041 Saisho 0348 Salora 0104, 0043, 0106 Samsung 0045, 0432, 0620, 0240 Samurai 0020 Sansei 0048 Sansui...
- Page 53 Jaton 0665 0730 Jeken 0699 0695 0623, 0539, 0503, 0558, 1940, 1901, 1164, 1988 Karcher 0783 Kendo 0713, 0699 Kennex 0770 Kenwood 0490, 0534 Kiiro 0770 Kiss 0665 Lawson 0768, 0716 Lenco 0770, 0651, 0699, 0672, 0713 Lenoxx 0690 Lexia...
- Page 54 Basic remote control operations for other components DVD player (Continued) Manufacturer Setup Codes Saivod 0831 Salora 0741 Sampo 0752, 0698 Samsung 0490, 0573, 1932, 0744 Sansui 0695, 0768, 0751, 0716, 1153 Sanyo 0670 Scan 0850, 0705 ScanMagic 0730 Schaub Lorenz 0770, 1151, 1115, 0788 Schneider 0539, 0831, 0651, 0790,...
-
Page 55: Dvd Player , Md Recorder Cd Player & Tv Operations
2 Press the keys corresponding to the operations you desire. Refer to the following sections for details. These keys can be used to perform the basic operations of KENWOOD and other manufacturers’ components which the setup code for each component had been entered beforehand. qr... -
Page 56: Vcr , Satellite Receiver & Cable Con- Verter Operations
2 Press the keys corresponding to the operations you desire. Refer to the following sections for details. These keys can be used to perform the basic operations of KENWOOD and other manufacturers’ components which the setup code for each component had been entered beforehand. qr... -
Page 57: In Case Of Difficulty
In case of difficulty Resetting the Microcomputer The microcomputer may malfunction (unit cannot be operated, or shows an erroneous display) if the power cord is unplugged while the power is ON, or due to some other external factor. If this happens, execute the following procedure to reset the microcom- puter and return the unit to its normal operating condition. - Page 58 Remedy Remedy SORUCE key to activate the operation mode for the As an ENERGY STAR ® Partner, Kenwood Corpora- tion has determined that this products meets the ENERGY STAR ® guidelines for energy efficiency. This product can save energy. Saving energy re- duces air pollution and lowers utility bills.
-
Page 59: Specifications
Coaxial (DVD, VIDEO 2) ... 0.5 Vp-p / 75 Ω Notes 1.KENWOOD follows a policy of continuous advancements in development. For this reason specifications may be changed without notice. 2.The full performance may not be exhibited in an extremely cold location (under a water-freezing temperature). -
Page 60: (For Europe And Australia)
Weight (Net) ... 4.4 kg (9.7 lb) Notes 1. KENWOOD follows a policy of continuous advancements in develop- ment. For this reason specifications may be changed without notice. 2. The full performance may not be exhibited in an extremely cold location (under a water-freezing temperature).
Need help?
Do you have a question about the VRS-7200 and is the answer not in the manual?
Questions and answers