Table of Contents
Advertisement
Advertisement
Table of Contents

Related Manuals for Heatrae Sadia Hotflo 10


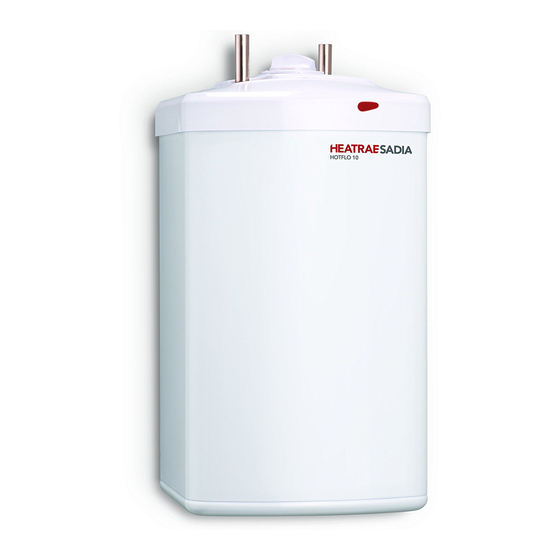
Summary of Contents for Heatrae Sadia Hotflo 10
- Page 1 HOTFLO 10 / 15 Fitting Instructions and User Guide...
-
Page 2: Table Of Contents
12.0 SPARES STOCKISTS 1.0 INTRODUCTION Thank you for purchasing a Heatrae Sadia Hotflo unvented water heater. The Hotflo water heater is manufactured in the UK to the highest standards and has been designed to meet all the latest relevant safety specifications. -
Page 3: Technical Specification
2.0 TECHNICAL SPECIFICATION Electrical rating 2.2kW@240V~ / 2.0kW@230V~ Capacities 10 or 15 litres Weight (full) 10 litre - 16.5kg 15 litre - 23.4kg Rated pressure 0.6 MPa (6 bar) Minimum supply pressure 0.08 MPa (0.8 bar) FIGURE 01: DIMENSIONS Dim ension 10 Litre 15 Litre NOTE: If fitting Pack U6 the valve will add... -
Page 4: Installation
3.0 INSTALLATION 3.1 IMPORTANT INSTALLATION POINTS 3.1.1 The Hotflo unvented water heater MUST be fitted with a Pressure (expansion) Relief Valve. This MUST be fitted to the cold water supply near the heater. FAILURE TO PROVIDE ADEQUATE PRESSURE RELIEF WILL INVALIDATE ANY GUARANTEE AND LEAD TO A DANGEROUS INSTALLATION. - Page 5 FIGURE 02: FOR INLET PRESSURES UP TO 0.41 MPa (4.1.BAR) FIGURE 03: FOR INLET PRESSURES UP TO 0.41 MPa (4.1BAR) WHERE EXPANSION IN MAIN SUPPLY IS NOT POSSIBLE FIGURE 04: FOR INLET PRESSURES ABOVE 0.41 MPa (4.1BAR)
- Page 6 FIGURE 05: TEMPERATURE AND PRESSURE RELIEF VALVE 3.2 LOCATION 3.2.1. The water heater should be vertically wall mounted using the screws and plugs provided. Position the bottom two screws as shown in Figure 01, page 3 with heads 3mm from the wall. Hang the heater and secure with the top screw.
- Page 7 3.4 PLUMBING 3.4.1 Refer to the section IMPORTANT INSTALLATION POINTS to determine which valves and accessories are required. Plumb in the valves in the sequence shown in the relevant Diagrams (Figures 02, 03, and 04, page 5). 3.4.2 The INLET is marked BLUE and the OUTLET is marked RED. The pipes are 15mm copper tube and are suitable for compression fittings.
-
Page 8: Electrical Requirements
3.6 ELECTRICAL REQUIREMENTS WARNING: This appliance must be earthed. It is suitable for a.c. supply only. Electrical installation must be carried out by a competent electrician and be in accordance with the latest I.E.E wiring regulations. Ensure the electrical supply is switched off before making any connections to the water heater. -
Page 9: Commissioning
4.0 COMMISSIONING Do not switch on the electrical supply until the unit has been filled with water and checked for leaks. Check that all installation, electrical and discharge pipe requirements have been met. Check that all water and electrical connections are tight. Open a hot water tap, turn on mains water supply to the heater. -
Page 10: Maintenance
In hard water areas the water heater will require periodic descaling. Maintenance and servicing should be carried out by a competent person and any replacement parts used should be authorised Heatrae Sadia spare parts. 6.1 RE SETTING THE THERMAL CUTOUT 6.1.1 Switch off and disconnect the electrical supply, turn off the water supply... - Page 11 FIGURE 07: ELEMENT PLATE ORIENTATION INLET COMBINED THERMOSTAT AND THERMAL CUT OUT CABLE CLAMP EARTH OUTLET POST 6.2 DRAINING THE WATER HEATER 6.2.1 Switch off and disconnect the electrical supply. Turn off the water supply to the unit. 6.2.2 Open a hot tap to relieve any system pressure. Disconnect the plumbing connections to the unit and remove (note full weights of units, page 3).
- Page 12 6.4 SAFETY VALVES The Pressure (Expansion) Relief Valve and, if fitted, the Temperature/Pressure Relief Valve should be operated regularly to remove lime deposits and to verify that it is not blocked. Manually operate the valves by either twisting the cap or lifting the lever.
-
Page 13: Fault Finding
Fault Finding should be carried out by a competent person and any replacement parts used should be authorised Heatrae Sadia spare parts. FAULT POSSIBLE CAUSES ACTION Water not heating 1. -
Page 14: Spare Parts
To ensure the continued safe and efficient operation of the water heater, it should be regularly maintained. Maintenance and servicing should be carried out by a competent person and any replacement parts used should be authorised Heatrae Sadia spare parts. DESCRIPTION CODE No. -
Page 15: Guarantee
This Guarantee in no way affects the statutory rights of the consumer. The policy of Heatrae Sadia is one of continuous product development and, as such, we reserve the right to change specifications without notice. 11.0 ENVIRONMENTAL INFORMATION Heatrae Sadia products are manufactured from many recyclable materials. -
Page 16: Spares Stockists
Tel: 01454 620500 William Wilson Ltd. Unit 3A, 780 South Street Whiteinch, Glasgow, G14 OSY Tel: 0141 434 1530 Service: 0844 8711535 Sevice Fax: 0844 8711528 E-mail: heatraesadiaservice @heateam.co.uk Heatrae Sadia Heating Hurricane Way Norwich NR6 6EA 36005719_issue_05 www.heatraesadia.com © 2011...
Need help?
Do you have a question about the Hotflo 10 and is the answer not in the manual?
Questions and answers