Table of Contents
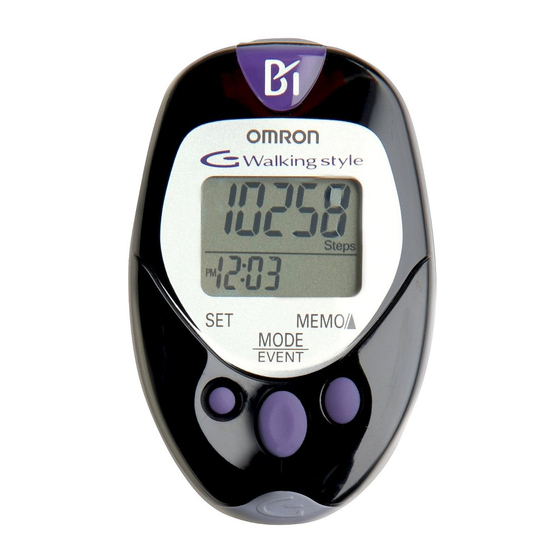
Advertisement
Advertisement
Table of Contents

Related Manuals for Omron HJ-720IT


Summary of Contents for Omron HJ-720IT
- Page 1 IN ST RU CTIO N MA N UAL Pedometer with Download Capability HJ-720IT Model...
-
Page 2: Table Of Contents
CONTENTS Before Using the Unit Introduction ..................3 Important Safety Information............4 Know Your Unit Main Unit ................5 Components ................6 Aerobic Step Function ..............7 Calorie/Amount of Fat Burned Display ...........7 Stride Length Measurement .............8 Operating Instructions Battery Installation ................9 Battery Replacement ..............10 Setting the Time ................11 Setting the Weight ................13 Setting the Stride Length..............14... -
Page 3: Introduction
This pedometer allows the user to place the pedometer in a pocket, bag or clip it to a belt when walking for added flexibility to count steps. Your HJ-720IT comes with the following components: Pedometer Screwdriver... -
Page 4: Important Safety Information
Do not swing the pedometer by holding the strap. This may cause injury. Do not disassemble or modify the unit. Changes or modifications not approved by Omron Healthcare will void the user warranty. Consult your physician or healthcare provider before beginning an exercise program. -
Page 5: Main Unit
KNOW YOUR UNIT KNOW YOUR UNIT MAIN UNIT USB Connector Display SET Button MEMO/L Button Holder MODE/EVENT Button Strap Clip Back of the main unit USB Connector Cover SYSTEM RESET Button Battery Cover Screw of Battery Cover... -
Page 6: Know Your Unit
KNOW YOUR UNIT Components Holder Use this holder when attaching the unit to your belt or the top of your pants. 1) Attach the main unit 2) Fasten the holder clip to the holder. to your pants. Holder Clip How to attach How to connect the How to release the strap to... -
Page 7: Aerobic Step Function
AEROBIC STEP FUNCTION The unit displays the total number of aerobic steps in a day that satisfies the following two conditions: (The minutes you walked as the number of aerobic steps is also displayed.) • Walk more than 60 steps per minute •... -
Page 8: Stride Length Measurement
STRIDE LENGTH MEASUREMENT Measure your stride length before beginning to set the pedometer. How to measure your stride length 1. Walk 10 steps with your normal stride as illustrated below. 2. Measure the distance from START to END in inches. 3. -
Page 9: Battery Installation
BATTERY INSTALLATION Remove the screw on the battery cover located on the back of the main unit. Use the supplied screwdriver or use a commercially available small screwdriver to remove the screw on the battery cover. Open the battery cover. Insert the battery. -
Page 10: Battery Replacement
BATTERY INSTALLATION Tighten the screw on the battery cover. NOTES: • The time setting display will appear on the screen for approximately 5 minutes after the battery is inserted. • After installing the battery, set time of day, weight and stride length. (Refer to “Setting the Time”... -
Page 11: Setting The Time
SETTING THE TIME Setting range: 12:00 AM-11:59 PM Install the battery. (Refer to “Battery Installation” on page 9) The hour flashes on the display. If the MEMO/L or SET Button is not pressed for 5 minutes, complete setting and display the number of steps and time. - Page 12 SETTING THE TIME Press the SET button to set the minute. The weight flashes on the display.
-
Page 13: Setting The Weight
SETTING THE WEIGHT Setting range: 70 to 300 lb. The weight flashes on the display. Press the MEMO/L Button to advance by increments of 1 lb. Press and hold the button to advance weight in 10 lb increments. NOTE: Press the MODE/EVENT button to return the weight to 88. -
Page 14: Setting The Stride Length
SETTING THE STRIDE LENGTH Setting range: 1'00'' to 4'00'' feet The stride length flashes on the display. Press the MEMO/L Button to advance by increments of 1'' inch. Press and hold the button to advance the stride in 4'' inches increments. NOTE: Press the MODE/EVENT Button to return the stride length to 1'08''. -
Page 15: Attaching The Pedometer
ATTACHING THE PEDOMETER Place the unit in the upper front pocket of your jacket, in a bag you hold tightly, or attach the unit to your pants or belt. Place the unit in your pocket. • Do not place the unit in the back pocket of your pants. - Page 16 ATTACHING THE PEDOMETER NOTE: The unit may not be able to count the steps correctly in the following cases. When the memory is being displayed or the unit is being set When the unit is not vertical to the ground •...
-
Page 17: Changing The Display
CHANGING THE DISPLAY Press the MODE/EVENT Button to change the display Each time you press the MODE/EVENT Button, the display will change. Number of Calories with aerobic steps amount of fat Number of steps Distance with minutes burned USING THE EVENT FUNCTION Press the MODE/EVENT Button for 2 seconds while current day’s data is displayed. -
Page 18: Using The Memory Function
USING THE MEMORY FUNCTION This unit can store up to the previous 41 days and display the most recent 7 days of data. The current day’s data is automatically stored in memory when the time reaches 12:00AM. The display will return to 0. NOTE: The time must be correctly set in the unit. - Page 19 USING THE MEMORY FUNCTION Full Memory Indicator NOTES: • Full memory indicator starts display when there are 35 days including current day of stored data which has not been downloaded. • Follow the direction by instructor or service provider to download the data.
-
Page 20: Using The System Reset Function
USING THE SYSTEM RESET FUNCTION Use the SYSTEM RESET function in the following cases: • When the display becomes unrecognizable Press the SYSTEM RESET Button on the back of the main unit with a thin stick that is not easily breakable. The time is reset. -
Page 21: Downloading Data To A Pc
DOWNLOADING DATA TO A PC Use only the authorized Omron USB cable sold separately, (Model Number HHX-CABLE-USB2) with this pedometer. Use of any other cable may cause damage to the pedometer and will void the user warranty. Open the USB Connector cover. -
Page 22: Care And Maintenance
Care and Maintenance CARE AND MAINTENANCE Clean the unit with a soft dry cloth. • Do not use any abrasive or volatile cleaners. • The unit is not waterproof. Do not wash it or touch it with wet hands. • Never immerse the unit in water. •... -
Page 23: Troubleshooting Tips
TROUBLESHOOTING TIPS Problem Probable cause How to correct The battery is low The Low Battery Replace the battery with or worn. Indicator blinks. a new one (CR2032). The polarities of battery (+ and -) Insert the battery in are aligned in the correct alignment. -
Page 24: Specifications
SPECIFICATIONS Model: HJ-720IT Power Supply: 3 VDC (1 lithium battery CR2032) Measurement Range: Steps: 0 to 99,999 steps Aerobic Steps: 0 to 99,999 steps Minutes for Aerobic Steps: 0 to 1,440 minutes Amount of Fat Burned: 0.0 to 199.9 g... -
Page 25: Fcc Statement
FCC STATEMENT NOTE: POTENTIAL FOR RADIO/TELEVISION INTERFERENCE (for U.S.A. only) This product has been tested and found to comply with the limits for a Class B digital device, pursuant to part 15 of the FCC rules. These limits are designed to provide reasonable protection against harmful interference in a residential installation. -
Page 26: Warranty Information
WARRANTY INFORMATION Limited Warranty Your Omron HJ-720IT Pedometer, excluding the battery, is warranted to be free from defects in materials and workmanship appearing within 1 year from the date of purchase, when used in accordance with the instructions provided with the unit. -
Page 27: Notes
NOTES... - Page 28 Distributed by: Omron Healthcare, Inc 1200 Lakeside Drive Bannockburn, Illinois 60015 © 2005 OMRON HEALTHCARE, INC. World Rights Reserved 720IT INST Rev 9042803-3A...
Need help?
Do you have a question about the HJ-720IT and is the answer not in the manual?
Questions and answers