oticon Streamer Pro Instructions For Use Manual
Hide thumbs
Also See for Streamer Pro:
- Operating manual and user manual (39 pages) ,
- Instructions for use (2 pages) ,
- Getting started (2 pages)
Table of Contents
Advertisement
Advertisement
Table of Contents

Subscribe to Our Youtube Channel
Related Manuals for oticon Streamer Pro


Summary of Contents for oticon Streamer Pro
- Page 1 InstructIons for use streamer Pro...
-
Page 2: Thank You
thank you Thank you for choosing our product as your means to better hearing. To support your efforts, we have put great care and attention into making sure that your new Streamer has the highest quality and is easy to use and maintain. The Streamer connects your hearing instruments wirelessly to different audio sources and makes your hearing instruments work like wireless headphones. - Page 3 Indication for use The Streamer is intended to be used by wireless Oticon hearing instrument users together with their hearing instruments. The Streamer is a communication interface between the hearing instruments and other devices such as cell phones. The Streamer can be connected to a range of external (additional) devices to enable the hearing instrument user to better hear a TV or to communicate through Bluetooth- enabled cell phones, etc.
-
Page 4: Important Notice
ImPortant notIce Please familiarize yourself with the entire contents of this booklet before using your Streamer. It contains instructions and important information about the use and handling of your Streamer and batteries. -
Page 5: Table Of Contents
contents Package contents Device view Warnings Basic functions - first-time use Wearing the Streamer with the neck loop Using the Streamer without the neck loop Turning the Streamer on and off Charging the Streamer Battery low indicator Remote control of the hearing instruments Pairing the Streamer with a cell phone and other devices Clear pairing Continues on next page... - Page 6 Primary functions Connectivity/streaming Cell phone ConnectLine Phone solution ConnectLine Microphone ConnectLine TV solution Secondary functions Connectivity/streaming Music/audio cable Headset cable Music/audio wireless PC headset - wireless T-coil (built-in) FM receiver (optional) Avoiding heat, humidity and chemicals...
- Page 7 Additional information Cleaning and maintenance Accessories and spare parts Personalizing your Streamer Technical information Index...
-
Page 8: Package Contents
Package contents Streamer Pro – what is included in the box: The Streamer box contains the following elements: Your new Streamer Neck loop - medium (page 16) Neck loop - long (page 16) Box 1 Box 4 Charger (page 22) -
Page 9: Getting Started
Streamer InstructIons for use streamer Pro 3.5 mm headset 0000121848000001 splitter cable for use Content of the Streamer Pro box Box 2 The Streamer box consists of the following elements: InstructIons for use streamer Pro with PCs (page 50) USB cable for charging via e.g. -
Page 11: Device View
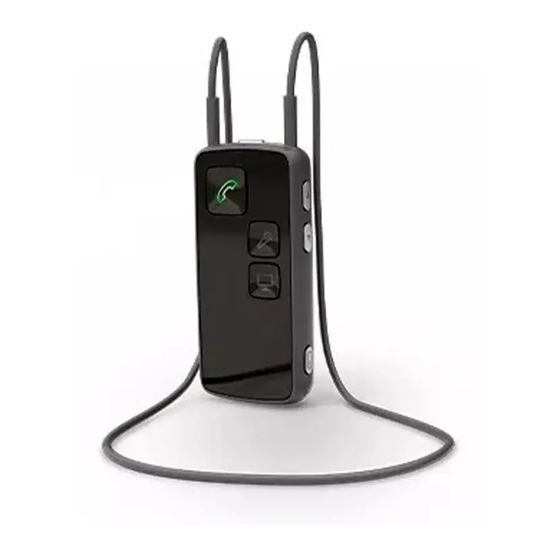
Device view Neck loop (page 16) On/off On/off button Neck loop in/out Phone On/off indicator Status (page 35 & 40) Volume control Pairing indicator (up/down) Battery (page 28) Microphone inlet Microphone (page 42) TV (page 44) AUX selector Mini jack Power supply (page 47) FM receiver... -
Page 12: Warnings
Warnings You should familiarize yourself fully with the following general warnings and the entire contents of this booklet before using your Streamer. Products to be connected to external equipment The safe use of the Streamer with the auxiliary input cable is determined by an external signal source. - Page 13 Warnings Chocking hazards The Streamer is not a toy and therefore should be kept out of the reach of children and anyone else who might swallow parts or otherwise cause injury to themselves. Special attention should be paid to the smaller components in order to prevent children from swallowing them and choking.
- Page 14 Warnings Use of the neck loop If by accident the neck loop should get caught on something while the user is wearing it, the neck loop is constructed to break automatically. Therefore, never try to shorten or modify the neck loop in an unauthorized way. The neck loop should not be used for chil- dren who weigh less than 11 kg.
- Page 15 Oticon takes no financial responsibility in terms of reimbursements of cell phones that do not work as expected.
-
Page 16: Basic Functions - First-Time Use Wearing The Streamer With The Neck Loop
Basic functions - first-time use Wearing the streamer – with the neck loop The neck loop is an integral part of the Streamer’s electronic system. It is used as an antenna to transmit sound to your hearing instruments. For the best possible sound and longest possible streaming time, the Streamer should always be worn with one of the included neck loops. - Page 17 Inserting the neck loop The neck loop snaps into the holes on the top of the Streamer. Note that when talking to somebody through the Streamer, it is important that your voice can be picked up by the built-in microphone on the top. Your voice Microphone Sound from...
-
Page 18: Using The Streamer Without The Neck Loop
using the streamer without the neck loop The Streamer can also be used without the neck loop, e.g., if kept in a pocket or used with the optional belt clip. When using the Streamer without the neck loop, the distance to the hearing instrument should be less than one meter. - Page 19 Max 1 meter Belt clip (optional)
-
Page 20: Turning The Streamer On And Off
turning the streamer on and off Power on Press the on/off button on the top of the Streamer for approx. 2 seconds until all lights on the front and top flash to indicate it is powered on. Release the on/off button. - Page 21 Power on/off Status Front Description The Streamer is off After pressing the on/off button for approx. 2 seconds, all lights will be on for a few seconds to indicate that the Streamer is now turned on The Streamer is now turned on and ready for use...
-
Page 22: Charging The Streamer
On/off indicator charging the streamer The Streamer uses a rechargeable battery. We recommend that you charge the Streamer daily for best possible performance. Using the enclosed charger and optional charger base (A), or a USB compliant device with a charge current of 500mA, simply insert the micro USB socket in the bottom of the Streamer (B). - Page 23 Charging Status Front Description When the Streamer is charging, the status indicator will blink green Charging – when turned on (or in use) – the status indicator will shift between strong and soft green. Blink Fade...
-
Page 24: Battery Low Indicator
Battery low indicator Battery low indicator The Streamer will indicate battery low (approx. 20 min- utes capacity left) with a steady red light, and battery very low (approx. 5 minutes capacity left) with a blinking red light. - Page 25 Battery low indicator Status Front Description Battery low – approx. 20 minutes capacity left when streaming to hearing instruments Battery very low – approx. 5 minutes capacity left when streaming to hearing instruments Steady Fading ImPortant notIce The battery should not be drained completely. Keeping the battery fully charged will prolong the capacity of the battery.
- Page 26 Battery capacity and charge time Battery capacity Up to 10 hours typical daily use: 2 hours phone, 6 hours TV using neck loop and 2 hours standby (after 2 years the capacity will be approx. 8 hours typical daily use). Battery capacity not Up to 5 hours typical use: 1 hour phone, 3 hours TV and 1 using neck loop...
-
Page 28: Remote Control Of The Hearing Instruments
AND down for 1 second simultaneously. ImPortant notIce • The mute function is only available in the most recent Oticon hearing instruments. Please consult your Hearing Care Professional for details. • Even though the Streamer is turned off, the remote functionality of the hearing... - Page 29 Volume/program mute shift...
-
Page 30: Pairing The Streamer With A Cell Phone And Other Devices
Pairing the streamer with a cell phone and other devices Before the Streamer can be used with other devices – such as cell phones - the two devices have to be paired. 1. Bring the Streamer into pairing mode Press and hold the on/off button for approx. 5 seconds, until the indicator blinks blue. - Page 31 2. Bring the other device (e.g., cell phone) into pairing mode. This is typically in a set-up menu on your phone. We advise you to look in your cell phone’s “instructions for use,” e.g., under pairing. 3. The other device (cell phone) will often request a pin code.
-
Page 32: Clear Pairing
clear pairing If you have problems with pairings, you can clear all pairings by pressing the on/off button and the volume up button at the same time for 3 seconds. - Page 33 Pairing Status Front Description Streamer in pairing mode Pairing complete Streamer on Steady Blinking...
-
Page 34: Primary Functions Connectivity/Streaming
Primary functions connectivity/streaming The ConnectLine Streamer user interface has been designed to give you the best possible daily use in the following situations: 1. Use of a cell phone through Bluetooth* (page 35). Use of the ConnectLine Phone solution (sold separately) with an analog landline phone* (page 40). -
Page 35: Cell Phone
cell phone To be able to receive or make calls while using the Streamer, make sure that the Streamer and cell phone have been paired (pages 30-31), are turned on and are within range (10 meters). Your cell phone may indicate that it is connected to the Streamer with a small headset icon. - Page 36 How to answer a call Make sure that you are able to speak into the Microphone Streamer’s microphone inlet. When your cell phone rings, you will hear an incom- ing call alert in your hearing instruments. At the same time the phone button on the Streamer and the status indicator will blink green.
- Page 37 Receiving a call Status Front Description Streamer on and ready Phone indicator and top status blinks green. You will hear an incoming call indicator in your instruments When the call is connected, you will hear a beep acknowledging that the call is answered – you are now able to listen and talk to the other party Steady Blinking...
- Page 38 How to make a call Make sure that you are able to speak into the Streamer’s microphone inlet. 3 3 4 0 1 7 _ _ To make a call, all you need to operate is the cell phone. You do not need to operate the Streamer. Simply key in the number as you normally do to make a call –...
- Page 39 Making a call Status Front Description Streamer on and ready When the call is connected, you will hear a beep acknowl- edging that the call is connected – you are able to listen and talk to the other party Steady Blinking...
-
Page 40: Connectline Phone Solution
connectLine Phone solution The Streamer can also be used with a traditional analog landline phone by using a ConnectLine Phone solution, which is available as a separate accessory. For details on how to use the ConnectLine Phone solution, please refer to the instructions included with the ConnectLine Phone solution or: www.oticonusa.com/connectline... - Page 41 Talking on the phone Status Front Description Streamer on and ready Streamer connected – you are able to listen and talk to the other party Steady...
-
Page 42: Connectline Microphone
connectLine microphone As a separate accessory, a ConnectLine Microphone is available, which transmits the sound from a chosen speaker to your hearing instruments through the Streamer. For details on how to use the ConnectLine Microphone solution, please refer to the instructions for use included with the ConnectLine Microphone or: www.oticonusa.com/connectline... - Page 43 Sound from ConnectLine Microphone Status Front Description Streamer on and ready When connected to the Microphone - you will hear sound from the microphone in the hearing instruments Steady Up to 15 meters...
-
Page 44: Connectline Tv Solution
As a separate accessory, a ConnectLine TV solution is available, which transmits the sound from a TV to your Oticon hearing instruments through the Streamer. For details on how to use the ConnectLine TV solution, please refer to the instructions for use included with the ConnectLine TV solution or: www.oticonusa.com/connectline... - Page 45 Watching TV Status Front Description Streamer on and ready Connecting to TV Streamer connected – sound from TV in hearing instruments Steady Blinking...
-
Page 47: Secondary Functions Connectivity/Streaming
secondary functions connectivity/streaming The Streamer can be used with a wide range of standard peripherals, such as MP3 players, computers, etc. The following priorities apply: A Priority 1 Mini jack in/out (if connected) Briefly press AUX selector Page 48 B Priority 2 FM (if connected) Briefly press AUX selector Page 58... -
Page 48: Music/Audio Cable
music/audio cable Inserting and connecting the included mini jack cable enables you to listen to music/audio from a wide range of devices. To listen to audio from your device, simply press the selector briefly. When the cable is inserted, streaming will start automatically. - Page 49 Music/audio - cable Status Front Description Streamer on and ready You will hear a confirmation beep followed by the sound from the device Steady...
-
Page 50: Headset Cable
Headset cable Microphone Make sure that you are able to speak into the Streamer’s microphone inlet. Inserting and connecting the included mini jack cable and the included headset splitter cable enables you to use the Streamer as a headset with your computer. To use the headset function, simply press the AUX selector briefly. - Page 51 Headset cable Status Front Description Streamer on and ready You will hear a confirmation beep – you are now able to listen and talk to the other party Steady...
-
Page 52: Music/Audio Wireless
music/audio wireless To hear music/sound wirelessly, e.g., from an MP3 player or a computer with built-in Bluetooth, make sure that the device has been paired to your Streamer (page 30), that both are turned on, and within range (<10 meters). If you pair to a computer, make sure that the Streamer is paired as headphone/A2DP device. - Page 53 Music/audio wireless Status Front Description Streamer on and ready Streamer connecting to music/audio device When connected, you will hear a confirmation beep followed by the sound from the device Steady Blink...
-
Page 54: Pc Headset - Wireless
Pc headset - wireless Make sure that you are able to speak into the Streamer’s microphone inlet. When pairing to a computer, make sure that the Streamer is paired as a headset device. To use the headset function, simply press the phone button briefly. - Page 55 Headset - wireless Status Front Description Streamer on and ready Streamer connecting to music/audio device When connected, you will hear a confirmation beep followed by the sound from the device Steady Blink...
-
Page 56: T-Coil (Built-In)
t-coil (built-in) The Streamer has a built-in tele loop receiver (T-coil). To receive sound from the tele loop receiver, press and hold the AUX selector for approx. seconds. For more information please refer to: www.oticonusa.com/connectline Please note: if desired, the operation can be changed so the T-coil can be activated by a short press instead. - Page 57 T-coil Status Front Description Streamer on and ready When connected, you will hear a confirmation beep followed by the sound from the tele loop system Steady...
-
Page 58: Fm Receiver (Optional)
Fm receiver (optional) Using the Euro pin socket in the bottom of the Streamer, sound from an FM receiver can be received. Simply plug in the FM receiver and press the AUX selector briefly. For more information please refer to: www.oticonusa.com/connectline... - Page 59 Status Front Description Streamer on and ready. FM receiver powered on and ready for channel sync When connected, you will hear a confirmation beep followed by the sound from the device Steady ImPortant notIce Please make sure the Streamer is powered on, but not streaming sound to the hear- ing instruments and that FM is NOT selected when entering a classroom or similar environment where FM channel sync is required.
-
Page 60: Avoiding Heat, Humidity And Chemicals
avoiding heat, humidity and chemicals The operating temperature for the Streamer is 10-45ºC. Your Streamer must never be exposed to extreme heat, such as putting it in the oven, microwave oven, burning it or leaving it inside a parked car in the sun. There is a risk that it will explode and cause serious injury. -
Page 61: Cleaning And Maintenance
additional information cleaning and maintenance The Streamer is a sealed device that requires only a minimum of maintenance. Any dirt, moisture or grease should be cleaned off by using a dry or damp cloth. It is recommended to clean the Streamer on a regular basis. The microphone inlet and the connectors for audio input, neck loop and charging must be kept free of dirt or debris. -
Page 62: Accessories And Spare Parts
accessories and spare parts Protective skins Additional protective skins are available from your Hearing Care Professional. Protective skin – single button A protective skin with one protruding button, which makes “blind” operation easier, is available from your Hearing Care Professional. - Page 63 Replacement neck loops Replacement neck loops are available in three sizes: Short (51 cm), medium (66 cm) and long (81 cm) from your Hearing Care Professional. Belt clip A belt clip is available from your Hearing Care Professional.
-
Page 64: Personalizing Your Streamer
Personalizing your streamer Your Hearing Care Professional is able to personalize your Streamer to better meet your specific needs. Cell Phone The following cell phone features can be enabled by your hearing care professional: Reject call An incoming call can be rejected by briefly pressing the volume down button on the Streamer. - Page 65 Last number redial Pressing and holding the phone button will activate the last number redial (if supported by the cell phone). Transfer call Pressing and holding the phone button will transfer a call back to the cell phone. Disable “all buttons answer call” functionality If disabled, only the phone button on the Streamer will answer calls.
- Page 66 Other AUX selector Default settings: Wireless Bluetooth (built-in) - short press Tele loop receiver (T-Coil) - long press Can be changed to: Tele loop receiver (T-Coil) - short press Wireless bluetooth (built in) - long press...
-
Page 67: Technical Information
technical information Besides the Bluetooth transmitter, the Streamer contains a radio transmitter using short-range magnetic induction technology, working at 3.84 MHz. The magnetic field strength of the transmitter is < -15 dBμA/m @ 10m. The emission power from the Streamer is below international emission limits for human exposure. - Page 68 Operation is subject to the following two conditions: 1. This device may not cause harmful interference. 2. This device must accept any interference received, including interference that may cause undesired operation. Changes or modifications not expressly approved by the party responsible for compliance could void the user’s authority to operate the equipment.
- Page 69 • Consult the dealer or an experienced radio/TV technician for help. Hereby, Oticon A/S declares that this Streamer Pro is in compliance with the essential requirements and other relevant provisions of Directive 1999/5/EC. Declaration of conformity is available at:...
-
Page 70: Index
Index Belt clip 18 Bluetooth 52 A2DP device. See Music wireless Accessories 62 Call Aircraft, use on 14 Answer 36 Answer a call 36 End 36, 38 Antenna 16 Make 38 Audio (music) 48 Reject 64 Cable 48 Transfer 65 Listen to music 48 Cars, use in 14 Wireless 52 Cell phone 35... - Page 71 Computer Headset 34 Headset cable 50 Cable 50 Music/audio cable 48 Cell phone 35 Music/audio wireless 52 Splitter cable 50 ConnectLine Wireless 52, 54 Microphone 42 Headset cable 50 Phone 40 Headset splitter cable 50 TV 44 Heat 60 Humidity 60 Earphones.
- Page 72 Maintenance 61 Pairing 30 Make a call 38 Clearing 32 Microphone 42 Mode 30 Microphone inlet 11 PC. See Computer Mini jack 11 Personalizing 64 Mini jack cable 48, 50 Phone solution 40 MP3 player 52 Pin code 31 Power off/on 20 Music 52 Cable 48 Protective skin 62...
- Page 73 Splitter 9 Splitter cable 50 Talking on the phone 36, 38, 41 T-coil 56 Technical information 67 Tele loop 56 Transfer call 65 TV 44 Voice dial 64 Volume up/down 28 Warnings 12, 13, 14 Wireless 52, 54 Without the neck loop 18...
- Page 74 People First People first is our promise to empower people to communicate freely, interact naturally and participate actively 0000128763000001...
Need help?
Do you have a question about the Streamer Pro and is the answer not in the manual?
Questions and answers