Table of Contents

Subscribe to Our Youtube Channel
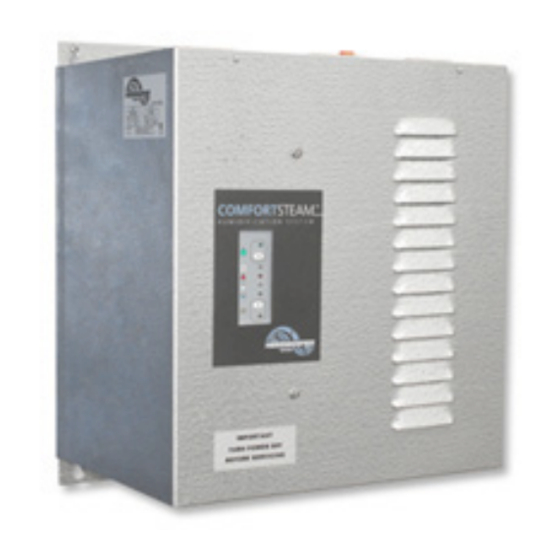
Related Manuals for Trion ComfortSTEAM


Summary of Contents for Trion ComfortSTEAM
- Page 1 Notice to Contractor: Once installation is complete, please leave this manual with the customer for future reference. Comfort STEAM READ AND SAVE THESE INSTRUCTIONS Humidification System T r i o n | w w w . t r i o n i a q . c o m ®...
-
Page 2: Table Of Contents
I n s t a l l a t i o n , O p e r a t i o n , & M a i n t e n a n c e M a n u a l COMFORTSTEAM... -
Page 3: Homeowner Section 1. Warranty Statement
WARRANTY LASTS, SO THE LIMITATION IN THE PRECEDING SENTENCE MAY NOT APPLY TO YOU. 10. Trion reserves the right to make changes in the design and material of its products without incurring any obligation to incorporate such changes in units completed on the effective date of such change. -
Page 4: Warnings And Disclaimer
I n s t a l l a t i o n , O p e r a t i o n , & M a i n t e n a n c e M a n u a l HOMEOWNER / CONTRACTOR 4. -
Page 5: Start-Up
ON. The humidifier is ready to work. • Open the water supply valve. If you installed a ComfortSteam humidistat and an outdoor sensor, • Adjust the knob on the humidistat. a setpoint adjustment will be done automatically as the outdoor temperature falls. -
Page 6: Functions Of The Electronic Circuit
The COMFORTSTEAM humidistat also has two pilot lights to indicate the current status. The green light is lit when the humidistat is demanding for humidity, thus activating the boiling cycle. -
Page 7: What To Do If A Malfunction Occurs
I n s t a l l a t i o n , O p e r a t i o n , & M a i n t e n a n c e M a n u a l 8. -
Page 8: Cleaning The Tank
I n s t a l l a t i o n , O p e r a t i o n , & M a i n t e n a n c e M a n u a l 10. -
Page 9: Preventative Maintenance
I n s t a l l a t i o n , O p e r a t i o n , & M a i n t e n a n c e M a n u a l 10. -
Page 10: Unpacking The Unit
I n s t a l l a t i o n , O p e r a t i o n , & M a i n t e n a n c e M a n u a l 12. -
Page 11: Dimensions And Available Models
I n s t a l l a t i o n , O p e r a t i o n , & M a i n t e n a n c e M a n u a l 13. -
Page 12: Detailed View Of Wiring
I n s t a l l a t i o n , O p e r a t i o n , & M a i n t e n a n c e M a n u a l 14. - Page 13 I n s t a l l a t i o n , O p e r a t i o n , & M a i n t e n a n c e M a n u a l View and list of the wire harness by color and function.
-
Page 14: Installing The Steam Hose And The Steam Diffuser
I n s t a l l a t i o n , O p e r a t i o n , & M a i n t e n a n c e M a n u a l PLEASE READ SECTIONS 15 AND 16 BEFORE PROCEEDING. - Page 15 I n s t a l l a t i o n , O p e r a t i o n , & M a i n t e n a n c e M a n u a l PLEASE READ SECTIONS 14 AND 15 BEFORE PROCEEDING.
-
Page 16: Installing The Humidifier
I n s t a l l a t i o n , O p e r a t i o n , & M a i n t e n a n c e M a n u a l 16. - Page 17 I n s t a l l a t i o n , O p e r a t i o n , & M a i n t e n a n c e M a n u a l If a rigid drain pipe has to be installed under the unit and connected to the main house drain, we recommend a 1”...
-
Page 18: Installing The Water Supply
I n s t a l l a t i o n , O p e r a t i o n , & M a i n t e n a n c e M a n u a l 17. -
Page 19: Installing The Air Pressure Probe
I n s t a l l a t i o n , O p e r a t i o n , & M a i n t e n a n c e M a n u a l 18. -
Page 20: Making Electrical Connections
20. Installing and connecting the humidistat See wiring diagrams in section 21 for proper connection. If you are using a COMFORTSTEAM electronic humidistat with outdoor sensor please refer to the instructions included with the humidistat. If you decide to use a standard mechanical humidistat, connect the mechanical humidistat between the terminals marked GND (ground) &... -
Page 21: Start-Up And Test Procedure
I n s t a l l a t i o n , O p e r a t i o n , & M a i n t e n a n c e M a n u a l 21. -
Page 22: Wiring Diagrams
I n s t a l l a t i o n , O p e r a t i o n , & M a i n t e n a n c e M a n u a l 22. - Page 23 I n s t a l l a t i o n , O p e r a t i o n , & M a i n t e n a n c e M a n u a l C o m f o r t S T E A M w w w.
- Page 24 Trion ® 101 McNeill Rd. | Sanford, NC 27330 P: 800.884.0002 | F: 800.458.2379 | www.trioniaq.com | customerservice@trioniaq.com Form No. 167649-001 Rev. 02/15 © Trion 2015. All Rights Reserved.
Need help?
Do you have a question about the ComfortSTEAM and is the answer not in the manual?
Questions and answers