Kenmore Automatic Washers Owner's Manual And Installation Instructions
Three-speed automatic washers
Hide thumbs
Also See for Automatic Washers:
- Owner's manual and installation instructions (42 pages) ,
- Owner's manual and installation instructions (108 pages) ,
- Owner's manual and installation instructions (128 pages)
Table of Contents
Advertisement
Owner's Manual and
Installation
Instructions
®
"Fhree-Speed
AUTOMATIC WASHERS
IMPORTANT:
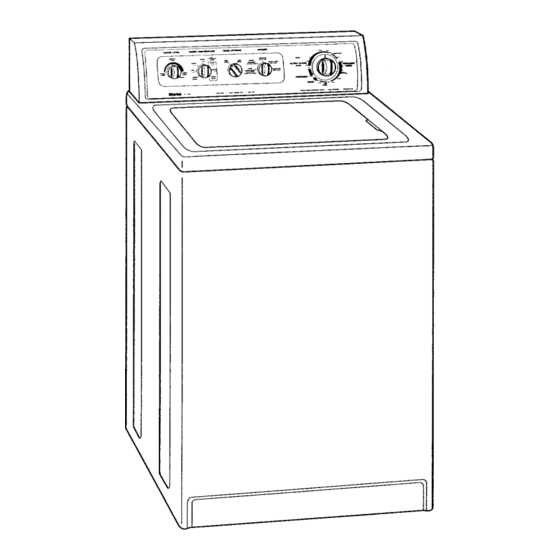
Your washer may look different
Read and follow all safety
from the washer shown.
and operating
instructions
before first use of this product.
Sears, Roebuck and Co., Hoffman
Estates, IL 60179 U.S.A.
PART NO. 3950144
Rev. A
PRINTED IN U.S.A.
Advertisement
Table of Contents

Subscribe to Our Youtube Channel
Related Manuals for Kenmore Automatic Washers

Summary of Contents for Kenmore Automatic Washers
- Page 1 Owner's Manual and Installation Instructions "Fhree-Speed AUTOMATIC WASHERS IMPORTANT: Read and follow all safety and operating instructions before first use of this product. Sears, Roebuck and Co., Hoffman PART NO. 3950144 Rev. A PRINTED IN U.S.A. ® Your washer may look different from the washer shown.
- Page 2 CARING FOR YOUR WASHER TROUBLESHOOTING SEARS MAINTENANCE Please read this manual. It will help you install and operate your new Kenmore washer in the safest and most economi('al way. For more information about the care and operation of Kenmore appliances call your nearest Sears store.
- Page 3 Owner's Manual, Sears will repair or replace any mechanical or electrical parts in this washer, if defective in material or workmanship. LIMITED 5-YEAR WARRANTY ON GEARCASE PARTS After one year and until five years from...
- Page 4 • Before the washer is removed from service or discarded, remove the lid. • Do not reach into the washer if the tub or agitator is moving. • Do not install or store this washer where it will be exposed to the weather.
- Page 5 INSTALLATION OVERVIEW For a complete list of tools and parts needled, see pages 6-8. A. SELECT LOCATION FOR YOUR WASHER (pgs. 10-12) Recessed Area/ Closet Installation Instructions Standpipe [)rain System (p. 12) Laundry Tub Drain System (p. 1 1) (p. 10)
- Page 6 B. REMOVE SHIPPING STRAP (p. 13) Tools Needed: Scissors Flashlight (optional depending on installation) C. CONNECT DRAIN HOSE (pgs. 14-15) TWIST PUSH Parts Needed: Tools Needed: Pliers that open to 19/16inches 1 yellow, single-wire 1 silver, double- hose clamp (top of wire hose clamp Flashlight (optional...
- Page 7 D. CONNECT INLET HOSES TO WASHER Tools Needed: Pliers that open to 19/16inche_ Flashlight (optional depending on installation) E. CONNECT INLET HOSESTO Tools Needed: Pliers that open to 1%6 inches uoket (optional Flashlight (optional depending depending on installation) installation) (pgs. 15-16)
- Page 8 F. SECURE DRAIN HOSE (p. 17) Tools Needed: Flashlight (optional depending on installation) G. LEVEL WASHER (p. 18) Tools Needed: 9/lo-lnch open-end wrench Flashlight (optional Wood block depending on installation) Parts Needed: Shipping strap with fastener Parts Needed: 2 front leveling legs with nuts...
- Page 9 This washer is equipped with a power supply cord having a 3-prong grounding plug. To minimize possible shock hazard, you must plug the power supply cord...
- Page 10 A. SELECT LOCATION FOR YOUR WASHER RECESSED AREA/ CLOSET INSTALLATION INSTRUCTIONS This washer may be installed 19" Ioooo *1"---_" [,<--- 27" _ 1-<--'1" FrontView (DoorNotShown) *Additional clearanceforwall, doorandfloor moldingsmay he required. Toreducetransferofwashersounds, a clearanceofI inchon the sidesofthe washeris recommended. • The installation...
- Page 11 Floor must be sturdy enough to support a total weight of 315 pounds (including washer, water, and load weight), Do not store or operate washer at or below 32°F (some water may remain in washer). See page 31 for Winterizing Information. Proper installation is your responsibility.
- Page 12 17 gallons Top of standpipe must be at least 39 inches above floor and no higher than 96 inches from bottom of washer. I1:you have: Laundry tub or standpipe taller than 96 inches 1-inch diameter standpipe...
- Page 13 There should be three cotter pins on the end of the shipping strap when it is pulled out of the washer. The electrical plug is attac!ned to this shipping strap. Eleclrical plug Shipping strap PULL STEP 3.
- Page 14 V4 inch from the end. c. Open clamp. Twist hose back and forth while pushing down onto drain connector at the bottom of the washer. Continue until hose contacts the ribbed stop on the cabinet. If you have: [:)rain hose that is too short...
- Page 15 STEP 1. Insert one new, flat washer (from the parts bag) into each end of the inlet hoses. Check that washers are firmly seated in couplings. COUPLING HOSES due to leaks.
- Page 16 (1-800-366-7278). E. CONNECT INLET TO WATER FAUCETS first STEP 1. Make sure washer basket is by hand. empty. Run water through turn with into a bucket or laundry tub to get rid of particles in the water lines that might clog hoses.
- Page 17 DRAIN HOSE Securing the drain hose properly will protect your floors from damage due to water leakage. STEP 1. Move washer to its final location. STEP 2. Locate the remaining piece of shipping strap (not the end with the three cotter pins) from STEP 4 of "REMOVE...
- Page 18 STEP 5. Move washer to its final location. STEP 6. Tilt washer forward until rear of washer is at least 3 inches off floor. You may hear the self-adjusting legs click into place. Lower washer to floor. Check levelness by placing a level on top of the washer, first side-to-side;...
- Page 19 [] Check that the water faucets are turned on. [] Take a few minutes and read the Operating Instructions (pages 20-28) to fully understand your new washer. Then, start the washer and allow it to complete the ULTRA CLEAN Cycle.
- Page 20 (Timer) Knob out. The dial will rotate as the cycle progresses. The knob will not rotate. STOPPING/RESTARTING YOUR WASHER • To stop the washer at any time, push the Cycle Selector Control (Timer) Knob in. • Pull the knob out to restart. OP13ONS...
- Page 21 • SMALL SET WATER TEMPERATURE CONTROL Your washer lets you select a wash and rinse water temperature setting based on the type of load you are washing. • Using warm rinse water will leave loads dryer after the spin cycle than if you use_ cold rinse water.
- Page 22 HAND WASHABLES blankets. NOTE: Some "HAND WASH" items, par- ticulady wool, naturally shrink when washed either in the sink or in the washer HAND from WASHABLES Cycle. Keep this in mind when you purchase items labeled "HAND WASH."...
- Page 23 You can select up to 10 minutes of wash time. NOTE: When the timer reaches PAUSE, the washer will drain and pause for no more than two minutes while some of the wash water is drained and replaced with rinse water.
- Page 24 AUTOMATIC SECOND RINSE Your washer allows you to add an auto- matic second rinse to the ULTRA CLEAN Cycle or PERMANENT PRESS Cycle. Simply set the RINSE OPTIONS on ,?ND RINSE before you start the washer.
- Page 25 TRIPLE ACTION'" AGITATOR Kenmore's exclusive TRIPLE ACTION Agitator gives you the most flexible fabric care for even your largest loads. The TRIPLE ACTION" Agitator in three directions, depending load size, to ensure proper cleaning.
- Page 26 During Washing When you select a small load size set- ting for a small wash load, your washer has a lower water level. With this lower water level, you may hear a clicking sound from the upper portion of the agitator.
- Page 27 USING LIQUID FABRIC SOFTENER DISPENSER After loading the washer, measure and add the recommended amount of fabric softener into the dispenser. Follow manufacturer's directions. NOTE: Pouring too much fabric softener into the dispenser will cause the fabric softener to dispense...
- Page 28 (reset to wash cycle and time) Wash SOAK Drain - selected no spin Agitate Spin Fill to (reset to SPIN to selected level drain washer) Rinse Drain - no spin Spin Off or 2ND RINSE level time Spin Fill to level Soak...
- Page 29 • Close zippers, snaps, and hooks to avoid snagging other items. Remove pins, buckles, and other hard objects to avoid scratching the washer interior. Remove non-washable trim and ornaments. • Empty pockets and turn them inside out. • Turn down cuffs, brush away lint and dirt.
- Page 30 • Drop items into washer loosely. Fill to the top of the basket (top row of holes). Do not wrap items around the agitator. Items should move easily through...
- Page 31 • Unplug the power supply cord or turn off electrical power to the washer. • Turn off the water supply to the washer. This helps avoid accidental (due to a water pressure you are away.
- Page 32 (see "INSTALLATION_' Section G). Redistribute the load. Reduce load size. Straighten or unplug hose (see "INSTALLATION_' Section C). After a wash or rinse, the washer will drain without spinning. After draining, the spinning begins. Close the lid. Lower drain hose (see "INSTALLATION,"...
- Page 33 (see "INSTALLATIONI' Section C). Do not seal off drain hose with tape. The drain hose needs an air gap. Redistribute load. Level washer. Reset rear legs (see "INSTALLATION_' Section G). Tighten nuts (see "INSTALLATION_' Section G). Remove strap with cotter pins (see "INSTALLATIONI' Section B).
- Page 34 The top of the agitator is much To() Low/Not higher than the highest water Completely level. This creates a perception Filling of the washer not being full. Tub is Tub pulled forward when Crooked unloading, Tub moves. Unit not level.
- Page 35 Sort dark clothing from whites and lights. Unload the washer as soon as it stops. Unload the washer as soon as it stops. Use cold rinses and cycles with slow spin speeds to reduce wrinkling. Loads should move freely during wash.
- Page 36 "We, Service What We Sell;' Sears Maintenance Agreement Maintain the value of your Kenmore Washer with a Sears Maintenance Agreement. Kenmore washers designed, manufactured, and tested for '/ears of dependable operation.
- Page 38 Forthe repair or replacement parts you need delivered directlyto your home Call 7 am -7 pm, 7 days a week 1-800-366-PART (11-800-368-7278) For in-home major brand repair service Call 24 hours a day, 7 days a week 11-800-4- R E PAl R (1-800-473-7247) Forthe locationof a Sears Parts and Repair Center in yourarea...
Need help?
Do you have a question about the Automatic Washers and is the answer not in the manual?
Questions and answers
does the agitator top open so I can clean inside?
No. The agitator top of the Kenmore Automatic Washer does not open for cleaning. The washer has a self-cleaning lint filter that automatically traps and removes lint without requiring manual cleaning.
This answer is automatically generated