Table of Contents
Advertisement
Dear Customer,
Thank you for choosing this quality product from ASKO.
We hope it will meet your expectations and fulfil your needs for many years to
come. Scandinavian design combines clean lines, everyday functionality and high
quality. These are key characteristics of all our products and the reason they are
greatly appreciated throughout the world.
To get the most out of your new machine, we recommend that you read the
operating instructions before using the machine. The operating instructions also
include information on how you can help protect the environment.
Operating Instructions
Washing Machine
ASKO W6424W
WARNING: Read the instructions before using the machine.
Advertisement
Table of Contents

Related Manuals for Asko W6424W


Summary of Contents for Asko W6424W
-
Page 1: Operating Instructions
Dear Customer, Thank you for choosing this quality product from ASKO. We hope it will meet your expectations and fulfil your needs for many years to come. Scandinavian design combines clean lines, everyday functionality and high quality. These are key characteristics of all our products and the reason they are greatly appreciated throughout the world. -
Page 2: Table Of Contents
Contents Before using your machine for Add detergent and fabric softener, as the first time required Select the program Transport protection Select options Packing material Close the washer door and press Washer door the Start/Stop button Checking water hardness Once the program has finished Important safety instructions Settings Grounding instructions... -
Page 3: Before Using Your Machine For The First Time
Before using your machine for the first time Do you need this Use&Care Guide in Spanish? Log on to www.askona.com/customer-care to download. ¿Necesita esta Instrucciones de uso y cuidado en español? Entre en www.askona.com/customer-care y descárguesela. Customer Care Center 1-800-898-1879 www.askona.com... -
Page 4: Before Using Your Machine For The First Time
Before using your machine for the first time Transport protection Remove any transport protection devices before installing the machine. See the "Transport protection" chapter. Packing material Please sort waste materials in accordance with local guidelines. Washer door • The washer door cannot be opened until the machine is connected to the electricity supply. -
Page 5: Important Safety Instructions
Important safety instructions SAVE THESE INSTRUCTIONS FOR the water flow from each for several minutes. FUTURE REFERENCE This will release any accumulated hydrogen gas. As the gas is flammable, do not smoke or WARNING! use an open flame during this time. To reduce the risk of fire, electric shock, or injury WARNING! to persons when using your appliance, follow... -
Page 6: Installation
Important safety instructions Disposal B) Grounding instructions for a permanently connected appliance: When the machine has reached the end of its This appliance must be connected to a grounded service life and is to be disposed of, it should metal, permanent wiring system, or an immediately be made unusable by removing the equipment-grounding conductor must be run door to the washing compartment. -
Page 7: Child Safety
Child safety Keep an eye on children! Activate child safety catch (for detergent compartment) WARNING! On the inside of the detergent compartment is a child safety catch. • Laundry detergents are corrosive, so always keep them out of reach of children. •... -
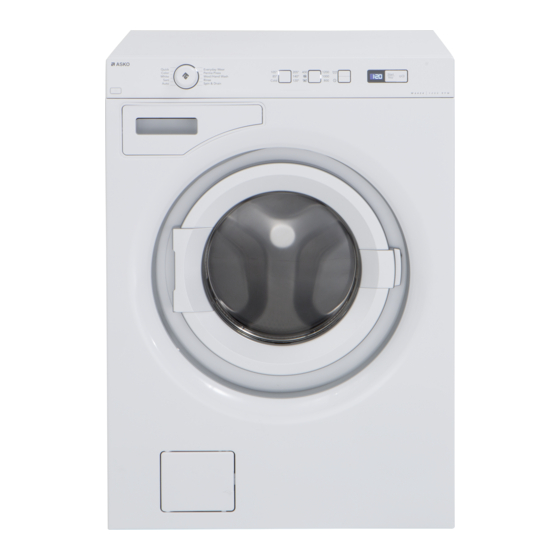
Page 8: Parts Of The Washing Machine
Parts of the washing machine 1. Main power switch 2. Detergent compartment 3. Program panel 4. Serial number plate (on inside of washer door) 5. Drain pump cover 6. Drain pump (behind cover) 7. Washer door Customer Care Center 1-800-898-1879 www.askona.com... -
Page 9: Detergent Compartment
Detergent compartment 1. Pre Wash 2. Main wash with liquid detergent. Use the separator. 3. Main wash with powder detergent. Do not use the separator. 4. Fabric softener 5. Release button 6. Child safety catch The detergent drawer automatically dispenses the detergent and fabric softener at the appropriate times. Simply pour the measured amounts of detergent and softener into the proper compartments (as illustrated) and close the drawer. -
Page 10: Advice And Tips Before Washing
Advice and tips before washing Here are some tips that may help you before washing. Sorting your laundry Sorting your laundry • how soiled they are • color • material Clothing 1. Close zippers and Velcro straps so they won’t damage fabrics. -
Page 11: Advice And Tips Before Washing
Advice and tips before washing Wash cycle Tumble dry cycle Normal wash cycle Machine dry Permanent Press or Wrinkle Normal setting Resistant setting Permanent Press or Wrinkle Gentle/Delicate setting Resistant setting Gentle or Delicate setting Hand wash only Do not tumble dry Do not wash Do not wring. -
Page 12: Coloured Cotton
Advice and tips before washing Coloured cotton Reducing allergic reactions Colored cotton items labeled 140 °F (60 °C) The washing machine has a Super Rinse option. should be washed at 140 °F (60 °C) the first time Use this for people with sensitive skin, such as in order to remove any excess dye. -
Page 13: Liquid Detergents
Recommended powder detergents to the detergent compartment. After dyeing, you should run the machine empty using the same ASKO washers use 50% to 75% less detergent program. Use the normal amount of detergent. than most other washers. This is because of their... - Page 14 Advice and tips before washing in your clothes, which can cause them to appear The amount of detergent needed can also gray or dingy. You should start with a small depend on the hardness of the water in your amount of detergent and increase it only if the area.
-
Page 15: Operating Instructions
Operating instructions compartment. Pour the liquid detergent into the WARNING! front section of the detergent compartment. Wash ball or net To reduce the risk of fire, electric shock, or injury to persons, read the IMPORTANT SAFETY If you use a wash ball or net, place it directly in INSTRUCTIONS before operating this appliance. -
Page 16: Select The Program
Operating instructions Select the program 4. Color You select a program by turning the A standard program for lightly to moderately program selector. An LED lights up soiled laundry. The temperature can be selected beside the selected freely, so follow the washing instructions for each program and the estimated program time garment. - Page 17 Operating instructions 9. Rinse This program performs one cold rinse cycle + spin. Suitable for laundry that just needs to be dampened and for cleaning cloths and mops. 10. Spin & Drain Used to just spin the load. If you only want to drain the machine of water, select the symbol (no spin).
-
Page 18: Program Chart
Operating instructions Program chart Program Temp. °F Number of Spin Max. load Water Energy Program time Wash rinses Speed (lb) consumption consumption (approx. hrs and (approx. gallon) (approx. kWh) min.) 1. Auto 2. Sani 1200 22,5 2:45 1200 19,8 2:40 3. -
Page 19: Select Options
Operating instructions 105˚ 205˚ 1200 85˚ 140˚ 1000 Cold 120˚ Select options The washing will remain covered by the water You can select options to adjust the wash from the final rinse, stopping it from getting program to suit your own specific wrinkled. -
Page 20: Close The Washer Door And Press The Start/Stop Button
Operating instructions Stopping or changing a program NOTE! You can stop a program by pressing the Start/ Stop button for three seconds. To restart the Remember to press the Start/Stop button to start machine, select a new program, add any extra the program. -
Page 21: Settings
Settings You can change the following settings: Automatic Door Opening. Extra rinses. Door opening If you choose Automatic Door Opening, the washer door will open once the program has finished. 1. Turn off the machine using the main power switch. 2. -
Page 22: Care And Maintenance Instructions
Care and maintenance instructions Cleaning the trap and the drain pump The washing machine has a trap where small items such as coins, buttons, and hairpins can collect. To clean the trap and the drain pump, do as follows: 1. Make sure the machine is empty of water and switched off at the main power switch. -
Page 23: Rinse Holes Under The Paddle
Care and maintenance instructions Rinse holes under the paddle If you have hard water If you suspect that objects such as nails or paper If you live in an area with hard water (high clips may have fallen into the wash drum, you limescale content), a grayish-white coating may should check the space under the paddles. -
Page 24: Troubleshooting
Troubleshooting The washer door will not open The machine will not start 1. Check that the main power switch is on. 1. Is the washer door properly closed? Push it 2. Is there power? Check your home’s fuses firmly. (circuit breakers). The washer door cannot be 2. -
Page 25: Error Messages
Troubleshooting Error messages F12 Water Inlet Fault Check: If an error occurs during the program, a message is shown on the display. To exit the message after • that the tap on the water pipe is open. taking action, turn the machine off and then back •... -
Page 26: Technical Information
Technical information Technical data Height: 33 1/2'' (850 mm) Width: 23 1/2'' (597 mm) Depth: 23 7/8" (606 mm) Weight: 161 lb (73 kg) Cylinder volume: 15,9 gal (60 l) Max. laundry capacity: 18 lb (8 kg) Spin speed (rpm): 400-1200 Rated power: See serial number tag and rating plate. -
Page 27: Transport Protection
Transport protection Remove the three transport bolts and the plastic plugs for locking the machine for transport before using the machine. NOTE! If the machine is to be transported, the bolts and plastic plugs for locking the machine during transport must be installed to prevent damage to the machine through shaking. -
Page 28: Installation
Water supply connection Read these instructions carefully and completely before you install the machine. The installation Since ASKO washers have a built-in heating should be carried out by a qualified person who element, you only need a cold water inlet. The... -
Page 29: Freestanding Installation
The plug supplied with the washer can only be Do not modify the plug provided with the appliance. used with an ASKO Dryer. If the washer is used If it will not fit the outlet, have a proper outlet separately or with another dryer, it must be on a installed by a qualified electrician. -
Page 30: Installation
Installation Built-in installation ASKO washers can be installed beneath a cabinet or worktop with a height of 34” to 35” (863 to 889 mm) or in a closet. There must be a gap of about ½” (12 mm) all around the machine, including between the rear edge of the machine’s... -
Page 31: Service
ASKO (“Authorized ASKO Dealer”), 4. Damage resulting from accident, alteration, that this ASKO Product is free of defects in material misuse, abuse, fire, flood, acts of God, improper and workmanship, subject to the terms and installation, installation not in accordance with conditions set forth herein. -
Page 32: Before Contacting The Customer Care Center
(3) can be found on the type plate on the inside of the washer door. TYPE Should you need further assistance, you can write to ASKO Appliances with any questions or concerns at the address below: ASKO Distribution North America, LLC. Customer Care Center... - Page 33 Notes Customer Care Center 1-800-898-1879 www.askona.com...
- Page 34 Notes Customer Care Center 1-800-898-1879 www.askona.com...
- Page 35 Notes Customer Care Center 1-800-898-1879 www.askona.com...
-
Page 36: Quick Guide
You select a programme by turning the programme selector. The selected programme is shown in the display. CLOSE THE WASHER DOOR AND PRESS THE START BUTTON The time remaining is shown in hours and minutes. We reserve the right to make changes. www.askona.com WM70.1 W6424W US/CA en (01-14)
Need help?
Do you have a question about the W6424W and is the answer not in the manual?
Questions and answers