Table of Contents
Advertisement
Quick Links
Dear Customer,
Thank you for choosing this quality product from ASKO.
We hope it will meet your expectations and fulfil your needs for many years to
come. Scandinavian design combines clean lines, everyday functionality and high
quality. These are key characteristics of all our products and the reason they are
greatly appreciated throughout the world.
To get the most out of your new machine, we recommend that you read the
operating instructions before using the machine. The operating instructions also
include information on how you can help protect the environment.
Operating Instructions
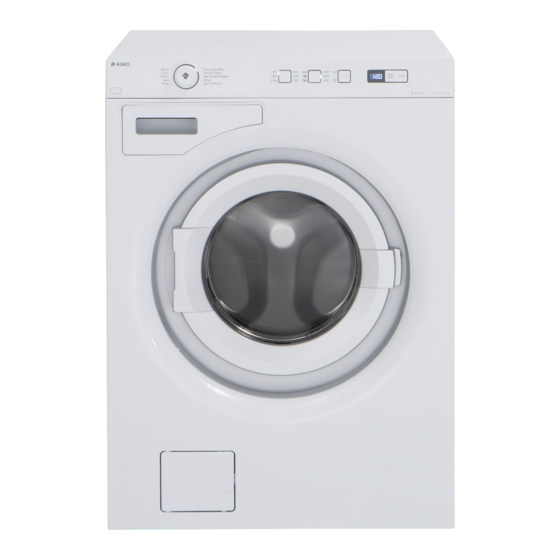
Washing Machine
ASKO W6424W
WARNING: Read the instructions before using the machine.
Advertisement
Table of Contents

Subscribe to Our Youtube Channel
Related Manuals for Asko W6424W


Summary of Contents for Asko W6424W
-
Page 1: Operating Instructions
Dear Customer, Thank you for choosing this quality product from ASKO. We hope it will meet your expectations and fulfil your needs for many years to come. Scandinavian design combines clean lines, everyday functionality and high quality. These are key characteristics of all our products and the reason they are greatly appreciated throughout the world. -
Page 2: Table Of Contents
Contents Before using your machine Dyeing fabrics for the first time Liquid detergents Transport protection Detergents Packing material Recommended powder detergents Washer door Detergent Amounts Based on Water Hardness Checking water hardness Amount of detergent to use Important safety instructions Operating instructions Grounding instructions Sort your laundry. - Page 3 Contents Troubleshooting The washer door will not open The machine will not start After power failure Wet laundry still in the machine Error messages Technical information Technical data Transport protection Installation Water supply connection Service Limited Warranty – Residential Appliances Quick guide Customer Care Center 1-800-898-1879...
-
Page 4: Before Using Your Machine For The First Time
Before using your machine for the first time Do you need this Use&Care Guide in Spanish? Log on to www.askona.com/customer-care to download. ¿Necesita esta Instrucciones de uso y cuidado en español? Entre en www.askona.com/customer-care y descárguesela. Customer Care Center 1-800-898-1879 www.askona.com... -
Page 5: Before Using Your Machine For The First Time
Before using your machine for the first time Transport protection Remove any transport protection devices before installing the machine. See the "Transport protection" chapter. Packing material Please sort waste materials in accordance with local guidelines. Washer door • The washer door cannot be opened until the machine is connected to the electricity supply. -
Page 6: Important Safety Instructions
Important safety instructions SAVE THESE INSTRUCTIONS FOR • Do not add gasoline, dry-cleaning solvents, FUTURE REFERENCE or other flammable or explosive substances to the wash water. These substances give off WARNING! vapors that could ignite or explode. • Under certain conditions, hydrogen gas To reduce the risk of fire, electric shock, or may be produced in a hot water system that injury to persons when using your appliance,... -
Page 7: Grounding Instructions
Important safety instructions Grounding instructions Installation A) Grounding instructions for a grounded, See the "Installation" chapter. cord-connected appliance: Overflow guard function In the event of malfunction or breakdown, grounding will reduce the risk of electric shock If the machine’s water level rises above the by providing a path of least resistance for normal level, the overflow guard function begins electric current. -
Page 8: Child Safety
Child safety Keep an eye on children! Activate child safety catch (for detergent compartment) WARNING! On the inside of the detergent compartment is a child safety catch. • Laundry detergents are corrosive, so always keep them out of reach of children. •... -
Page 9: Parts Of The Washing Machine
Parts of the washing machine 1. Main power switch 2. Dispenser 3. Program panel 4. Serial number plate (on inside of washer door) 5. Drain pump cover 6. Drain pump (behind cover) 7. Washer door Customer Care Center 1-800-898-1879 www.askona.com... -
Page 10: Dispenser
Dispenser 1. Pre Wash 2. Main wash with liquid detergent. Use the separator (A). 3. Main wash with powder detergent. Do not use the separator. 4. Fabric softener 5. Release button 6. Child safety catch The detergent drawer automatically dispenses the detergent and fabric softener at the appropriate times. -
Page 11: Advice And Tips Before Washing
Advice and tips before washing Here are some tips that may help you before washing. Sorting your laundry Sorting your laundry • how soiled they are • color • material Clothing 1. Close zippers and Velcro straps so they won’t damage fabrics. Laundry labels 2. -
Page 12: Advice And Tips Before Washing
Advice and tips before washing Wash cycle Tumble dry cycle Normal wash cycle Machine dry Permanent Press or Wrinkle Normal setting Resistant setting Permanent Press or Wrinkle Gentle/Delicate setting Resistant setting Gentle or Delicate setting Hand wash only Do not tumble dry Do not wash Do not wring. -
Page 13: Coloured Cotton
Advice and tips before washing Coloured cotton Save time and energy Colored cotton items labeled 140 °F (60 °C) Use the Color program to save time and energy. should be washed at 140 °F (60 °C) the first time This program has a shorter main wash than in order to remove any excess dye. -
Page 14: Liquid Detergents
Advice and tips before washing Recommended powder detergents NOTE! ASKO washers use 50% to 75% less detergent than most other washers. This is because of Due to environmental concerns, we discourage their low water consumption and the fact that all the use of strong chemicals. - Page 15 Advice and tips before washing and increase it only if the cleaning results are unsatisfactory. Additionally, you should never put detergent in the prewash compartment unless you are using a wash program that has a prewash cycle. This could cause excess foaming, which could damage the machine.
-
Page 16: Operating Instructions
Operating instructions WARNING! To reduce the risk of fire, electric shock, or injury to persons, read the IMPORTANT SAFETY INSTRUCTIONS before operating this appliance. Sort your laundry. See the "Advice and tips before washing" chapter. Place underwired bras in a laundry net. Empty pockets. -
Page 17: Add Detergent And Fabric Softener, As Required
Operating instructions Add detergent and fabric dispensed too early, which impairs the washing softener, as required effect. The detergent packaging will have recommendations for how much detergent WARNING! you should use. The machine holds 18 lb (8 kg) of laundry. If you only have a small amount To reduce the risk of fire, electric shock, or of laundry in the machine, you can reduce the injury to persons, read the IMPORTANT... -
Page 18: Select The Program
Operating instructions Select the program selected freely, so follow the washing You select a program by turning the instructions for each garment. Garments worn program selector. An LED lights up next to the skin ought to be washed at 140 °F beside the selected program and the estimated (60°C). - Page 19 Operating instructions 9. Rinse This program performs one cold rinse cycle + spin. Suitable for laundry that just needs to be dampened and for cleaning cloths and mops. 10. Spin & Drain Used to just spin the load. If you only want to drain the machine of water, select the symbol (no spin).
-
Page 20: Program Chart
Operating instructions Program chart Program 1. Auto 1200 22,5 2:45 2. Sani 1200 19,8 2:40 1200 15,6 1.10 2:21 3. White 1200 15,6 0.59 2:02 4. Color 1200 15,9 1:40 5. Quick 1200 0:40 6. Everyday Wear (Easy care) 1200 15,9 1:40 7. -
Page 21: Select Options
Operating instructions 105˚ 205˚ 1200 85˚ 140˚ 1000 Cold 120˚ Select options • No drain means that the program does You can select options to adjust the not include a spin cycle and ends with the wash program to suit your own specific water from the final rinse still in the machine. -
Page 22: Close The Washer Door And Press The Start/Stop Button
Operating instructions Close the washer door and • Press Start/Stop and the machine will count press the Start/Stop button down 1 hour at a time, starting after the selected delay. If you change your mind and want to cancel Delayed Start, press and hold Start/Stop for three seconds. -
Page 23: Once The Program Has Finished
Operating instructions Once the program has finished The text "End" is shown on the display for 2 minutes. The machine then turns off. The washer door opens automatically once the program has finished. If you want to deactivate the Automatic Door Opening function, see the "Selecting settings"... -
Page 24: Settings
Settings You can change the following settings: Automatic Door Opening. Extra rinses. Door opening If you choose Automatic Door Opening, the washer door will open once the program has finished. 1. Turn off the machine using the main power switch. 2. -
Page 25: Care And Maintenance Instructions
Care and maintenance instructions Cleaning the trap and the drain pump Cleaning the detergent compartment The washing machine has a trap where small Pull out the detergent compartment using the items such as coins, buttons, and hairpins can release button. collect. -
Page 26: Cleaning The Inside Of The Machine To Avoid Unpleasant Smells
Care and maintenance instructions Cleaning the inside of the machine to 3. Lift the paddle. avoid unpleasant smells 4. Remove any objects. Modern detergents often allow laundry to be 5. Place the paddle in the mounting hole with washed at low temperatures. This means that the F-mark toward you. -
Page 27: Troubleshooting
Troubleshooting The washer door will not open D Push the tool upward to open the washer 1. Check that the main power switch is on. door. 2. Is there power? Check your home’s fuses (circuit breakers). The washer door cannot be opened with the door opening button (with the key symbol) if the power is off. -
Page 28: Error Messages
Troubleshooting Error messages F12 Water Inlet Fault If an error occurs during the program, a Check: message is shown on the display. To exit the • that the tap on the water pipe is open. message after taking action, turn the machine •... -
Page 29: Technical Information
Technical information Technical data Height: 33 1/2'' (850 mm) Width: 23 1/2'' (597 mm) Depth: 23 7/8" (606 mm) Weight: 161 lb (73 kg) Cylinder volume: 15,9 gal (60 l) Max. laundry capacity: 18 lb (8 kg) Spin speed (rpm): 400-1200 Rated power: See serial number tag and rating plate. - Page 30 Transport protection Remove the three transport bolts and the plastic 3. Remove the plastic covers from the plugs. plugs for locking the machine for transport Push the plastic covers into the three holes before using the machine. that contained the plugs. Save the plastic plugs in case the machine is moved in the future.
-
Page 31: Water Supply Connection
Water supply connection Read these instructions carefully and completely before you install the machine. The Since ASKO washers have a built-in heating installation should be carried out by a qualified element, you only need a cold water inlet. The person who is familiar with all local codes... - Page 32 The plug supplied with the washer the appliance is properly grounded. can only be used with an ASKO Dryer. If the Do not modify the plug provided with the washer is used separately or with another dryer, appliance.
- Page 33 Installation Built-in installation ASKO washers can be installed beneath a cabinet or worktop with a height of 34” to 35” (863 to 889 mm) or in a closet. There must be a gap of about ½” (12 mm) all around the machine, including between the rear edge of the machine’s top panel and the back wall.
- Page 34 ASKO Distribution North America, LLC. 1. Replacement parts or repair labor if the (“ASKO”) warrants to the original purchaser ASKO Product is used in a manner that is (the “ASKO Customer”) of the ASKO product inconsistent with published user or operator (the “ASKO Product”), who purchased the...
- Page 35 RESPECTIVE PARENTS, SUBSIDIARIES problem after checking “Troubleshooting,” then AND AFFILIATES BE LIABLE FOR DAMAGES additional help can be obtained by calling ASKO OTHER THAN ACTUAL DAMAGES AND IN Customer Care at 1-800-898-1879. Read the NO EVENT FOR DAMAGES IN EXCESS OF “Troubleshooting”...
- Page 36 Limited Warranty, please contact ASKO Customer Care at 1-800-898-1879. After your purchase and prior to first use of the ASKO Product, register your ASKO Product with ASKO by utilizing the address information below. Should you need...
- Page 37 Notes Customer Care Center 1-800-898-1879 www.askona.com...
- Page 38 Notes Customer Care Center 1-800-898-1879 www.askona.com...
- Page 39 Notes Customer Care Center 1-800-898-1879 www.askona.com...
-
Page 40: Quick Guide
You select a programme by turning the programme selector. The selected programme is shown in the display. CLOSE THE WASHER DOOR AND PRESS THE START BUTTON The time remaining is shown in hours and minutes. We reserve the right to make changes. www.askona.com WM70.1 W6424W US/CA en (02-15)
Need help?
Do you have a question about the W6424W and is the answer not in the manual?
Questions and answers