Table of Contents
Advertisement
Dear Customer,
Thank you for choosing this quality product from ASKO.
We hope it will meet your expectations and fulfil your needs for many years to
come. Scandinavian design combines clean lines, everyday functionality and high
quality. These are key characteristics of all our products and the reason they are
greatly appreciated throughout the world.
To get the most out of your new machine, we recommend that you read the
operating instructions before using the machine. The operating instructions also
include information on how you can help protect the environment.
Operating Instructions
Washing Machine
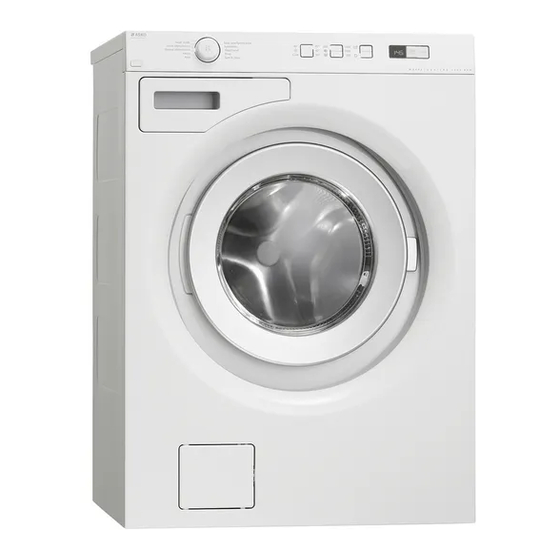
ASKO W6444A
Advertisement
Table of Contents

Related Manuals for Asko W6444A


Summary of Contents for Asko W6444A
-
Page 1: Operating Instructions
Dear Customer, Thank you for choosing this quality product from ASKO. We hope it will meet your expectations and fulfil your needs for many years to come. Scandinavian design combines clean lines, everyday functionality and high quality. These are key characteristics of all our products and the reason they are greatly appreciated throughout the world. -
Page 2: Table Of Contents
Contents Before using your machine for Washing the first time Sort your laundry. Transport protection Turn on the main power switch Packing material Open the washer door and load Washer door the washing Checking water hardness Add detergent and fabric softener, as required Safety instructions Program selection... - Page 3 Contents Technical information Information for test institute Energy labelling Technical data Transport protection Installation Positioning the washing machine Adjusting the feet Connection to water supply Drainage connection Electrical installation Service Before contacting the service division Quick guide...
-
Page 4: Before Using Your Machine For The First Time
Before using your machine for the first time Transport protection Remove any transport protection devices before installing the machine. See the "Transport protection" chapter. Packing material Sort waste materials in accordance with local guidelines. Washer door • The washer door will not open until the machine is connected to the electricity supply. -
Page 5: Safety Instructions
• Installation should be carried out by qualified Transport/Winter storage ASKO technicians. • The machine should only be used for If the machine is to be transported or stored in washing items as described in these unheated premises where the temperature can instructions. -
Page 6: Child Safety
Child safety Keep an eye on children! • Always close the door and start the programme immediately once you have added detergent. • The appliance is not intended for use by young children or infirm persons without supervision. • Young children should be supervised to ensure that they do not play with the appliance. -
Page 7: Description Of The Washing Machine
Description of the washing machine 1. Main power switch 2. Dispenser 3. Program panel 4. Serial number plate (on inside of washer door) 5. Drainage pump cover 6. Drainage pump (behind cover) 7. Washer door... -
Page 8: Dispenser
Dispenser 1. Pre-wash 2. Main wash with liquid detergent. Use the separator (A). 3. Main wash with powder detergent. Do not use the separator. 4. Fabric softener 5. Release button 6. Child safety catch... -
Page 9: Advice And Tips Before Washing
Advice and tips before washing Here are some tips that may help you before washing. Sorting your laundry Sort items according to: • how soiled they are • colour • material Clothing 1. Do up zips and close Velcro straps so that they don’t harm fabrics. -
Page 10: Advice And Tips Before Washing
Advice and tips before washing • Always wash with a full load when using the Wool Heavy, Everyday wash and Normal programs. These fabrics are labelled either machine wash • Avoid pre-washing. Modern machines and or hand wash. The Wool/hand wash program is detergents clean effectively without pre- at least as gentle as washing by hand. -
Page 11: Washing
Washing Sort your laundry. Liquid detergent See the "Advice and tips before washing" When using a liquid detergent, observe the chapter. detergent manufacturer's recommendations. Place underwired bras in a laundry net. We recommend using a laundry ball with thick Empty pockets. Coins, nails and the like can detergents. -
Page 12: Program Selection
Washing Program selection 4. Everyday wash You select a programme by turning A standard program for lightly to moderately the programme selector. The selected soiled laundry. The temperature can be selected programme is shown in the display. Now use freely, so follow the washing instructions for the option buttons to select any options. - Page 13 Washing 8. Wool/hand wash A gentle laundry program for wool, silk and garments that should be washed by hand. The highest temperature is 30 °C. This program has a short spin. The maximum spin speed is 800 rpm. 9. Rinse This program performs one cold rinse cycle + spin.
- Page 14 Washing Programme chart Water Energy Programme time Pre- Number Spin Speed Max load consumption consumption (approx. hrs and Program wash T emp. °C of rinses (kg) (approx. liter) (approx. kWh) min.) 1. Auto 1400 2:45 2. Heavy 1400 2:40 1400 1.13 3:21 3.
-
Page 15: Selecting Options
Washing 40° 95° 1400 30° 60° 1000 Cold 50° Selecting options Super rinse You can select options to adjust the wash Use the Super Rinse option if you want to program to suit your own specific increase the number of rinses. The maximum requirements. -
Page 16: Close The Washer Door And Press The Start/Stop Button
Washing Close the washer door and press the Start/Stop button Once the program has finished The text "End" is shown on the display for 2 minutes. The machine then turns off. The washer door opens automatically once the program has finished. If you want to deactivate the automatic door opening function, see the "Selecting settings"... -
Page 17: Settings
Settings You can change the following settings Automatic door opening. Extra rinses. Door opening If you choose Automatic door opening the Washer door will open once the program has finished. 1. Turn off the machine using the main power switch. 2. -
Page 18: Care And Cleaning
Care and cleaning Cleaning the trap and the drainage pump The washing machine has a trap where smaller objects such as coins and hairpins can collect. To clean the trap and the drainage pump, do as follows: 1. Make sure the machine is empty of water and switched off at the mains. -
Page 19: Rinse Holes Under The Agitator
Care and cleaning Rinse holes under the agitator If you have hard water If you suspect that objects such as nails or If you live in an area with hard water (high paper clips may have fallen into the wash limescale content), a greyish-white coating may drum, you should check the space under the form on the wash drum. -
Page 20: Troubleshooting
Troubleshooting The washer door will not open After use, store the emergency door opening 1. Check that the main power switch is on. key (C) in the dedicated compartment (B) (see 2. Is there power? Check your home’s fuses image in the section Dispenser). (circuit breakers). -
Page 21: Error Messages
Troubleshooting Error messages F12 Water inlet fault Check: If an error occurs during the program a message is shown on the display. To exit the message • that the tap on the water pipe is open. after taking measures, turn the machine off and •... -
Page 22: Technical Information
Technical information Technical information Information for test institute Energy labelling Australian standard: AS/NZS 2040.1:1998 Washing program: Normal, 40 °C, 7 kg cotton Connection: Cold water 20 °C Test method for noise measurement: IEC-60704-2-4 Power requirement when machine turned off < 0,3 W Power requirement for Delayed Start <... - Page 23 Technical information Loading procedure for standard test: When loading the machine for testing according to AS/NZS 2040:2005 it shall be loaded according to the table below. Garments are placed on top of each other in layers and the soil swatches should be placed inside the wash drum in the direction shown in the table, seen from above.
-
Page 24: Technical Data
Technical information Technical data Height: 850 mm Width: 595 mm Depth: 585 mm Weight: 73 kg Cylinder volume: 60 l Max. washing capacity: 7 kg Spin speed (rpm): 400-1400 Rated power: See type plate. Heater output: See type plate. Water pressure: 0,1-1 MPa 1-10 kp/cm 10-100 N/cm... -
Page 25: Transport Protection
Transport protection Remove the three transport bolts and the plastic plugs for locking the machine for transport before using the machine. NOTE! If the machine is to be transported, the bolts and plastic plugs for locking the machine during transport must be installed to prevent damage to the machine through shaking. -
Page 26: Installation
Installation Positioning the washing machine The washing machine can be installed as a built-in or freestanding unit. Place the machine on a firm surface with easy access to the plug. A. Built-in The washing machine can be installed under a counter top with a working height of 850-900 mm. -
Page 27: Electrical Installation
Installation Electrical installation The machine can also be connected to the drain via a spigot connection. In this case the hose Connect the machine by plugging it into an should also be 600-900 mm above the floor. The earthed wall socket. The electrical wall socket internal diameter of the hole should be at least must be placed outside of the installation area 18 mm. -
Page 28: Service
Service Before contacting the service division Model Before you contact the service division, make designation sure that you know the model number (located on the front panel), and serial number. The model designation can be found on the panel. The type designation and serial number Type can be found on the type plate on the inside of plate... - Page 29 Your notes...
- Page 30 Your notes...
- Page 31 Your notes...
-
Page 32: Quick Guide
You select a programme by turning the programme selector. The selected programme is shown in the display. CLOSE THE WASHER DOOR AND PRESS THE START BUTTON The time remaining is shown in hours and minutes. We reserve the right to make changes. www.asko.com WM70.1 W6444A AU/NZ en (09-14)
Need help?
Do you have a question about the W6444A and is the answer not in the manual?
Questions and answers
I have lost the emergency key and need to open the front door of my front loader