Paradox NVX80 Reference And Installation Manual
High end motion detector with anti-mask for indoor/outdoor use
Hide thumbs
Also See for NVX80:
- Installation manual (35 pages) ,
- Installation quick manual (4 pages) ,
- Quick start manual (2 pages)

Related Manuals for Paradox NVX80


Summary of Contents for Paradox NVX80
- Page 1 NVX80 High End Motion Detector with Anti-Mask for Indoor/Outdoor Use V1.02 Reference and Installation Manual PARADOX.COM Printed in Canada - 03/2013 NVX80-EI00...
-
Page 2: Table Of Contents
For complete warranty information, please visit www.paradox.com/terms. Your use of the Paradox product signifies your acceptance of all warranty terms and conditions. ENVY Series is a trademark or registered trademark of Paradox Ltd. or its affiliates in Canada, the United States and/or other countries. For the latest product approvals, such as UL and CE, please visit www.paradox.com. -
Page 3: Introduction
Introduction The NVX80 motion detector is suitable for harsh indoor and inclement outdoor environments. The detector boasts a blend of active IR and microwave anti-masking technologies. Features • Paradox Active IR anti-mask recognizes the degradation of lens clarity and objects blocking the main lens within 30 cm of the detector • 8 detection channels... - Page 4 Beam Patterns NVX80 Version 1.02...
-
Page 5: Technical Specifications
Increases false alarm rejection, settings for small and large pets Language English Accessories All Weather Cover Swivel Bracket Coverage 15 m x 15 m (50 ft x 50 ft) with 3 m x 3 m (10 ft x 10 ft) down- looking creep zone NVX80 Version 1.02... -
Page 6: Installation
11. While the tamper screw at the bottom of the unit is open, begin the power up process and access the menus to change any sensitivity or other settings, then save the altered settings 12. Tightly close the tamper screw found at the bottom of unit and put the detector into operation mode NVX80 Version 1.02... -
Page 7: Mounting Considerations
Installing the unit over 3.0 m / 10 ft does not affect the creep zone. Mounting Considerations The optimal installation height for the NVX80 is If the installation site is near heavy traffic or objects 2.5 m to 3.0 m (8 ft 2 in to 10 ft). - Page 8 Connecting to the Bus Connecting to the Digiplex bus is quite straight forward. The red, black, green and yellow wires must be placed into the red, black, green and yellow slots, respectively. NVX80 Version 1.02...
-
Page 9: Menus
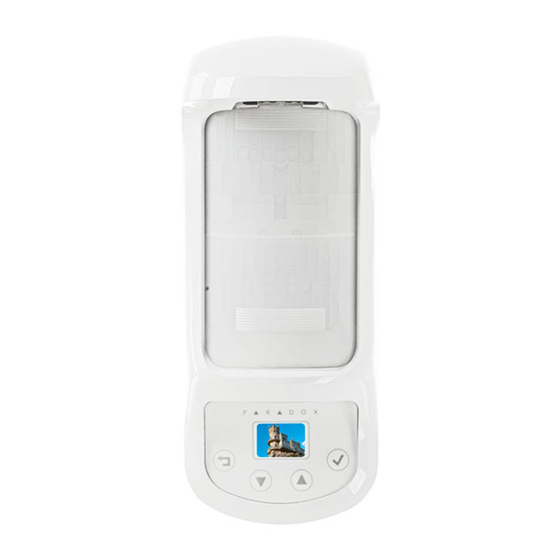
Menus Menu-Driven Settings and Configuration The NVX80 introduces a unique 4-button interface and full-color OLED display screen. The NVX80 is completely menu- driven, making programming and configuration simple. There are no jumpers, trimmers or complex wiring to contend with. The OLED screen displays a variety of icons which indicate the current state of the detector. Alarm, pre-alarm, and anti-mask events as well as notifications are displayed on the OLED. -
Page 10: Menu Tree
Menu Tree NVX80 Version 1.02... -
Page 11: Outputs And Wall Tamper In (Input)
Outputs and Wall Tamper In (Input) The NVX80 has 3 outputs and 1 input, called Wall Tamper In. The outputs menu also controls zones to 4 in the Digiplex communication. The outputs can be used to define the relay functionality, and the input is used to control the tamper input settings. -
Page 12: Settings
N/A for no connection or invalid operation Use the built-in diagnostics to pinpoint troublesome installations. Test the NVX80 detector settings and bus operation. The Test Bus option will test the bus voltage and Digiplex connection, by checking the status of data and clk lines reporting no connection or invalid operation. -
Page 13: Anti-Masking
50% from factory-set levels. The NVX80 anti-mask technology protects the detector from a wide range of materials;... -
Page 14: Display Icons
MW Anti-Mask Pre-Alarm in Test and Operation Mode The NVX80 is built for harsh conditions, indoor or outdoor. Its anti-mask settings can be set to reduce sensitivity to rain, wind and other inclement conditions. The MW anti-mask feature detects motion within 0.5 m - 2 m / 1 ft 64 in - 6 ft 5 in from the unit. - Page 15 When an obstruction or movement has been detected and confirmed, the following alarm icons will be displayed. Alarms as shown in Test and Operation Mode after PIR and MW Pre-Alarm Creep alarm as shown in Test and Operation Mode NVX80 Version 1.02...
-
Page 16: Passive Infrared Detection With Independent Creep Zone
17 m / 5 ft 6 in. Detection is at 90 degrees. The creep zone is exceptionally large. The NVX80 delivers approximately a 180 degree angle covering almost 2 m / 6 ft 7 in in all directions in front of the detector. When the Pet Immunity is activated, the creep zone is neutralized. -
Page 17: Microwave
Set for small or large pets The NVX80’s Pet Immunity can filter out the movement small and large animals, up to 20 kg / 44 lbs in both indoor and outdoor environments. By ignoring the movement of the pets the detector’s reliability increases. -
Page 18: Tamper
After closing the Wall Tamper, this message will appear. When any of the tampers are detected as open, a relay configured as a Tamper will trigger. The wall tamper switch can be excluded from this relay sequence by disabling it in the Input menu. NVX80 Version 1.02... -
Page 19: Notifications
Notifications The following notifications appear when the functionality of the NVX80 unit is compromised. These indicators can help troubleshoot during installation or during operation. Appears in Operation Mode when the unit’s voltage is below 10v. It may also appear after an alarm or at the end of the power up sequence if the voltage was low. -
Page 20: About Us
BUS zone # Shows the zone number set for each of the three relays (future) Information specific to your individual NVX80 detector can be found in the About Us section. Firmware Upgrades Use the diagram below to upload firmware upgrades.
Need help?
Do you have a question about the NVX80 and is the answer not in the manual?
Questions and answers