Table of Contents
Advertisement
Available languages
Available languages
Quick Links
Download this manual
See also:
User Manual
Advertisement
Chapters
Table of Contents

Related Manuals for Team Losi Ten SCTE


Summary of Contents for Team Losi Ten SCTE
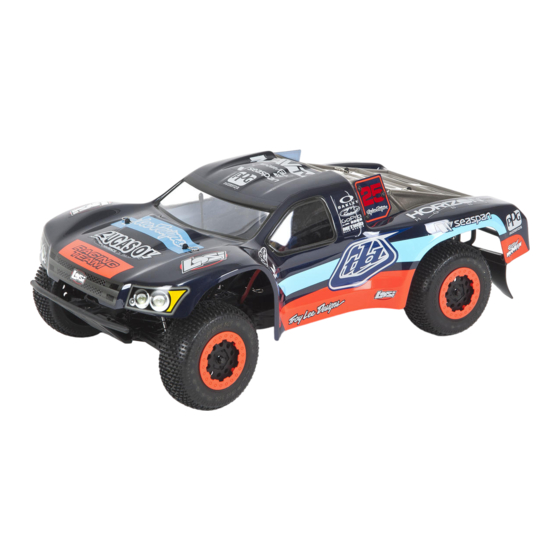
- Page 1 InstructIon Manual BedIenungsanleItung Manuel d’utIlIsatIon Manuale dI IstruzIonI Before operating this vehicle, please read all printed materials thoroughly. Losi TEN-sCTE RTR • iNsTRuCTioN maNuaL Horizon Hobby is not responsible for inadvertent errors in this manual.
-
Page 2: Table Of Contents
NOTICE All instructions, warranties and other collateral documents are subject to change at the sole discretion of Horizon Hobby, Inc. For up-to-date product literature, visit horizonhobby.com and click on the support tab for this product. meaning of special Language The following terms are used throughout the product literature to indicate various levels of potential harm when operating this product: NoTiCE: Procedures, which if not properly followed, create a possibility of physical property damage AND a little or no possibility of injury. CauTioN: Procedures, which if not properly followed, create the probability of physical property damage AND a possibility of serious injury. WaRNiNG: P rocedures, which if not properly followed, create the probability of property damage, collateral damage, and serious injury OR create a high probability of superficial injury. WaRNiNG: Read the ENTIRE instruction manual to become familiar with the features of the product before operating. Failure to operate the product correctly can result in damage to the product, personal property and cause serious injury. This is a sophisticated hobby product. It must be operated with caution and common sense and requires some basic mechanical ability. Failure to operate this Product in a safe and responsible manner could result in injury or damage to the product or other property. This product is not intended for use by children without direct adult supervision. Do not attempt disassembly, use with incompatible components or augment product in any way without the approval of Horizon Hobby, Inc. This manual contains instructions for safety, operation and maintenance. It is essential to read and follow all the instructions and warnings in the manual, prior to assembly, setup or use, in order to operate correctly and avoid damage or serious injury. additional safety Precautions and Warnings age Recommendation: Not for children under 14 years. This is not a toy. • Always keep a safe distance in all directions around your model to avoid collisions or injury. This model is controlled by a radio signal subject to interference from many sources outside your control. -
Page 3: Quick Start
Quick start Please read the entire manual to gain a full understanding of the TEN-SCTE RTR vehicle, fine-tuning the setup and performing maintenance. 1. Read the safety precautions found on this page. 2. Charge the battery pack you have chosen (NOT INCLUDED). Refer to the Manufacturer’s Supplied instructions for battery charging information. 3. Install the AA batteries into the Transmitter. Use alkaline or rechargeable batteries only. 4. Install a fully charged battery pack. 5. T urn on the transmitter and then the vehicle. Always turn the transmitter on before the vehicle and turn it off after the vehicle has been turned off. 6. Check steering. Verify that the servo is functioning properly. 7. Drive the TEN-SCTE RTR. 8. Perform necessary maintenance of the TEN-SCTE RTR. The Transmitter 1. Steering Wheel: Controls direction (left/right) of the model. 2. Throttle Trigger: Controls speed and direction (forward/reverse) of the model. 3. Antenna: Transmits signal to the model. -
Page 4: Driving Precautions
Driving Precautions CauTioN: Do not discharge a LiPo battery below 3V per cell. Batteries discharged to a voltage lower than the lowest approved • Avoid driving the vehicle in or through standing water, wet grass, mud or snow. voltage may become damaged, resulting in loss of performance and The electronics in the vehicle are not waterproof. potential fire when batteries are charged. • Maintain sight of the vehicle at all times. • Do not apply the throttle in forward or reverse if the vehicle is stuck. Applying • Inspect the vehicle for loose wheel hardware. throttle in this instance can damage the motor or ESC. • Inspect the steering assembly for any loose hardware. Driving the vehicle off- • After driving the vehicle, allow the electronics to cool to ambient temperature road can cause fasteners to loosen over time. before using the next battery pack. • Do not drive the vehicle in tall grass. Doing so can damage the vehicle or electronics. - Page 5 Rear Shock Sway Bar Rear Camber Link Rear Suspension Arm ESC with Fan Motor Center Differential Battery Tray Receiver Location Steering Servo Tie Rod Front Suspension Arm Front Shock Front Camber Link Losi TEN-sCTE RTR • iNsTRuCTioN maNuaL...
-
Page 6: Batteries And Charging
Batteries and Charging • Do not charge any battery that appears to have any damage. • If there are exposed wires, do not charge or use the battery until you install The TEN-SCTE RTR uses rechargeable batteries such as NiMH or LiPo. These shrink-wrap or replace the complete wire. batteries all have special requirements to preserve performance and last. When charging NiMH or LiPo batteries, select a charger to meet your • Read all instructions provided by the manufacturer of the batteries. requirements. You need a charger that is a 100–240V wall charger or one which • Never allow minors to charge battery packs. requires a 12V power supply. Follow the charger manufacturer’s instructions and • Always check to ensure the polarity of battery connection is correct. precautions during each use. • Never leave batteries unattended while charging. • Never charge a battery while it is installed in the TEN-SCTE RTR . installing the Battery Three-Position Battery Tray Your TEN-SCTE RTR comes with a three-position battery tray to alleviate the need for foam blocks. You can move the included battery stops in order to run the battery in a back, middle, or forward position. Please see the pictures as follows: Middle Back Forward Losi TEN-sCTE RTR • iNsTRuCTioN maNuaL... -
Page 7: Recalibrating And Adjusting The Msc-Mxpro Bl Esc
Recalibrating and adjusting the the full throttle endpoint has been set within the ESC and is now looking for the full brake endpoint (red LED blinking). msC-mXPRo BL EsC 5. M ove the throttle trigger to the full brake position and hold full brake. After a few seconds, the red LED on the ESC will flash and ring 4 times rapidly (accepting full brake endpoint). 6. A fter accepting the full brake endpoint, the yellow LED on the ESC will blink. Relax the trigger to the neutral position. The ESC will now ring 4 times and flash the yellow LED rapidly to accept the neutral position. After accepting the neutral position, the ESC will ring twice and all the LEDs will flash. This is the arming tone and LED indication that the ESC is now ARMED and the car will respond to throttle inputs from your transmitter. From this point on, when you connect the batteries and turn the switch on, the ESC will give the initialization tone and flash. Then the arming tone will ring a second or two later. If the ESC is programmed for the Auto-LiPo setting, it will beep the number of cells in your LiPo pack between the initialization tones and Preparing the Transmitter the arming tones. After the arming tone plays, the ESC is ACTIVE and will respond to throttle application. 1. Make sure the transmitter batteries are fully charged. 2. Power the transmitter on. If you have problems calibrating your transmitter with the Losi ESC, please contact the appropriate Horizon Hobby Service Center. Once you are calibrated 3. Set the Travel Adjust to the maximum value in the forward and reverse and armed, do one last check before going out and experiencing the Losi directions. If your transmitter has an adjustable throttle trigger, please select brushless difference. Slowly advance the throttle and check the rotation direction 70/30. -
Page 8: Tuning, Adjusting & Maintaining Your Vehicle
Tuning, adjusting & maintaining Your Vehicle service/Repair • Examine your vehicle on a regular basis. Radio/Speed Control & Motor • Use a brush to remove dirt and dust. If any problems other than those covered in the troubleshooting section arise, • Look for damage to the suspension arms and other molded parts. please call the appropriate electronics service department. They will be able to • Re-glue the tires to the wheels, if necessary. give the problem additional specific attention and provide instructions for the • Use suitable tools to tighten fasteners. solution. • Make sure the camber and steering linkages are not bent. Replace any bent Maintenance linkages. If any questions other than those covered in the troubleshooting or maintenance • Adjust the Toe and Camber settings, if necessary. sections arise, please call the appropriate Horizon product support department. • R emove the shocks and inspect them for damage. Rebuild the shocks if oil is leaking. -
Page 9: Limited Warranty
Limited Warranty http://www.horizonhobby.com under the Support tab. If you do not have internet access, please contact Horizon Product Support to obtain a RMA number along What this Warranty Covers with instructions for submitting your product for service. When calling Horizon, Horizon Hobby, Inc. (“Horizon”) warrants to the original purchaser you will be asked to provide your complete name, street address, email address that the product purchased (the “Product”) will be free from defects and phone number where you can be reached during business hours. When in materials and workmanship at the date of purchase. sending product into Horizon, please include your RMA number, a list of the included items, and a brief summary of the problem. A copy of your original What is Not Covered sales receipt must be included for warranty consideration. Be sure your name, This warranty is not transferable and does not cover (i) cosmetic damage, (ii) address, and RMA number are clearly written on the outside of the shipping damage due to acts of God, accident, misuse, abuse, negligence, commercial carton. use, or due to improper use, installation, operation or maintenance, (iii) modification of or to any part of the Product, (iv) attempted service by anyone NoTiCE: Do not ship Li-Po batteries to Horizon. if you have any issue other than a Horizon Hobby authorized service center, or (v) Products not with a Li-Po battery, please contact the appropriate Horizon Product purchased from an authorized Horizon dealer. -
Page 10: Warranty And Service Contact Information
Warranty and service Contact information Country of Purchase Horizon Hobby address Phone Number / Email address United States of America Horizon Service Center 4105 Fieldstone Rd 877-504-0233 (Electronics and engines) Champaign, Illinois, 61822 USA Online Repair Request Visit: www.horizonhobby.com/service Horizon Product Support 4105 Fieldstone Rd 877-504-0233 (All other products) Champaign, Illinois, 61822 USA productsupport@horizonhobby.com United Kingdom Horizon Hobby Limited Units 1-4 Ployters Rd +44 (0) 1279 641 097 Staple Tye sales@horizonhobby.co.uk Harlow, Essex CM18 7NS, United Kingdom Germany Horizon Technischer Service Christian-Junge-Str. 1 +04121 2655 100 25337 Elmshorn, Germany service@horizonhobby.de... -
Page 11: Komponenten
Front Explosionszeichnung ................44 Chassis Explosionszeichnung ..............45 Bitte verwenden Sie nur Losi oder anderes hochqualitatives Werkzeug. Die Setup Sheet ....................48 Verwendung von Werkzeug von schlechter Qualität kann die im Modell verwendeten Kleinteile und Schrauben beschädigen. LOSI TEN SCTE RTR • BEdIENuNgSaNLEITuNg... -
Page 12: Quick Start
14. Vollbremsung: Endpunkt Bremse. Gibt die Stärke der Vollbremsung an. ST. TRIM 15. Lenkung links: Endpunkt bei Linkslenkung. Gibt den Ausschlag bei ST. RATE Linkssteuerung an. 16. Lenkung rechts: Endpunkt bei Rechtslenkung. Gibt den Ausschlag bei Rechtssteuerung an. TH. TRIM Einlegen der Batterien 1. Drücken Sie die Batteriefachabdeckung etwas ein, um die Sperre zu lösen, und nehmen Sie sie dann ab. 2. Legen Sie 4 AA-Batterien oder -Akkus ein und achten Sie dabei auf die richtige Polarität, die im Diagramm im Batteriefach des Senders angegeben ist. 3. Schließen Sie die Batteriefachabdeckung vorsichtig wieder, indem Sie die Laschen in die Schlitze im Sender führen. aCHTuNg: Nehmen Sie die Senderbatterien nicht heraus, wenn das Modell eingeschaltet ist oder fährt, da Sie sonst die Kontrolle über das Modell verlieren und möglicherweise Schäden oder Verletzungen verursachen. LOSI TEN SCTE RTR • BEdIENuNgSaNLEITuNg... -
Page 13: Sicherheitshinweise Beim Fahren
So verlängern Sie die Laufzeit 29,5mm Bodenabstand vorne haben und hinten 24,5mm .Die Einstellung wird • Halten Sie Ihr Fahrzeug sauber und in gutem Wartungszustand. durch die Dämpfervorspannungsringe an den Stoßdämpfern vorgenommen. • Erlauben Sie einen besseren Luftstrom zum ESC und zum Motor. 4. Stellen Sie den Sturz ein. Dieses geschieht durch ein- oder ausdrehen der Sturzstangen. Stellen Sie den Sturz der Vorderreifen auf 0° ein. Den Sturz der • Wechseln Sie das Getriebe zu einem niedrigeren Übersetzungsverhältnis. Hinterreifen auf negative 2,5° auf normaler Fahrzeughöhe. Ein niedrigeres Übersetzungsverhältnis senkt die Betriebstemperatur der Elektronik. Verwenden Sie ein kleineres Ritzel oder ein größeres Stirnrad, um 5. Stellen Sie die Vorspur ein. Stellen Sie die Lenkstangen so ein, dass die Räder das Übersetzungsverhältnis zu senken. bei zentrierter Lenkung gerade nach vorne zeigen. • Verwenden Sie ein Akkupack mit einem höheren mAh-Wert. 6. Laden Sie den Akku Pack so wie es der Hersteller des Akkus oder des Ladegerätes vorgesehen hat. • Verwenden Sie das optimale Ladegerät zum Aufladen der Akkupacks (Beratung bei Ihrem Hobbyhändler). 7. Stellen Sie den elektronischen Fahrtenregler ein. Folgen Sie dazu den Einstellanweisungen des TEN-SCTE RTR. 8. Stellen Sie die Lenk- und Subtrimmung des Senders ein. Folgen Sie bitte dazu den Anweisungen des Herstellers. Achten Sie bitte darauf, dass das Fahrzeug ohne Steuereingabe geradeaus fährt. 9. Stellen Sie die Endpunkte der Steuerung ein. Folgen Sie dazu den Anweisungen des Herstellers und achten darauf, dass Servo und Steuerung einen vollen Ausschlag ermöglichen. LOSI TEN SCTE RTR • BEdIENuNgSaNLEITuNg... - Page 14 Hinterer Stoßdämpfer Querstabilisator Hintere Sturzstange Hinterer Querlenker Regler mit Kühllüfter Motor Mitteldifferential Akkuhalter Empfänger Einbauplatz Lenkservo Spurstange Vorderer Querlenker Front Stoßdämpfer Front Sturzstange LOSI TEN SCTE RTR • BEdIENuNgSaNLEITuNg...
-
Page 15: Akkus Und Laden
• Versuchen Sie nie Akkus zu laden, die möglicherweise einen Defekt haben Der TEN-SCT RTR verwendet aufladbare Akkus der Typen NiMH oder LiPo. Diese können. Akkus erfordern einen besonderen Umgang um die Haltbarkeit und Leistung zu • Sollten Sie offene Kontakte oder nicht isolierte Stellen an Ihrem Akku haben, gewähren. laden Sie das Akku nicht und isolieren erst die Kontakte. • Bitte lesen Sie alle Anweisungen des Herstellers sorgfältig durch. Bitte nutzen Sie zum Laden von NiMH oder LiPo Akkus ausschließlich geeignete • Lassen Sie niemals Minderjährige Akkus laden. Ladegeräte. Sie benötigen ein Ladegerät für 230 Volt Netzstrom oder eines, • Überprüfen Sie vor dem Laden ob die Polarität der Akkus korrekt ist. dass eine 12 Volt Stromversorgung benötigt. Bitte befolgen Sie immer die • Lassen Sie niemals die Akkus unbeaufsichtigt laden. Anweisungen und Sicherheitshinweise des Herstellers. Einsetzen des akkus Akkuhalter mit drei Positionen Ihr TEN SCT RTR bietet Ihnen drei mögliche Positionen für die Akkuplacierung. Setzen Sie die Akkustopper wie abgebildet ein, um den Akku sicher in vorderer, mittlerer oder hinterer Position zu placieren. Siehe Abbildunge. Mitte Hinten Vorne LOSI TEN SCTE RTR • BEdIENuNgSaNLEITuNg... -
Page 16: Kalibrierung Und Einstellen Des Msc-Mxpro Bl Esc Reglers
Schließen Sie jetzt noch nicht den Akku an. Stellen Sie sicher, dass die Polarität die weitere Option in dem Menü. Haben Sie Ja gewählt springt der Regler in die des Akkueinganges und des Regler korrekt sind. Prüfen Sie den Ein/Aus Schalter erste Auswahl des nächsten Menüs. und vergewissern Sie sich, dass er auf OFF (AUS) steht. (ON = EIN ist in schmalen Buchstaben auf einer Seite vermerkt) Wir empfehlen das Ritzel aus Technische Spezifikationen Sicherheitsgründen zu entfernen. Sensorloser Brushless Regler Kalibrieren des Reglers Innenwiederstand 0,0003 Ohm Der Motor erhält keine Leistung wenn der Regler (ESC) im Programmier- oder Kalibriermodus ist. Dauerstrom 1. Schalten Sie den Sender ein (ON), der Regler bleibt AUS (OFF) und ist nicht mit MAX RPM 80,000 dem Akku verbunden. Akku 5 bis 18 Zellen NiMH/NiCd, oder 2 bis 6 S LiPo 2. Verbinden Sie den Akku mit dem Losi Regler. 5,5 V bis 7V (programmierbar) 3,5A 3. Halten Sie Vollgas und schalten den Regler ein. Sind alle Anschlüsse korrekt hören Sie jetzt ein Mehrton "Ring". Dieser Ton wird durch Motorvibrationen erzeugt. LOSI TEN SCTE RTR • BEdIENuNgSaNLEITuNg... -
Page 17: Tunen, Anpassen Und Warten Des Fahrzeugs
Servogetriebe oder Motor defekt Ersetzen oder reparieren Sie das Servo Lenkt nicht in eine Richtung Servogetriebe beschädigt Ersetzen oder reparieren Sie das Servo Motor dreht nicht Motoranschluß/Lötstelle ist beschädigt Löten Sie das Kabel wieder an Motorkabel ist gebrochen Reparieren oder ersetzen Sie wie benötigt Regler ist beschädigt Kontaktieren Sie den technischen Service von Horizon Hobby Regler wird heiß Motorübersetzung falsch gewählt Verwenden Sie kleinere Ritzel oder ein größeres Zahnrad Antrieb blockiert Überprüfen Sie den Antrieb auf Blockieren Geringe Laufzeit oder Akkupack nicht vollständig geladen Laden Sie den Akku schlechte Beschleunigung Ladegerät lädt nicht vollständig Verwenden Sie anderes Ladegerät Antrieb behindert/blockiert Überprüfen Sie Räder oder Antrieb auf Behinderung/Blockierung Schlechte Reichweite oder Senderbatterien leer Überprüfen und ersetzen Aussetzer Fahrzeugakku leer Laden Sie den Akku Lose Kabel oder Anschlüsse Überprüfen Sie alle Anschlüsse und Stecker LOSI TEN SCTE RTR • BEdIENuNgSaNLEITuNg... -
Page 18: Garantie Und Service Informationen
Schadensbeschränkung soll. Befolgen Sie sorgfältig alle Hinweise und Warnungen für dieses Produkt Horizon ist nicht für direkte oder indirekte Folgeschäden, Einkommensausfälle und für alle Komponenten und Produkte, die Sie im Zusammenhang mit oder kommerzielle Verluste, die in irgendeinem Zusammenhang mit dem Produkt diesem Produkt einsetzen. Ihr Modell empfängt Funksignale und wird dadurch stehen nicht verantwortlich, unabhängig ab ein Anspruch im Zusammenhang gesteuert. Funksignale können gestört werden, was zu einem Signalverlust miteinem Vertrag, der Garantie oder der Gewährleistung erhoben werden. im Modell führen würde. Stellen Sie deshalb sicher, dass Sie um Ihr Modell Horizon wird darüber hinaus keine Ansprüche aus einem Garantiefall akzeptieren, einen ausreichenden Sicherheitsabstand einhalten, um einem solchen Vorfall die über den individuellen Wert des Produktes hinaus gehen. Horizon hat keine vorzubeugen. Einfluss auf den Einbau, die Verwendung oder die Wartung des Produktes oder etwaiger Produktkombinationen, die vom Käufer gewählt werden. Horizon übernimmt keine Garantie und akzeptiert keine Ansprüche für in der folge auftretende Verletzungen oder Beschädigungen. Mit der Verwendung und dem Einbau des Produktes akzeptiert der Käufer alle aufgeführten Garantiebestimmungen ohne Einschränkungen und Vorbehalte. Wenn Sie als Käufer nicht bereit sind, diese Bestimmungen im Zusammenhang mit der Benutzung des Produktes zu akzeptieren, werden Sie gebeten, dass Produkt in unbenutztem Zustand in der Originalverpackung vollständig bei dem Verkäufer zurückzugeben. Sicherheitshinweise Dieses ist ein hochwertiges Hobby Produkt und kein Spielzeug. Es muss mit Vorsicht und Umsicht eingesetzt werden und erfordert einige mechanische wie auch mentale Fähigkeiten. Ein Versagen, das Produkt sicher und umsichtig zu betreiben kann zu Verletzungen von Lebewesen und Sachbeschädigungen erheblichen Ausmaßes führen. Dieses Produkt ist nicht für den Gebrauch durch Kinder ohne die Aufsicht eines Erziehungsberechtigten vorgesehen. Die Anleitung LOSI TEN SCTE RTR • BEdIENuNgSaNLEITuNg... -
Page 19: Garantie Und Service Kontaktinformationen
EN 60950-1:2006+a11 Birgit Schamuhn Steven A. Hall Elmshorn, Geschäftsfuhrerin Geschäftsfuhrer 16 October 2011 Managing Director Managing Director Horizon Hobby GmbH; Christian-Junge-Straße 1; D-25337 Elmshorn HR Pi: HRB 1909; UStlDNr,:DE812678792; STR.NR.L 1829812324 Geschäftsführer: Birgit Schamuhn, Steven A. Hall -- Tel.: +49 4121 4619960 • Fax: +49 4121 4619970 eMail: info@horizonhobby.de; Internet: www.horizonhobby.de Es gelten unsere allgemeinen Geschäftsbedingungen, die in unseren Geschäftsräumen eingesehen weden können. Eare bleibt bis zur vollstandigen Bezahlung Eigentum der Horizon Hobby GmbH anweisungen zur Entsorgung von Elektro- und Elektronik-altgeräten für Benutzer in der Europäischen union Dieses Produkt darf nicht zusammen mit anderem Abfall entsorgt werden. Stattdessen ist der Benutzer dafür verantwortlich, unbrauchbare Geräte durch Abgabe bei einer speziellen Sammelstelle für das Recycling von unbrauchbaren elektrischen und elektronischen Geräten zu entsorgen. Die separate Sammlung und das Recycling von unbrauchbaren Geräten zum Zeitpunkt der Entsorgung hilft, natürliche Ressourcen zu bewahren und sicherzustellen, dass Geräte auf eine Weise wiederverwertet werden, bei der die menschliche Gesundheit und die Umwelt geschützt werden. Weitere Informationen dazu, wo Sie unbrauchbare Geräte zum Recycling abgeben können, erhalten Sie bei lokalen Ämtern, bei der Müllabfuhr für Haushaltsmüll sowie dort, wo Sie das Produkt gekauft haben. LOSI TEN SCTE RTR • BEdIENuNgSaNLEITuNg... -
Page 20: Enregistrez Votre Produit Losi En Ligne
REMaRQuE La totalité des instructions, garanties et autres documents est sujette à modification à la seule discrétion d’Horizon Hobby, Inc. Pour obtenir la documentation à jour, rendez-vous sur le site horizonhobby.com et cliquez sur l’onglet de support de ce produit. Signification de certains termes spécifiques Les termes suivants sont utilisés dans l’ensemble du manuel pour indiquer différents niveaux de danger lors de l’utilisation de ce produit : REMaRQuE: P rocédures qui, si elles ne sont pas suivies correctement, peuvent entraîner des dégâts matériels ET éventuellement un faible risque de blessures. aTTENTioN: Procédures qui, si elles ne sont pas suivies correctement, peuvent entraîner des dégâts matériels ET des blessures graves. aVERTissEMENT: P rocédures qui, si elles ne sont pas suivies correctement, peuvent entraîner des dégâts matériels et des blessures graves OU engendrer une probabilité élevée de blessure superficielle. -
Page 21: Compliance Information For The European Union
démarrage rapide Veuillez lire entièrement le manuel du TEN SCTE RTR afin d'y découvrir les possibilités de réglages et la maintenance à effectuer. 1. Lisez les précautions de sécurités présentes sur cette page. 2. Chargez votre batterie (non fournie). Consultez la documentation de votre batterie pour les recommandations de charge. 3. Installez les piles AA dans l'émetteur. Utilisez uniquement des piles alcalines ou des accus rechargeables. 4. Installez la batterie totalement chargée. 5. Mettez l'émetteur sous tension puis le contrôleur. Toujours allumer l'émetteur en premier et l'éteindre en dernier. 6. Effectuer un contrôle de la direction. 7. Pilotez votre TEN SCTE RTR. 8. Effectuez la maintenance nécessaire. L’émetteur 1. Volant : il contrôle la direction (gauche/droite) du modèle. 2. Gâchette des gaz : elle contrôle la vitesse et la direction (avant/arrière) du modèle. 3. Antenne : elle transmet le signal au modèle. 4. Interrupteur Marche/Arrêt : il permet d’allumer et BIND 2P 3P LIN d’éteindre l’émetteur. ST-L ST-R TH-F TH-B AUX-H AUX-L... -
Page 22: Précautions Pour La Conduite
Précautions pour la conduite a TTENTioN: ne déchargez pas une batterie Li-Po au-dessous du seuil de 3 V par cellule. Les batteries déchargées à une tension inférieure à la • Évitez d’utiliser le véhicule dans des flaques d’eau, de l’herbe humide, de la tension minimale approuvée peuvent se détériorer, ce qui entraîne des boue ou de la neige. L’électronique embarquée n’est pas étanche. pertes de performances et un risque d’incendie potentiel lorsque les • Gardez le véhicule bien en vue à tout moment. batteries sont chargées. • Inspectez le véhicule pour vérifier que les pièces des roues sont bien fixées. • Ne mettez pas les gaz en marche avant ou arrière si le véhicule est coincé. • Inspectez la direction pour vérifier que les pièces sont bien fixées. La conduite Dans ce cas, le fait d’accélérer peut en effet endommager le moteur ou le du véhicule ailleurs que sur une route peut en effet entraîner le desserrage contrôleur électronique de vitesse. des fixations au fil du temps. • Après avoir piloté le véhicule, laissez les composants électroniques refroidir et • N’utilisez pas le véhicule dans des herbes hautes. Vous risqueriez revenir à température ambiante avant d’utiliser un autre pack de batterie. d’endommager celui-ci ou son électronique. • Arrêtez d’utiliser le véhicule quand vous remarquez un manque de puissance. Le fait de piloter un véhicule lorsque la batterie est déchargée peut entraîner la mise hors tension du récepteur. Vous pourriez perdre le contrôle du modèle. Test des commandes Effectuez un test des commandes avec les roues du véhicule qui ne touchent pas le sol. Si les pneus tournent une fois le véhicule sous tension, réglez le bouton TH. TRIM situé en bas à gauche du volant jusqu’à ce qu’ils s’arrêtent. Pour faire avancer les roues, tirez la gâchette. Pour faire marche arrière, attendez que le modèle... - Page 23 Amortisseur arrière Barre anti-roulis Biellette de carrossage arrière Triangle inférieur arrière Ventilateur de refroidisseament du contrôleur Moteur Différentiel central Support de batterie Compartiment du récepteur Servo de direction Biellette de direction Triangle avant inférieur Amortisseur avant Biellette de carrossage avant Losi TEN-sCTE RTR • MaNuEL d’uTiLisaTioN...
-
Page 24: Batteries Et Charge
Batteries et charge • Ne tentez pas de charger une batterie endommagée. • Si les gaines des câbles sont endommagées, n'utilisez pas la batterie avant Le TEN SCTE RTR utilise des batteries rechargeables NiMH ou LiPo. Ces batteries d'avoir changé les câbles ou utilisé de l'adhésif isolant pour isoler les parties nécessitent une attention particulière afin de préserver leurs performances. abîmées. • Lisez toutes les instructions fournies par le fabricant des batteries. Quand vous chargez de batteries LiPo ou NiMh sélectionnez un chargeur • Ne laissez jamais des enfants charger les batteries seuls. correspondant aux caractéristiques des batteries. Il vous faudra un chargeur • Toujours vérifier que la polarité est respectée. alimenté par prise secteur 100-240V ou alimenté en 12V. Suivez les précautions d'emploi du fabricant de votre chargeur. • Ne laissez jamais des batteries en charge sans surveillance. • Ne charger jamais la batterie quand elle est installée sur le châssis du TEN SCTE RTR. Installation de la batterie Support de batterie à trois positions Votre TEN SCTE RTR est équipé d'un support de batterie réglable permettant d'éviter l'utilisation de blocs de mousse. Vous pouvez déplacer les butées de façon à obtenir une position en avant, une position en arrière ou centrée. Voir illustrations correspondantes. Centrale Arrière Avant... -
Page 25: Recalibrage Et Paramétrage Du Contrôleur Msc-Mxpro Bl
Recalibrage et paramétrage du contrôleur 6. A près la validation de la position frein, la DEL jaune du contrôleur va clignoter. Relâchez la gâchette. la DEL va se mettre à flasher rapidement et 4 tonalités MsC-MXPRo BL vont retentir (indiquant que le neutre a été validé). Après la validation du neutre, le contrôleur va sonner deux fois et toutes les DELs vont flasher, cela indique que le contrôleur est armé et qu'il va répondre aux ordres donnés par l'émetteur. Une fois le calibrage effectué, quand vous connecterez la batterie puis placez l'interrupteur sur ON, le contrôleur va s'initialiser en émettant une tonalité et un clignotement de DEL. La tonalité d'armement va retentir une à deux secondes plus tard. Si le contrôleur est programmé en mode LiPo auto, il bipera du nombre d'éléments de la batterie LiPo. Une fois que la tonalité d'armement a retenti, le contrôleur est ACTIF et répondra au commandes de l'émetteur. Si vous rencontrez des difficultés à calibrer votre contrôleur, veuillez contacter votre revendeur ou le service technique Horizon Hobby. Avant de rouler effectuez une vérification, pressez légèrement la gâchette, si la DEL verte s'allume et que Préparation de l'émetteur les roues ne tournent pas dans le bon sens vous devez inverser le branchement de deux câbles entre le moteur et le contrôleur. Si le DEL verte s'allume et les 1. Vérifiez que les batteries de votre émetteur sont bien chargées. roues tournent dans le bon sens, le branchement est correct. 2. Mettez l'émetteur sous tension. 3. Mettez les valeurs des courses avant/arrière au maximum. Si votre émetteur Programmation manuelle possède une gâchette réglable, placez la en position 70/30. Suivez les étapes suivantes pour paramétrer le contrôleur sans ordinateur. Nous 4. Vérifiez que la voie des gaz est en position NORMAL. vous conseillons de retirer le pignon du moteur avant d'effectuer le calibrage ou 5. Mettez le trim et le sub trim des gaz au neutre. la programmation du contrôleur. -
Page 26: Optimisation, Réglage Et Entretien De Votre Véhicule
Optimisation, réglage et entretien de votre véhicule Maintenance/Réparation • Examinez régulièrement votre véhicule. Radio/Contrôleur de vitesse et moteur • Utilisez une brosse pour enlever saletés et poussières. Si des problèmes autres que ceux répertoriés dans la section de dépannage • Vérifiez si les bras de suspension et les autres parties moulées sont en bon surviennent, veuillez appeler le service chargé de la maintenance des état. composants électroniques. Celui-ci pourra se pencher sur le problème que vous • Recollez les pneus aux roues, si nécessaire. rencontrez et vous donner des instructions pour le résoudre. • Utilisez des outils appropriés pour effectuer les serrages. Maintenance • Vérifiez que les liaisons de cambrure et de direction ne sont pas faussées. Si des questions autres que celles répertoriées dans les sections de dépannage Remplacez les liaisons endommagées. et de maintenance surviennent, veuillez appeler le service d’assistance produit • Modifiez les réglages de pincement et de cambrure si nécessaire. Horizon. • Retirez les amortisseurs et vérifiez s’ils sont abîmés. Remontez-les s’ils perdent de l’huile. Nettoyage • Inspectez l’électronique et les batteries pour vérifier si des câblages sont à nu. -
Page 27: Garantie Et Réparations
Garantie et réparations Indications relatives à la sécurité Ceci est un produit de loisirs perfectionné et non un jouet. Il doit être utilisé avec durée de la garantie précaution et bon sens et nécessite quelques aptitudes mécaniques ainsi que Garantie exclusive - Horizon Hobby, Inc. (Horizon) garantit que le Produit acheté mentales. L’incapacité à utiliser le produit de manière sûre et raisonnable peut (le « Produit ») sera exempt de défauts matériels et de fabrication à sa date provoquer des blessures et des dégâts matériels conséquents. Ce produit n’est d’achat par l’Acheteur. La durée de garantie correspond aux dispositions légales pas destiné à être utilisé par des enfants sans la surveillance par un tuteur. La du pays dans lequel le produit a été acquis. La durée notice d’utilisation contient des indications relatives à la sécurité ainsi que des de garantie est de 6 mois et la durée d’obligation de garantie de 18 indications concernant la maintenance et le fonctionnement du produit. Il est mois à l’expiration de la période de garantie. absolument indispensable de lire et de comprendre ces indications avant la première mise en service. C’est uniquement ainsi qu’il sera possible d’éviter une Limitations de la garantie manipulation erronée et des accidents entraînant des blessures et des dégâts. (a) La garantie est donnée à l’acheteur initial (« Acheteur ») et n’est pas Questions, assistance et réparations transférable. Le recours de l’acheteur consiste en la réparation ou en l‘échange dans le cadre de cette garantie. La garantie s’applique uniquement aux produits Votre revendeur spécialisé local et le point de vente ne peuvent effectuer une achetés chez un revendeur Horizon agréé. Les ventes faites à des tiers ne estimation d’éligibilité à l’application de la garantie sans avoir consulté Horizon. -
Page 28: Coordonnées De Garantie Et Réparations
Coordonnées de Garantie et réparations Pays d'achat Horizon Hobby adress Numéro de téléphone/Courriel France Horizon Hobby SAS 14 Rue Gustave Eiffel +33 (0) 1 60 47 44 70 Zone d’Activité du Réveil Matin infofrance@horizonhobby.com 91230 Montgeron Informations de contact pour les pièces Pays d'achat Horizon Hobby address Numéro de téléphone/Courriel France Horizon Hobby SAS 14 Rue Gustave Eiffel +33 (0) 1 60 47 44 70 Zone d’Activité du Réveil Matin infofrance@horizonhobby.com 91230 Montgeron informations de conformité... -
Page 29: Registra Il Tuo Prodotto Losi Online
aVViso Tutte le istruzioni, le garanzie e gli altri documenti pertinenti sono soggetti a cambiamenti a totale discrezione di Horizon Hobby, Inc. Per una documentazione aggiornata sul prodotto, visitare il sito www.horizonhobby.com e fare clic sulla sezione Support per questo prodotto. significato dei termini particolari In tutta la documentazione relativa al prodotto sono utilizzati i seguenti termini per indicare vari livelli di potenziale pericolo durante il funzionamento: aVViso: Procedure che, se non sono seguite correttamente, possono creare danni materiali E nessuna o scarsa possibilità di lesioni. aTTENzioNE: Procedure che, se non sono seguite correttamente, possono creare danni materiali E possibili gravi lesioni. aVVERTENza: Procedure che, se non debitamente seguite, espongono alla possibilità di danni alla proprietà fisica o possono omportare un’elevata possibilità di provocare ferite superficiali. aVVERTENza: Leggere TUTTO il manuale di istruzioni e prendere familiarità con le caratteristiche del prodotto, prima di farlo funzionare. Un utilizzo scorretto del prodotto può causare danni al prodotto stesso, alle persone o alle cose, provocando gravi lesioni. Questo è un prodotto di hobbistica sofisticato e NON un giocattolo. È necessario farlo funzionare con cautela e responsabilità e avere conoscenze basilari di meccanica. Se questo prodotto non è utilizzato in maniera sicura e responsabile potrebbero verificarsi lesioni o danni al prodotto stesso o ad altre proprietà. Non è un prodotto adatto a essere utilizzato dai bambini senza la diretta supervisione di un adulto. Non tentare di smontare il prodotto, di utilizzare componenti incompatibili o di potenziarlo in alcun modo senza previa approvazione di Horizon Hobby, Inc. Questo manuale contiene le istruzioni per un funzionamento e una manutenzione sicuri. È fondamentale leggere e seguire tutte le istruzioni e le avvertenze del manuale prima di montare, configurare o far funzionare il Prodotto, al fine di utilizzarlo correttamente e di evitare danni o lesioni gravi. ulteriori precauzioni per la sicurezza e avvertenze almeno 14 anni. Non è un giocattolo • Mantenere sempre un perimetro di sicurezza intorno al modello per evitare collisioni o ferite. Questo modello funziona con comandi radio soggetti all’interferenza di altri dispositivi non controllabili dall’utente. Qualsiasi interferenza può provocare una momentanea perdita di controllo. • Utilizzare sempre l’aeromodello in spazi aperti liberi da veicoli, traffico o persone. • Seguire sempre scrupolosamente le istruzioni e le avvertenze relative all’aeromodello e a tutti gli accessori (caricabatteria, pacchi batterie ricaricabili ecc.). -
Page 30: Inizio Rapido
inizio rapido Si prega di leggere attentamente il manuale per avere la piena conoscenza di questo veicolo riguardo alle regolazioni, alle impostazioni e alla manutenzione. 1. Leggere le precauzioni per la sicurezza che si trovano in questa pagina. 2. Caricare la batteria scelta (NON compresa). Far riferimento alle istruzioni del costruttore riguardo alla carica. 3. Montare le batterie AA nel trasmettitore. Usare solo batterie alcaline o ricaricabili. 4. Montare una batteria completamente carica. 5. Accendere prima il trasmettitore e poi il modello e spegnere prima il modello e poi il trasmettitore. 6. Verificare lo sterzo, controllando che il servo funzioni correttamente. 7. Guidare il TEN-SCTE RTR. 8. Eseguire la necessaria manutenzione del TEN-SCTE RTR. Trasmettitore 1. Volante: controlla la direzione (sinistra/destra) del modellino. 2. Trigger del throttle: controlla la velocità e il senso di marcia (avanti/indietro) del modellino. 3. Antenna: trasmette il segnale al modellino. BIND 2P 3P LIN 4. Interruttore On/Off: accende/spegne il trasmettitore. ST-L ST-R TH-F TH-B AUX-H AUX-L 5. Spie luminose: la spia verde (destra) indica che la carica della batteria è sufficiente. -
Page 31: Precauzioni Per La Guida
Precauzioni per la guida aTTENzioNE: Non scaricare la batteria Li-Po al di sotto dei 3 V per cella. La scarica della batteria a una tensione inferiore alla minima • Evitare di far passare il veicolo su acqua stagnante, erba umida, fango o neve. approvata può causare danni alla batteria e, di conseguenza, una Le parti elettroniche del veicolo non sono a tenuta stagna. riduzione delle prestazioni, nonché il rischio di incendio durante la • Non perdere mai di vista il veicolo. carica della batteria. • Assicurarsi che le parti meccaniche delle ruote non siano allentate. • Non applicare il throttle in marcia avanti o indietro se il veicolo è bloccato. Ciò • Assicurarsi che le parti dell’assieme dello sterzo non siano allentate. L’utilizzo può causare danni al motore e all’ESC. del veicolo fuori strada può causare a lungo andare l’allentamento degli • Lasciar raffreddare le parti elettroniche fino a temperatura ambiente dopo elementi di fissaggio. l’utilizzo del veicolo prima di installare un nuovo pacco batteria. • Non utilizzare il veicolo nell’erba alta. Ciò può causare danni al veicolo o alle parti elettroniche. • Se si nota un calo di potenza, smettere di utilizzare il veicolo. L’uso del veicolo con la batteria scarica può causare lo spegnimento del ricevitore e la perdita del controllo del veicolo. Test di prova Eseguire un test di prova con le ruote del veicolo staccate da terra. Se le ruote girano all’accensione del veicolo, utilizzare la manopola “TH. Trim” posta in basso a sinistra del volante per regolare il trim del throttle fino all’arresto delle ruote. Per far muovere le ruote in avanti, tirare il trigger. Per la marcia indietro, attendere l’arresto del modellino, quindi spingere il trigger. Durante la marcia avanti, le ruote devono tracciare una linea retta senza alcun intervento... - Page 32 Ammortizzatore posteriore Barra antitorsione Link camber posteriore Braccio sospensione posteriore ESC con ventola Motore Differenziale centrale Supporto batteria Posizione ricevitore Servo sterzo Tirante Braccio sospensione anteriore Ammortizzatore anteriore Link camber anteriore Losi TEN-sCTE RTR • MaNuaLE di isTRuzioNi...
-
Page 33: Batterie E Loro Carica
Batterie e loro carica • Non caricare batterie con danni evidenti. • Se il cavo della batteria è spelato si raccomanda di non usarla o caricarla Il TEN-SCTE RTR usa batterie ricaricabili come le NiMH o le LiPo. Queste batterie finché non si è messo un opportuno isolante e si è sostituito il cavo. hanno bisogno di un particolare trattamento per conservare prestazioni e durata. Per caricare le batterie NiMH o LiPo è necessario avere un caricabatterie adatto • Leggere tutte le istruzioni fornite dal costruttore delle batterie. che si possa alimentare con il 220 V della rete e/o con il 12 V di un alimentatore • Non permettere ai bambini di caricare le batterie. o batteria. Seguire sempre le istruzioni e le raccomandazioni del costruttore. • Verificare sempre la polarità delle connessioni. • Non abbandonare le batterie durante la carica. • Non caricare la batteria mentre è montata sul modello. installare la batteria Contenitore con tre posizioni Il TEN-SCTE RTR ha una sede per la batteria con tre posizioni variabili per evitare la necessità dei blocchi di spugna. Si possono quindi spostare questi fermi per posizionare la batteria indietro, in mezzo o in avanti. Si prega di osservare le figure che seguono: Middle Back Forward Losi TEN-sCTE RTR • MaNuaLE di isTRuzioNi... -
Page 34: Calibrazione E Regolazione Del Msc-Mxpro Bl Esc
Calibrazione e regolazione del MsC-MXPRo BL EsC 5. Muovere il grilletto del trasmettitore in posizione di massima frenata e tenerlo in questa posizione. Dopo pochi secondi il LED rosso sull'ESC lampeggia e vengono emessi 4 "suoni" in rapida sequenza (conferma la corsa massima del freno). 6. Dopo aver accettato la corsa massima del freno, il LED giallo sull'ESC lampeggia. Rilasciando il grilletto nella posizione neutra, l'ESC emette 4 suoni e il LED giallo lampeggia rapidamente per accettare la posizione neutra. Dopo aver accettato la posizione neutra, l'ESC suona 2 volte e tutti i LED lampeggiano. Questo indica che adesso l'ESC è armato e quindi il motore dell'auto risponderà ai comandi del trasmettitore. Da questo momento, tutte le volte che si connette la batteria e si mette l'interruttore su ON, l'ESC emetterà i toni e il lampeggio di inizializzazione. Dopo uno o due secondi emetterà il tono di armamento. Se l'ESC è impostato su Auto-LiPo, emetterà tanti beep quante sono le celle del pacco LiPo, tra i toni di Preparare il trasmettitore inizializzazione e quelli di armamento. Dopo i toni di armamento l'ESC è attivo e 1. Accertarsi che le batterie del trasmettitore siano completamente cariche. risponderà ai comandi del motore. 2. Accendere il trasmettitore Se avete problemi a programmare il vostro ESC, potete rivolgervi al servizio 3. Regolare le corse al massimo sia in avanti che indietro. Se il trasmettitore ha la assistenza Horizon Hobby. Dopo aver fatto la calibrazione e l'armamento bisogna possibilità di variare il centro, si prega di posizionarlo su 70/30. fare ancora un controllo: muovendo lentamente il comando motore verso il massimo, controllare il verso di rotazione del motore e il colore dei LED sull'ESC. 4. Accertarsi che il Reverse del canale del motore sia su NORMAL. Se il motore gira nel verso giusto e il LED verde lampeggia, si può fare una 5. Centrare il trim del motore verificando che anche il sub-trim sia a zero. prova di funzionamento prima di entrare nelle impostazioni dell'ESC. Se invece Collegare la batteria al regolatore (ESC si accende il LED verde sotto motore, ma le ruote girano nel verso sbagliato, 1. Controllare che l'interruttore del regolatore sia su OFF (spento). -
Page 35: Messa A Punto, Regolazione E Manutenzione Del Veicolo
Messa a punto, regolazione e manutenzione assistenza e riparazione del veicolo Controllo radio, controllo velocità e motore • Controllare regolarmente le condizioni del veicolo. In caso di problemi non trattati nella sezione relativa alla risoluzione dei problemi, • Rimuovere lo sporco e la polvere con uno spazzolino. contattare il reparto di assistenza elettronica di competenza, che potrà analizzare il problema con maggiore attenzione e fornire istruzioni per la risoluzione. • Verificare l’assenza di danni ai bracci di sospensione e ad altri pezzi saldati. • Incollare nuovamente gli pneumatici alle ruote, se necessario. Manutenzione • Stringere gli elementi di fissaggio con gli utensili opportuni. In caso di domande non trattate nelle sezioni relative alla risoluzione dei problemi • Assicurarsi che i leveraggi dello sterzo e del camber non siano piegati. e alla manutenzione, contattare il reparto di assistenza ai prodotti Horizon di Sostituire le eventuali parti piegate. competenza. • Regolare campanatura e convergenza, se necessario. Pulizia • Rimuovere gli ammortizzatori e verificare l’assenza di danni. Ricostruire gli La presenza di sporco sulle parti in movimento delle sospensioni può comportare ammortizzatori in caso di perdita d’olio. -
Page 36: Durata Della Garanzia
durata della Garanzia Manutenzione e riparazione Se il prodotto deve essere ispezionato o riparato, si prega di rivolgersi ad un Periodo di garanzia rivenditore specializzato o direttamente ad Horizon. il prodotto deve essere Garanzia esclusiva - Horizon Hobby, Inc., (Horizon) garantisce che i prodotti Imballato con cura. Bisogna far notare che i box originali solitamente non sono acquistati (il “Prodotto”) sono privi di difetti relativi ai materiali e di eventuali errori adatti per effettuare una spedizione senza subire alcun danno. Bisogna effettuare di montaggio. Il periodo di garanzia è conforme alle disposizioni legali del paese una spedizione via corriere che fornisce una tracciabilità e un’assicurazione, in nel quale il prodotto è stato acquistato. Tale periodo di garanzia ammonta a 6 quanto Horizon non si assume alcuna responsabilità in relazione alla spedizione mesi e si estende ad altri 18 mesi dopo tale termine. del prodotto. Inserire il prodotto in una busta assieme ad una descrizione limiti della garanzia dettagliata degli errori e ad una lista di tutti i singoli componenti spediti. Inoltre abbiasmo bisogno di un indirizzo completo, di un numnero di telefono per (a) La garanzia è limitata all’acquirente originale (Acquirente) e non è cedibile a chiedere ulteriori domande e di un indirizzo e-mail. terzi. L’acquirente ha il diritto a far riparare o a far sostituire la merce durante il periodo di questa garanzia. La garanzia copre solo quei prodotti acquistati presso Garanzia a riparazione un rivenditore autorizzato Horizon. Altre transazioni di terze parti non sono coperte Le richieste in garanzia verranno elaborate solo se è presente una prova da questa garanzia. La prova di acquisto è necessaria per far valere il diritto di d’acquisto in originale proveniente da un rivenditore specializzato autorizzato, garanzia. Inoltre, Horizon si riserva il diritto di cambiare o modificare i termini di nella quale è ben visibile la data di acquisto. Se la garanzia viene confermata, questa garanzia senza alcun preavviso e di escludere tutte le altre garanzie già allora il prodotto verrà riparato o sostituito. Questa decisione spetta esistenti. -
Page 37: Garanzia E Revisiona Informazioni Per I Contatti
Garanzia e Revisiona informazioni per i contatti stato in cui il prodotto è stato acquistato Horizon Hobby indirizzo Telefono/indirizzo e-mail Germania Horizon Technischer Service Christian-Junge-Straße 1 +04121 2655 100 25337 Elmshorn, Germany service@horizonhobby.de informazioni di servizio clienti stato in cui il prodotto è stato acquistato Horizon Hobby indirizzo Telefono/indirizzo e-mail Germania... -
Page 38: Parts Listings/Teileliste/Liste Des Pièces/Elenco Componenti
Parts Listings/Teileliste/Liste des pièces/Elenco componenti Part # English deutsch Français italiano LOSB2021 Front Suspension Arm Set Querlenkerset Vorne Set de triangles avant Set braccetti sospensioni anteriori LOSB2022 Rear Suspension Mount Cover Hintere Querlenkerabdeckung Protection de renfort de cellule arrière Coperchio sospensione posteriore LOSB2023 Rear Suspension Arm Set Querlenkerset hinten Set de triangles arrière Set braccetti sospensioni posteriori LOSB2100 Front Spindles and Carriers Achsschenkel und Achsschenkelträger Fusées et étriers avant Supporti semiassi anteriori LOSB2103 Rear Hubs and Spacers Radträger hinten Fusées arrières avec entretoises Mozzi e distanziali posteriori LOSB2123 Steering Bellcrank Set Servosaver Set Set de renvois de direction Set rinvii sterzo LOSB2124 Steering Posts/Tube and Hardware... - Page 39 Part # English deutsch Français italiano LOSB2826 Rear Shock Body Set Dämpfergehäuse Set hinten Set de corps d'amortisseurs arrière Set corpo ammortizzatore posteriore LOSB2845 Front and Rear Shock Shaft Set Stoßdämpferkolben Set v/h Set de tiges d'amortisseurs av/arr Set alberino ammortizzatore anteriore e posteriore LOSB2904 Front and Rear Shock Plastics and Ball Kugelpfannen u. Kugeln (4) Set de chapes et bouchons Set plastica e sfere ammortizzatori Set (4) d'amortisseurs av/arr (4) anteriori e posteriori LOSB2905 Front and Rear Shock Boots (8) Stoßdämpfermanschetten v/h (8) Chaussettes d'amortisseurs av/arr (8) Calza ammortizzatore anteriore e posteriore (8) LOSB2906 Shock Rebuild Set (2) Stoßdämpfer Reparatur Set (2) Set de réparation d'amortisseur (2) Set ammortizzatore ricostruito (2) LOSB2961 Front and Rear Spring Set (4)–Med Stoßdämpferfedern (4) v/h Schwarz Set de ressorts av/arr (4) Set molle anteriore e posteriore (4)- med (Black) (Mittel)
- Page 40 Part # English deutsch Français italiano LOSB4210 Steering/Throttle/Brake Link Set Gas/Bremsgestänge Set Set de tringleries Set collegamenti sterzo/motore/freno LOSB7018 Wheel Set (2) Radset (2) Set de jantes (2) Set ruote (2) LOSB7019 B eadlock Ring with Screws, Chrome Beadlock Ring mit Schrauben, Chrome Anneau Beadlock avec vis, chromé Anelli blocca tallone con viti, cromati LOSB8028 TEN-SCTE Body, Clear Ten Scte Body Klar Carrosserie transparente TEN-SCTE Carrozzeria TEN-SCTE, chiara LOSB8044 TEN-SCTE Painted Body: #33 Stphensen TEN-SCTE lackierter Body #33 Carrosserie TEN-SCTE décoration Carrozzeria TEN-SCTE dipinta, schema Scheme Stephenson Stephenson n°33 #33 Stphensen LOSA4006 Antenna Kit Antennen Kit Kit d'antenne Kit antenna LOSA6204 4-40 x 1/2 Cap Screws...
-
Page 41: Optional Parts/Optionale Bauteile/Piéces Optionnelles/Pezzi Opzionali
Part # English deutsch Français italiano LOSA6299 5-40 x 1/8 Setscrews 5-40 x 1/8 Madenschrauben Vis Imbus 5-40 x 1/8 Grani 5-40 x 1/8 LOSA6302 5-40 Steel Lock Nuts 5-40 Stopmuttern Stahl Ecrous freinés en inox 5-40 Dado autobloccante 5-40 LOSA6350 #4 and 1/8-Inch Hardened Washer (24) #4 und 1/8 inch gehärtete Unterlegs- Rondelles n°4 et 1/8 (24) Rondella indurita #4 e 1/8-inch (24) cheiben (24) LOSA6907 5 x 8 x 2.5 Ball Bearing (2) 5 x 8 x 2,5 Kugellager (2) Roulement 5x8x2.5 (2) Cuscinetto a sfere 5x8x2,5 (2) LOSA6947 5 x 11 Sealed Ball Bearings (2) 5 x 11 Kugellager gekapselt (2) Roulement étanche 5x11 (2) Cuscinetto a sfere sigillato 5x11 (2) LOSA6954 5 x 10 x 4 Sealed Ball Bearings (2) 5 x 10 x 4 Kugellager gekapselt (2) Roulement étanche 5 x 10 x 4 (2) Cuscinetto a sfere sigillato 5x10x4 (2) LOSA6956 12 x 18 x 4 Sealed Ball Bearings (2) 12 x 18 x 4 Kugellager gekapselt (2) Roulement étanche 12 x 18 x 4 (2) Cuscinetto a sfere sigillato 12x18x4 (2) LOSA6957... - Page 42 Part # English deutsch Français taliano LOSA99202 Losi-Lok Threadlock, Blue Losi Schraubensicherungslack Blau Frein filet Losi, bleu Frenafiletti Losi-Lok, blu LOSA99203 High-Pressure Black Grease Hochleistungsfett Schwarz Graisse haute pression noire Grasso alta pressione, nero LOSA99217 Nitrotec Cleaner Spray Nitrotec Reiniger Spray Spray nettoyant Nitrotec Spray pulitore Nitrotec LOSB2167 Front Shock Tower, Machined Aluminum Aluminium Stoßdämpferbrücke vorne Support d'amortisseurs avant, Aluminium Supporto ammortizz. anter., fresato in usiné alluminio LOSB2171 Rear Shock Tower, Machined Aluminum Aluminium Stoßdämpferbrücke hinten Support d'amortisseurs arrière, Alu- Supporto ammortizz. poster., fresato in minium usiné alluminio LOSB2172 Rear Shock Tower, Carbon, 4mm Carbon Stoßdämpferbrücke hinten 4mm Support d'amortisseurs arrière en Supporto ammortizz. poster., carbonio carbone, ep 4mm 4 mm LOSB2173...
-
Page 43: Rear Exploded View
LOsI TEN-sCTE RTR... -
Page 44: Front Exploded View
LOsI TEN-sCTE RTR... -
Page 45: Chassis Exploded View
LOsI TEN-sCTE RTR... - Page 46 LOsI TEN-sCTE RTR...
- Page 47 LOsI TEN-sCTE RTR...
-
Page 48: Setup Sheet
setup sheet TEN-SCTE 10/06/10 1 degrees OUT 29.5mm 0 degree stock/20 degrees 2.0mm 4 holes @ 1.07mm/40 wt Gold/Hard Inside Center Outside 85mm Center to Center Long Position 1 Position 1/Outside Grease For increased stability, use 10000 weight oil in the front and center differentials. - Page 52 www.losi.com ©2011 Horizon Hobby inc. Losi, dsM , EC3, Eclipse, Nitrotec, Losi Lok, Xcelorin, 8iGHT and the Horizon Hobby logo are trademarks or registered trademarks of Horizon Hobby, inc. The spektrum trademark is used with permission of Bachmann industries, inc. Futaba is a registered trademark of Futaba denshi Kogyo Kabushiki Kaisha Corporation of Japan.
Need help?
Do you have a question about the Ten SCTE and is the answer not in the manual?
Questions and answers