Table of Contents
Advertisement
Advertisement
Table of Contents

Related Manuals for Kenmore 911.92391


Summary of Contents for Kenmore 911.92391
- Page 1 OWHER'S IVIAHUAL CAUTEON: Before using this range, read this manua! foHlow Safety Operating _nstructions. Sears, Roebuck • Safety . Operation . Care Rules ° Problem Co., Hoffm_n Estates, 229C4020Pt instructions Cleaning Solving IL 60179 U.S.A. (SR- 10323)
- Page 2 Oven Shut-off ... To Set the Clock ... To Set the Timer ... To Reset The Timer ... To Cancel The Timer ... Oven Cooking Tips ... 11-t4 Strong Smell or Odor ... 11 Aluminum Foil ... Oven Vent ...
- Page 3 Phillips head screwdriver ° 1 3/8" open end or adjustable wrench 1. Remove the bracket from the prepack located inside the oven 2. Decide whether the bracket will be installed on the right or left side of range location 3.
- Page 4 • NEVER LEAVE jars or cans of fat or drippings in your oven, • ALWAYS KEEP the oven and surface unit areas free from things that will burn. Food, wooden utensils, and grease buildup could catch fire.
- Page 5 Leftover grease in the broiler pan could catch fire the next time you use your oven ° ALWAYS USE care when opening the oven door Let hot air and steam escape before moving foods °...
- Page 6 NEVER TRY to clean utensils, cookware, removable parts, or broiler pan and grid in the self-clean cycle • DO NOT USE oven cleaners - No commercial oven cleaner, or protective coating of any kind, should be used in or around any part of the oven, •...
-
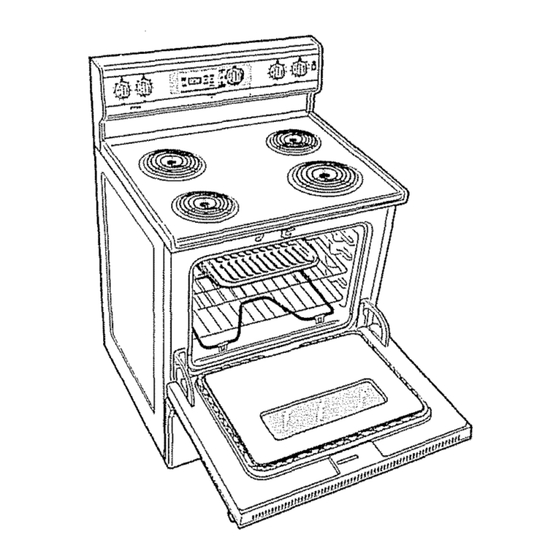
Page 7: Features Of Your Range
Cooktop Surface, Door Handle, Oven Area, Control Panel Area and Door Trim Area OPERATION Cooktop Control tape, use household oil. With a soft cloth rub into the area and allow to... - Page 8 OPERATION CooktopCooking The sign near each control knob shows you which element is turned on by that knob LEFT LEFT RIGHT FRONT REAR REAR Used for quick starts, such as bringing water to a boil Used for slow boiling and saut6ing.
- Page 9 Note the number after the "F" Turn the oven control knob to the OFF position, Allow the oven to cool for about 1 hour and retry the oven operation repeats call for service. Advise the...
- Page 10 OPERATION Clock and Timer The CLOCK and TIMER are set by using the touch pads, The TIMER not control any oven operation, 1. Press the CLOCK pad twice to make the display flash. 2. Press the HOUR/MINUTE UP or DOWN pads to set...
-
Page 11: Aluminum Foil
In the back of the oven you will notice a small tube. This is a heat sensor that maintains the temperature oven Never move or bend this tube... - Page 12 1 to I 1/2" of air space around it. Place pans so one is not directly above the other The oven racks are designed stop locks, a convenience a safety precaution. a bump to prevent the racks from tilt-...
-
Page 13: Oven Control
See Do It Yourself Tem- perature Adjustment in the back of this manual to make the adjustment you feel your oven is too hot or too cool for your cooking preference, Your oven control has a selector knob... - Page 14 To recall the temperature display press the _NUTE down arrow pad 2. The "OVEN ON" indicator wilt glow, 3. When the oven has reached selected temperature, a series of short tones will sound, and the "PREHEATED" and "OVEH ON" indicator lights will glow, 4,.
-
Page 15: Broiler Pan And Grid
Cook side 1 at least 2 minutes longer than side 2 If your oven is connected to 208 volts, you may want to use a higher rack position and/or broil foods longer. - Page 16 This allows for proper air circulation Door Panel Gasket .;t.. _ _"-4 oOr Liner It is normal for your oven door to give the appearance of not having a good seal against the range This is due to the gasket The location of the gasket...
- Page 17 8. When the temperature has cooled, the door latch handle will easily slide to the left Turn the oven control knob to the off position. You wilt need to wait for the oven temperature lock temperature before attempting The indicator light will not blink if the...
-
Page 18: Walls Of The Oven
CLEA_¢ERS IN OR AROUHD PART THE OVEN, When cleaning, be sure not to bend or displace the temperature located on the back wall of the oven. CLEANING MATERIALS • Dishwashing • Warm water ,_Paper towel • Ammonia • Abrasive cleaner °... -
Page 19: Control Knobs
3. Align the molded rib to the clear groove in the knob stem. Push the knob back as far as it wilt go. P" I I' I'PlI_ I II the oven CAUTION: switch position. touch a hot light hands... - Page 20 CARE ANDCLEANING RemovableParts CLEANING MATERIALS • Dishwashing detergent • Damp cloth • Warm water REMOVE 1, Pull the drawer out until it stops, 2. Lift the front of the drawer until the stop guide of the drawer clears the stop guide on the base rail Stop Guide 3.
- Page 21 CARE ANDCLEANING RemovableParts 1. Grasp the edge of the cooktop lift up 2. Holding the cooktop with one hand, lift the support rod(s) up and rest the edge of the cooktop 3. When cleaning is finished, the support rod(s) and the cooktop.
- Page 22 _frame. TO REPLACE 1. Make sure the hinge arms are in...
-
Page 23: Oven Racks
Improper foil d. Improper temperature setting for utensil used e. Recipe not followed Improper control calibration. g. Range and oven rack not level, i,iii1,11111111111111,11 Oven Oven control calibration temperature seems inaccurate. i,,11,11 ii Oven light a. Light switch is in... -
Page 24: Oven Door
Allow the oven to coo! until the temperature the lock temperature will slides easily I'JlIIIHI'IM,lU a, Allow the oven to clean its full cycle b. Heavy spillovers should be cleaned before the cycle is set. SOLUTION ,, iiiii time. - Page 25 If you think your new oven is too hot (burning foods) or not hot enough (foods are undercooked) you can...
- Page 26 NOTES...
-
Page 27: Service
• rFUU. ONEYEARWARRANTY Off THEFUNCTIONING OF ALLPARTSEXCEPTGLASS PARTS If,within oneyearfromthedateof installation,anypart,otherthan a glasspart,failstofunction properlydueto a defectin materialor workmanship,Sears will repairor replace it, freeof charger FULL30-DAY WARRANTY ONGLASSPARTSAND FINISH OF PORCELAIN EPJ_,MEL, PAINTEDOR BRIGHTMETALFIHISHEDPARTS If, within 30 daysfromthedateof JnstallaUon, anyglasspartor thefinishon anyporcelainenamel, ]aintedor brightmetalpart is defective in materialor workmanship,Sears wUi replace thepart,free of charge,, FULL90-DAY WARRANTY OHMECHANICAL ADJUSTMENTS... - Page 28 For the repair or replacement parts you need delivered directly to your home Call 7 arn - 7 pro, 7 days a week t -800-366-PART (1-800-366-7278) For in-homemajor brandrepair service Call 24 hours a day, 7 days a week t =800=4-REPAIR (1-800-473-7247) For the location of a Searsparts and Repair Centerin your area...
Need help?
Do you have a question about the 911.92391 and is the answer not in the manual?
Questions and answers