Table of Contents
Advertisement
Advertisement
Table of Contents

Subscribe to Our Youtube Channel
Related Manuals for Russell Hobbs RHFSGEC90SS


Summary of Contents for Russell Hobbs RHFSGEC90SS
- Page 2 Dear Customer: Thank you for choosing our product. This appliance is easy to use; please read this manual carefully before installing and using the appliance. The correct indications in the manual are for the best installation, use and care of the appliance.
-
Page 3: For Your Safety
FOR YOUR SAFETY This appliance is adjusted to operate on LPG and NG as per the rating label on the unit . IF YOU SMELL GAS: Turn off gas supply at bottle Extinguish all naked flames; Do not operate any electrical appliances Ventilate the area Check for leaks as detailed in this manual If odour persists, contact your dealer or gas supplier immediately... - Page 4 Index pag.3-4 CAUTIONS Instructions for installation: pag. 5 Dimensions and installation features pag. 6 Electrical connection Ventilation and gas connection pag. 6 Adaptation to different types of gas pag. 7 Setting the minimum flame pag. 7 Burner and injector characteristic table pag.
- Page 5 CAUTIONS: This appliance shall be installed in accordance with the regulations in force and only used in a well ventilated space. Read the instructions before installing or using this appliance. Very important: keep this instruction booklet with the appliance for handy references This appliance is designed for use in private home.
- Page 6 knowledge, unless they have been given supervision or instruction concerning use of the appliance by a person responsible for their safety.Children should be supervised to ensure that they do not play with the appliance. If the supply cord is damaged, it must be replaced by the manufacturer, its service agent or similarly qualified persons in order to avoid a hazard.
-
Page 7: Instructions For Installation
Instructions for Installation DIMENSIONS AND INSTALLATION FEATURES Warning: a) Prior to installation, ensure that the local distribution conditions (nature of the gas and gas pressure) and the adjustment of the appliance are compatible b)The adjustment conditions for this appliance are stated on data plate c) This appliance is not connected to a combustion products evacuation device. -
Page 8: Electrical Connection
ELECTRICAL CONNECTION The appliance is fitted with an approved 15 Amp flexible cord and plug which must be connected to a correctly earthed socket outlet. The manufacturer is not liable for any direct or indirect damage caused by faulty installation or connection. It is therefore necessary that all installation and connection operations are carried out by qualified personnel complying with the local and general regulations in force. - Page 9 between 1 - 1.2m long. The hose should not be subjected to abrasion, kinking or permanent deformation and should be able to be inspected along its entire length. Unions compatible with the hose fittings must be used and connections tested for gas leaks. The flexible tube shall be fitted in such a way that it cannot come into contact with a moveable part of the housing unit (e.g.
- Page 10 LPG TO NG:Use a thin blade screwdriver to turn the by-pass screw located above left of the gas valve,shaft as shown right. Turn gently the by-pass screw clockwise to the end completely then turn it anti-clockwise 1 turn for the Triple ring,7/8 turn for the Fish,3/4 turn for the Rapid,1/2 turn for the Semi- Rapid and 3/8 turn for the Auxiliary .
- Page 11 Burner and injector characteristic table Burner and injector characteristic table Consumption(*) By pass I3B/P(30) I3+(28-30/37) I3B/P(50) Burner Input Input Main Injector Main Injector Input Input Main Injector Main Injector kw(g/h) kw(g/h) kw(g/h) Rapid 0.44 3.0(218) 0.85 3.0(218) 0.85 3.0(214) 0.85 0.75(S) Semi-rapid 0.34...
-
Page 12: Instructions For Use
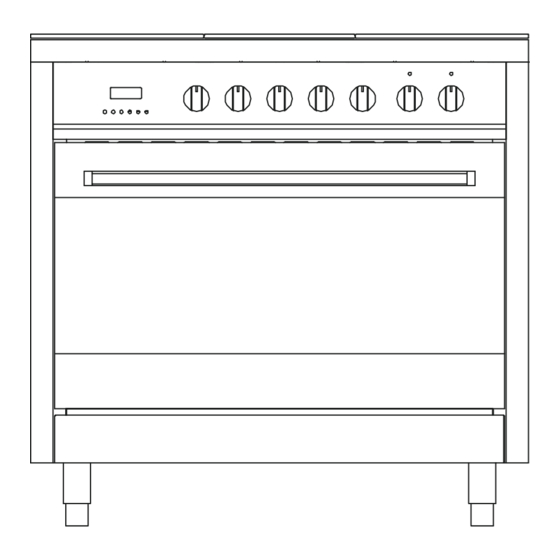
Instructions for Use (gas cooking top side) Description of the main parts of the appliance Waring: 1 This appliance shall be installed in accordance with the regulations in force and only used in a well (e.g. DO not use the appliance in the carbarn,basement and the room without windows, etc) ventilated space Read the instructors before installing or using this appliance. -
Page 13: Description Of Symbols
DESCRIPTION OF SYMBOLS FRONT LEFT BURNER FRONT CENTRAL BURNER CENTRAL BURNER ℃ REAR LEFT BURNER REAR CENTRAL BURNER ELECTRIC OVEN THERMOSTAT FRONT RIGHT BURNER LEFT CENTRAL BURNER ELECTRIC OVEN FUNTION KNOB REAR RIGHT BURNER RIGHT CENTRAL BURNER IGNITION AND OPERATION OF THE BURNERS In order to ignite a burner, it is necessary to depress the knob while rotating it anti-clockwise, till the index is aligned with the position corresponding to the maximum gas delivery (i.e. - Page 14 Instructions for Use ℃ (oven side) ELECTRIC OVEN THERMOSTAT KNOB Selection of cooking temperature is carried out by turning the knob 60 ℃ clockwise to the required temperature, between and MAX . If the appliance is with an electric oven, the warning light will come on when the oven is heating up.
- Page 15 DEFROSTING THERMOSTAT SELECTOR SWITCH ANY The fan located on the bottom of the oven makes the air circulate at room temperature around the food .This is recommended for the defrosting of all types of food ,but in particular for delicate types of food which do not require heat such as for example:ice cream cakes,cream or custard desserts,fruit cakes.By using the fan,the defrosting time is approximately halved.In the case of meat,fish and bread,it is possible ℃...
-
Page 17: Instructions For Cooking
Instructions for Cooking OVEN COOKINGS For a perfect cooking, it is necessary to pre-heat the oven to the preset cooking temperature. Only very fat meat can be placed into a cold oven. To minimse food splashes into the oven (which can produce smoke sometimes) deep baking dishes are recommended.Use instead highedged containers, preferably terracotta containers, put on the grate at about half the height of the oven. -
Page 18: Desserts(Pastries)
Selector knob Temperature Level Time in minutes(*) Food to be cooked ℃ setting from below First courses Lasagne 210-230 oven-baked pasta 210-230 MEAT 30-40/kg Roast veal 175-200 Traditional 30-40/kg Roast b eef 210-240 cooking Roast pork 30-40/kg 170-200 170-200 45-60 Chicken Duck 170-200... -
Page 19: Shelf Positions
Selector knob Level Food to be cooked Time in minutes setting from below First surface Second surface Pork chops Grilling Fillet of pork 9-11 Fillet of beef 9-11 9-11 Liver Veal Escalopes Half chicken 9-14 9-11 Sausages Meat-balls Fish fillets Toast SHELF POSITIONS FAN OVEN... -
Page 20: Cleaning The Oven Door
Ovens with facility to lower grill for cleaning purposes 1 Warning:ensure that all controls are in the“OFF”position and wait the grill elementcooling. 2 Support the front of the grill element while you remove the knurled screw retaining the element. 3 Lower the front of the element carefully to the rest position. 4 When cleaning the oven make sure do not apply any forces to the grill element 5 When the cleaning is complete, carefully remove any cleaning chemicals and water from the grill element.
Need help?
Do you have a question about the RHFSGEC90SS and is the answer not in the manual?
Questions and answers
Good day I need replacement element for this model stove please
You can find a replacement element for the Russell Hobbs RHFSGEC90SS stove by purchasing the "Russell Hobbs Oven Thermofan Element" listed under SKU: TFERH.
This answer is automatically generated