
Subscribe to Our Youtube Channel
Related Manuals for Russell Hobbs RHBEOCH60SS


Summary of Contents for Russell Hobbs RHBEOCH60SS
- Page 1 Built in Oven and Ceramic Hob MODEL : RHBEOCH60SS INSTRUCTION MANUAL...
-
Page 2: Dear Customer
DEAR CUSTOMER , Congratulations on purchasing the Russell Hobbs oven set as its exceptionally easy to use and extremely efficient. After reading the instruction manual, you will find that operating the oven will be easy. Before being packaged and leaving the manufacturer, the oven was thoroughly checked with regard to safety and functionality. -
Page 3: Table Of Contents
TABLE OF CONTENTS ............Safety instructions ..........Description of the appliance Installation ............... Operation..............15 Cleaning and maintenance ..........20 Using in the oven - practical hints ..........24 Technical specification ............30 ............30 Warranty... -
Page 4: Safety Instructions
SAFETY INSTRUCTIONS NOTE; Ensure there is a grounded socket nearby (behind the unit). A dedicated power circuit is recommended for the unit but not required. Additional electrical appliances on the same circuit may exceed the current (amperage) rating for that circuit. The circuit breaker trips or the fuse fails on a repeated basis, then a dedicated circuit will likely required. - Page 5 SAFETY INSTRUCTIONS ! The panels adjacent to the oven must be made of heat resistant material ! Cabinets with a veneer exterior must be assembled with glues which can withstand temp- eratures of up to 100℃. ! Keep combustible materials such as curtains drapes...
-
Page 6: How To Save Energy
HOW TO SAVE ENERGY Using energy in a respon- sible way not only saves money but also helps the environment. So let's save energy! And this is how you can do it: ! Do not remove the content from pots or pans too often (a watched pot never boils !) Do not open the oven door unnecessarily often. - Page 7 UNPACKING DISPOSAL OF THE APPLIANCE Old appliances should not sim - During transportation protec tive packaging was used to ply be disposed of with normal protect the appliance against household waste but should be delivered to a collection and any damage After unpack- ing please dispose of all...
-
Page 8: Description Of The Appliance
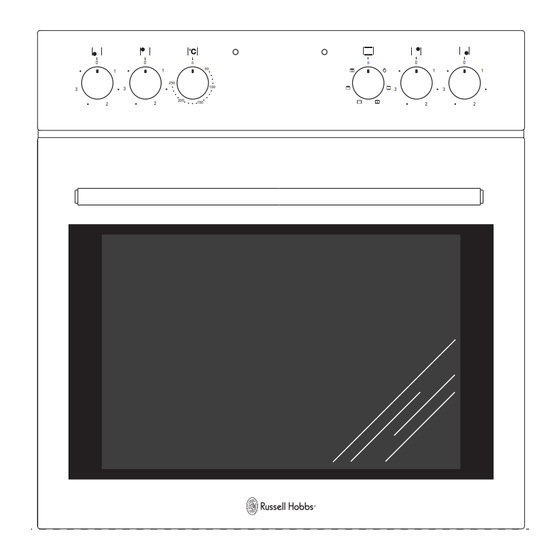
DESCRIPTION OF THE APPLIANCE 1 Temperature control knob 2 Oven function selection knob , , , 3 4 5 6 Heating zone control knobs 7 Temperature regulator signal light red 8 Cooker operation signal light yellow 9 Oven door handle... - Page 9 SPECIFICATIONS OF THE APPLIANCE Baking tray Grill Rack drying rack...
-
Page 10: Installation
INSTALLATION The kitchen area should be dry, aired and equipped with efficient ventilation. When installing the oven, easy access to all control elements should be ensured. This is a Y-type design built-in oven, which means that its back wall and one side wall can be placed next to a high piece of furniture or wall. - Page 11 INSTALLATION Selection of the installation equipment Drill holes on the table surface according to the sizes shown in the drawing. For the purpose of installation and use, a minimum of 50 mm space shall be preserved around the hole. Be sure the thickness of the table surface is at least 30mm. Please select heat-resistant table material to avoid larger deformation caused by the heat radiation from the hob.
- Page 12 INSTALLATION - To install your appliance above a cupboard with drawer When the air outlet is underneath the hob: Ideally, an air outlet grill should be placed between the he ting zone and the cupboard door. It will be easy to 4 7cm min install if the cross bar is small.
-
Page 13: Electrical Connection
INSTALLATION Electrical connection Warning! All electrical work should be carried out by a qualified and authorised electrician. Fitting guidelines The oven is manufactured to work with three-phase alternating current ( 230V /50Hz).The connection diagram is also found on the cover of the connection box. Remember that the connection wire should match the connection type and the power rating of the oven. - Page 14 INSTALLATION Electrical connection Warning! All electrical work should be carried out by a qualified and authorised electrician. Fitting guidelines The oven is manufactured to work with three–phase alternating current (400V 3N~50Hz). The voltage rating of the oven heating elements is 230V. Adapting the oven to operate with one-phase current is possible by appropriate bridging in the connection box according to the connection diagram below.
- Page 15 OPERATION Before first use Remove packaging, clean the interior of the oven and the hob . Take out and wash the oven fittings with warm water and a little washing up liquid Switch on the ventilation in the room or open a window .
-
Page 16: Operation
OPERATION Controlling the heating zones of the ceramic hob. Choice of cookware Choose a pan with a diameter that is at least as large as the heating zone . Do not use pans with a concave or convex base . Always remember to put a proper cover on the. recommend the use of pans with thick. - Page 17 OPERATION Zone heating indicator If the temperature of a heating zone exceeds 50° C this is signed by an indicator which lights up for that zone . When the heating indicator lights up it warns the person using the hob against touching the hot heating zone .
- Page 18 OPERATION Oven with automatic air circulation Possible settings of the oven function (including fan) knob The oven can be warmed up using the bottom Separate oven lighting and top elements, as well as the grill. Operation By setting the knob to this position the lighting inside the oven is of the oven is controlled by the oven function switched on, e.g.
- Page 19 OPERATION Combined grill (Grill and the top element) When the “combined grill” is ac- tive it enables grilling with the grill and with the top element switched on at the same time. This function allows a higher tem- perature at the top of the cooling area, which causes more intense browning of the dish and permits larger portions to be grilled.
- Page 20 OPERATION Fast oven heat-up Use of the grill In ovens with automatic air circulation, The grilling process operates through infrared equipped with a fan and an heater, the fast rays emitted onto the dish by the incandes- heat-up function may be used the oven will cent grill element.
-
Page 21: Cleaning And Maintenance
CLEANING AND MAINTENANCE Caution! By ensuring proper cleaning and mainte- Do not use cleaning products contain- nance of your cooker you can have a sig- ing abrasive materials for the cleaning nificant influence on the continuing life and maintenance of the glass front operation of your appliance. - Page 22 CLEANING AND MAINTENANCE Replacement of the oven light bulb In order to avoid the possibility of an electric shock ensure that the appliance is switched off before replacing the bulb. Set all control knobs to the position” ”/”0” ● and disconnect the mains plug, unscrew and wash the lamp cover and then wipe it dry.
- Page 23 CLEANING AND MAINTENANCE Removal of the internal glass Door removal Panel Unscrew and unfasten the plastic latch that In order to obtain easier access to the oven chamber for cleaning. Close the door lightly, lift is in the corner at the top of the door. Next and pull it out towards you.
- Page 24 OPERATION IN CASE OF EMERGENCY In the event of an emergency, you should: switch off all working functions of the cooker disconnect the mains plug call the service center Some minor faults can be fixed by referring to the instructions given in the table below.
-
Page 25: Using In The Oven-Practical Hints
USING IN THE OVEN-PRACTICAL HINTS Cooking we recommend using the baking trays which were provided with your cooker; it is also possible to bake in cake tins and trays bought elsewhere which should be put on the drying rack; for baking it is better to use enameled which conduct heat better and shorten the baking time;... - Page 26 COOKING THE OVEN-PRACTICAL HINTS TABLE 1:Cakes Oven functions: bottom + top elements convection fan BOTTOM+ CONVECTION FAN TOP ELEMENTS COOKING CAKE TYPE TEMPE- TIME TEMPE- LEVEL LEVEL RATURE [min] RATURE ℃ ℃ Cooking in cake tins Sponge cake/marble cake 170-180 150-170 60-80 Victoria sponge...
- Page 27 COOKING IN THE OVEN-PRACTICAL HINTS TABLE 1A: Cakes Oven functions: cake (bottom and top elements + fan) TEMPERATURE COOKING TIME BAKING TYPE ℃ [min] Cooking in cake tins Meringues 60-70 Victoria sponge 65-70 Tea cake 60-70 Layer cake 25-35 Cooking on the trays provided with the cooker Yeast cake 40-45 Crumble cake...
- Page 28 COOKING IN THE OVEN-PRACTICAL HINTS TABLE 2: Roasting meat Oven functions: bottom and top elements convection fan LEVEL ℃ TEMPERATURE[ FROM THE BOTTOM TIME﹡ TYPE OF MEAT IN MINUTES BOTTOM+ BOTTOM+ CONVECTION FAN CONVECTION FAN TOP ELEMENTS TOP ELEMENTS Per 1 cm BEEF Roast beef or fillet 12-15...
- Page 29 COOKING IN THE OVEN-PRACTICAL HINTS TABLE 3:Grill Oven functions: grill element GRILLING TIME [MINUTES] LEVEL TEMPERATURE FROM THE TYPE OF DISH ℃ BOTTOM SIDE 2 SIDE 1 8 10 Pork chop Pork schnitzel 10 12 Shish kebab 8 10 8 10 Sausages 12 15 Roast beef, (approx.
- Page 30 COOKING IN THE OVEN-PRACTICAL HINTS TABLE 4:Fan with grill Oven functions: combined grill + fan grill + fan COOKING TEMPERATURE WEIGHT LEVEL TYPE OF MEAT FROM THE BOTTOM ℃ [MINUTES] [kg ] Roast pork 80 100 170 190 170 190 100 120 170 190 120 140...
-
Page 31: Technical Specification
56 liters Net/gross weight (oven) 33/36 kg Net/gross weight (hob) 8.0/9.2 kg Warranty Service Information: If you experiencing problems with your Russell Hobbs appliance please contact your nearest store or contact our customer care department on our toll free number 0123300287.
Need help?
Do you have a question about the RHBEOCH60SS and is the answer not in the manual?
Questions and answers