
Related Manuals for Lectrosonics CR187


Summary of Contents for Lectrosonics CR187
- Page 1 INSTRUCTION MANUAL CR187 Compact Receiver Fill in for your records: Serial Number: Purchase Date: Rio Rancho, NM, USA www.lectrosonics.com...
- Page 2 CR187 LECTROSONICS, INC.
-
Page 3: Table Of Contents
Returning Units for Repair ..................................11 Introduction The CR187 receiver design originated in the late 1980’s with a feature set intended for camera mounted ENG appli- cations. It’s fixed frequency design included extremely sharp front-end filters and narrowband crystal filters in the IF stage, which likely explains its continued use in today’s crowded RF environment. -
Page 4: Introduction
1 MHz and drives a double tuned quadra- trimpot on the side panel. ture type FM demodulator. The squelch circuit is a Warning: The CR187 is a negative ground supersonic noise detector type and is factory set for a device. Do not connect this receiver to a -20 dB SINAD level (about .5 uV). -
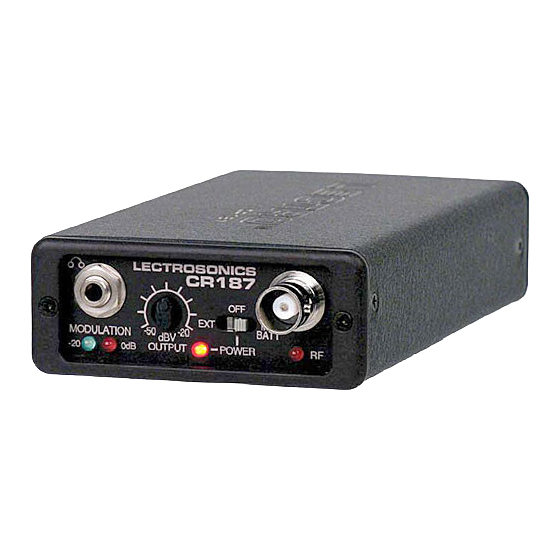
Page 5: Controls And Functions
Compact Receiver Controls and Functions Side and Front Panels LECTROSONICS CR187 This device complies with part FCC ID: DBZ7F7CR185 15 of the FCC rules. Operation S/N: XXXX Lectrosonics, Inc. is subject to the condition that this device does not cause... -
Page 6: Receiver Rear Panel
CR187 Receiver Rear Panel Battery Replacement The CR187 is powered by a standard alkaline 9 volt battery. It is important that you use ONLY an ALKALINE battery for longest life. Standard zinc-carbon batteries marked “heavy duty” or “long-lasting” are not adequate. - Page 7 Compact Receiver Operating Instructions 1) Connect the power cord or install the battery. (The CR187 is a negative ground device. Do not connect this receiver to a positive ground device through the audio cabling. Damage to either device could result.) 2) Attach and extend the antenna.
-
Page 8: Antenna Use And Placement
CR187 Antenna Use and Placement Connect the antenna to the front panel jack. Position the Dropouts can be avoided by careful placement of the antenna so that it is not touching any metallic surfaces. receiver. If you are mounting the receiver on a video... -
Page 9: Operating Instructions
Compact Receiver Troubleshooting Before proceding, ensure that you have a good battery in the receiver (or a properly connected AC adapter) and that the POWER LED is glowing brightly. SYMPTOM POSSIBLE CAUSE NO POWER LED 1) Receiver switch in “OFF” position 2) Dead or weak battery 3) External 12 Volt power disconnected 4 )CH-12 AC adapter disconnected... -
Page 10: Replacement Parts And Accessories
CR187 Replacement Parts and Accessories Part No. Description CH-12 110 Volt AC adapter for CR187 receiver A-185 Coax Remote, folded-dipole antenna with coaxial cable 35753 System pouch A-195RA Helical, flexible (“rubber duckie”) antenna with a 9inch whip and a right angle BNC... -
Page 11: Service And Repair
LECTROSONICS’ Service Department is equipped and staffed to quickly repair your equipment. In warranty repairs are made at no charge in accordance with the terms of the warranty. Out-of-warranty repairs are charged at a modest flat rate plus parts and shipping. -
Page 12: Limited One Year Warranty
This warranty does not apply to used or demonstrator equipment. Should any defect develop, Lectrosonics, Inc. will, at our option, repair or replace any defective parts without charge for either parts or labor. If Lectrosonics, Inc. cannot correct the defect in your equipment, it will be replaced at no charge with a similar new item.
Need help?
Do you have a question about the CR187 and is the answer not in the manual?
Questions and answers